文章目录
- 前言
- 一、数据准备
- 二、训练
- 三、结果
前言
Imagenet是计算机视觉的经典分类比赛,但是Imagenet数据集本身太大了,我们穷学生没有这么大的算力,2016年google DeepMind团队从Imagnet数据集中抽取的一小部分(大小约3GB)制作了Mini-Imagenet数据集(也就是Imagenet的子集),共有100个类别,每个类别都有600张图片,共60000张图片。这个大小的数据集是可以训练得动的。
一、数据准备
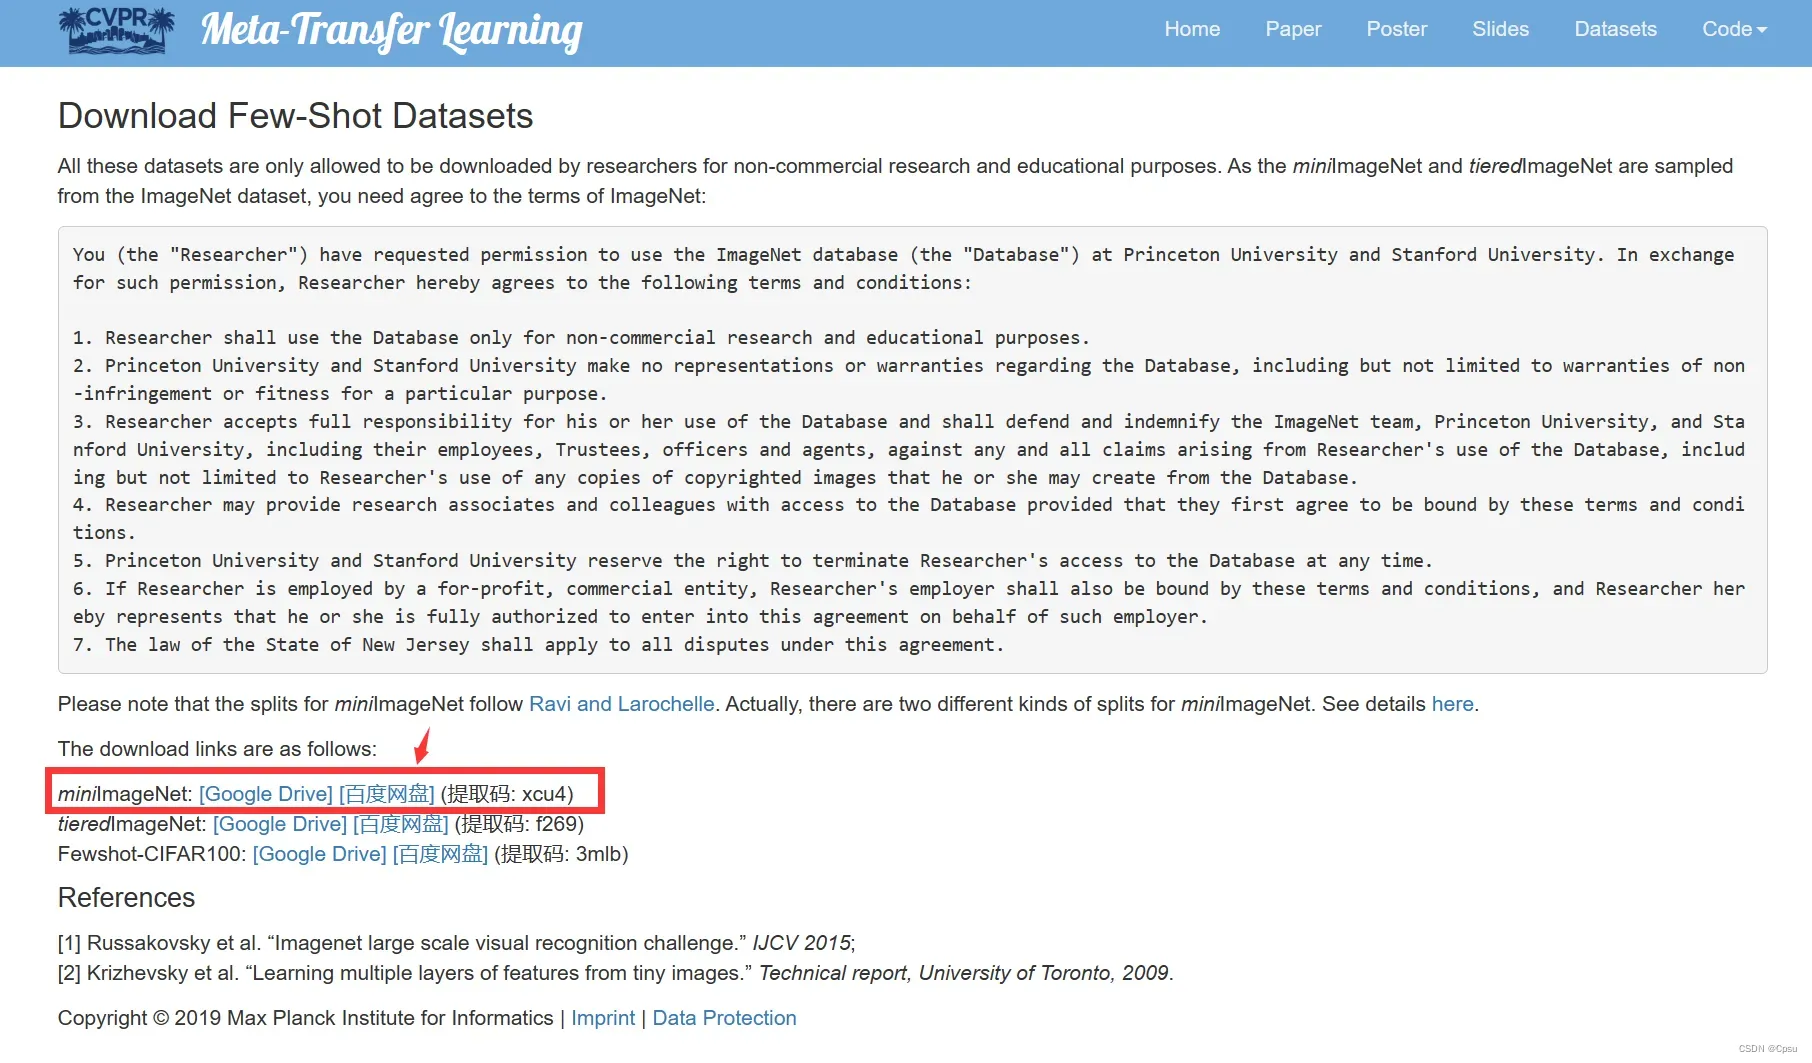
首先下载数据集,链接:miniimagenet,提取码:hl31
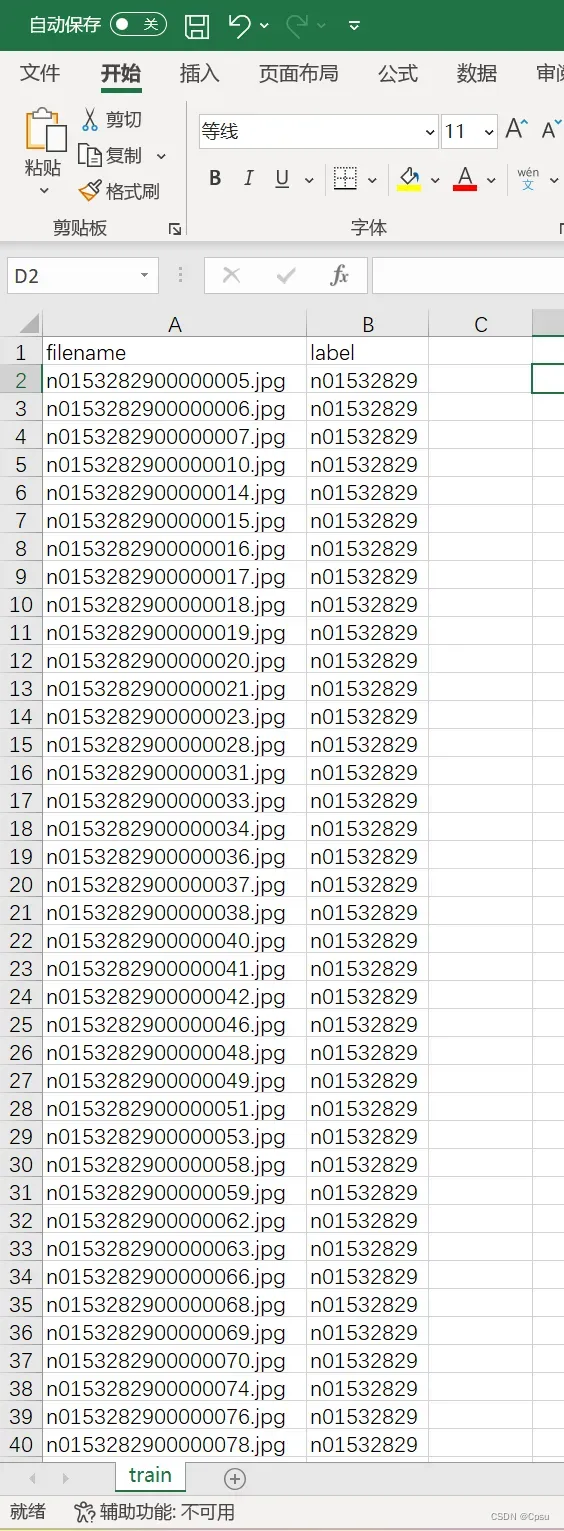
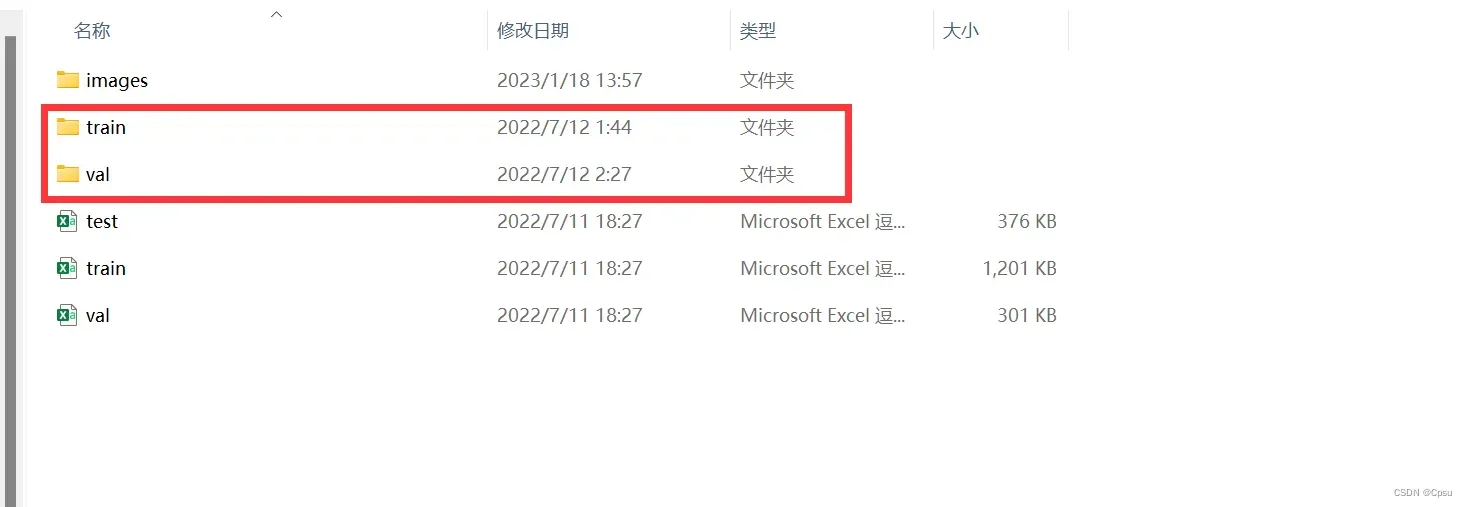
下载完成后,文件里面应该有4个文件夹,iamges文件夹包含了60000张从Imagenet中选出来的图片。还有三个csv文件:train、val、test,对应训练集、验证集、测试集,csv文件里面是图片的文件名和对应的标签。
├── mini-imagenet
     ├── images
     ├── train.csv
     ├── val.csv
     └── test.csv
但是这三个csv文件不能直接使用,因为train.csv包含38400张图片,共64个类别。val.csv包含9600张图片,共16个类别。可以看出作者将60000张图片共100类分在了这三个csv文件,所以我们肯定不能按照他的CSV文件来划分训练集和验证集(自己跑实验就没必要分三个了,分训练集和验证集就足够了)。
下面是60000张图片划分为训练集和验证集的脚本,只需要修改imagenet的根目录和验证集的比例即可。
import csv
import glob
import os
import random
import shutil
# 找出所有csv文件


def concat_csv(csv_list):
    file_with_label = {}
    for csv_path in csv_list:
        with open(csv_path) as csvfile:
            reader = csv.reader(csvfile)
            header = next(reader)
            for line in reader:
                if (line[1] not in file_with_label.keys()):
                    file_with_label[line[1]] = [line[0]]
                else:
                    file_with_label[line[1]].append(line[0])
    return file_with_label


def split_dataset(file_with_label, root, ratio):
    for label in file_with_label.keys():
        if not os.path.exists(os.path.join(root, "train", label)) and not os.path.exists(os.path.join(root, "val", label)):
            os.makedirs(os.path.join(root, "train", label))
            os.makedirs(os.path.join(root, "val", label))
        for file_name in file_with_label[label]:
            shutil.move(os.path.join(root, "images", file_name),
                        os.path.join(root, "train", label))
    for label in os.listdir(os.path.join(root, "train")):
        samples = random.sample(os.listdir(
            os.path.join(root, "train", label)), int(len(os.listdir(os.path.join(root, "train", label))) * ratio))
        for files in samples:
            shutil.move(os.path.join(root, "train", label, files),
                        os.path.join(root, "val", label))
    print("数据集划分完成!")

def main():
    root = "F:/Mini-ImageNet"  # 修改imagenet根目录
    csv_list = glob.glob(os.path.join(root, "*.csv"))  # 获取三个csv文件
    file_with_label = concat_csv(csv_list)  # 整合csv文件
    split_dataset(file_with_label, root, 0.2)  # 分成训练集和验证集,修改验证集比例,默认0.2

if __name__ == "__main__":
    main()
运行代码后会看到增加了两个文件夹,train文件夹是训练图片,存放格式是:
├── train
     ├── label 1
     	├── image
     ├── label 2
     	├── iamge
...
train文件夹里面有100个文件夹,对应100分类。每个文件夹的文件名就是对应的label。每个label下存放着训练图片。这样我们可以直接用Pytorch的内置数据模块torchvision.datasets.ImageFolder来加载数据。val文件夹同理。
使用
torchvision.datasets.ImageFolder加载数据集时,是按照文件夹顺序来索引的。比如经过softmax后输出最大概率值索引是0,那么就对应类别为n01532829;最大概率值索引是1,那么就对应类别为n01558993。
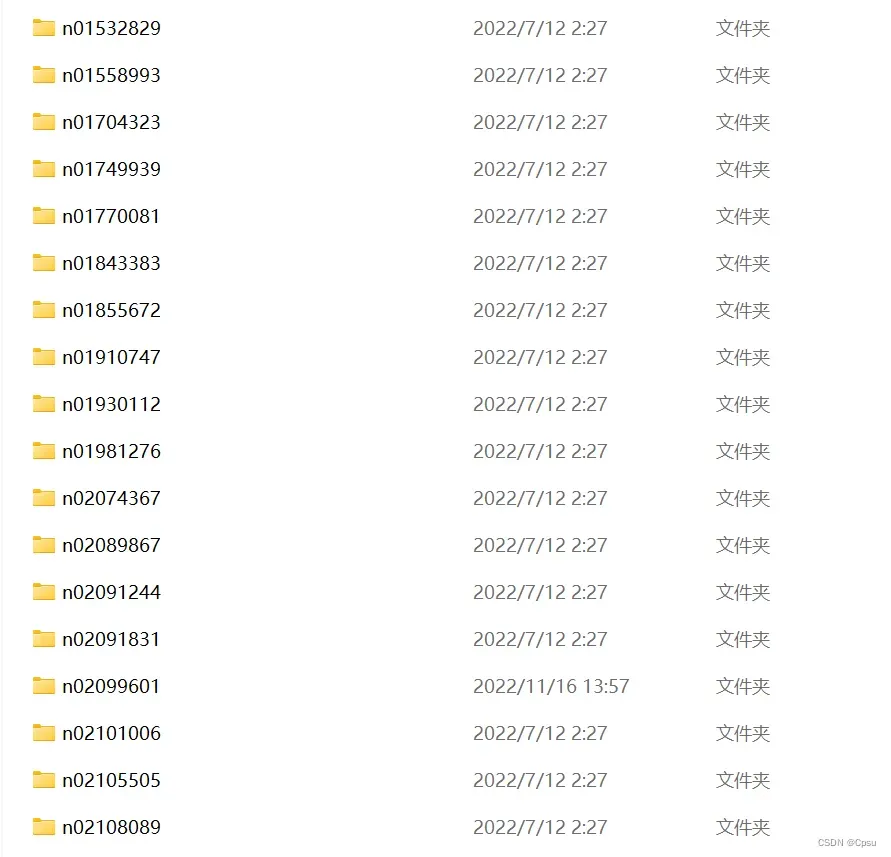
我们可以看到label都是n01532829这种,我们可以通过Imagenet的json文件来查找对应的具体类别。
json文件参考:label
我把100类对应的具体类别挑了出来:
label_class = {'n01532829': 'house_finch',
 'n01558993': 'robin',
 'n01704323': 'triceratops',
 'n01749939': 'green_mamba',
 'n01770081': 'harvestman',
 'n01843383': 'toucan',
 'n01855672': 'goose',
 'n01910747': 'jellyfish',
 'n01930112': 'nematode',
 'n01981276': 'king_crab',
 'n02074367': 'dugong',
 'n02089867': 'Walker_hound',
 'n02091244': 'Ibizan_hound',
 'n02091831': 'Saluki',
 'n02099601': 'golden_retriever',
 'n02101006': 'Gordon_setter',
 'n02105505': 'komondor',
 'n02108089': 'boxer',
 'n02108551': 'Tibetan_mastiff',
 'n02108915': 'French_bulldog',
 'n02110063': 'malamute',
 'n02110341': 'dalmatian',
 'n02111277': 'Newfoundland',
 'n02113712': 'miniature_poodle',
 'n02114548': 'white_wolf',
 'n02116738': 'African_hunting_dog',
 'n02120079': 'Arctic_fox',
 'n02129165': 'lion',
 'n02138441': 'meerkat',
 'n02165456': 'ladybug',
 'n02174001': 'rhinoceros_beetle',
 'n02219486': 'ant',
 'n02443484': 'black-footed_ferret',
 'n02457408': 'three-toed_sloth',
 'n02606052': 'rock_beauty',
 'n02687172': 'aircraft_carrier',
 'n02747177': 'ashcan',
 'n02795169': 'barrel',
 'n02823428': 'beer_bottle',
 'n02871525': 'bookshop',
 'n02950826': 'cannon',
 'n02966193': 'carousel',
 'n02971356': 'carton',
 'n02981792': 'catamaran',
 'n03017168': 'chime',
 'n03047690': 'clog',
 'n03062245': 'cocktail_shaker',
 'n03075370': 'combination_lock',
 'n03127925': 'crate',
 'n03146219': 'cuirass',
 'n03207743': 'dishrag',
 'n03220513': 'dome',
 'n03272010': 'electric_guitar',
 'n03337140': 'file',
 'n03347037': 'fire_screen',
 'n03400231': 'frying_pan',
 'n03417042': 'garbage_truck',
 'n03476684': 'hair_slide',
 'n03527444': 'holster',
 'n03535780': 'horizontal_bar',
 'n03544143': 'hourglass',
 'n03584254': 'iPod',
 'n03676483': 'lipstick',
 'n03770439': 'miniskirt',
 'n03773504': 'missile',
 'n03775546': 'mixing_bowl',
 'n03838899': 'oboe',
 'n03854065': 'organ',
 'n03888605': 'parallel_bars',
 'n03908618': 'pencil_box',
 'n03924679': 'photocopier',
 'n03980874': 'poncho',
 'n03998194': 'prayer_rug',
 'n04067472': 'reel',
 'n04146614': 'school_bus',
 'n04149813': 'scoreboard',
 'n04243546': 'slot',
 'n04251144': 'snorkel',
 'n04258138': 'solar_dish',
 'n04275548': 'spider_web',
 'n04296562': 'stage',
 'n04389033': 'tank',
 'n04418357': 'theater_curtain',
 'n04435653': 'tile_roof',
 'n04443257': 'tobacco_shop',
 'n04509417': 'unicycle',
 'n04515003': 'upright',
 'n04522168': 'vase',
 'n04596742': 'wok',
 'n04604644': 'worm_fence',
 'n04612504': 'yawl',
 'n06794110': 'street_sign',
 'n07584110': 'consomme',
 'n07613480': 'trifle',
 'n07697537': 'hotdog',
 'n07747607': 'orange',
 'n09246464': 'cliff',
 'n09256479': 'coral_reef',
 'n13054560': 'bolete',
 'n13133613': 'ear'}
二、训练
搭建AlexNet/ResNet或者其他网络可以自己写模型也可以直接加载torchvision.models 里写好的网络架构。如果是自己搭建网络,按照自己写的模板来就行.
推荐大佬的github项目:https://github.com/WZMIAOMIAO/deep-learning-for-image-processing/tree/master/pytorch_classification/mini_imagenet
import torch
import torchvision

# 数据集路径
# 根据数据集保存的格式我们用torchvision.datasets.ImageFolder加载数据集
train_set = torchvision.datasets.ImageFolder("F:/DLdata/mini-imagenet/train", transform=data_transform["train"] )
test_set = torchvision.datasets.ImageFolder("F:/DLdata/mini-imagenet/val",  transform=data_transform["val"])

train_loader = torch.utils.data.DataLoader(train_set, batch_size=128, shuffle=True)
test_loader = torch.utils.data.DataLoader(test_set, batch_size=256, shuffle=False)
如果是调用models模块的网络结构,则可以省略很多工作,但是要记得修改最后一层softmax的输出维度。官方模型是1000分类,这里是100分类。修改模型网络结构可以参考另一篇:加载预训练模型与修改网络结构
三、结果
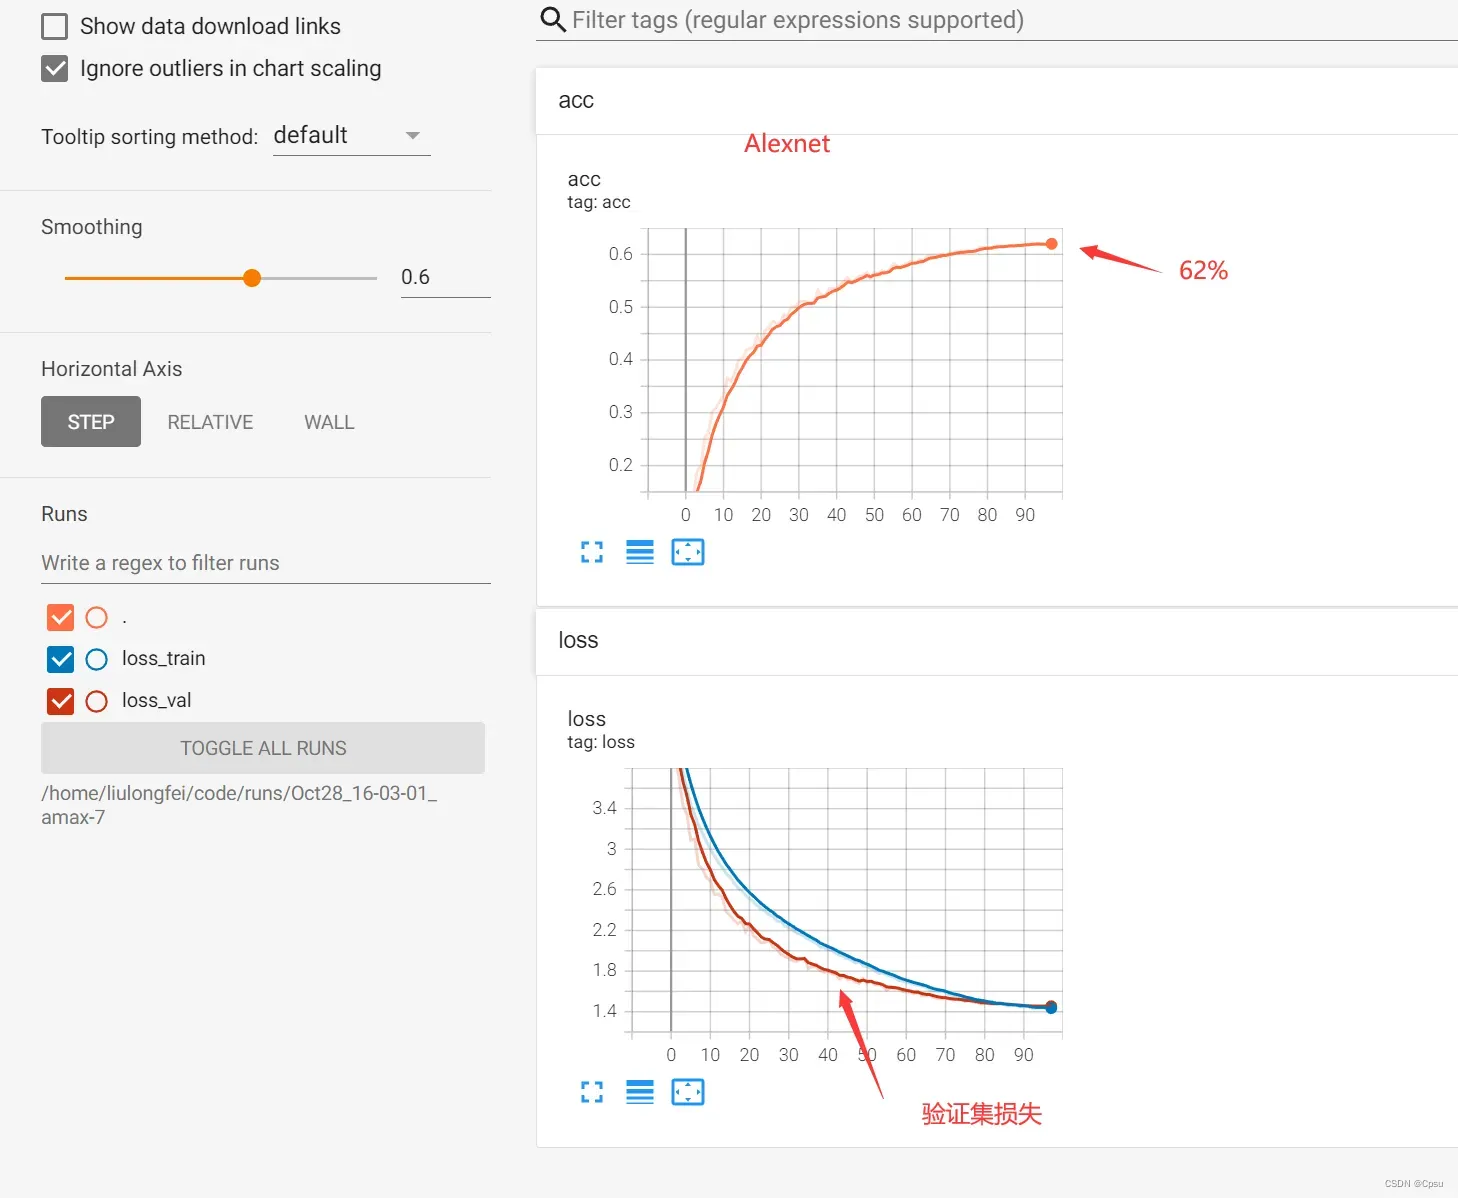
在ResNet34中训练了80多个epoch,达到了74%的准确率。AlexNet就要差一些了,只有62%,毕竟是很早之前的模型了,也可以再调调参。
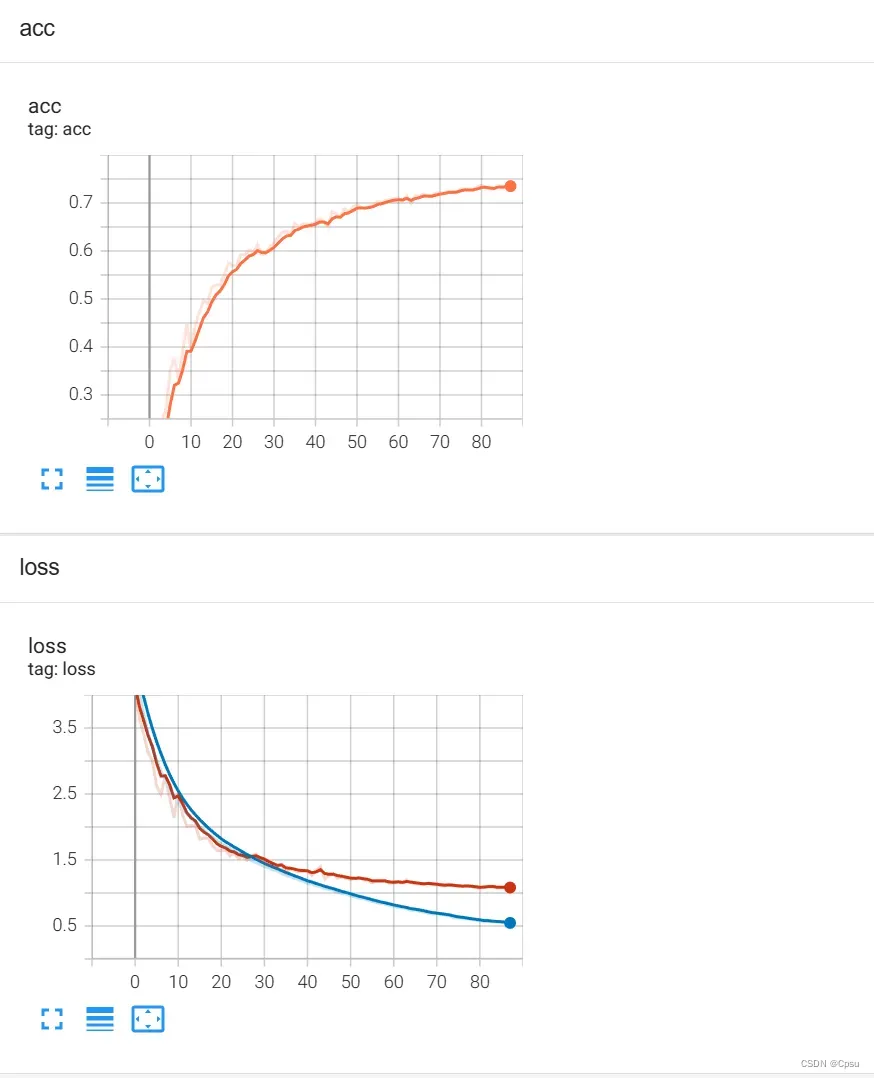
ResNet50:重新训练了一些ResNet50,最后能达到82%的准确率,如果再多加一点Mixup等数据增强方法的话,精度应该还能再高一点。
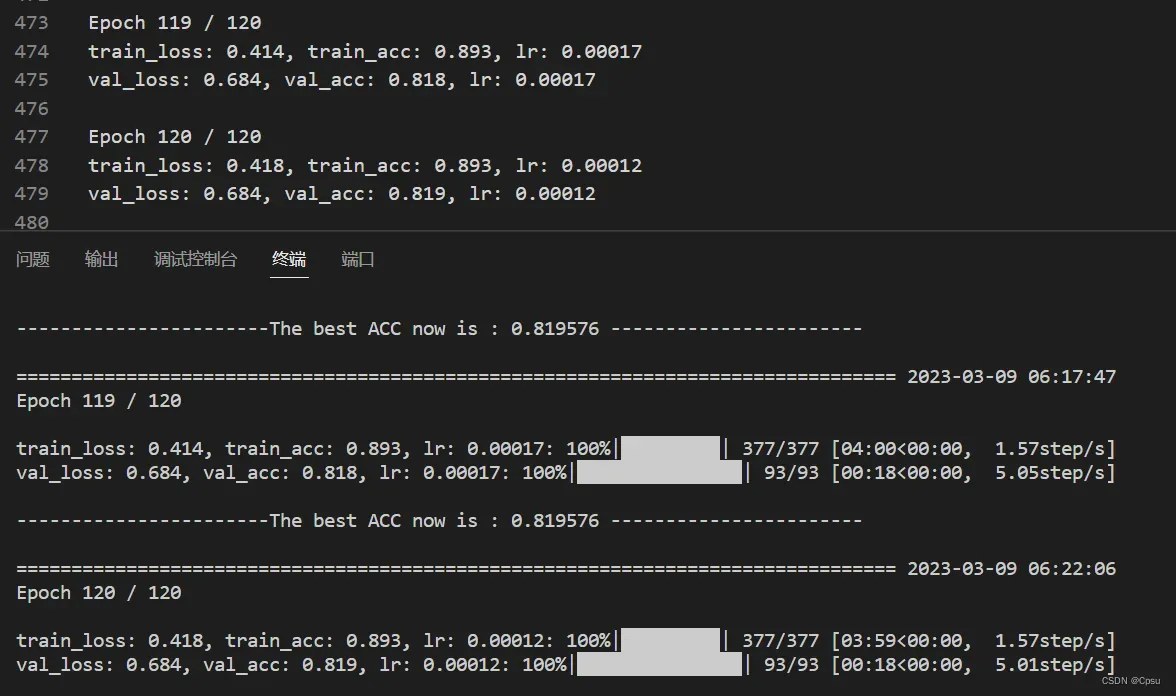
ResNet34:
AlexNet:
文章出处登录后可见!