前言
本文记录了Camelyon16数据集的切块预处理过程。该数据集可用于两种任务:1.训练多实例学习模型,预测slide level的标签;2.训练分类网络,检测WSI的tumor区域
如果是癌区域检测任务的话,是需要将WSI切成小块的,本文记录了切块方法。
一、Camelyon16数据集介绍
数据为 *.tif 格式的全视野数字切片图像 (WSI),一张WSI的分辨率约为100k×100k像素,大约1GB大小。数据集一共包含700张WSI,大约700+GB。数据集内容如下:
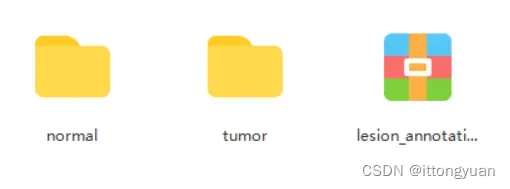
1.trianing (训练集):(1)normal 包含了159张没有癌细胞的WSI;(2)tumor 包含了111张有癌细胞的WSI;(3)lesion_annotations 中是 tumor 中癌细胞区域的标注文件,格式为 .xml
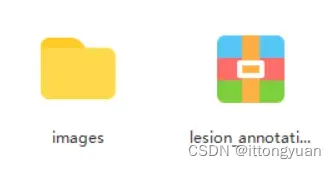
2.testing (测试集):(1)images 包含了一共129张WSI,其中一些有癌细胞,一些没有。(2)lesion_annotations 中是 129张WSI中有癌细胞的癌区域标注文件。
分类项目是用不到不含癌细胞的WSI的(多实例学习的话得用),所以训练集就是那111张tumorWSI,测试集就是129张中有癌细胞的那几十张WSI。
二、Camelyon16数据集切块
虽然最初的400张WSI文件包含了所有必要的信息,但是由于高水平分辨率较高引起机器内存不足以及多分辨率的问题,它们并不适用于直接训练一个深度卷积神经网络 (CNN)。因此,我们必须采样更小的补丁图像,例如256×256,使得典型的CNN能够处理。有效的采样信息和代表性的补丁图像是实现良好肿瘤检测性能的关键部分之一。 补丁图像的获取应当包含三个部分,掩码的生成、补丁图像中心坐标的筛选和补丁的获取。
以下所有程序都是处理单个文件,需要批量处理的话,只需要os.lisdir得到文件名列表,用for循环遍历即可。
请注意本文代码缩进有误,有的是tab键,复制后请修改成4个空格,要不会报错!!!!!!!!!!!!!!!!!!!
1.将xml标注转换为json格式
每个注释都是多边形列表,其中每个多边形都由其顶点表示。阳性多边形表示肿瘤区域,阴性多边形表示正常区域。在本阶段,将标注格式转换成更简单的 .json 格式。
import os
import json
import numpy as np
import xml.etree.ElementTree as ET

def camelyon16xml2json(inxml, outjson):
        """
        Convert an annotation of camelyon16 xml format into a json format.
        Arguments:
            inxml: string, path to the input camelyon16 xml format
            outjson: string, path to the output json format
        """
        root = ET.parse(inxml).getroot()
        annotations_tumor = \
            root.findall('./Annotations/Annotation[@PartOfGroup="Tumor"]')
        annotations_0 = \
            root.findall('./Annotations/Annotation[@PartOfGroup="_0"]')
        annotations_1 = \
            root.findall('./Annotations/Annotation[@PartOfGroup="_1"]')
        annotations_2 = \
            root.findall('./Annotations/Annotation[@PartOfGroup="_2"]')
        annotations_positive = \
            annotations_tumor + annotations_0 + annotations_1
        annotations_negative = annotations_2

        json_dict = {}
        json_dict['positive'] = []
        json_dict['negative'] = []

        for annotation in annotations_positive:
            X = list(map(lambda x: float(x.get('X')),
                     annotation.findall('./Coordinates/Coordinate')))
            Y = list(map(lambda x: float(x.get('Y')),
                     annotation.findall('./Coordinates/Coordinate')))
            vertices = np.round([X, Y]).astype(int).transpose().tolist()
            name = annotation.attrib['Name']
            json_dict['positive'].append({'name': name, 'vertices': vertices})

        for annotation in annotations_negative:
            X = list(map(lambda x: float(x.get('X')),
                     annotation.findall('./Coordinates/Coordinate')))
            Y = list(map(lambda x: float(x.get('Y')),
                     annotation.findall('./Coordinates/Coordinate')))
            vertices = np.round([X, Y]).astype(int).transpose().tolist()
            name = annotation.attrib['Name']
            json_dict['negative'].append({'name': name, 'vertices': vertices})

        with open(outjson, 'w') as f:
            json.dump(json_dict, f, indent=1)
if __name__=='__main__':
        xml_path = 'Camelyon16/lesion_annotations/tumor_001.xml' # xml文件路径
        json_path = 'Camelyon16/json_annotations/tumor_001.json' # json文件路径
        camelyon16xml2json(xml_path, json_path)
2.获得tumor区域的mask
本阶段利用json标注得到tumor区域的mask文件,格式为 .npy 。
import os
import numpy as np
import openslide
import cv2
import json

wsi_path = 'CAMELYON16/training/tumor/Tumor_001.tif' # wsi文件路径
json_path = 'PatchCamelyon/train/annotation_json/Tumor_001.json' # josn标注文件路径
npy_path = 'PatchCamelyon/train/tumor_npy/Tumor_001.npy' # mask文件输出路径
level = 6 # at which WSI level to obtain the mask

if __name__=='__main__':
	slide = openslide.OpenSlide(wsi_path)
    w, h = slide.level_dimensions[level]
    mask_tumor = np.zeros((h, w)) # the init mask, and all the value is 0

    factor = slide.level_downsamples[level]# get the factor of level * e.g. level 6 is 2^6

    with open(json_path) as f:
        dicts = json.load(f)
    tumor_polygons = dicts['positive']
    for tumor_polygon in tumor_polygons:
        # plot a polygon
        vertices = np.array(tumor_polygon["vertices"]) / factor
        vertices = vertices.astype(np.int32)

        cv2.fillPoly(mask_tumor, [vertices], (255))

    mask_tumor = mask_tumor[:] > 127
    mask_tumor = np.transpose(mask_tumor)
    np.save(npy_path, mask_tumor)# 获得Tumor_001.tif在level_6下的tumor区域掩码
3.获得tissue区域的mask
使用大津算法进行图像分割即可获得组织区域。RGB_min可以手动调整,确定最低阈值。可以将tissue_mask转化为二值图像保存下来看看效果.
import os
import openslide
import numpy as np
from PIL import Image
from skimage.color import rgb2hsv
from skimage.filters import threshold_otsu

wsi_path = 'CAMELYON16/training/tumor/Tumor_001.tif' # wsi文件路径
npy_path = 'PatchCamelyon/train/tissue_npy/Tumor_001.npy' # mask文件路径
level = 6 # at which WSI level to obtain the mask
RGB_min = 50 # min value for RGB channel

if __name__=='__main__':
	slide = openslide.OpenSlide(wsi_path)
    img_RGB = np.transpose(np.array(slide.read_region((0, 0),
                        level,
                        slide.level_dimensions[level]).convert('RGB')),
                        axes=[1, 0, 2])
    img_HSV = rgb2hsv(img_RGB)

    background_R = img_RGB[:, :, 0] > threshold_otsu(img_RGB[:, :, 0])
    background_G = img_RGB[:, :, 1] > threshold_otsu(img_RGB[:, :, 1])
    background_B = img_RGB[:, :, 2] > threshold_otsu(img_RGB[:, :, 2])
    tissue_RGB = np.logical_not(background_R & background_G & background_B)
    tissue_S = img_HSV[:, :, 1] > threshold_otsu(img_HSV[:, :, 1])
    min_R = img_RGB[:, :, 0] > RGB_min
    min_G = img_RGB[:, :, 1] > RGB_min
    min_B = img_RGB[:, :, 2] > RGB_min

    tissue_mask = tissue_S & tissue_RGB & min_R & min_G & min_B

    np.save(npy_path, tissue_mask)# 获得Tumor_001.tif在level_6下的组织掩码
    # img = Image.fromarray(tissue_mask)
    # img.save('tumor_001_tissue.png') # 可以保存二值图像看看效果如何
4.获得no_tumor区域的mask
tissue区域包含了tumor和no_tumor,所以只需要通过tissue_mask和tumor_mask做一下逻辑运算即可得到no_tumor区域的mask。
import os
import numpy as np

tumor_npy_path = 'PatchCamelyon/train/tumor_npy/Tumor_001.npy'
tissue_npy_path = 'PatchCamelyon/train/tissue_npy/Tumor_001.npy'
no_tumor_npy_path = 'PatchCamelyon/train/no_tumor_npy/Tumor_001.npy'

if __name__=='__main__':
	tumor_mask = np.load(tumor_npy_path)
	tissue_mask = np.load(tissue_npy_path)
	no_tumor_mask = tissue_mask & (~ tumor_mask)

 	np.save(no_tumor_npy_path, no_tumor_mask)
5.随机采样各组织(tumor、no_tumor)区域。
一张WSI就可以切出来成千上万块patch,但并不需要全部的,只需要在每张WSI中采样出一定数量就可以了。
采样原理比较简单,由于前面拿到的都是WSI 在level 6 下的mask,大概1k * 2k的分辨率,直接在低分辨率的mask中采样一些点,得到采样点在level 6下的坐标,再乘以缩放倍数就能算出他们在level 0 下的坐标(patch的中心点坐标)。得到采样坐标txt文件。
import os
import numpy as np

mask_path = 'PatchCamelyon/train/tumor_npy/Tumor_001.npy'
# mask_path = 'PatchCamelyon/train/no_tumor_npy/Tumor_001.npy' # no_tumor区域一样的流程
txt_path = 'PatchCamelyon/train/tumor_txt/Tumor_001.txt'
patch_number = 1000 # 采样点数
level = 6 # npy 文件的level

if __name__=='__main__':
	mask_tissue = np.load(mask_path)
	X_idcs, Y_idcs = np.where(mask_tissue)
	centre_points = np.stack(np.vstack((X_idcs.T, Y_idcs.T)), axis=1)
    if centre_points.shape[0] > patch_number:
        sampled_points = centre_points[np.random.randint(centre_points.shape[0],
                                                         size=patch_number), :]
    else:
        sampled_points = centre_points # 点数不够就全要

    sampled_points = (sampled_points * 2 ** level).astype(np.int32) # make sure the factor
    mask_only_name = os.path.split(mask_path)[-1].split(".")[0]
    name = np.full((sampled_points.shape[0], 1), mask_only_name)
    center_points = np.hstack((name, sampled_points))

    with open(txt_path, "a") as f:
        np.savetxt(f, center_points, fmt="%s", delimiter=",")
6.得到patch数据集
根据采样点的坐标,在level 0 下切割WSI即可得到patch。需要对tumor和no_tumor分别操作,得到两类patch。还需要对测试集切块,都是一样的流程。仅以训练集的tumor切块举例。
import os
import openslide
from multiprocessing import Pool

wsi_path = 'CAMELYON16/training/lesion_annotations/tumor_001.tif' # WSI文件路径
txt_path = 'PatchCamelyon/train/sample_spot_txt/tumor_001.txt' # 采样点txt文件路径
patch_file = 'PatchCamelyon/train/train_patch/tumor' # patch输出文件夹路径
patch_size = 256 # patch 的尺寸 默认256*256大小
level = 0 # 默认在level 0 切割WSI
num_process = 16 # 进程数,使用多进程切块要快得多

def process(opts):
    j, pid, x_center, y_center, wsi_path = opts
    x = int(int(x_center) - patch_size / 2)
    y = int(int(y_center) - patch_size / 2)
    slide = openslide.OpenSlide(wsi_path)
    img = slide.read_region((x,y),level,(patch_size,patch_size)).convert('RGB')
    img.save(os.path.join(patch_file,pid+'_'+str(100000+j)+'.png'))
if __name__=='__main__':
	opt_list = []
	with open(txt_path) as f:
      for j,line in enumerate(f):
            pid, x_center, y_center = line.strip('\n').split(',')
            # pid为不带后缀的文件名字,如tumor_001
            opt_list.append((j,pid,x_center,y_center,wsi_path))
    pool = Pool(processes=num_process)
    pool.map(process, opt_list) # 多进程切块
总结
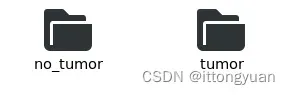
切块完成后就得到了PatchCamelyon(Camelyon16的patch版)的训练集(train),数据集中含有两类patch: tumor 和 no_tumor 。每类大约11w块(110张WSI,每类采样1000块)。测试集不能采样,而是根据tissue_mask全部切块进行测试。
我们在训练网络时需要用到验证集,从训练集拿出20%数据即可(提示:拿到patch列表后random shuffle,取前80%得到他们对应的标号和路径,后20%的标号和路径,存成txt文件,训练时直接根据路径读取图片)。
项目参照
文章出处登录后可见!