目录
在点云处理的内容中,简单介绍了open3d中对点云下采样使用了体素的操作,这里对体素化进行详细的介绍。
点云和三角面片(triangle meshes)表达的数据是无序的几何结构;而体素则是另一种表达三维数据的几何结构,体素类似于图片中的像素,具有规则性。因此,open3d中提供了VoxelGrid几何类型用于对体素的表达。
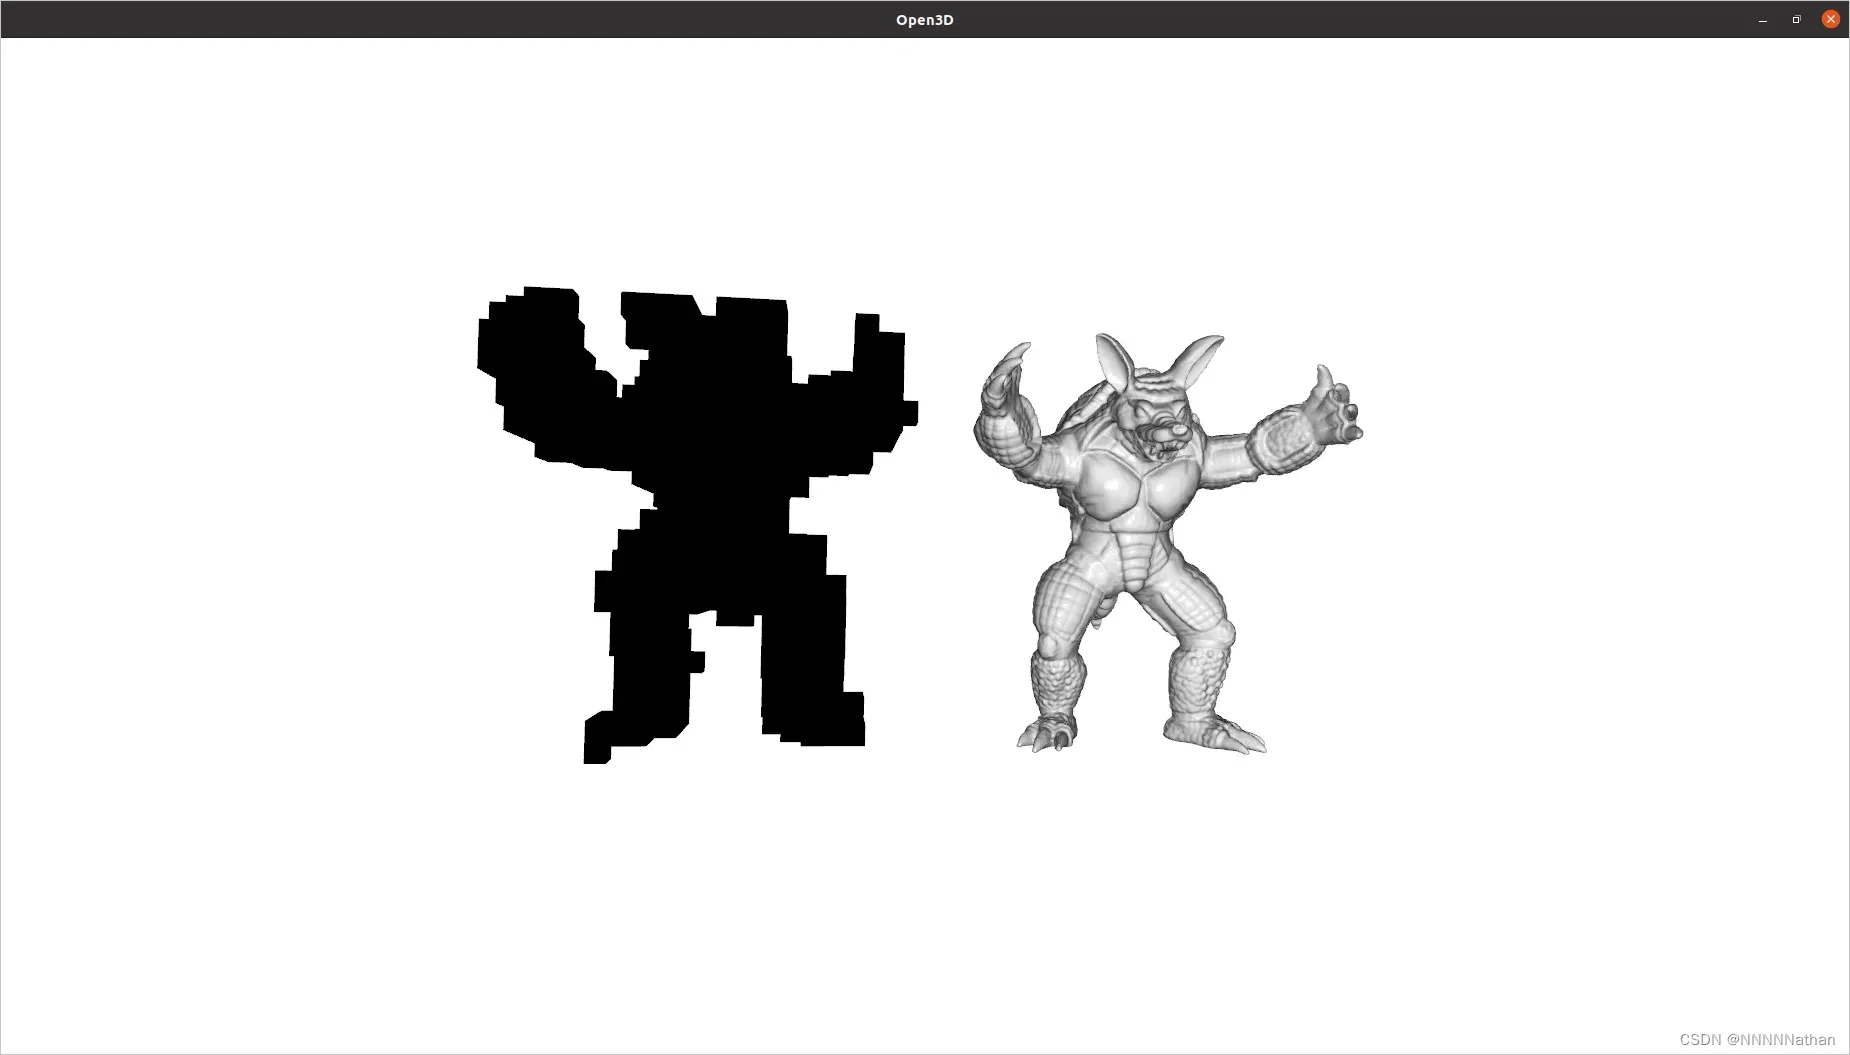
1 从triangle meshes中创建体素
方法create_from_triangle_mesh可以从mesh中创建体素,任何一个mesh与体素相交,则该体素置为1(存在);否则置为0(不存在)。该方法包含一个参数voxel_size用于设置体素的分辨率。
import copy

import open3d as o3d
import numpy as np

if __name__ == "__main__":
    # bunny = o3d.data.BunnyMesh()
    armadillo_data = o3d.data.ArmadilloMesh()
    mesh = o3d.io.read_triangle_mesh(armadillo_data.path)
    # 计算顶点的法向量
    mesh.compute_vertex_normals()

    # Fit to unit cube.
    mesh.scale(1 / np.max(mesh.get_max_bound() - mesh.get_min_bound()),
               center=mesh.get_center())
    print('Displaying input mesh ...')
    # o3d.visualization.draw_geometries([mesh])

    """
    create_from_triangle_mesh
    param:
    voxel_size:设置每个体素的长宽高为0.5
    返回值类型为o3d.geometry.VoxelGrid
    """

    mesh_for_voxelGrid: o3d.geometry.TriangleMesh = copy.deepcopy(mesh)
    mesh_for_voxelGrid.translate([1, 0, 0])
    voxel_grid: o3d.geometry.VoxelGrid = o3d.geometry.VoxelGrid.create_from_triangle_mesh(
        mesh_for_voxelGrid, voxel_size=0.05)
    print('Displaying voxel grid ...')
    o3d.visualization.draw_geometries([mesh,voxel_grid])
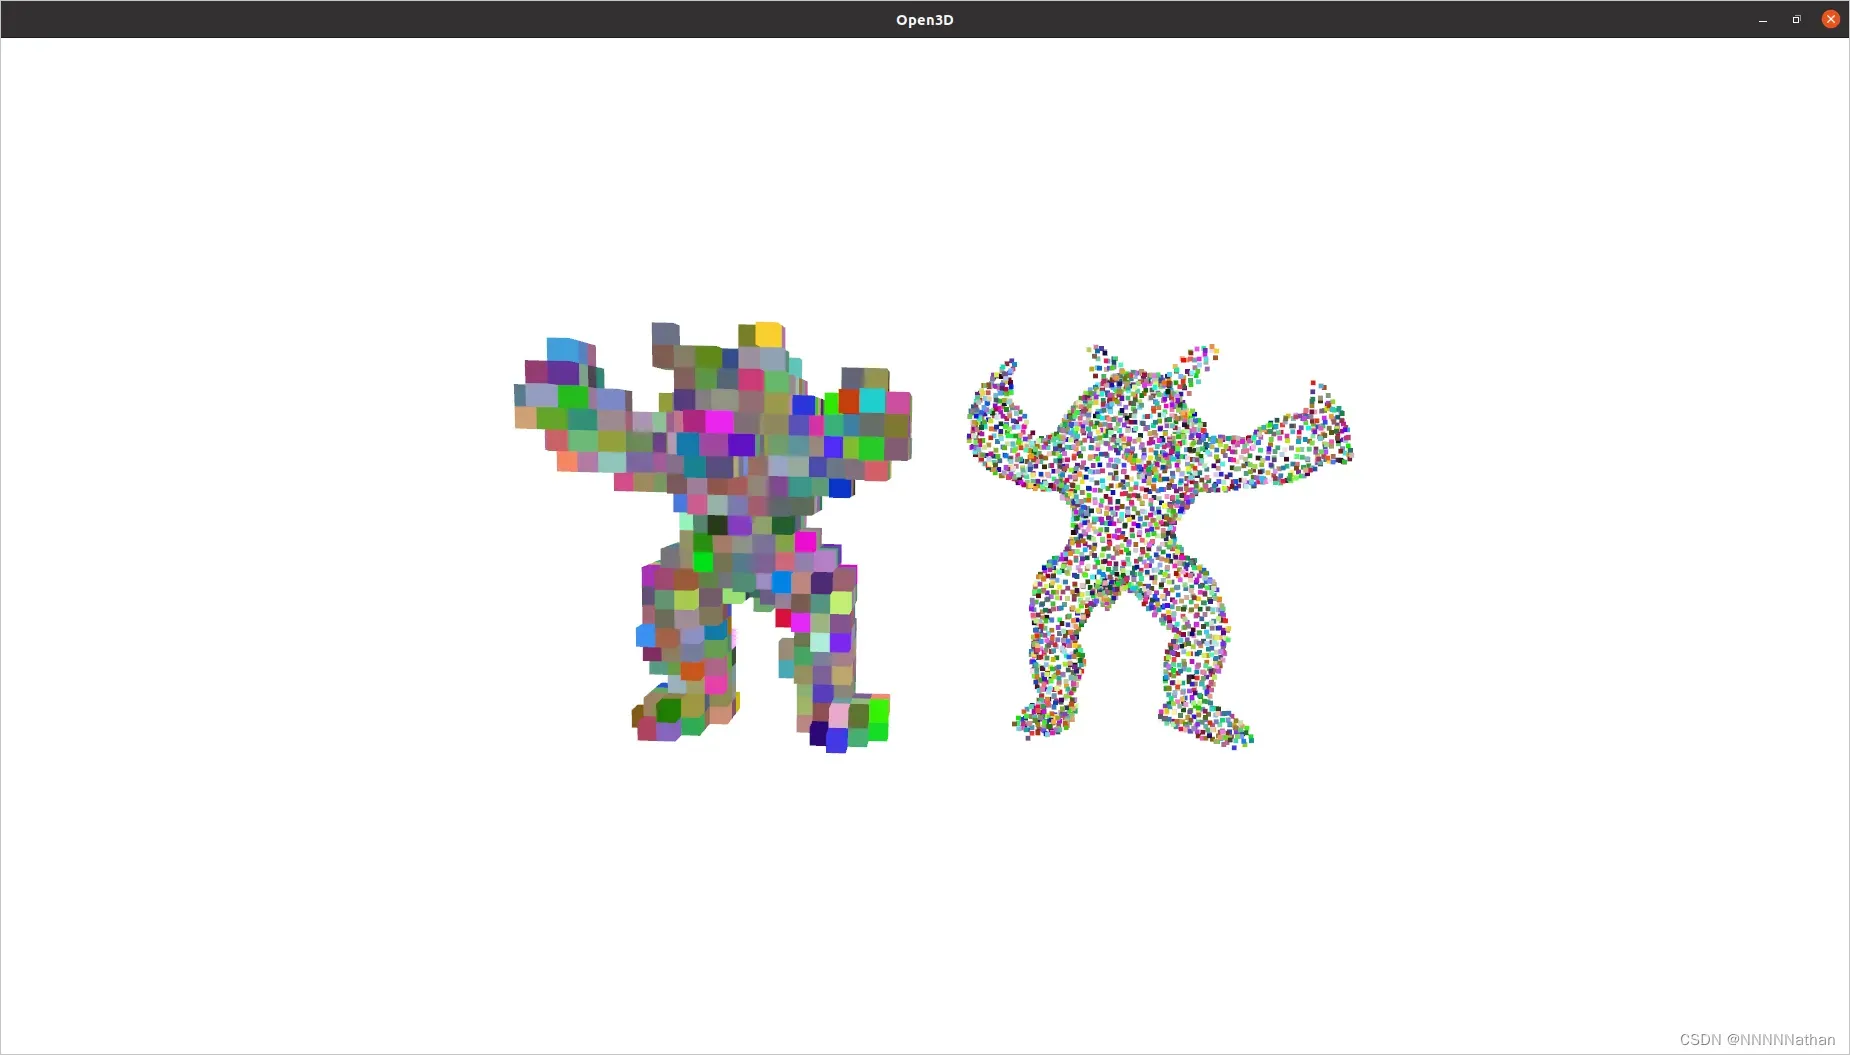
2 从点云中创建体素
使用方法create_from_point_cloud可以实现从点云中创建voxelgrid,一个voxel被占用的话,则至少该voxel中存在一个点云。voxel的颜色则是对该voxel中所有点云的颜色做平均;参数voxel_size设置voxelgrid的分辨率。
import open3d as o3d
import numpy as np

if __name__ == "__main__":

    N = 3000
    armadillo_data = o3d.data.ArmadilloMesh()
    pcd = o3d.io.read_triangle_mesh(
        armadillo_data.path).sample_points_poisson_disk(N)
    # Fit to unit cube.
    pcd.scale(1 / np.max(pcd.get_max_bound() - pcd.get_min_bound()),
              center=pcd.get_center())
    pcd.colors = o3d.utility.Vector3dVector(np.random.uniform(0, 1,
                                                              size=(N, 3)))
    print('Displaying input point cloud ...')
    o3d.visualization.draw_geometries([pcd])

    print('Displaying voxel grid ...')
    voxel_grid = o3d.geometry.VoxelGrid.create_from_point_cloud(pcd,
                                                                voxel_size=0.05)
    o3d.visualization.draw_geometries([voxel_grid])
3 体素包含测试(Inclusion test)
voxel grid可以用于测试一个点云是否被体素所包含;方法check_if_included接受一个(n,3)的array;并返回array中每个点是否在voxelgrid中。
import copy
import open3d as o3d
import numpy as np
if __name__ == "__main__":
N = 3000
armadillo_data = o3d.data.ArmadilloMesh()
pcd = o3d.io.read_triangle_mesh(
armadillo_data.path).sample_points_poisson_disk(N)
# Fit to unit cube.
pcd.scale(1 / np.max(pcd.get_max_bound() - pcd.get_min_bound()),
center=pcd.get_center())
pcd.colors = o3d.utility.Vector3dVector(np.random.uniform(0, 1,
size=(N, 3)))
# print('Displaying input point cloud ...')
# o3d.visualization.draw_geometries([pcd])
pcd_for_voxelgrid = copy.deepcopy(pcd)
pcd_for_voxelgrid.translate([1, 0, 0])
print('Displaying voxel grid ...')
voxel_grid = o3d.geometry.VoxelGrid.create_from_point_cloud(pcd_for_voxelgrid,
voxel_size=0.05)
# o3d.visualization.draw_geometries([pcd, voxel_grid])
queries = np.asarray(pcd.points)
output = voxel_grid.check_if_included(o3d.utility.Vector3dVector(queries))
print(output[:10])
queries = np.asarray(pcd_for_voxelgrid.points)
output = voxel_grid.check_if_included(o3d.utility.Vector3dVector(queries))
print(output[:10])
"""
输出结果
Displaying voxel grid ...
[False, False, False, False, False, False, False, False, False, False]
[True, True, True, True, True, True, True, True, True, True]
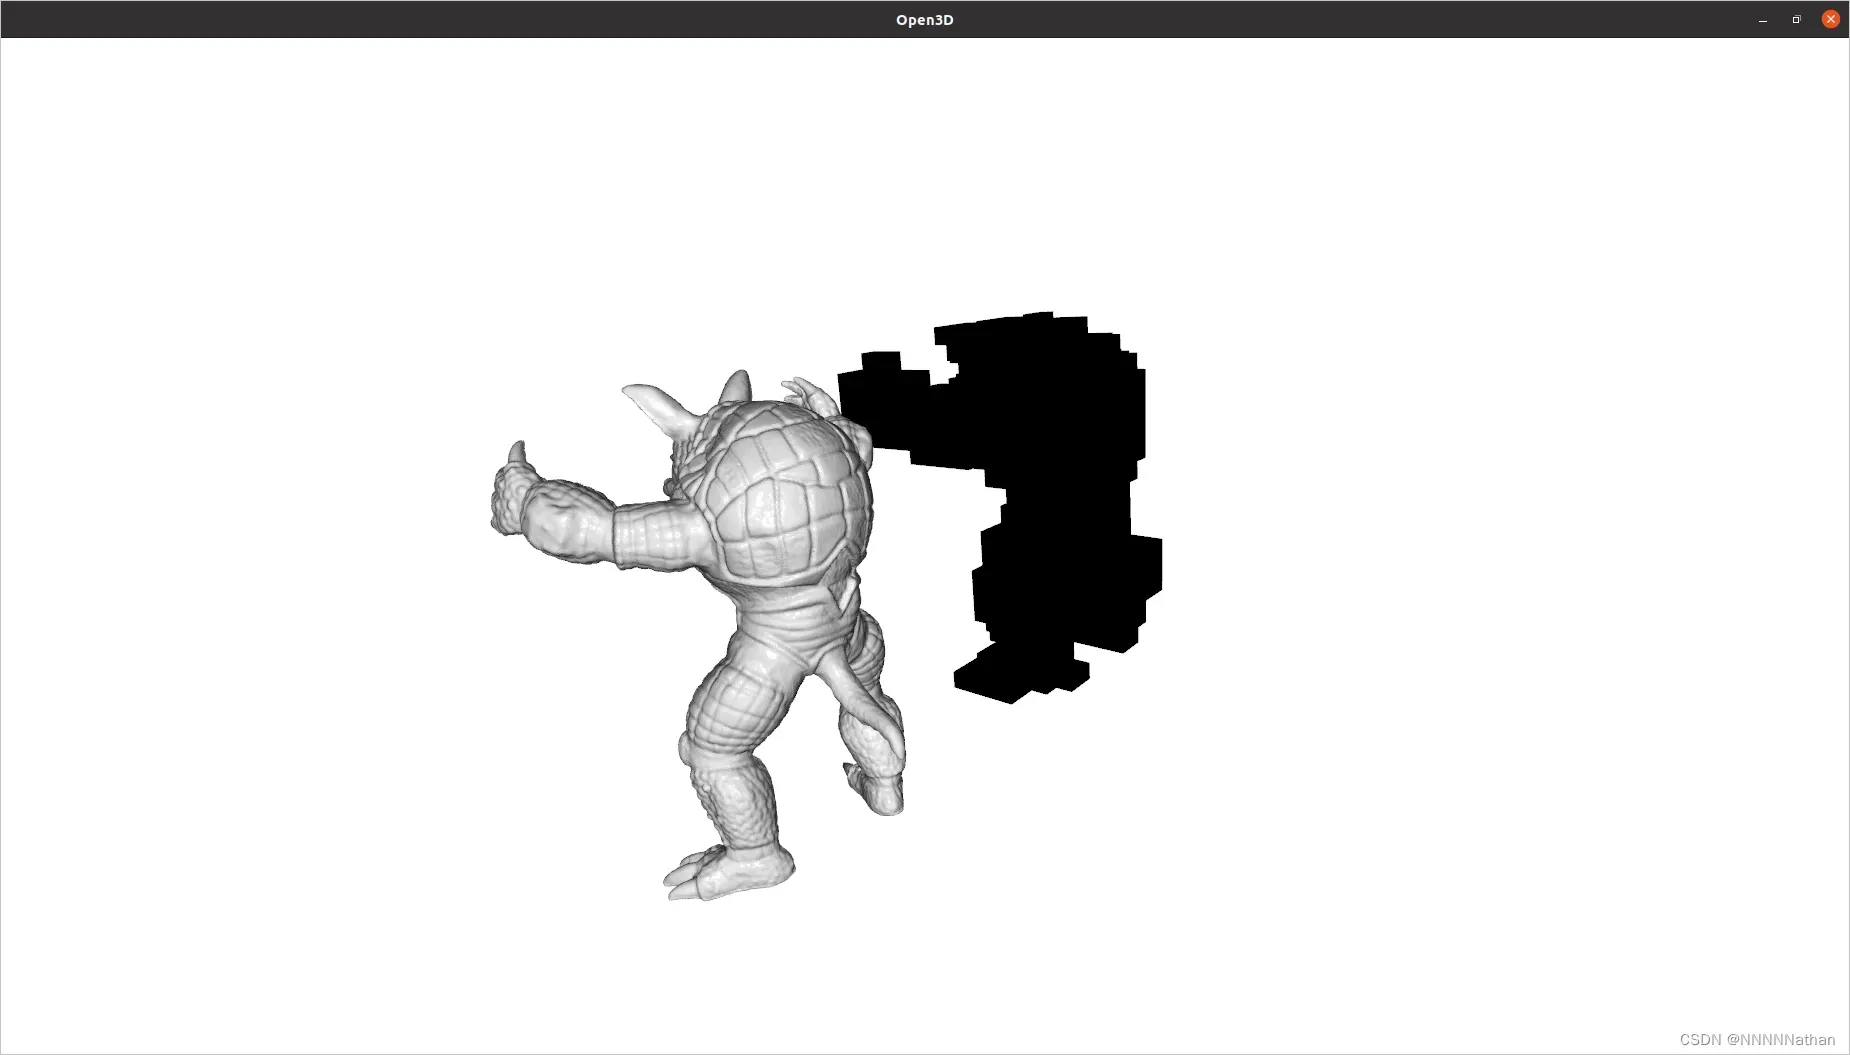
"""4 Voxel carving
上述两种方法创建的voxelGrid只在点云或mesh占用该voxel时,才会将该voxel设置为被占用的状态;因此会出现物体的中心在voxelGrid为空洞的情况,只有表面的voxelGrid被占据;但是也可以从多个深度图(depth maps)或者轮廓图(silhouettes)中雕刻出体素网格;在open3d中提供了该实现分别为carve_depth_map和carve_silhouette。
下面已depth map为示例进行展示
# ----------------------------------------------------------------------------
# - Open3D: www.open3d.org -
# ----------------------------------------------------------------------------
# The MIT License (MIT)
#
# Copyright (c) 2018-2021 www.open3d.org
#
# Permission is hereby granted, free of charge, to any person obtaining a copy
# of this software and associated documentation files (the "Software"), to deal
# in the Software without restriction, including without limitation the rights
# to use, copy, modify, merge, publish, distribute, sublicense, and/or sell
# copies of the Software, and to permit persons to whom the Software is
# furnished to do so, subject to the following conditions:
#
# The above copyright notice and this permission notice shall be included in
# all copies or substantial portions of the Software.
#
# THE SOFTWARE IS PROVIDED "AS IS", WITHOUT WARRANTY OF ANY KIND, EXPRESS OR
# IMPLIED, INCLUDING BUT NOT LIMITED TO THE WARRANTIES OF MERCHANTABILITY,
# FITNESS FOR A PARTICULAR PURPOSE AND NONINFRINGEMENT. IN NO EVENT SHALL THE
# AUTHORS OR COPYRIGHT HOLDERS BE LIABLE FOR ANY CLAIM, DAMAGES OR OTHER
# LIABILITY, WHETHER IN AN ACTION OF CONTRACT, TORT OR OTHERWISE, ARISING
# FROM, OUT OF OR IN CONNECTION WITH THE SOFTWARE OR THE USE OR OTHER DEALINGS
# IN THE SOFTWARE.
# ----------------------------------------------------------------------------
import open3d as o3d
import numpy as np
def xyz_spherical(xyz):
x = xyz[0]
y = xyz[1]
z = xyz[2]
# 计算得到球体的半径
r = np.sqrt(x * x + y * y + z * z)
# 半径与x轴的夹角
r_x = np.arccos(y / r)
# 半径在y轴的夹角
r_y = np.arctan2(z, x)
return [r, r_x, r_y]
def get_rotation_matrix(r_x, r_y):
rot_x = np.asarray([[1, 0, 0], [0, np.cos(r_x), -np.sin(r_x)],
[0, np.sin(r_x), np.cos(r_x)]])
rot_y = np.asarray([[np.cos(r_y), 0, np.sin(r_y)], [0, 1, 0],
[-np.sin(r_y), 0, np.cos(r_y)]])
return rot_y.dot(rot_x)
def get_extrinsic(xyz):
rvec = xyz_spherical(xyz)
# 计算该相机位姿下的旋转矩阵和平移向量并拼接成T矩阵
r = get_rotation_matrix(rvec[1], rvec[2])
t = np.asarray([0, 0, 2]).transpose()
trans = np.eye(4)
trans[:3, :3] = r
trans[:3, 3] = t
return trans
def preprocess(model):
min_bound = model.get_min_bound()
max_bound = model.get_max_bound()
center = min_bound + (max_bound - min_bound) / 2.0
scale = np.linalg.norm(max_bound - min_bound) / 2.0
vertices = np.asarray(model.vertices)
vertices -= center
model.vertices = o3d.utility.Vector3dVector(vertices / scale)
return model
def voxel_carving(mesh, cubic_size, voxel_resolution, w=300, h=300):
# 计算mesh的顶点法向量
mesh.compute_vertex_normals()
# 创建球体
camera_sphere = o3d.geometry.TriangleMesh.create_sphere(radius=1.0,
resolution=10)
# o3d.visualization.draw_geometries([camera_sphere], mesh_show_back_face=True)
# Setup dense voxel grid.
voxel_carving = o3d.geometry.VoxelGrid.create_dense(
width=cubic_size,
height=cubic_size,
depth=cubic_size,
voxel_size=cubic_size / voxel_resolution,
origin=[-cubic_size / 2.0, -cubic_size / 2.0, -cubic_size / 2.0],
color=[1.0, 0.7, 0.0])
# Rescale geometry.
camera_sphere = preprocess(camera_sphere)
mesh = preprocess(mesh)
# Setup visualizer to render depthmaps.
vis = o3d.visualization.Visualizer()
vis.create_window(width=w, height=h, visible=False)
vis.add_geometry(mesh)
vis.get_render_option().mesh_show_back_face = True
ctr = vis.get_view_control()
param = ctr.convert_to_pinhole_camera_parameters()
# Carve voxel grid.
centers_pts = np.zeros((len(camera_sphere.vertices), 3))
for cid, xyz in enumerate(camera_sphere.vertices):
# Get new camera pose.
trans = get_extrinsic(xyz)
param.extrinsic = trans
c = np.linalg.inv(trans).dot(np.asarray([0, 0, 0, 1]).transpose())
centers_pts[cid, :] = c[:3]
# 转换相机的参数到成open3d中的相机内外参
ctr.convert_from_pinhole_camera_parameters(param)
# Capture depth image and make a point cloud.
vis.poll_events()
vis.update_renderer()
# 根据当前的位姿来进行渲染拍摄得到深度图
depth = vis.capture_depth_float_buffer(False)
# Depth map carving method.
voxel_carving.carve_depth_map(o3d.geometry.Image(depth), param)
print("Carve view %03d/%03d" % (cid + 1, len(camera_sphere.vertices)))
vis.destroy_window()
return voxel_carving
"""
流程:
1 先创建一个固定大小的稠密(dense)voxleGrid对象
2 创建一个球形用于虚拟相机的位姿来拍摄拍摄深度图
3 根据拍摄得到的深度图与相机位姿使用carve_depth_map融合到dense voxelGrid中
"""
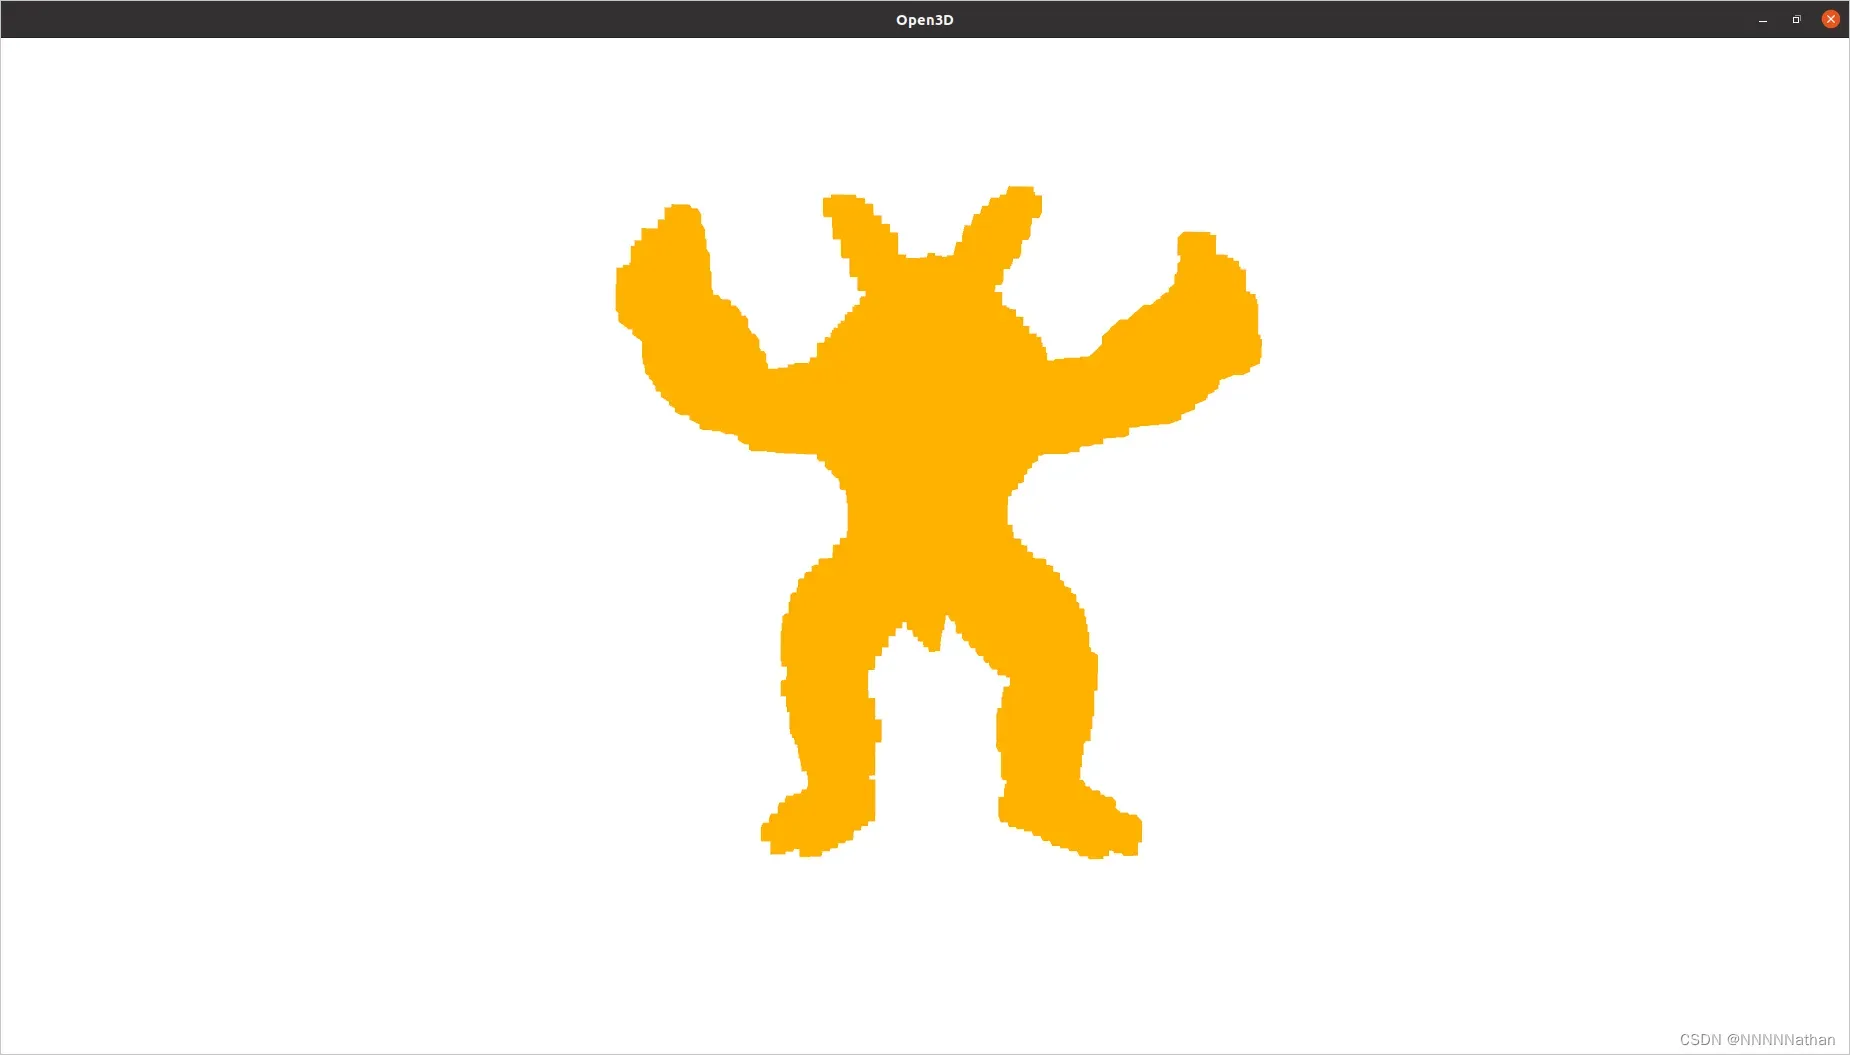
if __name__ == "__main__":
armadillo_data = o3d.data.ArmadilloMesh()
mesh = o3d.io.read_triangle_mesh(armadillo_data.path)
cubic_size = 2.0
voxel_resolution = 128.0
carved_voxels = voxel_carving(mesh, cubic_size, voxel_resolution)
print("Carved voxels ...")
print(carved_voxels)
o3d.visualization.draw_geometries([carved_voxels])
生成的voxelGird内部也是被填充的,可以自行方法查看
文章出处登录后可见!