本文章主要是针对yolov7中数据集处理部分代码进行解析(和yolov5是一样的),也是可以更好的理解训练中送入的数据集到底是什么样子的。数据集的处理离不开两个类,一个是Dataset(from torch.utils.data import Dataset),一个是DataLoader(from torch.utils.data.dataloader import DataLoader),不论什么样的算法,在处理数据集的时候都需要继承这两个类来重写自己的数据集(在我另外的文章中有讲这两个类的使用)。
先看一下yolov7创建数据集的函数代码:
# Trainloader  训练数据集的处理
    dataloader, dataset = create_dataloader(train_path, imgsz, batch_size, gs, opt,hyp=hyp, augment=True, cache=opt.cache_images, rect=opt.rect, rank=rank,world_size=opt.world_size, workers=opt.workers,image_weights=opt.image_weights, quad=opt.quad, prefix=colorstr('train:'))
作者是定义了一个create_dataloader来产生dataloader和dataset【dataset是对数据集的预处理,包括归一化,数据增强等都可以在里面实现,dataloader是对dataset分成batch然后送入网络进行训练】
create_dataloader产生dataloader和dataset:
再来具体看一下这个函数代码:
def create_dataloader(path, imgsz, batch_size, stride, opt, hyp=None, augment=False, cache=False, pad=0.0, rect=False,
                      rank=-1, world_size=1, workers=8, image_weights=False, quad=False, prefix=''):
    # Make sure only the first process in DDP process the dataset first, and the following others can use the cache
    with torch_distributed_zero_first(rank):
        dataset = LoadImagesAndLabels(path, imgsz, batch_size,
                                      augment=augment,  # augment images
                                      hyp=hyp,  # augmentation hyperparameters
                                      rect=rect,  # rectangular training
                                      cache_images=cache,
                                      single_cls=opt.single_cls,
                                      stride=int(stride),
                                      pad=pad,
                                      image_weights=image_weights,
                                      prefix=prefix)

    batch_size = min(batch_size, len(dataset))
    nw = min([os.cpu_count() // world_size, batch_size if batch_size > 1 else 0, workers])  # number of workers
    sampler = torch.utils.data.distributed.DistributedSampler(dataset) if rank != -1 else None
    loader = torch.utils.data.DataLoader if image_weights else InfiniteDataLoader
    # Use torch.utils.data.DataLoader() if dataset.properties will update during training else InfiniteDataLoader()
    dataloader = loader(dataset,
                        batch_size=batch_size,
                        num_workers=nw,
                        sampler=sampler,
                        pin_memory=True,
                        collate_fn=LoadImagesAndLabels.collate_fn4 if quad else LoadImagesAndLabels.collate_fn)
    return dataloader, dataset
torch_distributed_zero_first分布式训练
先来说下torch_distributed_zero_first函数:
该函数的作用是主进程来加载数据,其他进程在此期间等待,直到主进程加载数据完毕。具体函数如下:rank就是设置create_dataloader()是否是主进程。最终的数据同步是用torch.distributed.barrier()。
def torch_distributed_zero_first(local_rank: int):
    """
    Decorator to make all processes in distributed training wait for each local_master to do something.
    torch_distributed_zero_first是在create_dataloader函数中调用的,如果执行create_dataloader()函数的进程不是主进程,
    即rank不等于0或者-1,上下文管理器会执行相应的torch.distributed.barrier(),设置一个阻塞栅栏,让此进程处于等待状态,等待所有进程到达栅栏处
    (包括主进程数据处理完毕);
    如果执行create_dataloader()函数的进程是主进程,其会直接去读取数据并处理,然后其处理结束之后会接着遇到torch.distributed.barrier(),
    此时,所有进程都到达了当前的栅栏处,这样所有进程就达到了同步,并同时得到释放。
    """
    if local_rank not in [-1, 0]:
        torch.distributed.barrier()
    yield
    if local_rank == 0:
        torch.distributed.barrier()
LoadImagesAndLabels处理数据集
再接下来是LoadImagesAndLabels函数,通过该函数可以加载数据集。该函数是继承Dataset写的,需要实现父类的def __len__(self)【用来返回数据集长度】函数和def __getitem__(self,index)【通过索引对数据集样本进行处理】。
然后我们来一块一块的分析该代码:
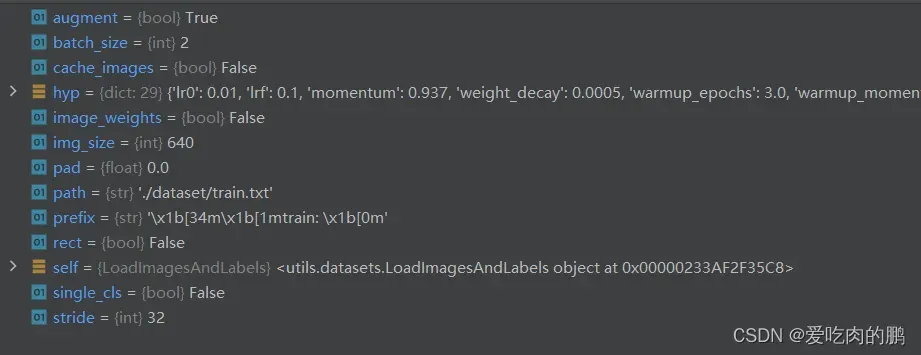
def __init__中主要是一些初始化参数,path是我们生成的train.txt文件【我这里是在dataset/train.txt】。augment是否采用数据增强。
class LoadImagesAndLabels(Dataset):  # for training/testing
    # path为txt路径
    def __init__(self, path, img_size=640, batch_size=16, augment=False, hyp=None, rect=False, image_weights=False,
                 cache_images=False, single_cls=False, stride=32, pad=0.0, prefix=''):
        self.img_size = img_size
        self.augment = augment
        self.hyp = hyp
        self.image_weights = image_weights
        self.rect = False if image_weights else rect
        self.mosaic = self.augment and not self.rect  # load 4 images at a time into a mosaic (only during training)
        self.mosaic_border = [-img_size // 2, -img_size // 2]
        self.stride = stride
        self.path = path
可以通过打断点的方式详细看一下:
下面这一段代码是读取数据集的,包含图像的路径等信息,同时这些数据集是排好序的,通过sorted实现的,代码中的os.sep是跨平台,比如windows可以用/来分割路径,Linux可以用\\(当然windows也可以),但可以使用os.sep统一为\\。同时用Exception来记录报错信息。
        try:
            f = []  # image files
            for p in path if isinstance(path, list) else [path]:
                p = Path(p)  # os-agnostic
                if p.is_dir():  # dir 判断改路径是否为目录
                    f += glob.glob(str(p / '**' / '*.*'), recursive=True)
                    # f = list(p.rglob('**/*.*'))  # pathlib
                elif p.is_file():  # file
                    with open(p, 'r') as t:
                        t = t.read().strip().splitlines()  # splitlines = readlines()
                        parent = str(p.parent) + os.sep
                        f += [x.replace('./', parent) if x.startswith('./') else x for x in t]  # local to global path
                        # f += [p.parent / x.lstrip(os.sep) for x in t]  # local to global path (pathlib)
                else:
                    raise Exception(f'{prefix}{p} does not exist')
            self.img_files = sorted([x.replace('/', os.sep) for x in f if x.split('.')[-1].lower() in img_formats])
            # self.img_files = sorted([x for x in f if x.suffix[1:].lower() in img_formats])  # pathlib
            assert self.img_files, f'{prefix}No images found'
        except Exception as e:
            raise Exception(f'{prefix}Error loading data from {path}: {e}\nSee {help_url}')
f是个列表,用来存放image文件信息,此时我这里的path是dataset/train.txt。train.txt内容大致如下:
F:\yolov7/dataset/images/0.jpg
F:\yolov7/dataset/images/000000.jpg
F:\yolov7/dataset/images/000001.jpg
F:\yolov7/dataset/images/000002.jpg
F:\yolov7/dataset/images/000003.jpg
F:\yolov7/dataset/images/000004.jpg
F:\yolov7/dataset/images/000005.jpg
F:\yolov7/dataset/images/000008.jpg
F:\yolov7/dataset/images/00001.jpg
通过Path()函数在for循环中将p变为windows路径(因为原来只是字符串)。接着通过p.is_dir()或者是p.is_file()判断一下该路径是目录还是文件。由于我这里txt为文件,因此会跳转到p.is_file()继续执行。
接下来是通过open()函数对txt进行读取,接着是将txt中每行的图像路径放入前面提到的f列表中。此刻的f列表存放为:
[‘F:\\yolov7/dataset/images/0.jpg’, ‘F:\\yolov7/dataset/images/000000.jpg’, ‘F:\\yolov7/dataset/images/000001.jpg’, ‘F:\\yolov7/dataset/images/000002.jpg’, ‘F:\\yolov7/dataset/images/000003.jpg’, ‘F:\\yolov7/dataset/images/000004.jpg’, ‘F:\\yolov7/dataset/images/000005.jpg’, ‘F:\\yolov7/dataset/images/000008.jpg’, ‘F:\\yolov7/dataset/images/00001.jpg’, ‘F:\\yolov7/dataset/images/000011.jpg’, ‘F:\\yolov7/dataset/images/000012.jpg’, ‘F:\\yolov7/dataset/images/000013.jpg’, ‘F:\\yolov7/dataset/images/000014.jpg’, ‘F:\\yolov7/dataset/images/000017.jpg’, ‘F:\\yolov7/dataset/images/000021.jpg’, ‘F:\\yolov7/dataset/images/000023.jpg’, ‘F:\\yolov7/dataset/images/000024.jpg’, ‘F:\\yolov7/dataset/images/000025.jpg’, ‘F:\\yolov7/dataset/images/000026.jpg’, ‘F:\\yolov7/dataset/images/000027.jpg’, ‘F:\\yolov7/dataset/images/000028.jpg’, ‘F:\\yolov7/dataset/images/000031.jpg’,
self.img_files = sorted([x.replace('/', os.sep) for x in f if x.split('.')[-1].lower() in img_formats])通过for循环定义变量x在列表f中遍历,并通过split()函数来判断图像格式是否正确(即是否属于jpg、png等)
check cache
然后是检查cache(缓存),通过img2label_paths获取标签文件。
# Check cache
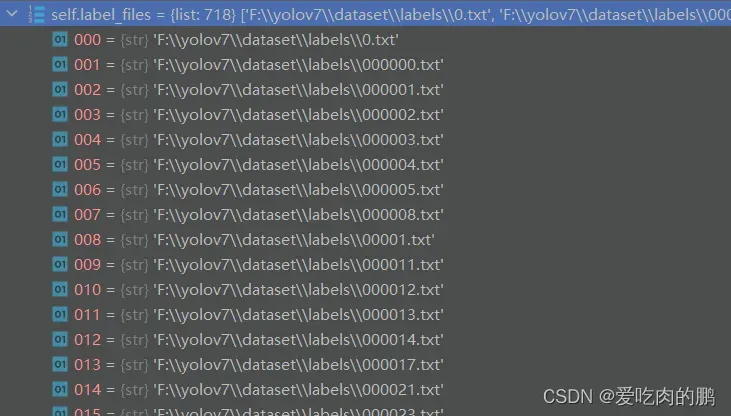
self.label_files = img2label_paths(self.img_files) # labels
cache_path = (p if p.is_file() else Path(self.label_files[0]).parent).with_suffix('.cache') # cached labels
if cache_path.is_file():
cache, exists = torch.load(cache_path), True # load
#if cache['hash'] != get_hash(self.label_files + self.img_files) or 'version' not in cache: # changed
# cache, exists = self.cache_labels(cache_path, prefix), False # re-cache
else:
cache, exists = self.cache_labels(cache_path, prefix), False # cacheimg_paths是个列表类型,每个元素为图像路径。sa是获得图像路径(即存放你的图像),sb是标签路径(存放标签,也是txt格式)。
def img2label_paths(img_paths):
    # Define label paths as a function of image paths
    sa, sb = os.sep + 'images' + os.sep, os.sep + 'labels' + os.sep  # /images/, /labels/ substrings
    return ['txt'.join(x.replace(sa, sb, 1).rsplit(x.split('.')[-1], 1)) for x in img_paths]
返回的结果为:
 而每个txt中存放内容如下,共有5列,第一列是类【我这里只有1个类,所以是对应0类】,后面对应(x,y,w,h)即中心点,宽和高,均为归一化的【这个转化以后我会写】:
0 0.5697115384615385 0.6442307692307693 0.44711538461538464 0.6538461538461539
然后是cache_labels函数,传入cach_path为train.cache,该函数主要是判断图像信息以及labels是否正确,如果你的labels是不正确的(比如你的w,h为负数)则会报错
cache, exists = self.cache_labels(cache_path, prefix), False然后我们看一下这个cache里面都缓存了点什么东西。
首先里面以字典的形式保存了图像信息以及对应的labels信息,key为图像路径,value为label信息。我这里只取第一个key,为Array,有5列【类,x,y,w,h】:

同时还换成了图像的shape:
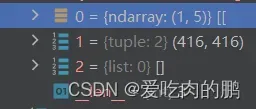
同时还有以下几个dict,用来存放数据集信息,比如找到了多少个样本,多少个是空的,多少个错误的等。
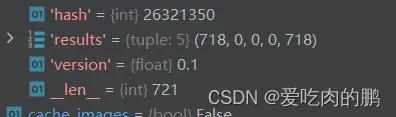
接下来是从缓存中进行读取。
        # Read cache
        cache.pop('hash')  # remove hash
        cache.pop('version')  # remove version
        labels, shapes, self.segments = zip(*cache.values())
        self.labels = list(labels)
        self.shapes = np.array(shapes, dtype=np.float64)
        self.img_files = list(cache.keys())  # update
        self.label_files = img2label_paths(cache.keys())  # update
        if single_cls:
            for x in self.labels:
                x[:, 0] = 0

        n = len(shapes)  # number of images
        bi = np.floor(np.arange(n) / batch_size).astype(np.int)  # batch index
        nb = bi[-1] + 1  # number of batches
        self.batch = bi  # batch index of image
        self.n = n
        self.indices = range(n)
将图像缓存到内存中
        # Cache images into memory for faster training (WARNING: large datasets may exceed system RAM)
        self.imgs = [None] * n
        if cache_images:
            if cache_images == 'disk':
                self.im_cache_dir = Path(Path(self.img_files[0]).parent.as_posix() + '_npy')
                self.img_npy = [self.im_cache_dir / Path(f).with_suffix('.npy').name for f in self.img_files]
                self.im_cache_dir.mkdir(parents=True, exist_ok=True)
            gb = 0  # Gigabytes of cached images
            self.img_hw0, self.img_hw = [None] * n, [None] * n
            results = ThreadPool(8).imap(lambda x: load_image(*x), zip(repeat(self), range(n)))
            pbar = tqdm(enumerate(results), total=n)
            for i, x in pbar:
                if cache_images == 'disk':
                    if not self.img_npy[i].exists():
                        np.save(self.img_npy[i].as_posix(), x[0])
                    gb += self.img_npy[i].stat().st_size
                else:
                    self.imgs[i], self.img_hw0[i], self.img_hw[i] = x
                    gb += self.imgs[i].nbytes
                pbar.desc = f'{prefix}Caching images ({gb / 1E9:.1f}GB)'
            pbar.close()
数据集处理def __getitem__(self,index)
从前面缓存中进行读取(这里先不说mosaic数据增强)。通过索引index加载图像,获取图像的尺寸,通过letterbox对图像进行reshape,使其适合网络输入大小。将labels中的box信息从xywh转为xyxy(中心点,w,h—>左上角和右下角)【可以用来做数据增强处理】。
            # Load image
            img, (h0, w0), (h, w) = load_image(self, index)

            # Letterbox
            shape = self.batch_shapes[self.batch[index]] if self.rect else self.img_size  # final letterboxed shape
            img, ratio, pad = letterbox(img, shape, auto=False, scaleup=self.augment)
            shapes = (h0, w0), ((h / h0, w / w0), pad)  # for COCO mAP rescaling

            labels = self.labels[index].copy()
            if labels.size:  # normalized xywh to pixel xyxy format
                labels[:, 1:] = xywhn2xyxy(labels[:, 1:], ratio[0] * w, ratio[1] * h, padw=pad[0], padh=pad[1])
数据增强后再转为xywh(不增强也要转,我这里是以不增强为例)。
        nL = len(labels)  # number of labels
        if nL:
            labels[:, 1:5] = xyxy2xywh(labels[:, 1:5])  # convert xyxy to xywh
            labels[:, [2, 4]] /= img.shape[0]  # normalized height 0-1
            labels[:, [1, 3]] /= img.shape[1]  # normalized width 0-1
创建一个labels_out 用来存储labels
labels_out = torch.zeros((nL, 6))
这里再说一下,前面我们得到的labels是shape为(1,5),这里的labels_out是(1,6)在最前面多了一列。
图像shape的转换:
img = img[:, :, ::-1].transpose(2, 0, 1)  # BGR to RGB, to 3x416x416
img = np.ascontiguousarray(img)
最终返回的是图像img(转张量),labels_out,img_files[index]【对应img的路径】,shapes
return torch.from_numpy(img), labels_out, self.img_files[index], shapes获得的dataset形式
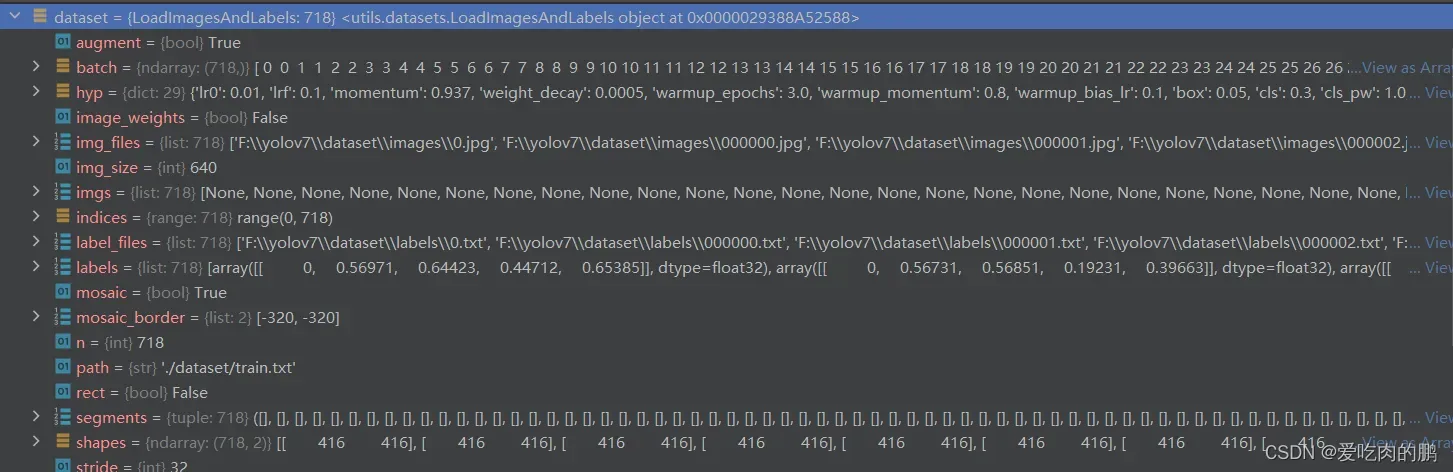
通过LoadImagesAndLabels可以获得我们上述处理的数据集。可以看下现在的dataset都包含哪些内容。【里面的segments是用来做图像分割的,我这里没有,所以是空】
获得batch_size和number workers 。DistributedSampler是分布式采样器。可以将数据集放在多卡上进行训练,但我这里用的是单卡。每个GPU上数据的划分为:一个epoch数据集数量/num_gpu=每个GPU得到的数量,如果shuffle=True,那么每个GPU得到的数据是随机的,否则是按顺序划分。
    batch_size = min(batch_size, len(dataset))
    nw = min([os.cpu_count() // world_size, batch_size if batch_size > 1 else 0, workers])  # number of workers
    sampler = torch.utils.data.distributed.DistributedSampler(dataset) if rank != -1 else None
    loader = torch.utils.data.DataLoader if image_weights else InfiniteDataLoader
    # Use torch.utils.data.DataLoader() if dataset.properties will update during training else InfiniteDataLoader()
    dataloader = loader(dataset,
                        batch_size=batch_size,
                        num_workers=nw,
                        sampler=sampler,
                        pin_memory=True,
                        collate_fn=LoadImagesAndLabels.collate_fn4 if quad else LoadImagesAndLabels.collate_fn)
    return dataloader, dataset
dataloader
继承DataLoader可以写自己的loader函数,或者是直接调用torch中的dataloader也可以。主要放入:dataset,batch_size,num_workers,pin_memory,以及自己实现的collate_fn函数。
    dataloader = loader(dataset,
                        batch_size=batch_size,
                        num_workers=nw,
                        sampler=sampler,
                        pin_memory=True,
                        collate_fn=LoadImagesAndLabels.collate_fn4 if quad else LoadImagesAndLabels.collate_fn)
dataloader内容:
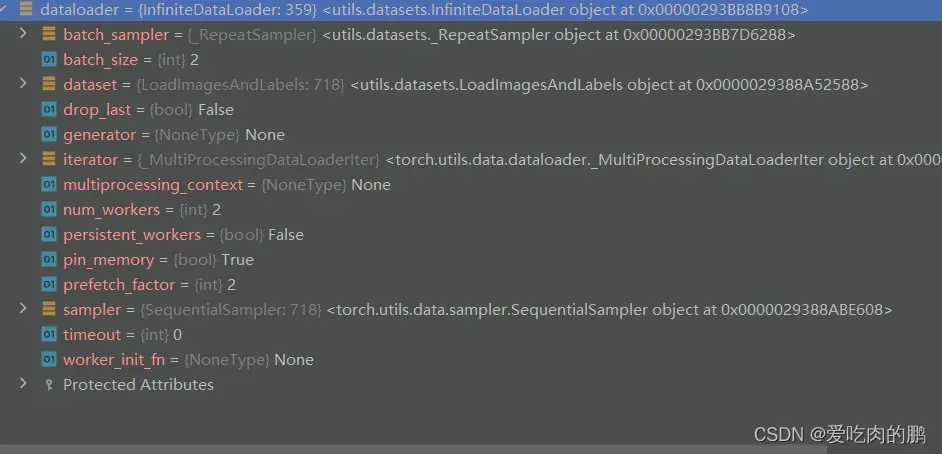
以上就是yolov7中数据集处理以及加载过程,还有一些细节后面再补充。
文章出处登录后可见!