这里记录下yolov5 tag7.0的实例分割,因为也用过paddle家族的实例分割,能够训练出来,但是开放restiful api时遇到点小问题,还是yolov爽啊!!通过这篇博文,您可以一步步的搭建自己的分割网络。
文章目录
- 前言
- 一、小试牛刀
- 1. 预训练权重
- 2. coco128 数据集在这里
- 3.coco128-seg的数据初探
- 二、自有数据集路面积水
- 1.数据介绍
- 2.标注文件的转化:
- 3.标注再验证
- 4.分割数据集
- 三、训练
- 1.构建配置文件
- 2.训练
- 3.选择模型
- 四、模型转化
- 1.转化细节
- 2.推理返回值代表
- 五、ONNX 内存泄漏
- 六 遗传参数的用处
- 七 关于图片通道问题的一个bug 20230411发现
- 总结
前言
git仓库:https://github.com/ultralytics/yolov5/tree/v7.0
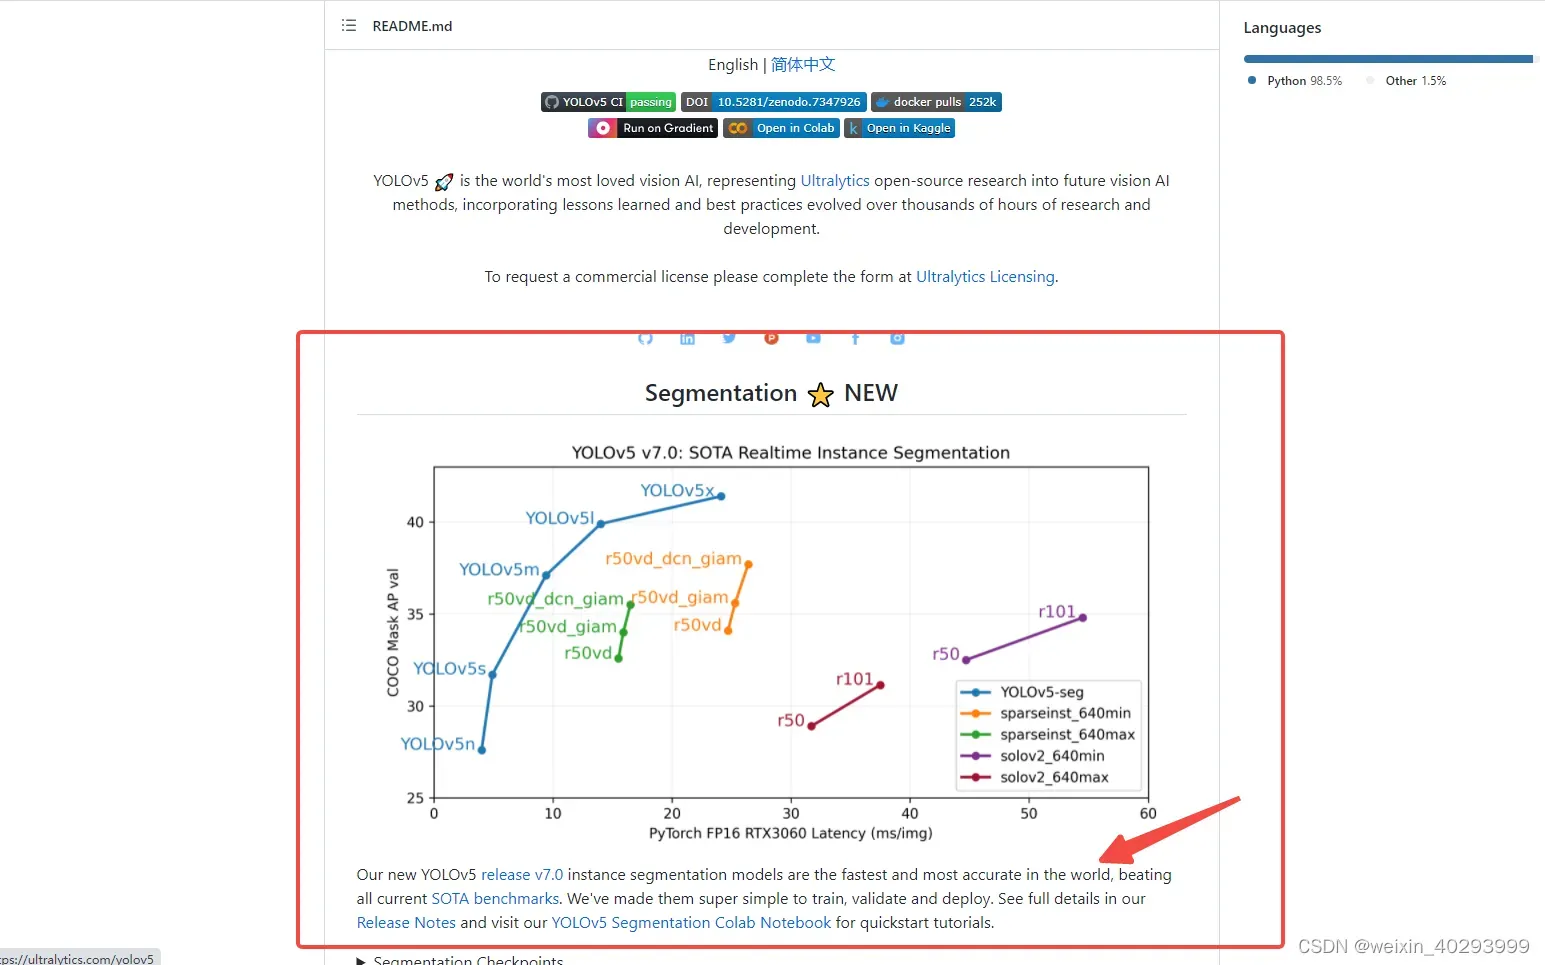
在tag7.0开始支持的,号称sota,在master下的英文介绍中,有这句话,是realtime的sota。
yolv6,yolov7也都在号称sota,大家都是sota。。。。
中文介绍到时没有这个,看来是十分新的研究成果了。
一、小试牛刀
yolov5-7.0/segment/
下,有个tutorials.ipynb文件,这上面说的很清楚,如何训练、如何推理预测,和目标检测的用法几乎是一模一样的。
关于如何安装自行解决吧。
如何预测:
python segment/predict.py –source 0 # webcam
img.jpg # image
vid.mp4 # video
screen # screenshot
path/ # directory
‘path/*.jpg’ # glob
‘https://youtu.be/Zgi9g1ksQHc’ # YouTube
‘rtsp://example.com/media.mp4’ # RTSP, RTMP, HTTP stream
python segment/predict.py --weights yolov5s-seg.pt --img 640 --conf 0.25 --source data/images
#display.Image(filename='runs/predict-seg/exp/zidane.jpg', width=600)
如何训练:
Train YOLOv5s on COCO128 for 3 epochs
!python segment/train.py –img 640 –batch 16 –epochs 3 –data coco128-seg.yaml –weights yolov5s-seg.pt –cache
1. 预训练权重
https://github.com/ultralytics/yolov5/releases/v7.0
2. coco128 数据集在这里
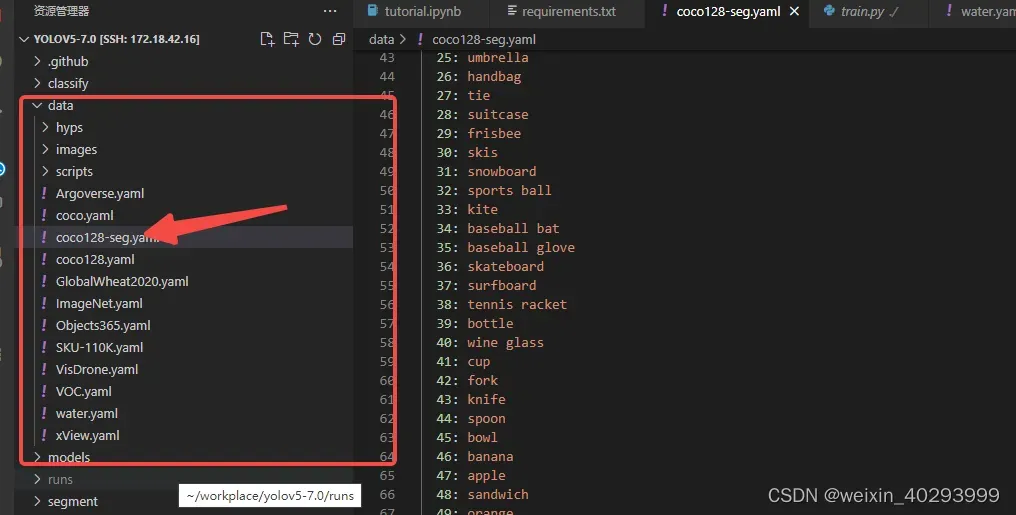
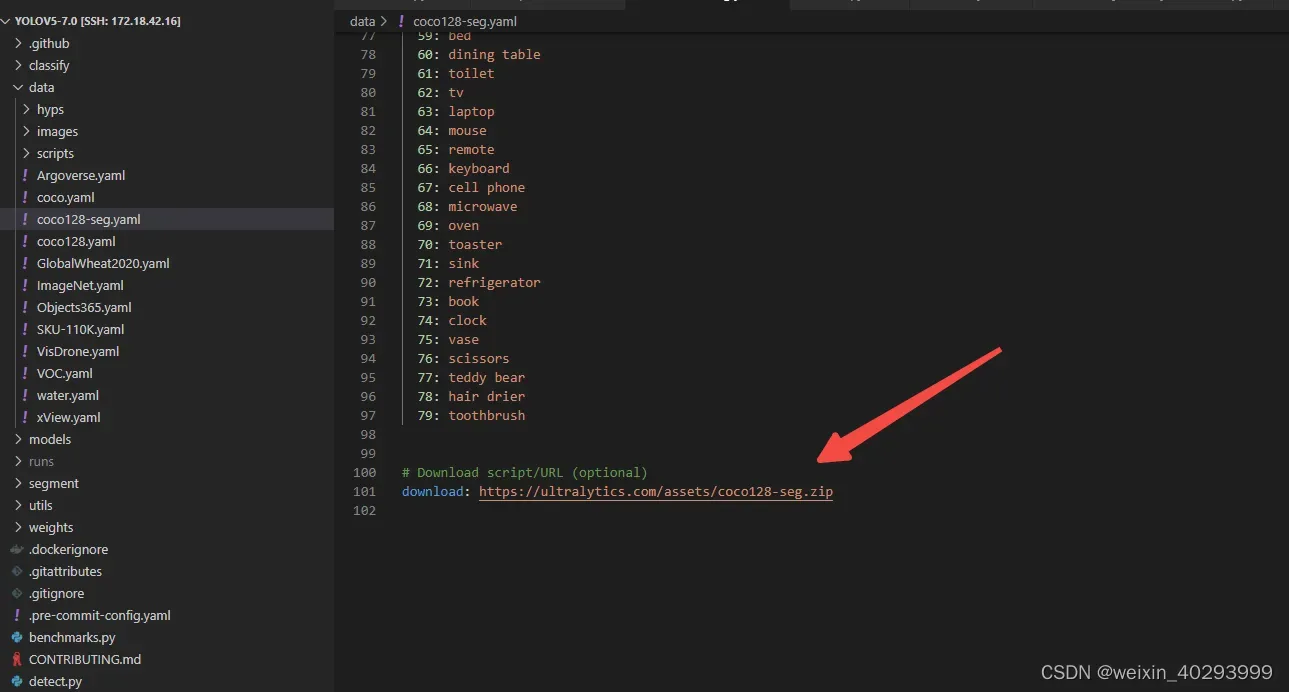
download: https://ultralytics.com/assets/coco128-seg.zip
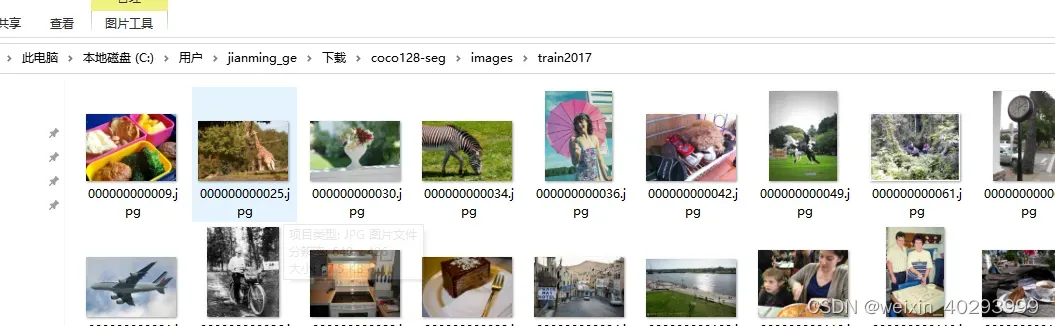
3.coco128-seg的数据初探
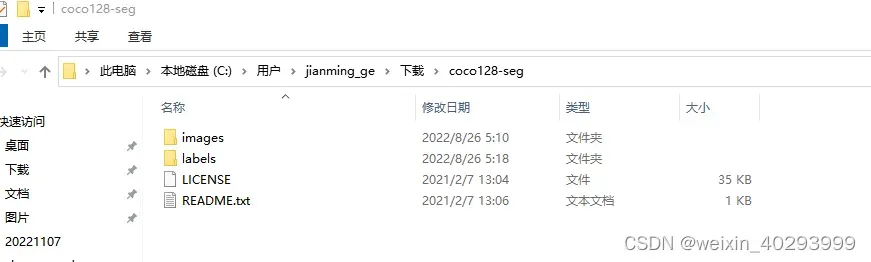
连码放的格式都和目标检测一模一样
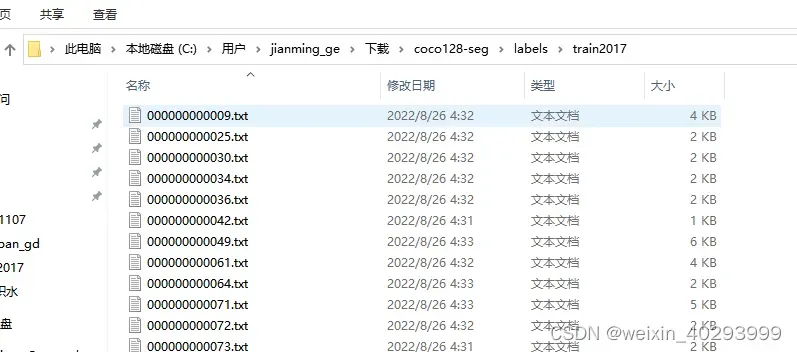

45 是指的类别, 和coco128-seg.yaml文件的names相对应
后面是 x,y x,y …的坐标。分别对应宽和高,需要特别说明的是,这是归一化的。
细心如我,一定会将他们反写到图片,看看啥情况了啊,反写代码如下
def get_a_coco_pic():
    pic_path = r"C:\Users\jianming_ge\Downloads\coco128-seg\images\train2017\000000000009.jpg"
    txt_path = r"C:\Users\jianming_ge\Downloads\coco128-seg\labels\train2017\000000000009.txt"
    import cv2
    img = cv2.imread(pic_path)
    height, width, _ = img.shape
    print(height, width)

    # cv2.imshow("111",img)
    # 显示原始图片
    # cv2.waitKey()
    # 勾勒多边形
    file_handle = open(txt_path)
    cnt_info = file_handle.readlines()
    new_cnt_info = [line_str.replace("\n", "").split(" ") for line_str in cnt_info]
    print(len(new_cnt_info))
    print("---====---")
    # 45 bowl 碗 49 橘子 50 西兰花
    color_map = {"49": (0, 255, 255), "45": (255, 0, 255), "50": (255, 255, 0)}
    for new_info in new_cnt_info:
        print(new_info)
        s = []
        for i in range(1, len(new_info), 2):
            b = [float(tmp) for tmp in new_info[i:i + 2]]
            s.append([int(b[0] * width), int(b[1] * height)])
        print(s)
        cv2.polylines(img, [np.array(s, np.int32)], True, color_map.get(new_info[0]))
    cv2.imshow('img2', img)
    cv2.waitKey()
效果也贴出来,现在还找到yolov官方提供的回写标注到图片的代码,但以我对yolov的了解,不出几天就会出来。
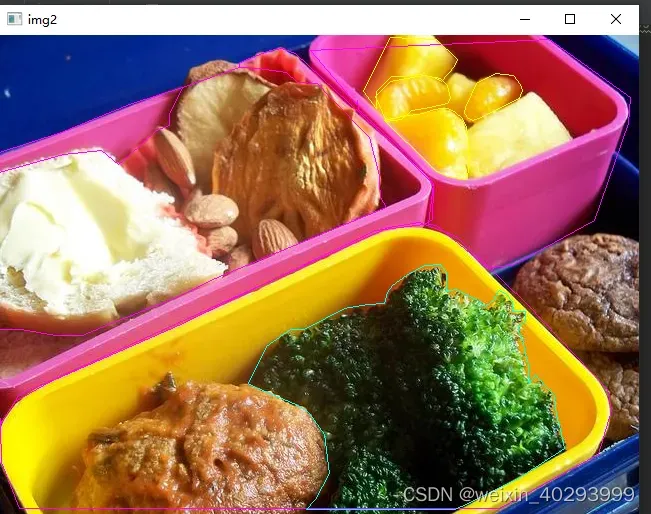
类别是45 bowl 碗 49 橘子 50 西兰花 好吧,那个黄黄的是橘子。
然后就可以拿着这个coco128训练玩儿了,但是你一定不会满足于此,哪我还用写这个blog么。直接看yolov5的readme.md 不是也能搞定么。
看下面,我们用yolov5做一个路面积水
二、自有数据集路面积水
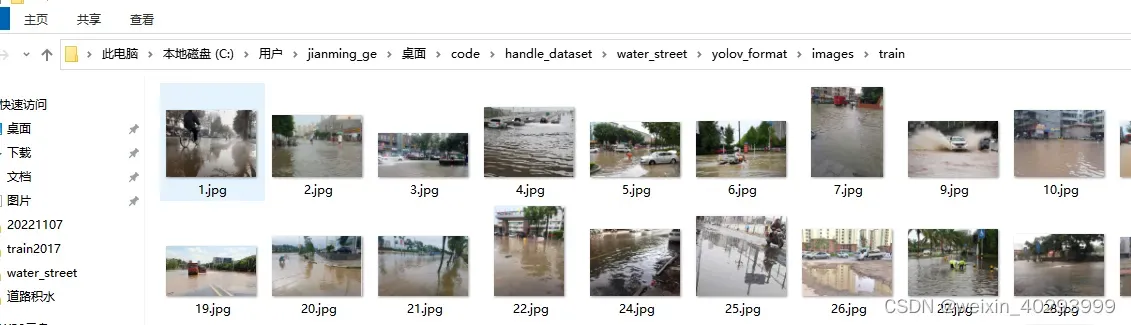
1.数据介绍
一共550张,lambelme标注,效果如下:
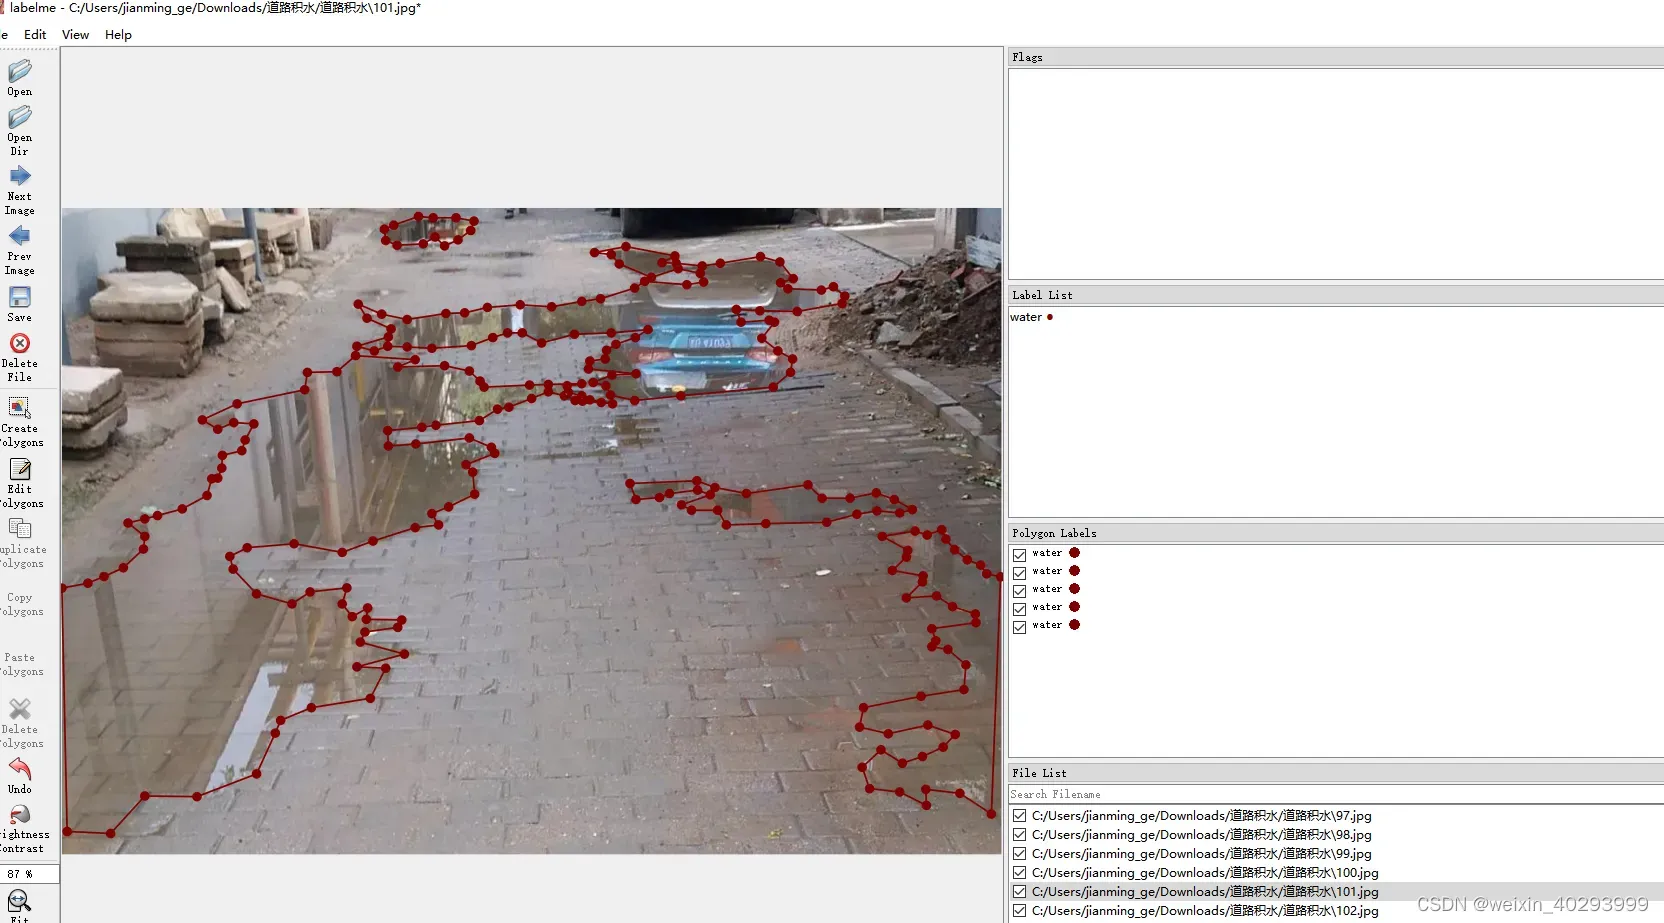
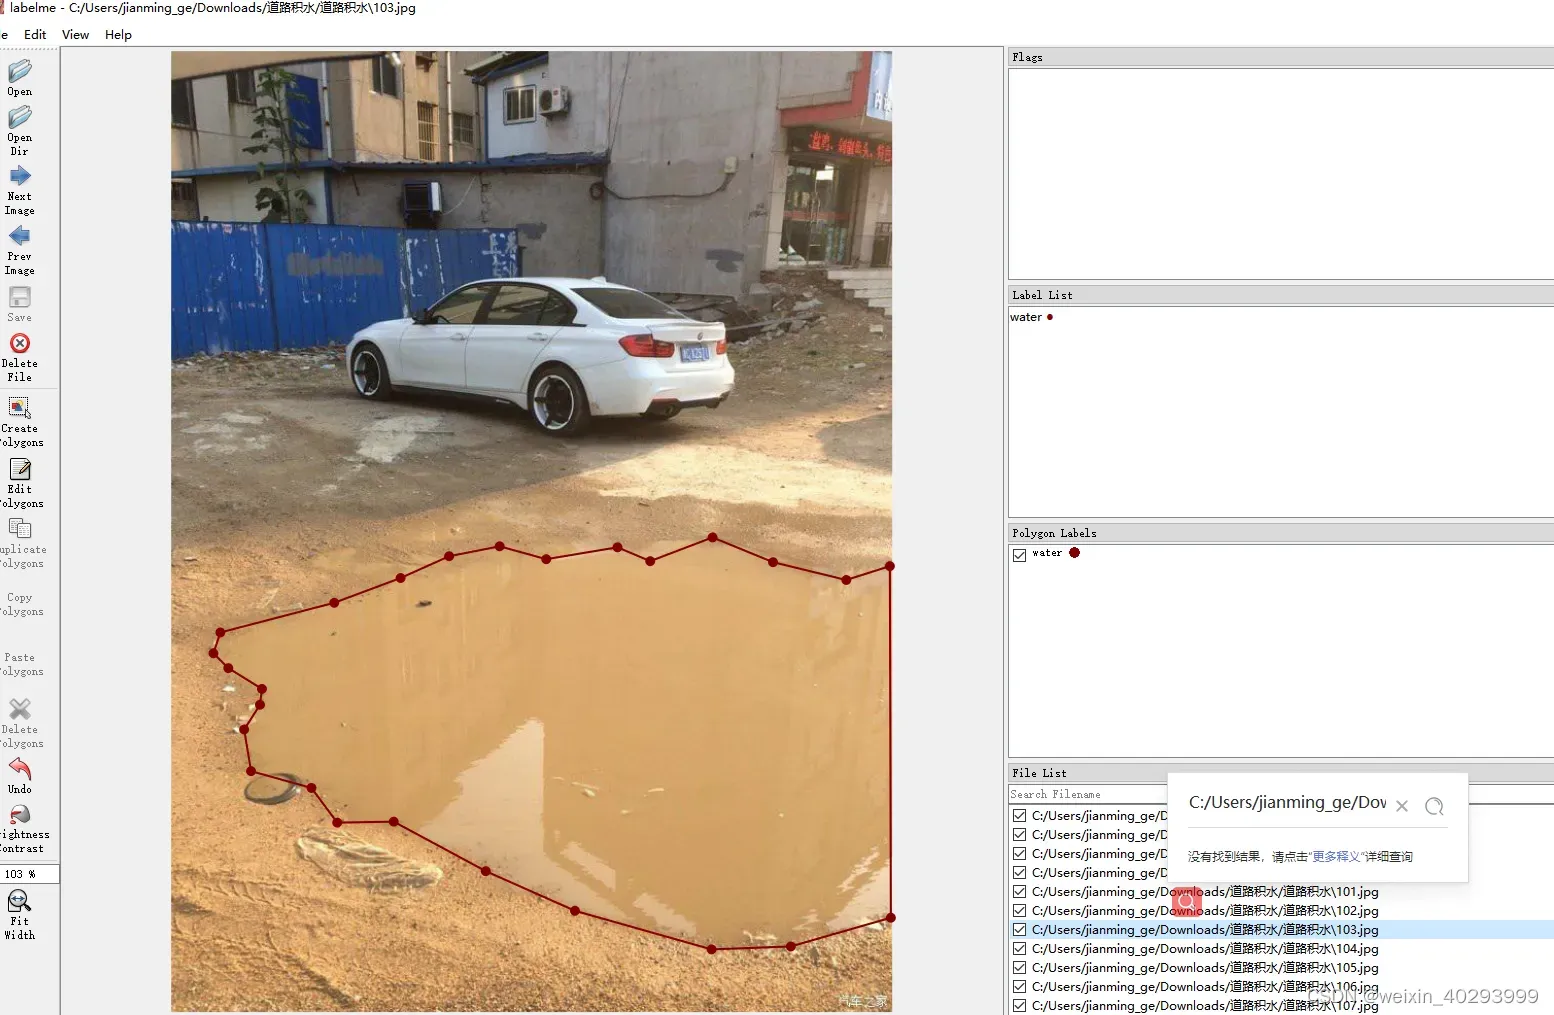
但是labelme的标注是json格式的,需要做一次转换。
这还是自己准备好的数据集,只需要批量转换一下,自己标注分割就费时费力了啊。(广告:本数据集有偿提供,私信我即可),主要是归一化一下
2.标注文件的转化:
需要安装他的要求转,转换脚本如下:
def convert_json_label_to_yolov_seg_label():
import glob
import numpy as np
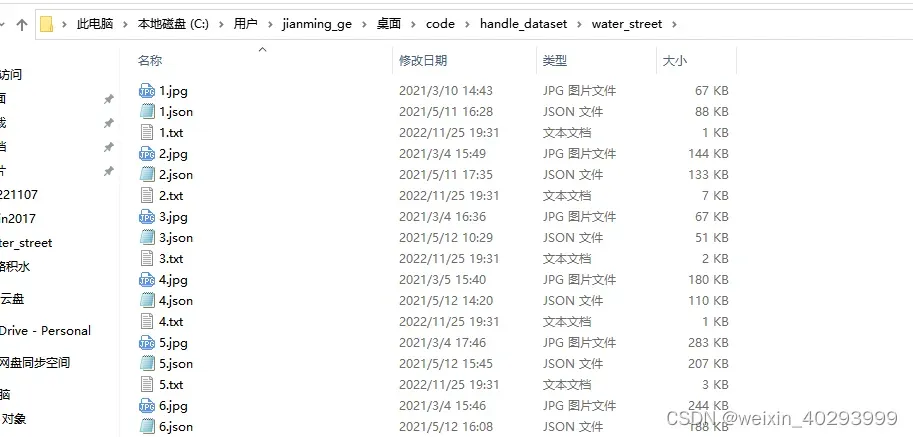
json_path = r"C:\Users\jianming_ge\Desktop\code\handle_dataset\water_street";
json_files = glob.glob(json_path + "/*.json")
for json_file in json_files:
# if json_file != r"C:\Users\jianming_ge\Desktop\code\handle_dataset\water_street\223.json":
# continue
print(json_file)
f = open(json_file)
json_info = json.load(f)
# print(json_info.keys())
img = cv2.imread(os.path.join(json_path, json_info["imagePath"]))
height, width, _ = img.shape
np_w_h = np.array([[width, height]], np.int32)
txt_file = json_file.replace(".json", ".txt")
f = open(txt_file, "a")
for point_json in json_info["shapes"]:
txt_content = ""
np_points = np.array(point_json["points"], np.int32)
norm_points = np_points / np_w_h
norm_points_list = norm_points.tolist()
txt_content += "0 " + " ".join([" ".join([str(cell[0]), str(cell[1])]) for cell in norm_points_list]) + "\n"
f.write(txt_content)
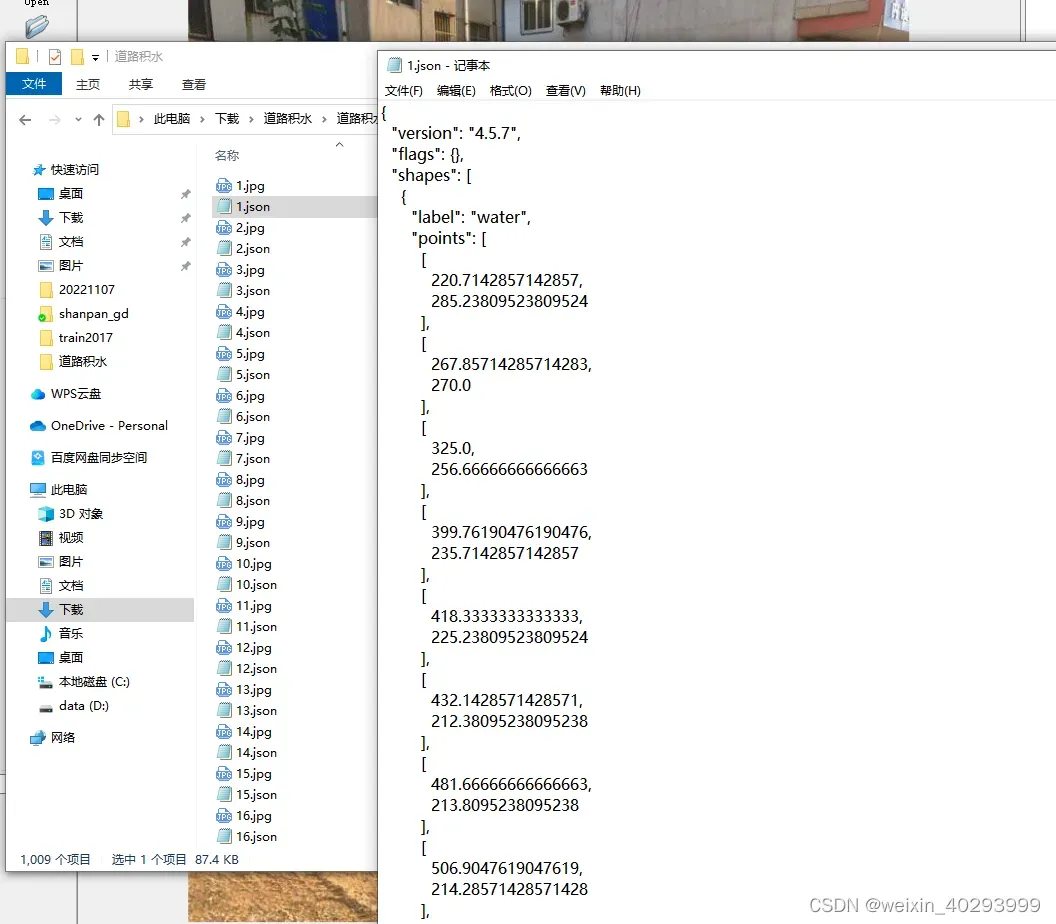
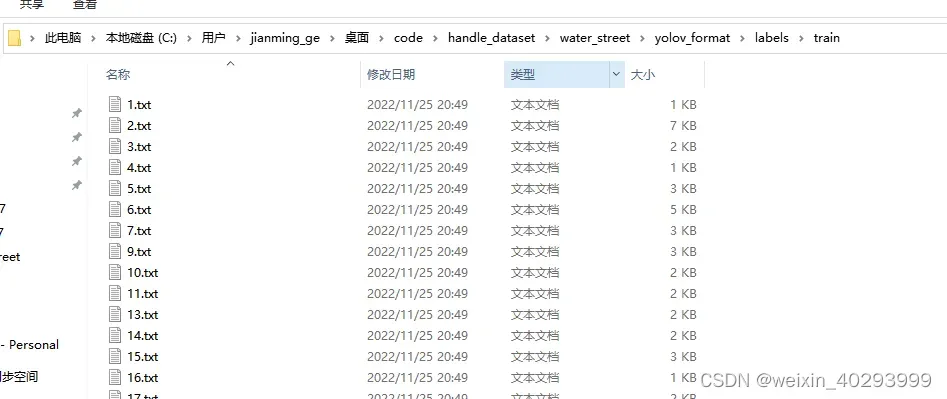
会对应产生.txt 文件,和之前yolov分割例子的coco-128一致
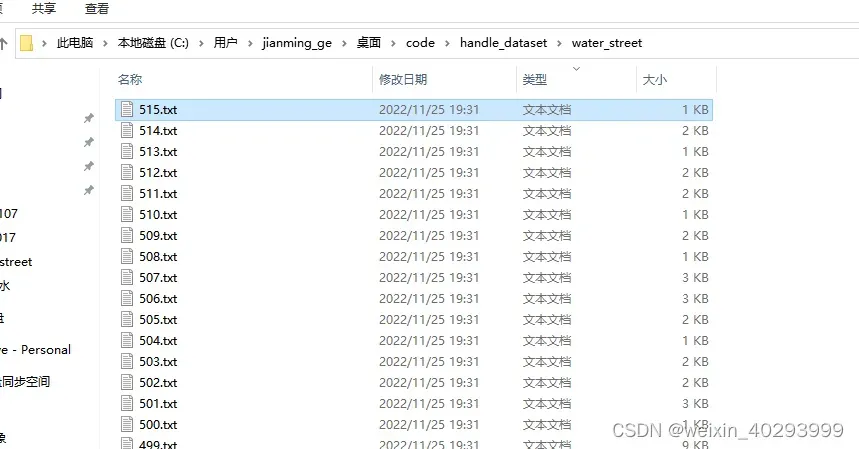
整个数据集的对应关系:
1.jpg 是原始图片,1.json是labelme标注的图片,1.txt是yolov分割所需要的格式
3.标注再验证
转化完成一定要再次验证一遍,否则会死的很惨。因为算法工程师80%的时间,都耗费再数据上,而训练只是一行命令的事儿。
def check_convert_json_label_to_yolov_seg_label():
    """
    验证一下对不对
    :return:
    """
    import glob
    import numpy as np
    import cv2
    txt_path = r"C:\Users\jianming_ge\Desktop\code\handle_dataset\water_street";
    txt_files = glob.glob(txt_path + "/*.txt")
    for txt_file in txt_files:
        # if json_file != r"C:\Users\jianming_ge\Desktop\code\handle_dataset\water_street\223.json":
        # continue
        print(txt_file)
        pic_path = txt_file.replace(".txt", ".jpg")
        img = cv2.imread(pic_path)
        height, width, _ = img.shape
        print(height, width)

        # cv2.imshow("111",img)
        # 显示原始图片
        # cv2.waitKey()
        # 勾勒多边形
        file_handle = open(txt_file)
        cnt_info = file_handle.readlines()
        new_cnt_info = [line_str.replace("\n", "").split(" ") for line_str in cnt_info]
        print(len(new_cnt_info))
        print("---====---")
        # 45 bowl 碗 49 橘子 50 西兰花
        color_map = {"49": (0, 255, 255), "45": (255, 0, 255), "50": (255, 255, 0)}
        for new_info in new_cnt_info:
            print(new_info)
            s = []
            for i in range(1, len(new_info), 2):
                b = [float(tmp) for tmp in new_info[i:i + 2]]
                s.append([int(b[0] * width), int(b[1] * height)])
            print(s)
            cv2.polylines(img, [np.array(s, np.int32)], True, color_map.get(new_info[0]))
        cv2.imshow('img2', img)
        cv2.waitKey()
你会看到这样的图片:
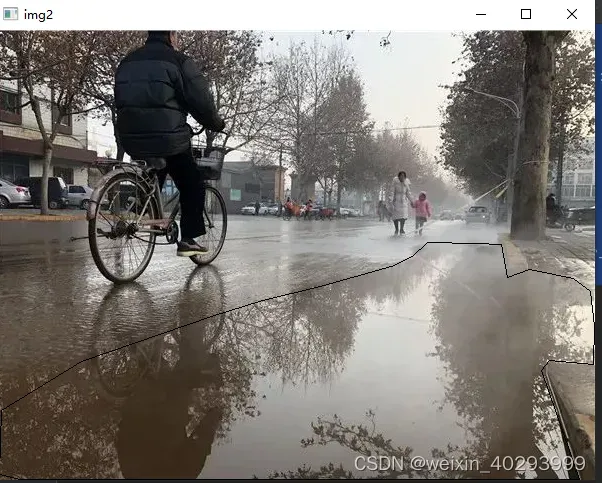
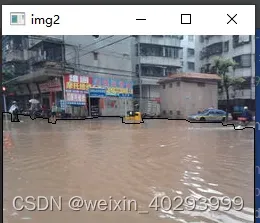

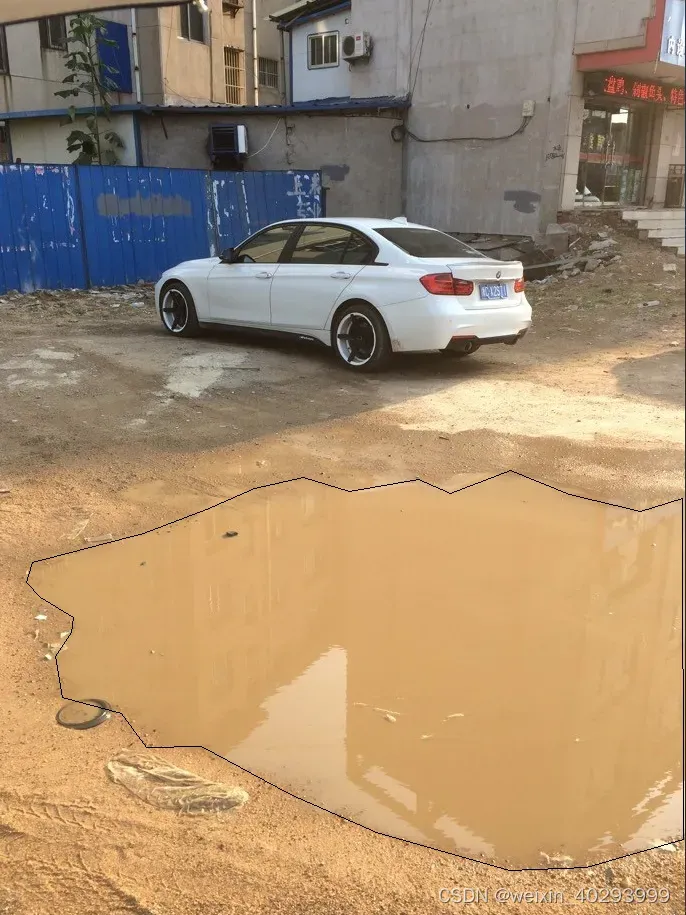
证明转化的标注文件没有问题。
4.分割数据集
下面就是要按1:9 或者2:8的比例分开数据集,因为数据集才550张,不是特别大,所以我会在代码中重新建目录,把图片和标注文件复制过来。这样并不动旧的数据集,这是一个好习惯!
数据集拆分的代码如下:
def split_dataset():
    # 为防止数据混乱,执行此脚本前,先将'C:\Users\jianming_ge\Desktop\code\handle_dataset\water_street\yolov_format'清空
    """
    :return:
    """
    import glob
    import shutil
    import random
    txt_path = r"C:\Users\jianming_ge\Desktop\code\handle_dataset\water_street"
    txt_files = glob.glob(txt_path + "/*.txt")
    # 基础图片文件夹
    images_base_dir = r"C:\Users\jianming_ge\Desktop\code\handle_dataset\water_street\yolov_format\images"
    # 基础标注文件夹
    labels_base_dir = r"C:\Users\jianming_ge\Desktop\code\handle_dataset\water_street\yolov_format\labels"

    # 训练集图片文件夹
    images_train_dir = os.path.join(images_base_dir, "train")
    # 训练集标注文件夹
    labels_train_dir = os.path.join(labels_base_dir, "train")
    # 验证集图片文件夹
    images_val_dir = os.path.join(images_base_dir, "val")
    # 验证集标注文件夹
    labels_val_dir = os.path.join(labels_base_dir, "val")
    # 生成所需4个文件夹
    [make_new_dir(dir_path) for dir_path in [images_train_dir, labels_train_dir, images_val_dir, labels_val_dir]]
    # 验证集数据的比例,可以自定义成任何你所需要的比例
    val_rate = 0.1
    for txt_ori_path in txt_files:
        fpath, fname = os.path.split(txt_ori_path)  # 分离文件名和路径
        if random.randint(1, 10) == 10 * val_rate:
            # 验证集数据
            txt_dst_path = os.path.join(labels_val_dir, fname)
            img_dst_path = os.path.join(images_val_dir, fname.replace(".txt", ".jpg"))
        else:
            # 训练集
            txt_dst_path = os.path.join(labels_train_dir, fname)
            img_dst_path = os.path.join(images_train_dir, fname.replace(".txt", ".jpg"))
        # 执行复制
        # 图片都是jpg,且和原始txt文件在同一个目录,所以可以这么写
        img_ori_path = txt_ori_path.replace(".txt", ".jpg")
        # 移动标注文件
        shutil.copy(txt_ori_path, txt_dst_path)
        # 移动图片文件
        shutil.copy(img_ori_path, img_dst_path)
执行完,会多这个目录,和coco128-seg的一样:
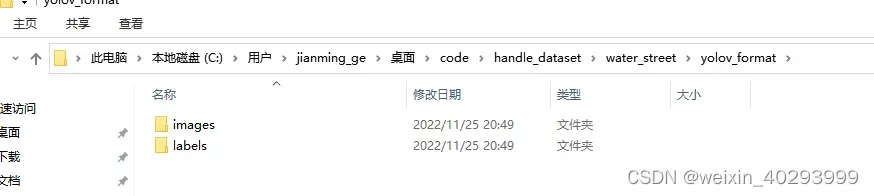

ok完事具备,开始训练吧!
三、训练
1.构建配置文件
water.yaml
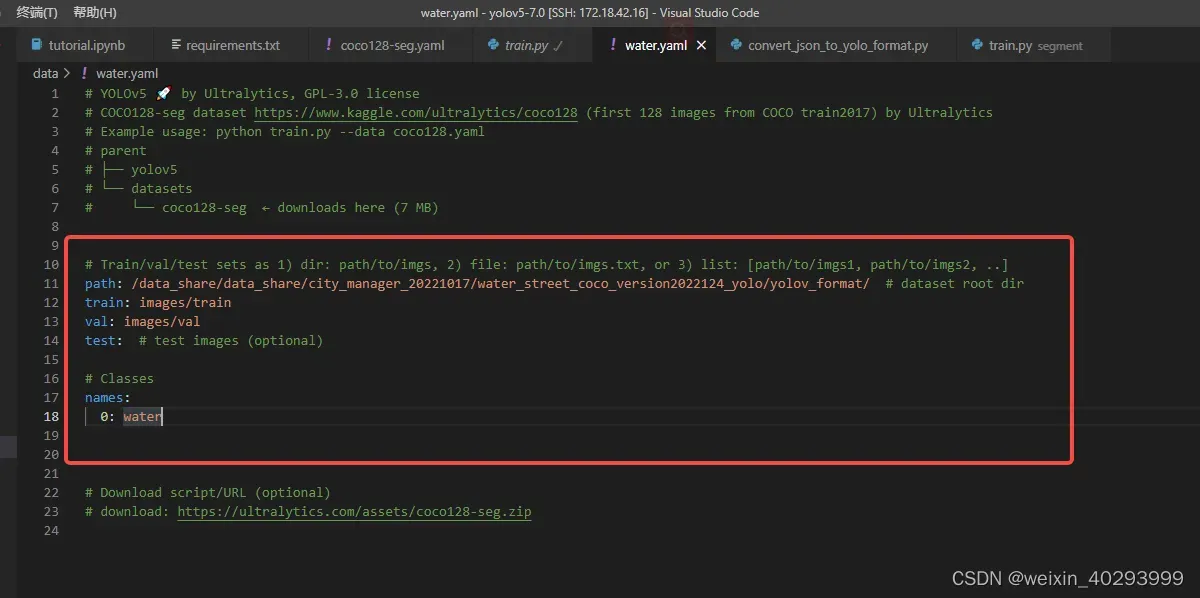
照著coco128-seg.yaml抄一份,改成自己目录结构即可
path: /data_share/data_share/city_manager_20221017/water_street_coco_version2022124_yolo/yolov_format/  # dataset root dir
train: images/train
val: images/val
test:  # test images (optional)

# Classes
names:
  0: water
这里需要多啰嗦一句,配置文件只需要体现图片的路径即可
比如train,最终代码会到这个目录下加载图片:
/data_share/data_share/city_manager_20221017/water_street_coco_version2022124_yolo/yolov_format/images/train
然后智能(暴力)把images替换成labels,也就是说去:/data_share/data_share/city_manager_20221017/water_street_coco_version2022124_yolo/yolov_format/labels/train 下找标注
反正配置文件的写法有好几种,我就照着coco128-seg超了一份。
这里插入一个知识点, 为什么test下人家给写的是optional,引出的问题是在啥时候不需要test数据集?
瓜书上说,train是用来xxx,val是用来ooo,test数据集是用来xxoo。
那么问题来了,那是书上写的,我的问题是,什么时候不需要test数据集,少废话,出答案:
在train、val、test都来自一个概率分布的时候,是不需要test的,仔细想想,都来自一个概率分布,其实连val都可以不用。当然,val是用来防止模型过拟合的,根据loss曲线挑选一个train和val表现都还不错的模型。
就目前这个分割网络来说,我们没有拿到生产数据,还不知道是啥情况,只能先训练一个初版,然后试运行(预生产时)再去迭代优化了。话说,我这里已经在生产摄像头下,下雨时,把收集了一些积水的视频。
2.训练
发车、发车。。
前面已经说过了和目标检测训练的命令一模一样,祖上富裕,3张卡,走你
python -m torch.distributed.launch --nproc_per_node=3 segment/train.py --img 640 --batch 48 --epochs 300 --data water-seg.yaml --weights weights/yolov5m-seg.pt --workers 16 --save-period 20 --cache
上面几个参数自行查一下他的意思
卡的数据和batch 一定是能被整出才行,比如我有3张卡,那么batch要是3的倍数。
一切正常:
3.选择模型
300轮次下来,每20轮保留一个模型,
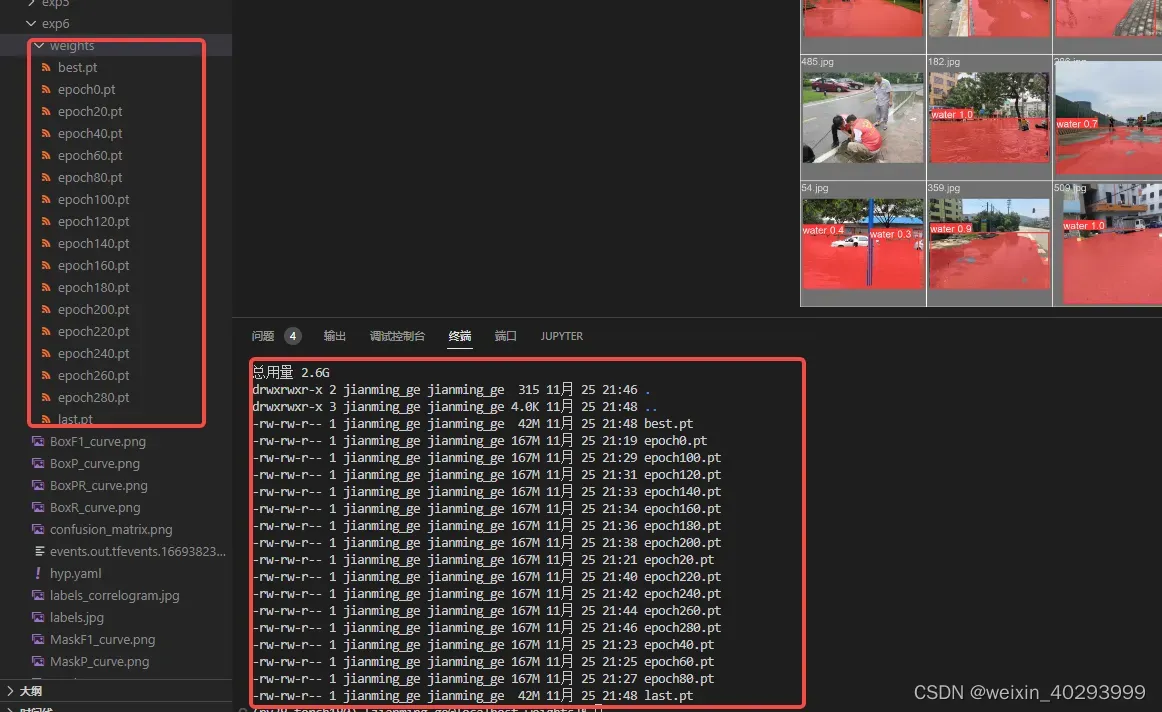
可以看到last.pt 就是best.pt
从result.png 上看
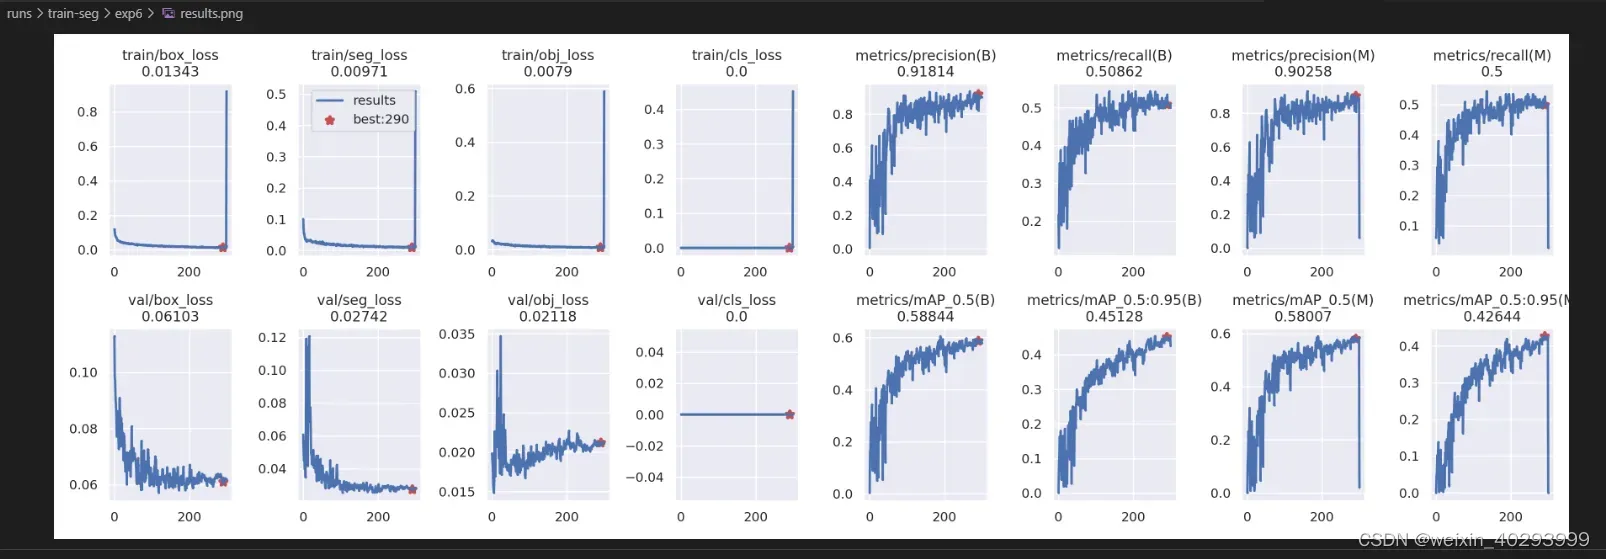
选取200-300轮直接的一个模型是合适的,
本来用tensorboard看更直观的,可是我的tensorboard报错,尚不清楚咋回事。解决了两个小时,无解,翻过来正过去就是那么两句话。
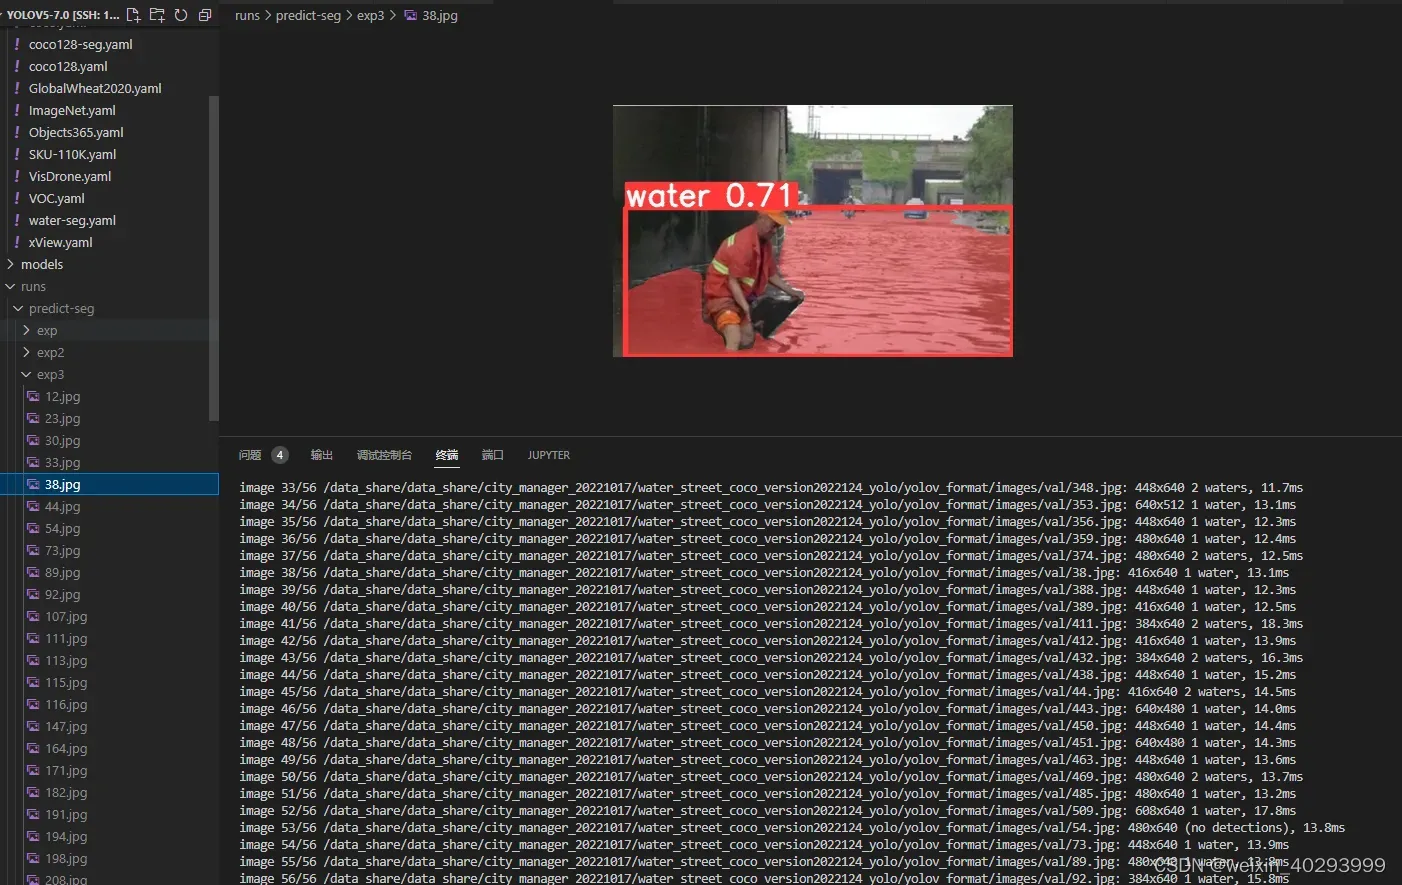
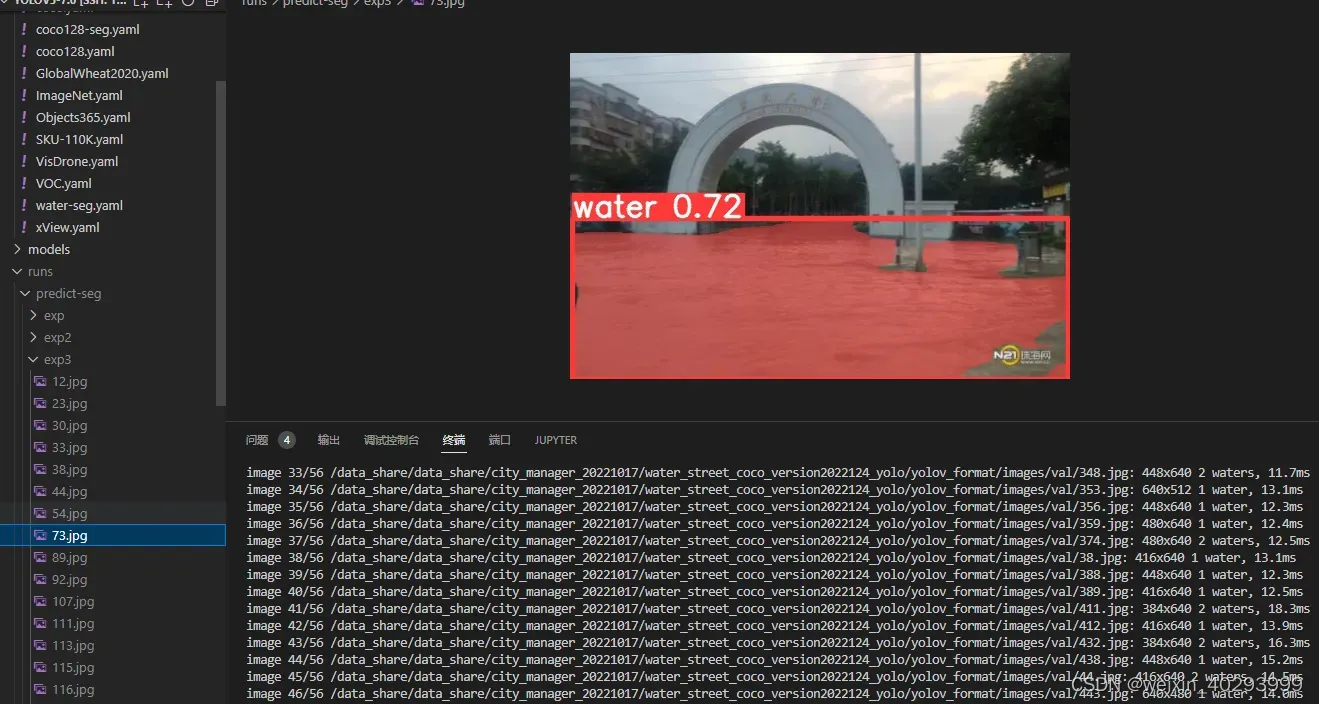
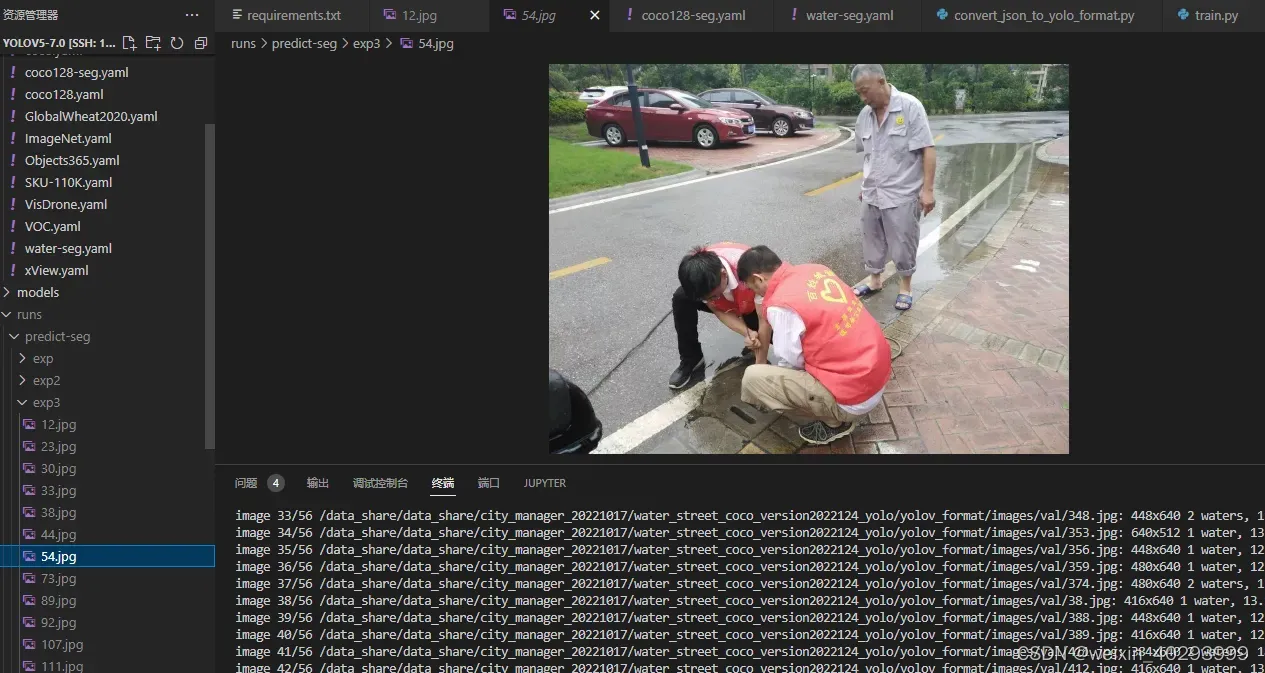
就用best.pt 推理一下试试,把runs/exp 下的best.pt 复制到weights/下,并且重命名為best-seg.pt
python segment/predict.py --weights weights/best-seg.pt --img 640 --conf 0.25 --source /data_share/data_share/city_manager_20221017/water_street_coco_version2022124_yolo/yolov_format/images/val
#display.Image(filename='runs/predict-seg/exp/zidane.jpg', width=600)
麻蛋,把环境搞坏了,这可是我的主环境啊啊啊:
Uninstalling torchvision-0.2.2:
Successfully uninstalled torchvision-0.2.2
Successfully installed dataclasses-0.6 torch-1.7.0 torchvision-0.8.1
报错说需要torchvision>=0.8.1, 我的是0.2.2, 然后我pip install torchvision==0.8.1, 结果给我把torch1.8卸载了,重新安装的torch1.7,
然后重新运行命令,就报错了
Traceback (most recent call last):
  File "segment/predict.py", line 274, in <module>
    main(opt)
  File "segment/predict.py", line 269, in main
    run(**vars(opt))
  File "/home/jianming_ge/miniconda3/envs/py38_torch180/lib/python3.8/site-packages/torch/autograd/grad_mode.py", line 26, in decorate_context
    return func(*args, **kwargs)
  File "segment/predict.py", line 99, in run
    model = DetectMultiBackend(weights, device=device, dnn=dnn, data=data, fp16=half)
  File "/home/jianming_ge/workplace/yolov5-7.0/models/common.py", line 345, in __init__
    model = attempt_load(weights if isinstance(weights, list) else w, device=device, inplace=True, fuse=fuse)
  File "/home/jianming_ge/workplace/yolov5-7.0/models/experimental.py", line 80, in attempt_load
    ckpt = (ckpt.get('ema') or ckpt['model']).to(device).float()  # FP32 model
  File "/home/jianming_ge/miniconda3/envs/py38_torch180/lib/python3.8/site-packages/torch/nn/modules/module.py", line 490, in float
    return self._apply(lambda t: t.float() if t.is_floating_point() else t)
  File "/home/jianming_ge/workplace/yolov5-7.0/models/yolo.py", line 155, in _apply
    self = super()._apply(fn)
  File "/home/jianming_ge/miniconda3/envs/py38_torch180/lib/python3.8/site-packages/torch/nn/modules/module.py", line 359, in _apply
    module._apply(fn)
  File "/home/jianming_ge/miniconda3/envs/py38_torch180/lib/python3.8/site-packages/torch/nn/modules/module.py", line 359, in _apply
    module._apply(fn)
  File "/home/jianming_ge/miniconda3/envs/py38_torch180/lib/python3.8/site-packages/torch/nn/modules/module.py", line 359, in _apply
    module._apply(fn)
  File "/home/jianming_ge/miniconda3/envs/py38_torch180/lib/python3.8/site-packages/torch/nn/modules/module.py", line 381, in _apply
    param_applied = fn(param)
  File "/home/jianming_ge/miniconda3/envs/py38_torch180/lib/python3.8/site-packages/torch/nn/modules/module.py", line 490, in <lambda>
    return self._apply(lambda t: t.float() if t.is_floating_point() else t)
RuntimeError: CUDA error: no kernel image is available for execution on the device
唉锅从天上来啊,和cuda有不匹配了,算求,又重启了一个环境,安装了新环境。深度学习,有一半时间再安装环境,另一半时间制作docker…
py39_torch1.10.1
# 基础环境
pip install torch==1.10.1+cu111 torchvision==0.11.2+cu111 torchaudio==0.10.1 -f https://download.pytorch.org/whl/cu113/torch_stable.html
# yolov所需环境
pip install -r requirements.txt
# 其它的再报错再说吧,唉,倒霉啊!!比如flask fastapi kafka mysql sharply之类的,求大牛指导管理环境啊
在等这个安装的同时,又重新将原环境装了一次:torch 从1.8 更换成1.8.2 因为LST版本。很快就装完了,然后执行推理也好使。太奇怪了。不知道怎么动了环境
pip install torch==1.8.2 torchvision==0.9.2 torchaudio==0.8.2 --extra-index-url https://download.pytorch.org/whl/lts/1.8/cu111
也有未识别的
再看看tensorbord好用了没

还是没有,其实我已经pip install tensorboard了,主要是想很直观的看loss,先这样吧,等环境py39_torch1.10.1弄好了,再运行下看是否成功。
四、模型转化
1.转化细节
.pt 到.onnx
根据我之前的博文,onnx对cpu非常友好,能够提升10倍的推理速度,从1-2s 下降到 0.1-0.2s
onnx的安装可以看我之前的博文
转化命令:
python export.py --weights weights/best-seg.pt --include onnx
验证速度:
python segment/predict.py --weights weights/best-seg.onnx --img 640 --conf 0.25 --source /data_share/data_share/city_manager_20221017/water_street_coco_version2022124_yolo/yolov_format/images/val
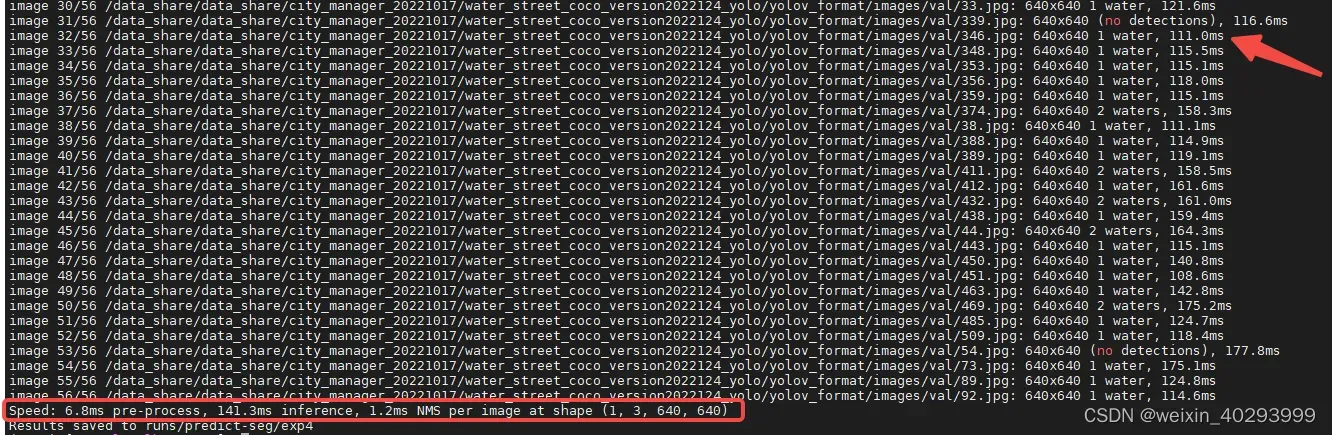
cpu 的onnx 下是0.15s,作为对比gpu的.pt 是0.015s,证明cpu下的分割网络是可行的。
2.推理返回值代表
# Run inference
        self.model.warmup(imgsz=(1 if pt else bs, 3, *imgsz))  # warmup
        dt =  (Profile(), Profile(), Profile())
        with dt[0]:
            im = torch.from_numpy(im).to(self.device)
            im = im.half() if self.model.fp16 else im.float()  # uint8 to fp16/32
            im /= 255  # 0 - 255 to 0.0 - 1.0
            if len(im.shape) == 3:
                im = im[None]  # expand for batch dim
        # Inference
        with dt[1]:
            visualize = False
            pred, proto = self.model(im, augment=False, visualize=visualize)[:2]
        # NMS
        with dt[2]:
            pred = non_max_suppression(pred, self.conf_thres, self.iou_thres, self.retain_classes,nm=32)

        for i, det in enumerate(pred):  # per image
            im0 = im0.copy()
            im0 = im0.copy()
        segments = None
        annotator = Annotator(im0, line_width=3, example=str(names))
        if len(det):
            masks = process_mask(proto[i], det[:, 6:], det[:, :4], im.shape[2:], upsample=True)  # HWC
            det[:, :4] = scale_boxes(im.shape[2:], det[:, :4], im0.shape).round()  # rescale boxes to im0 size

            # Segments
            save_txt =True
            if save_txt:
                segments = reversed(masks2segments(masks))
                segments = [scale_segments(im.shape[2:], x, im0.shape, normalize=True) for x in segments]

            # Print results
            s = ""
            for c in det[:, 5].unique():
                n = (det[:, 5] == c).sum()  # detections per class
                s += f"{n} {names[int(c)]}{'s' * (n > 1)}, "  # add to string

            # Mask plotting
            retina_masks = False
            annotator.masks(masks,
                            colors=[colors(x, True) for x in det[:, 5]],
                            im_gpu=None if retina_masks else im[i])
这是我略加修改后的代码,原始代码在segment/predict.py下
pred, proto = self.model(im, augment=False, visualize=visualize)[:2]
这个里面的proto也是重要的,代表了分割的实例组成的list,细节的分割点位
det 代表有无识别到目标其里面的内容很风丰富,但是经过nms之后
non_max_suppression函数的注释是,是将pred经过非极大抑制之后的矩形框
list of detections, on (n,6) tensor per image [xyxy, conf, cls]
四个坐标点,置信度,类别值,这是我打印出来的det,看样子不是(n,6) 我的理解是前6个元素的含义是明确的,先存疑??
tensor([[ 3.14000e+02,  2.53000e+02,  9.28000e+02,  6.02000e+02,  9.83171e-01,  0.00000e+00,  5.36699e-01, -5.76064e-01, -3.26006e-01,  1.20082e+00,  3.36137e-01, -4.49288e-01, -1.76419e-01,  7.95439e-01,  4.11805e-01, -2.94021e-01, -1.07274e+00,  3.74787e-01,  7.30362e-01, -5.80536e-01,  1.28794e+00,  1.05980e+00,
          7.34846e-01, -6.37928e-01,  5.95232e-01,  7.47005e-01, -5.02438e-01,  4.93569e-01, -3.65522e-01,  3.31907e-01,  2.75088e-01, -1.21060e+00, -7.28429e-01,  4.78636e-01,  1.70226e-01, -7.33963e-01, -5.29957e-01,  3.69660e-01],
        [ 2.00000e+00,  2.05000e+02,  2.84000e+02,  6.03000e+02,  9.76957e-01,  0.00000e+00,  4.87412e-01, -4.98163e-01, -4.37511e-01,  1.22402e+00,  2.67139e-01, -4.17416e-01, -1.08538e-01,  7.58215e-01,  4.04070e-01, -3.91520e-01, -7.94110e-01, -2.26625e-02,  7.35040e-01, -3.86938e-01,  1.27367e+00,  6.53839e-01,
          9.14556e-01, -4.18411e-01,  7.33185e-01,  4.69820e-01, -2.65769e-01,  3.17441e-01, -2.13026e-01,  2.10853e-01,  1.38901e-01, -1.21001e+00, -6.82711e-01,  6.36819e-01,  3.86214e-01, -6.94586e-01, -6.36750e-01,  3.26956e-01]])
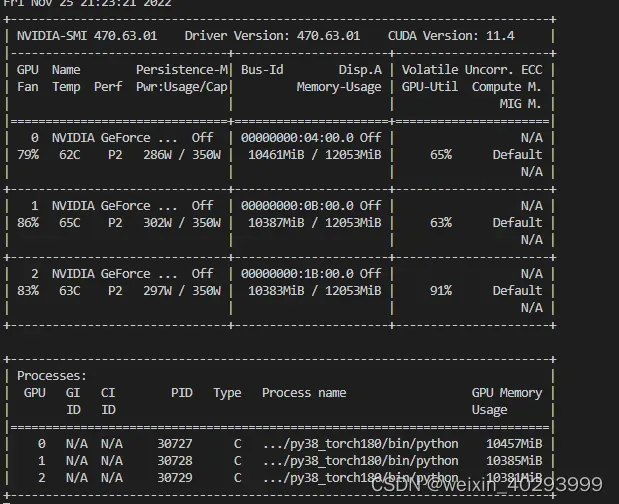
五、ONNX 内存泄漏
美好的时光总是短暂的,量化也没有那么好,起码在onnx的cpu版本是有问题的。bug在这里:
https://github.com/microsoft/onnxruntime/issues/9313
发现它是因为,服务器登陆不上了,关机了, 原因是内存和cpu都顶爆了。
内存持续升高,存在内存泄漏的问题, 不是pytorch 或者 yolov的问题,是onnx的问题。
初始状态:
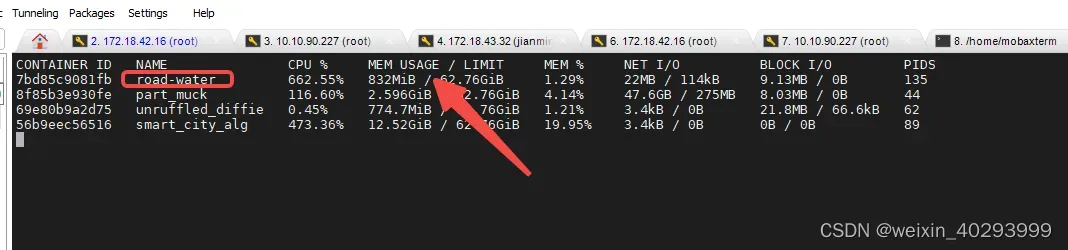
35分钟之后:

我是用docker的方式启动的 只有要图片送入,mem usage会一直增加。。。而且进入docker内部 杀死推理服务外侧docker的监控的mem usage依然不会往下掉,只是不在变化,观察一下,半天干到6G的内存了, 所以重启大法了,一小时重启一次。
后面有时间,再根进下,这个是个大活儿,我还挺有兴趣的,虽然自己很菜,人菜瘾大。
您若是直接命令启动的服务,则可以用脚本控制,每隔一段时间重启一次。
分割线:20230331 ——————————————————
六 遗传参数的用处
今天再次迭代算法,想要尝试copy paste的方式来增加样本量,但是我大yolov已经给我们准备好了,实在是太贴心了。
有好处就有缺点,用了–evolve 就不能用一机多卡的形式了。 这不得不说是个遗憾。
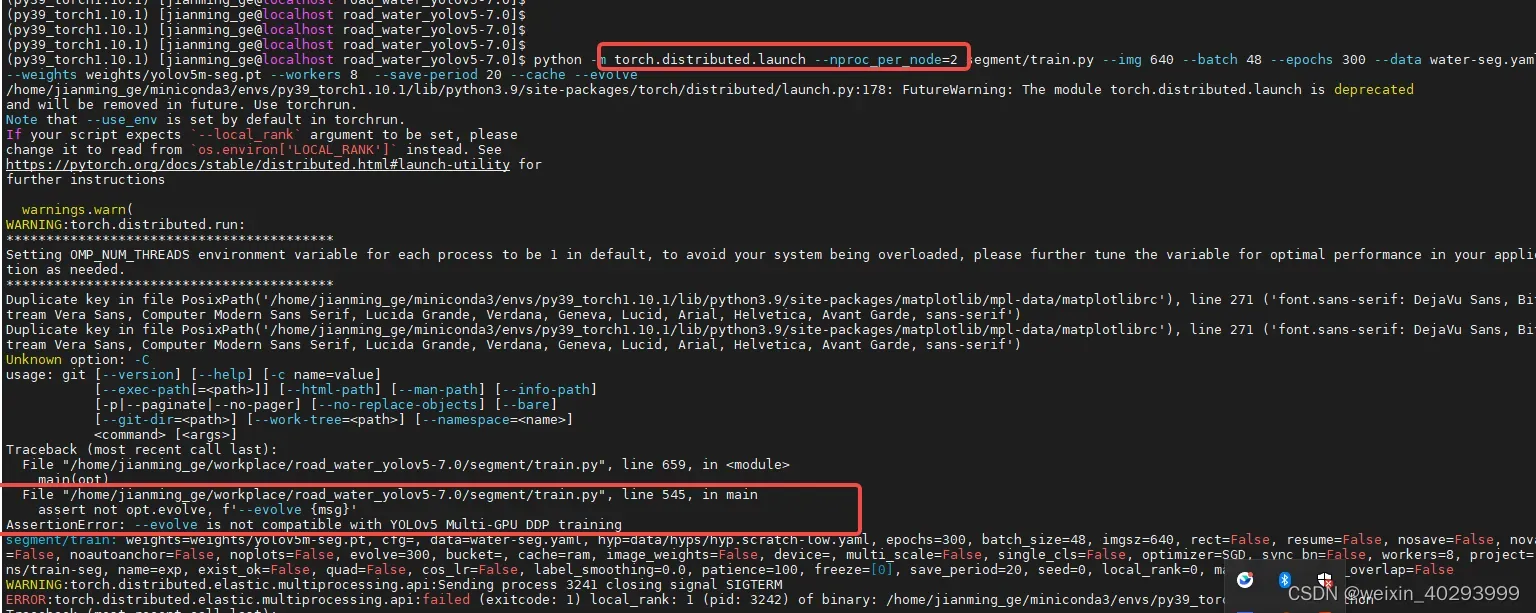
报错单独贴一下:
AssertionError: --evolve is not compatible with YOLOv5 Multi-GPU DDP training
实际运行命令:
python segment/train.py --img 640 --batch 12 --epochs 300 --data water-seg.yaml --weights weights/yolov5m-seg.pt --workers 2 --save-period 20 --cache --evolve
实际是用到了这里。
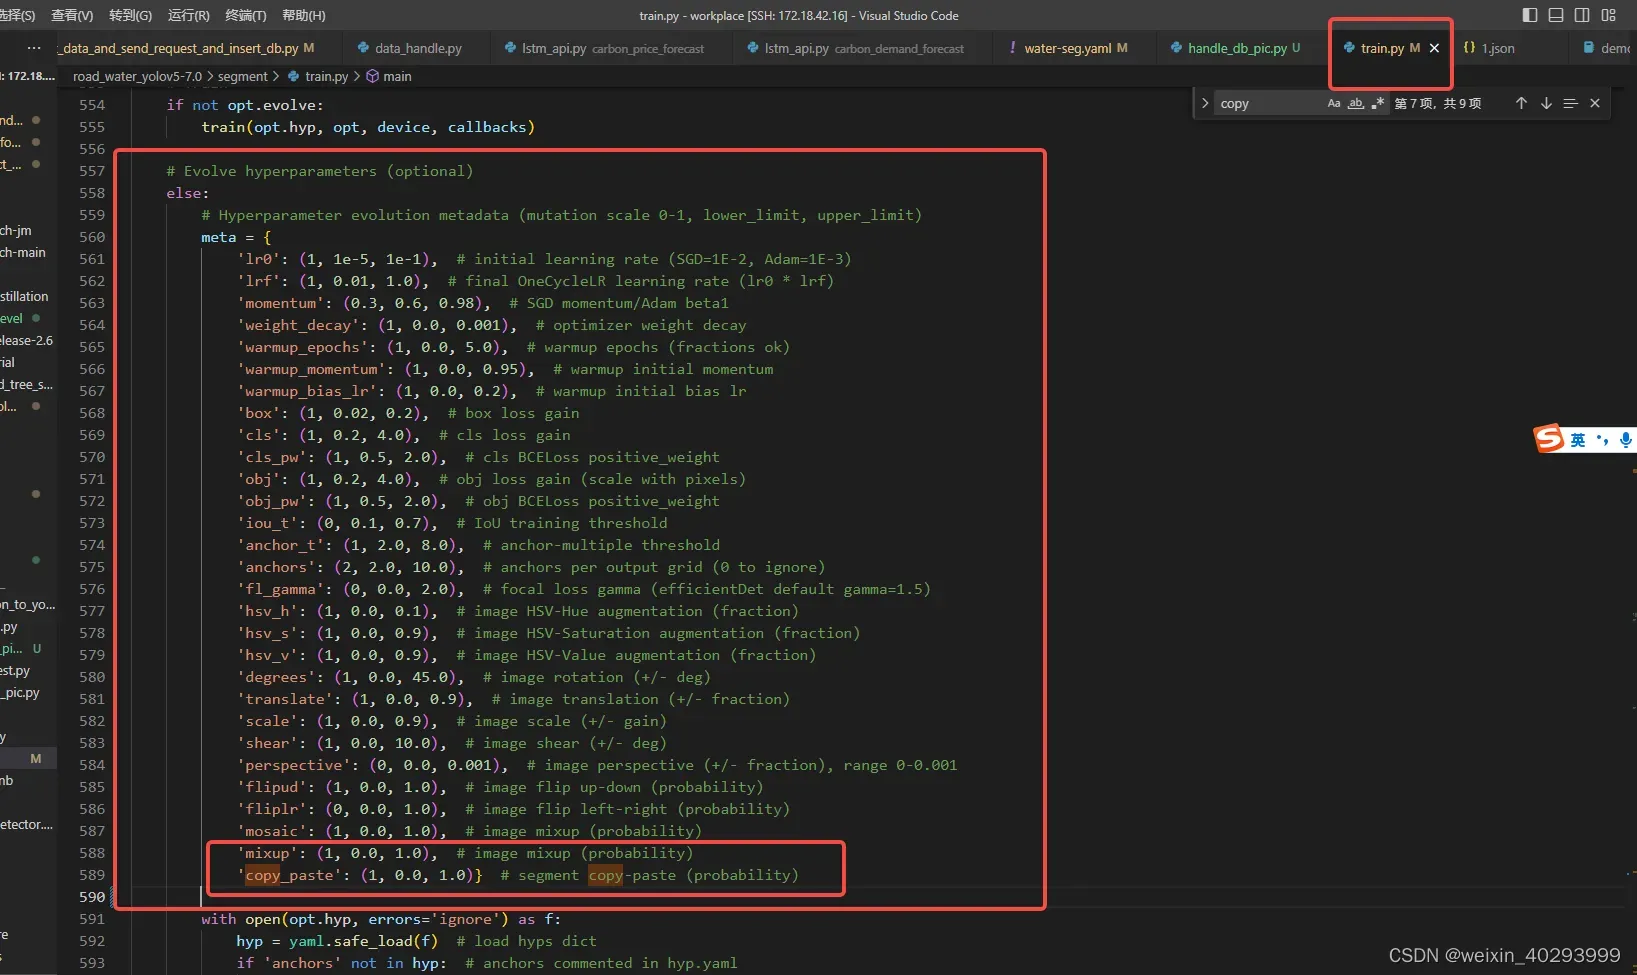
 # Train
    if not opt.evolve:
        train(opt.hyp, opt, device, callbacks)

    # Evolve hyperparameters (optional)
    else:
        # Hyperparameter evolution metadata (mutation scale 0-1, lower_limit, upper_limit)
        meta = {
            'lr0': (1, 1e-5, 1e-1),  # initial learning rate (SGD=1E-2, Adam=1E-3)
            'lrf': (1, 0.01, 1.0),  # final OneCycleLR learning rate (lr0 * lrf)
            'momentum': (0.3, 0.6, 0.98),  # SGD momentum/Adam beta1
            'weight_decay': (1, 0.0, 0.001),  # optimizer weight decay
            'warmup_epochs': (1, 0.0, 5.0),  # warmup epochs (fractions ok)
            'warmup_momentum': (1, 0.0, 0.95),  # warmup initial momentum
            'warmup_bias_lr': (1, 0.0, 0.2),  # warmup initial bias lr
            'box': (1, 0.02, 0.2),  # box loss gain
            'cls': (1, 0.2, 4.0),  # cls loss gain
            'cls_pw': (1, 0.5, 2.0),  # cls BCELoss positive_weight
            'obj': (1, 0.2, 4.0),  # obj loss gain (scale with pixels)
            'obj_pw': (1, 0.5, 2.0),  # obj BCELoss positive_weight
            'iou_t': (0, 0.1, 0.7),  # IoU training threshold
            'anchor_t': (1, 2.0, 8.0),  # anchor-multiple threshold
            'anchors': (2, 2.0, 10.0),  # anchors per output grid (0 to ignore)
            'fl_gamma': (0, 0.0, 2.0),  # focal loss gamma (efficientDet default gamma=1.5)
            'hsv_h': (1, 0.0, 0.1),  # image HSV-Hue augmentation (fraction)
            'hsv_s': (1, 0.0, 0.9),  # image HSV-Saturation augmentation (fraction)
            'hsv_v': (1, 0.0, 0.9),  # image HSV-Value augmentation (fraction)
            'degrees': (1, 0.0, 45.0),  # image rotation (+/- deg)
            'translate': (1, 0.0, 0.9),  # image translation (+/- fraction)
            'scale': (1, 0.0, 0.9),  # image scale (+/- gain)
            'shear': (1, 0.0, 10.0),  # image shear (+/- deg)
            'perspective': (0, 0.0, 0.001),  # image perspective (+/- fraction), range 0-0.001
            'flipud': (1, 0.0, 1.0),  # image flip up-down (probability)
            'fliplr': (0, 0.0, 1.0),  # image flip left-right (probability)
            'mosaic': (1, 0.0, 1.0),  # image mixup (probability)
            'mixup': (1, 0.0, 1.0),  # image mixup (probability)
            'copy_paste': (1, 0.0, 1.0)}  # segment copy-paste (probability)
不加—-evolve 参数的话, else 这里面的一坨优化手动应该都是用不到的。包括hsv,mosaic,mixup,copy_pase等等。(存疑)
TensorBoard: Start with 'tensorboard --logdir runs/train-seg', view at http://localhost:6006/
 tensorboard --logdir runs/train-seg --host=0.0.0.0
新装的环境发现报错:
2023-04-04 16:02:14.485000: W tensorflow/compiler/xla/stream_executor/platform/default/dso_loader.cc:64] Could not load dynamic library ‘libnvinfer.so.7’; dlerror: libnvinfer.so.7: cannot op
七 关于图片通道问题的一个bug 20230411发现
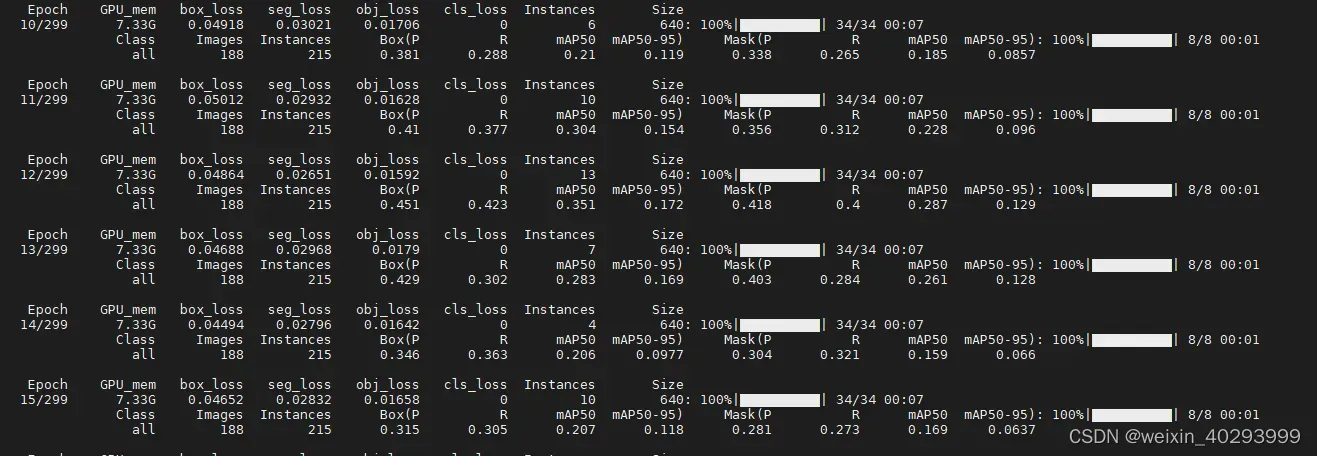
      Epoch    GPU_mem   box_loss   seg_loss   obj_loss   cls_loss  Instances       Size
      0/299      5.74G     0.1204    0.07856    0.02553          0         23        640:  35%|███▌      | 12/34 00:07libpng warning: sBIT: invalid
      0/299      5.74G     0.1188    0.07694    0.02574          0         33        640:  41%|████      | 14/34 00:08libpng warning: sBIT: invalid
      0/299      5.74G     0.1108    0.07117    0.02713          0         28        640:  71%|███████   | 24/34 00:11libpng warning: sBIT: invalid
      0/299      5.75G     0.1029    0.06394    0.02723          0         10        640: 100%|██████████| 34/34 00:13
                 Class     Images  Instances      Box(P          R      mAP50  mAP50-95)     Mask(P          R      mAP50  mAP50-95): 100%|██████████| 8/8 00:02
                   all        188        215       0.28      0.251      0.142       0.06      0.212      0.195      0.082     0.0289

      Epoch    GPU_mem   box_loss   seg_loss   obj_loss   cls_loss  Instances       Size
      1/299      7.32G    0.07902    0.04293    0.02481          0         40        640:  32%|███▏      | 11/34 00:02libpng warning: sBIT: invalid
      1/299      7.32G    0.07798    0.04315    0.02462          0         27        640:  38%|███▊      | 13/34 00:03libpng warning: sBIT: invalid
      1/299      7.32G    0.07878    0.04556    0.02474          0         38        640:  62%|██████▏   | 21/34 00:05libpng warning: sBIT: invalid
      1/299      7.32G    0.07873    0.04521    0.02454          0         36        640:  68%|██████▊   | 23/34 00:05libpng warning: sBIT: invalid
      1/299      7.32G    0.07862    0.04364    0.02392          0         34        640:  82%|████████▏ | 28/34 00:06libpng warning: sBIT: invalid
      1/299      7.32G    0.07739    0.04325     0.0235          0          8        640: 100%|██████████| 34/34 00:07
                 Class     Images  Instances      Box(P          R      mAP50  mAP50-95)     Mask(P          R      mAP50  mAP50-95):  25%|██▌       | 2/8 00:00libpng warning: sBIT: invalid
                 Class     Images  Instances      Box(P          R      mAP50  mAP50-95)     Mask(P          R      mAP50  mAP50-95): 100%|██████████| 8/8 00:01
                   all        188        215      0.334      0.279      0.166      0.101      0.291      0.251       0.13     0.0608

      Epoch    GPU_mem   box_loss   seg_loss   obj_loss   cls_loss  Instances       Size
      2/299      7.32G    0.06256    0.03825     0.0188          0         27        640:   3%|▎         | 1/34 00:00libpng warning: sBIT: invalid
      2/299      7.32G    0.07064    0.04049    0.02257          0         40        640:  18%|█▊        | 6/34 00:01libpng warning: sBIT: invalid
      2/299      7.32G    0.07023    0.03491    0.02087          0         22        640:  44%|████▍     | 15/34 00:03libpng warning: sBIT: invalid
      2/299      7.32G    0.06993    0.03416    0.02027          0         25        640:  50%|█████     | 17/34 00:04libpng warning: sBIT: invalid
      2/299      7.32G    0.06714    0.03363    0.01893          0          6        640: 100%|██████████| 34/34 00:07
                 Class     Images  Instances      Box(P          R      mAP50  mAP50-95)     Mask(P          R      mAP50  mAP50-95): 100%|██████████| 8/8 00:01
                   all        188        215      0.359      0.326      0.167     0.0631      0.235      0.228     0.0824     0.0265

      Epoch    GPU_mem   box_loss   seg_loss   obj_loss   cls_loss  Instances       Size
      3/299      7.32G    0.06512    0.03397    0.02116          0         37        640:   3%|▎         | 1/34 00:00libpng warning: sBIT: invalid
      3/299      7.32G    0.06598    0.04451    0.01951          0         32        640:   9%|▉         | 3/34 00:00libpng warning: sBIT: invalid
      3/299      7.32G    0.06442    0.03769    0.01774          0         21        640:  18%|█▊        | 6/34 00:01libpng warning: sBIT: invalid
      3/299      7.32G    0.06639    0.03573    0.02024          0         19        640:  38%|███▊      | 13/34 00:03libpng warning: sBIT: invalid
      3/299      7.32G    0.06504    0.03499    0.02038          0         29        640:  76%|███████▋  | 26/34 00:06^Z
warning :00:03libpng warning: sBIT: invalid
出现这个问题是因为有的图片是四通道的,带透明度。要先转换成三通道才可以,
修复后进度条都可以走到100%,否则遇到四通道的图片就break down了。
pytorch1.8 肯定是没这个问题, 现在用的1.10 是有问题的。
修复脚本也很简单:
import glob
import glob
import os
from PIL import Image
base_dir_list =  ['/data_share/data_share/city_manager_20221017/water_street_coco_version2022124_yolo/yolov_format/images/train','/data_share/data_share/bad_case_water20230119/final/train/images','/data_share/data_share/city_manager_20221017/bad_case_water20240331/final/images']

for base_dir in base_dir_list:
    imglist =  glob.glob(base_dir + "/*.jpg")
    for imgpath in imglist:
        print(imgpath)
        image = Image.open(imgpath)
        # image = image.resize((128, 128))   # 批量处理图像大小
        image = image.convert("RGB")  # 4通道转化为rgb三通道
        image.save(imgpath)
总结
就先写到这里把,等着模型好了,看看效果继续写。
后面就是封装api了,已经有现成的框架和套路了,美滋滋。
再打一次广告,需要数据集私信我,but 有偿啊
文章出处登录后可见!