如果觉得文章还行,能点个赞嘛?您的点赞是我更新的动力!!
目录
SAM的demo源码使用
首先说明这个链接里面的代码是关于demo的,目前还不能训练。
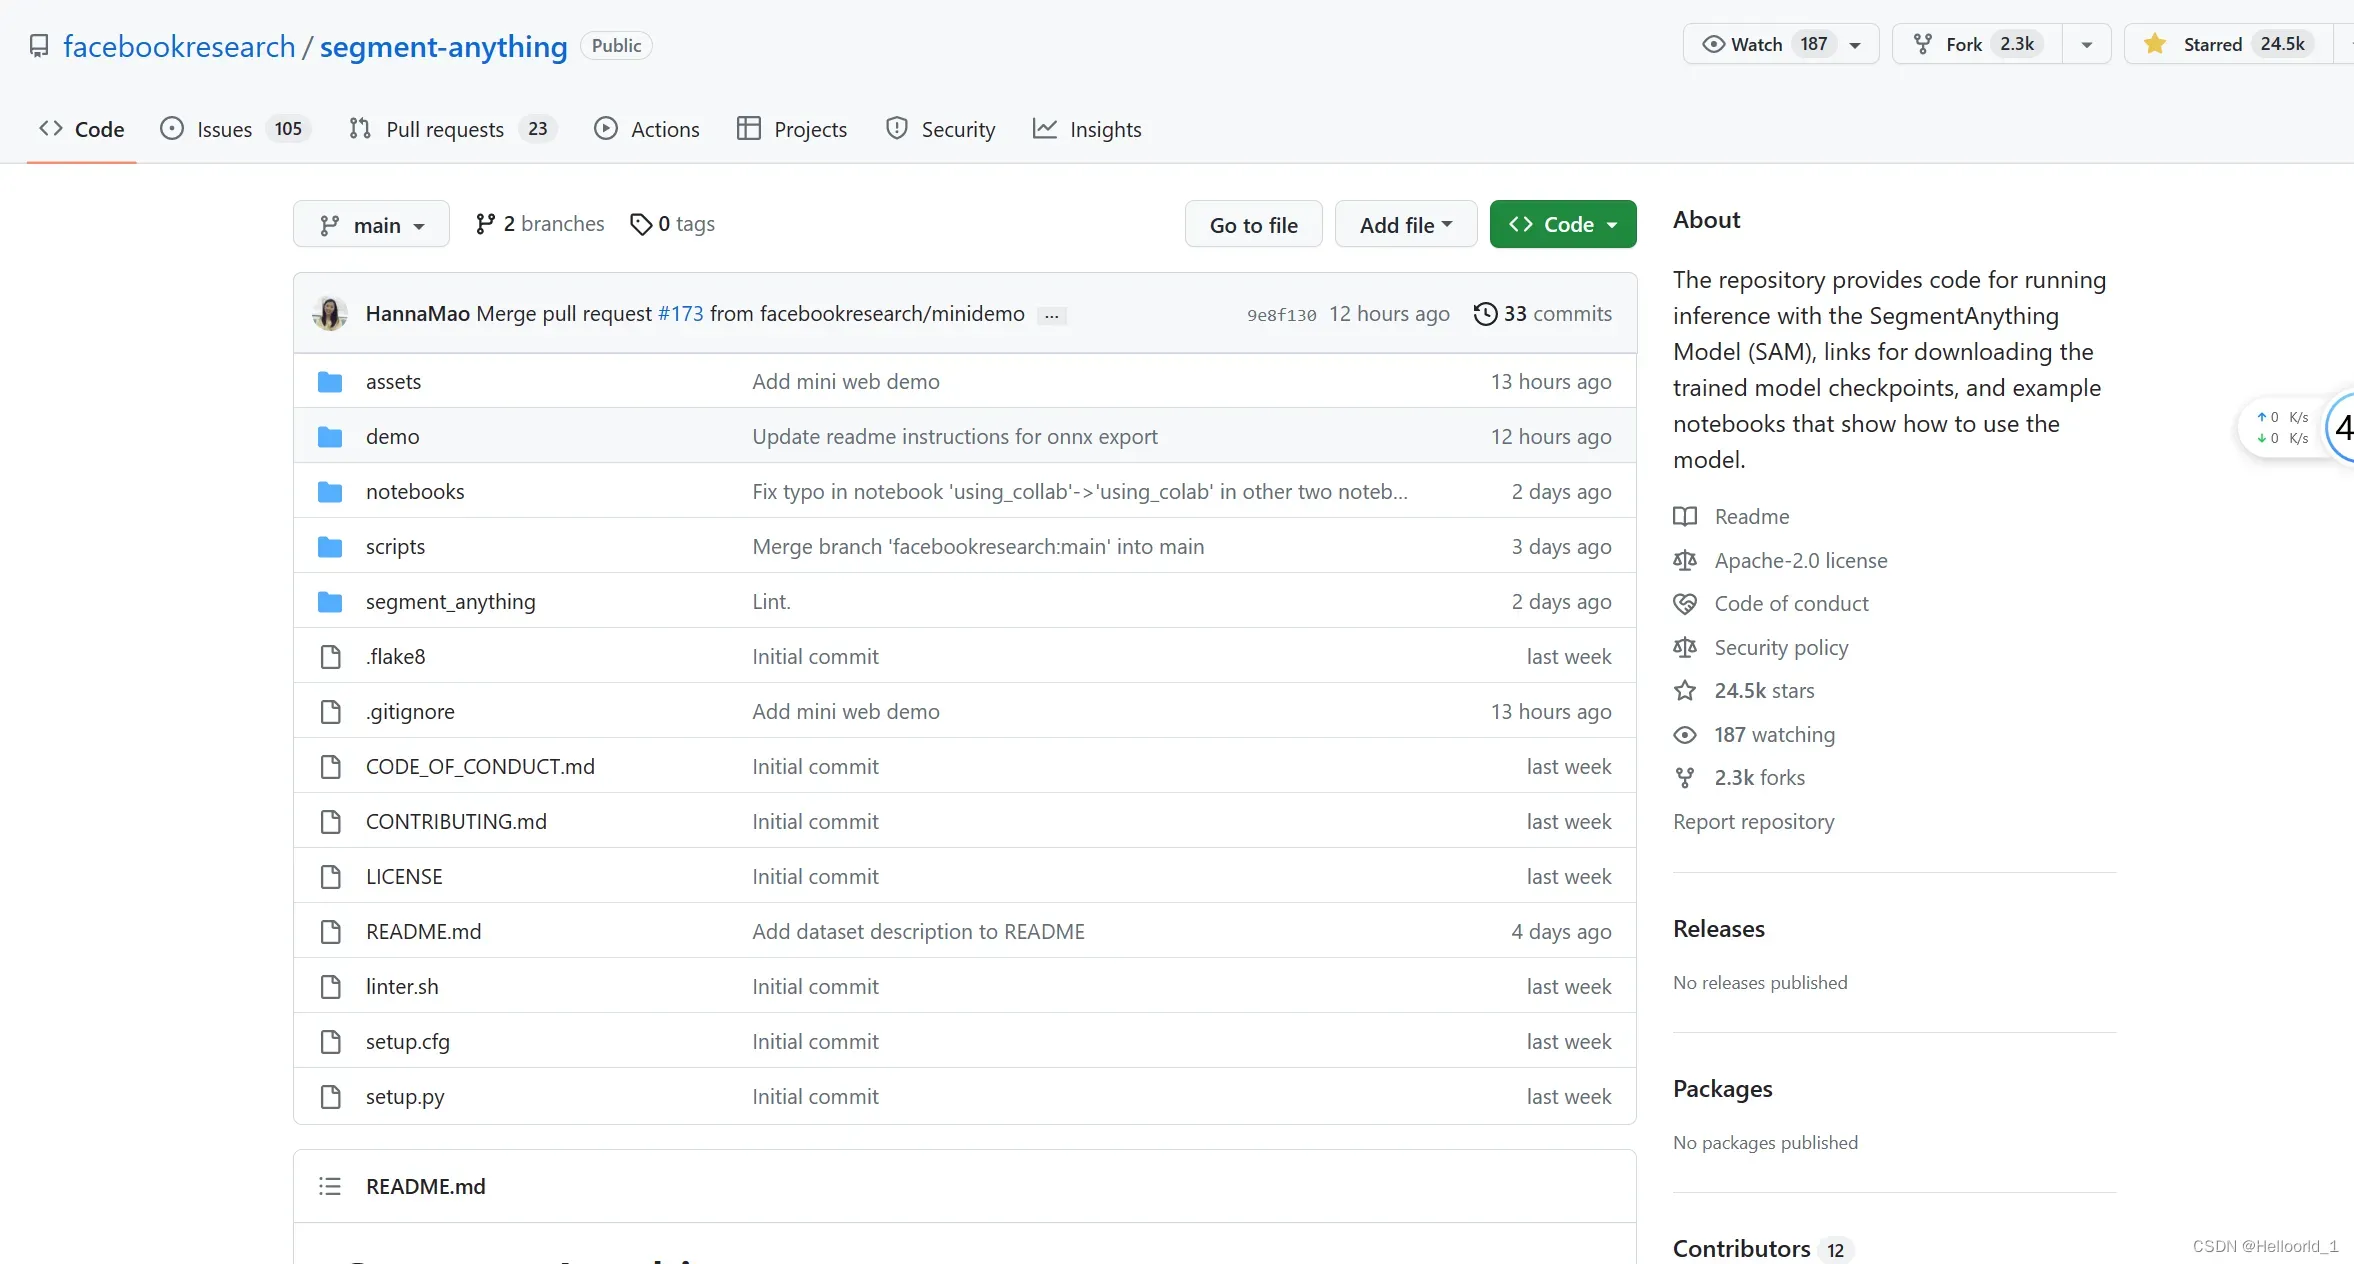
原仓库![]() https://github.com/facebookresearch/segment-anything
https://github.com/facebookresearch/segment-anything
我们都知道在CV领域比较重要的处理图像的几个方向有:识别,测量(标定),三维物体重建等。
识别是最基础也是最重要的,那么分割在识别里面更是重中之重,所以这个大模型分割真的是:一个字“6”.
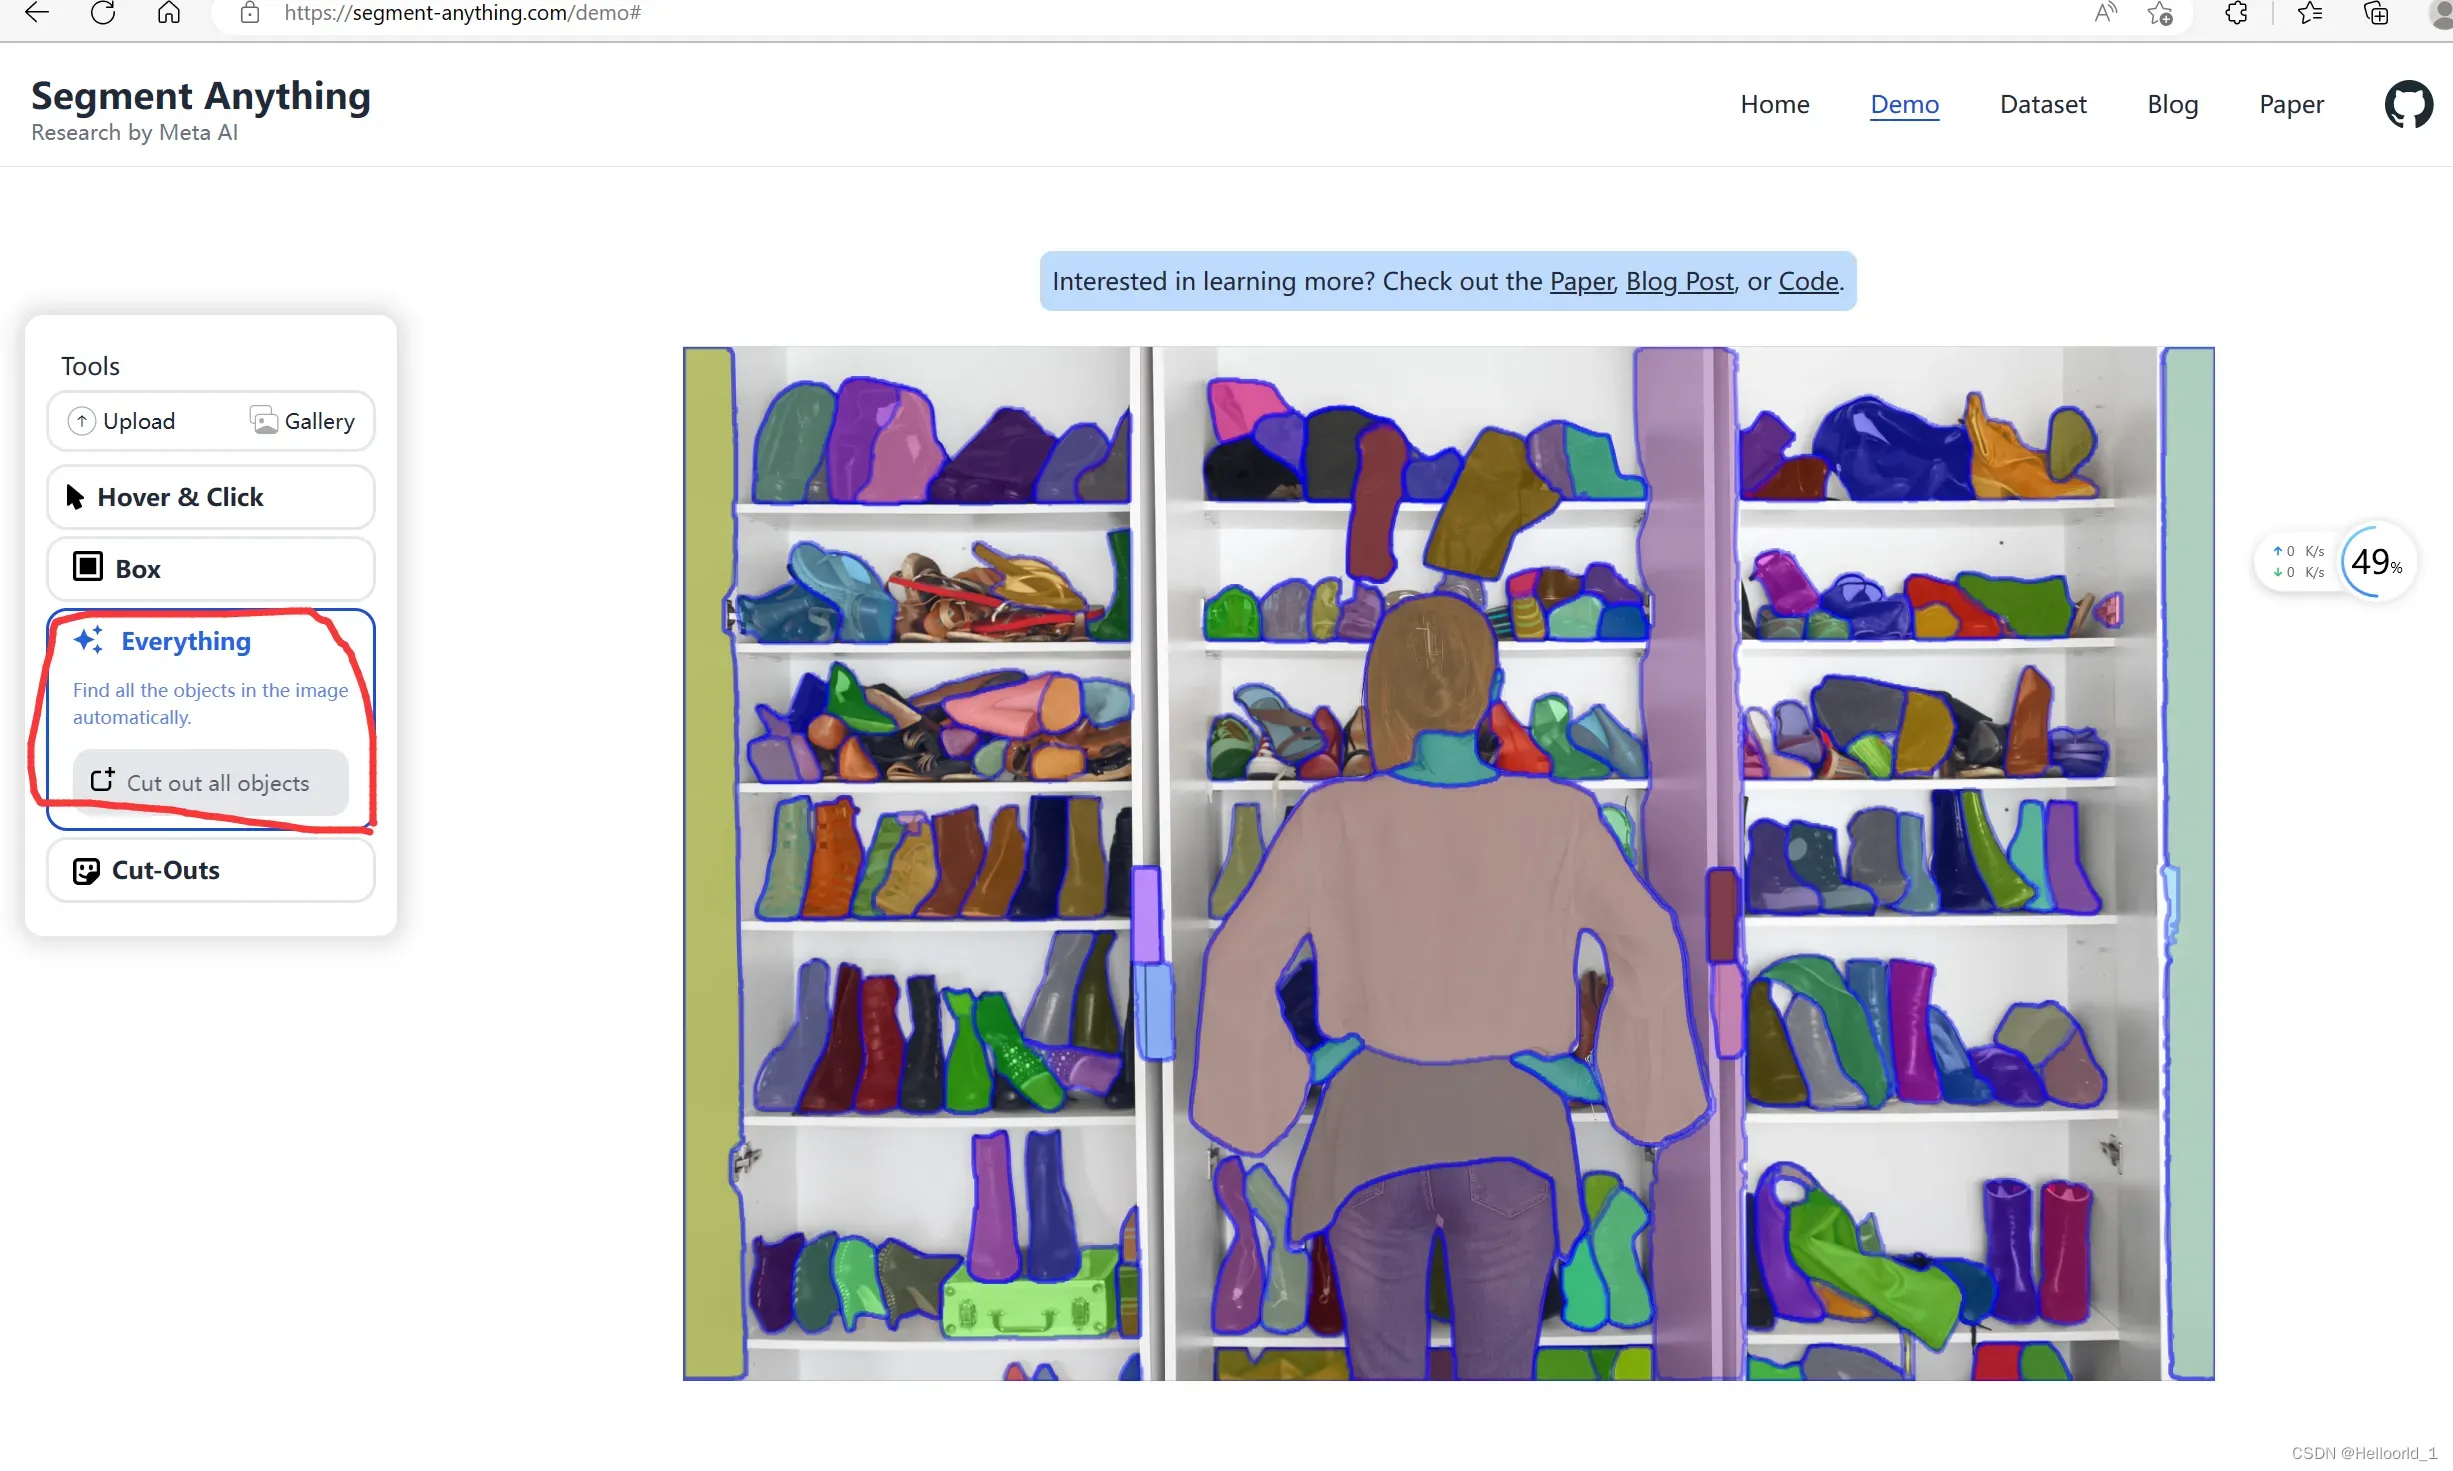
官方给出了demo供大家体验
demo
放个示例:
到上面给的链接(原仓库),去下载即可。
看到最近比较火的CV分割神器,于是思考看看代码,在这里记录一哈自己踩过的坑。
首先是在上面链接里面点击code进行下载
然后解压到目标文件夹下面
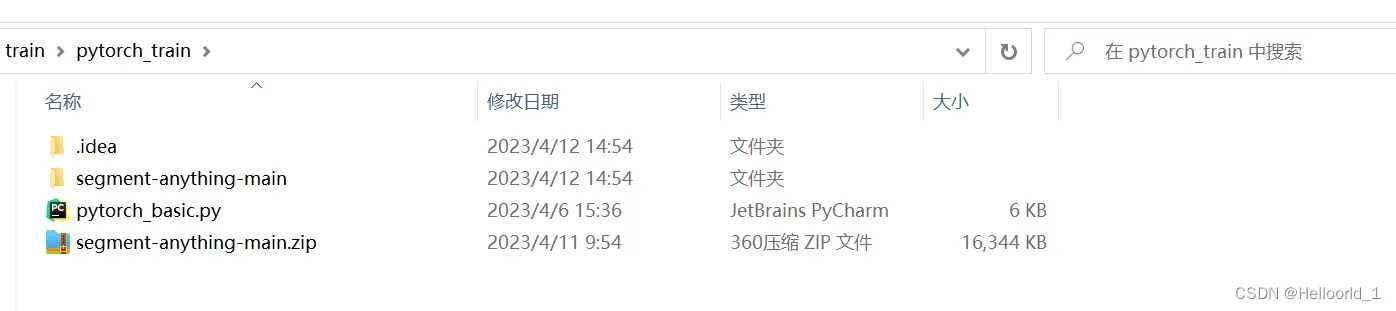
然后下载模型库,放到解压目录文件夹下面,也就是和setup.py同一目录下。
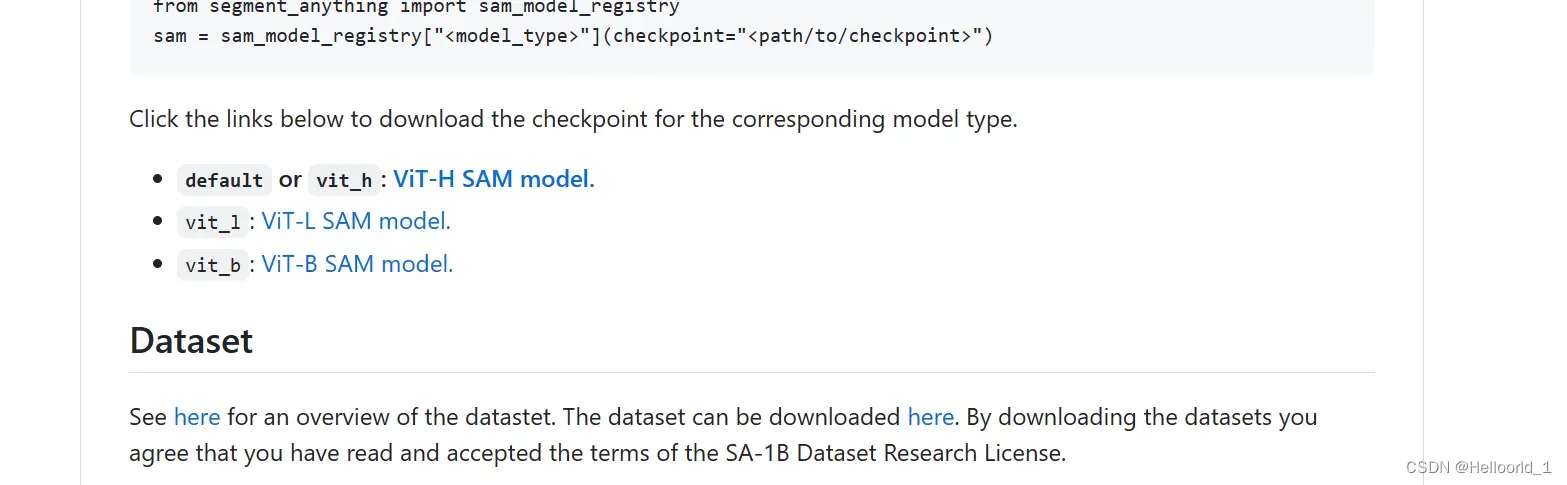
如果是个人笔记本的话,这里推荐vit-b
如果想要使用vit-h,建议用小分辨率的图片并修改batch_size的大小
(即SamAutomaticMaskGenerator(sam, points_per_batch=16)),或者部署到服务器上。
配置环境,按照原文所述,环境配置为:
安装 PyTorch 和 TorchVision 依赖项。强烈建议同时安装具有CUDA支持的PyTorch和TorchVision. python>=3.8 pytorch>=1.7(如果要导出onnx则>=2.0) torchvision>=0.8
还有依赖库:matplotlib,pycocotools,opencv-python,onnx,onnxruntime(这些是必须安装的)
官方给的安装方式有
pip install git+https://github.com/facebookresearch/segment-anything.git或者:
git clone git@github.com:facebookresearch/segment-anything.git
cd segment-anything; pip install -e .
还有:
pip install opencv-python pycocotools matplotlib onnxruntime onnx以上方式对于我而言好像出错了,我就采取的另外的方式:
利用cmd打开到解压文件目录里面(就是含有setup.py),然后输入以下指令:
进行安装即可,对了我是用的anconda环境,建议创建一个新的虚拟环境,避免干扰自己的其他配置,注意python版本一定要>=3.8
conda create -n 环境名 python=3.8
conda activate 环境名即可python setup.py install环境配置好以后,根据自身情况去考虑,是否采用GPU和cpu的问题。
接下来我们开始运行开源的demo,有两种方式:
cmd命令:注意notebooks/images/是指你的输入图片路径,output是指的输出mask的路径,后面的–device cpu如果加了,就会采用cpu跑,不然会默认GPU。
python scripts/amg.py --checkpoint sam_vit_b_01ec64.pth --model-type vit_b --input notebooks/images/ --output output --device cpu创建一个train.py在相同目录下(setup.py)
里面代码如下:
import sys
import numpy as np
import matplotlib
import matplotlib.pyplot as plt
import cv2
from segment_anything import sam_model_registry, SamAutomaticMaskGenerator, SamPredictor

matplotlib.use('TkAgg')

def show_anns(anns):
    if len(anns) == 0:
        return
    sorted_anns = sorted(anns, key=(lambda x: x['area']), reverse=True)
    ax = plt.gca()
    ax.set_autoscale_on(False)
    polygons = []
    color = []
    for ann in sorted_anns:
        m = ann['segmentation']
        img = np.ones((m.shape[0], m.shape[1], 3))
        color_mask = np.random.random((1, 3)).tolist()[0]
        for i in range(3):
            img[:,:,i] = color_mask[i]
        ax.imshow(np.dstack((img, m*0.35)))

sys.path.append("..")


sam_checkpoint = "sam_vit_b_01ec64.pth"
model_type = "vit_b"

device = "cuda"#如果想用cpu,改成cpu即可

sam = sam_model_registry[model_type](checkpoint=sam_checkpoint)
sam.to(device=device)

image = cv2.imread('notebooks/images/dog.jpg')
image = cv2.cvtColor(image, cv2.COLOR_BGR2RGB)
# plt.figure(figsize=(20,20))
# plt.imshow(image)
# plt.axis('off')
# plt.show()


mask_generator = SamAutomaticMaskGenerator(sam)

masks = mask_generator.generate(image)
print(len(masks))
plt.figure(figsize=(20,20))
plt.imshow(image)
show_anns(masks)
plt.axis('off')
plt.show()
# import torch # 如果pytorch安装成功即可导入
# print(torch.cuda.is_available()) # 查看CUDA是否可用
# print(torch.cuda.device_count()) # 查看可用的CUDA数量
# print(torch.version.cuda) # 查看CUDA的版本号
我遇到的问题有:
如果采用GPU运行报错为:

则是因为GPU要求内存太大,把模型改成vit-b即可,我用vit-h就会报这个错了!
如果报错为:

则添加以下代码即可:
import matplotlib
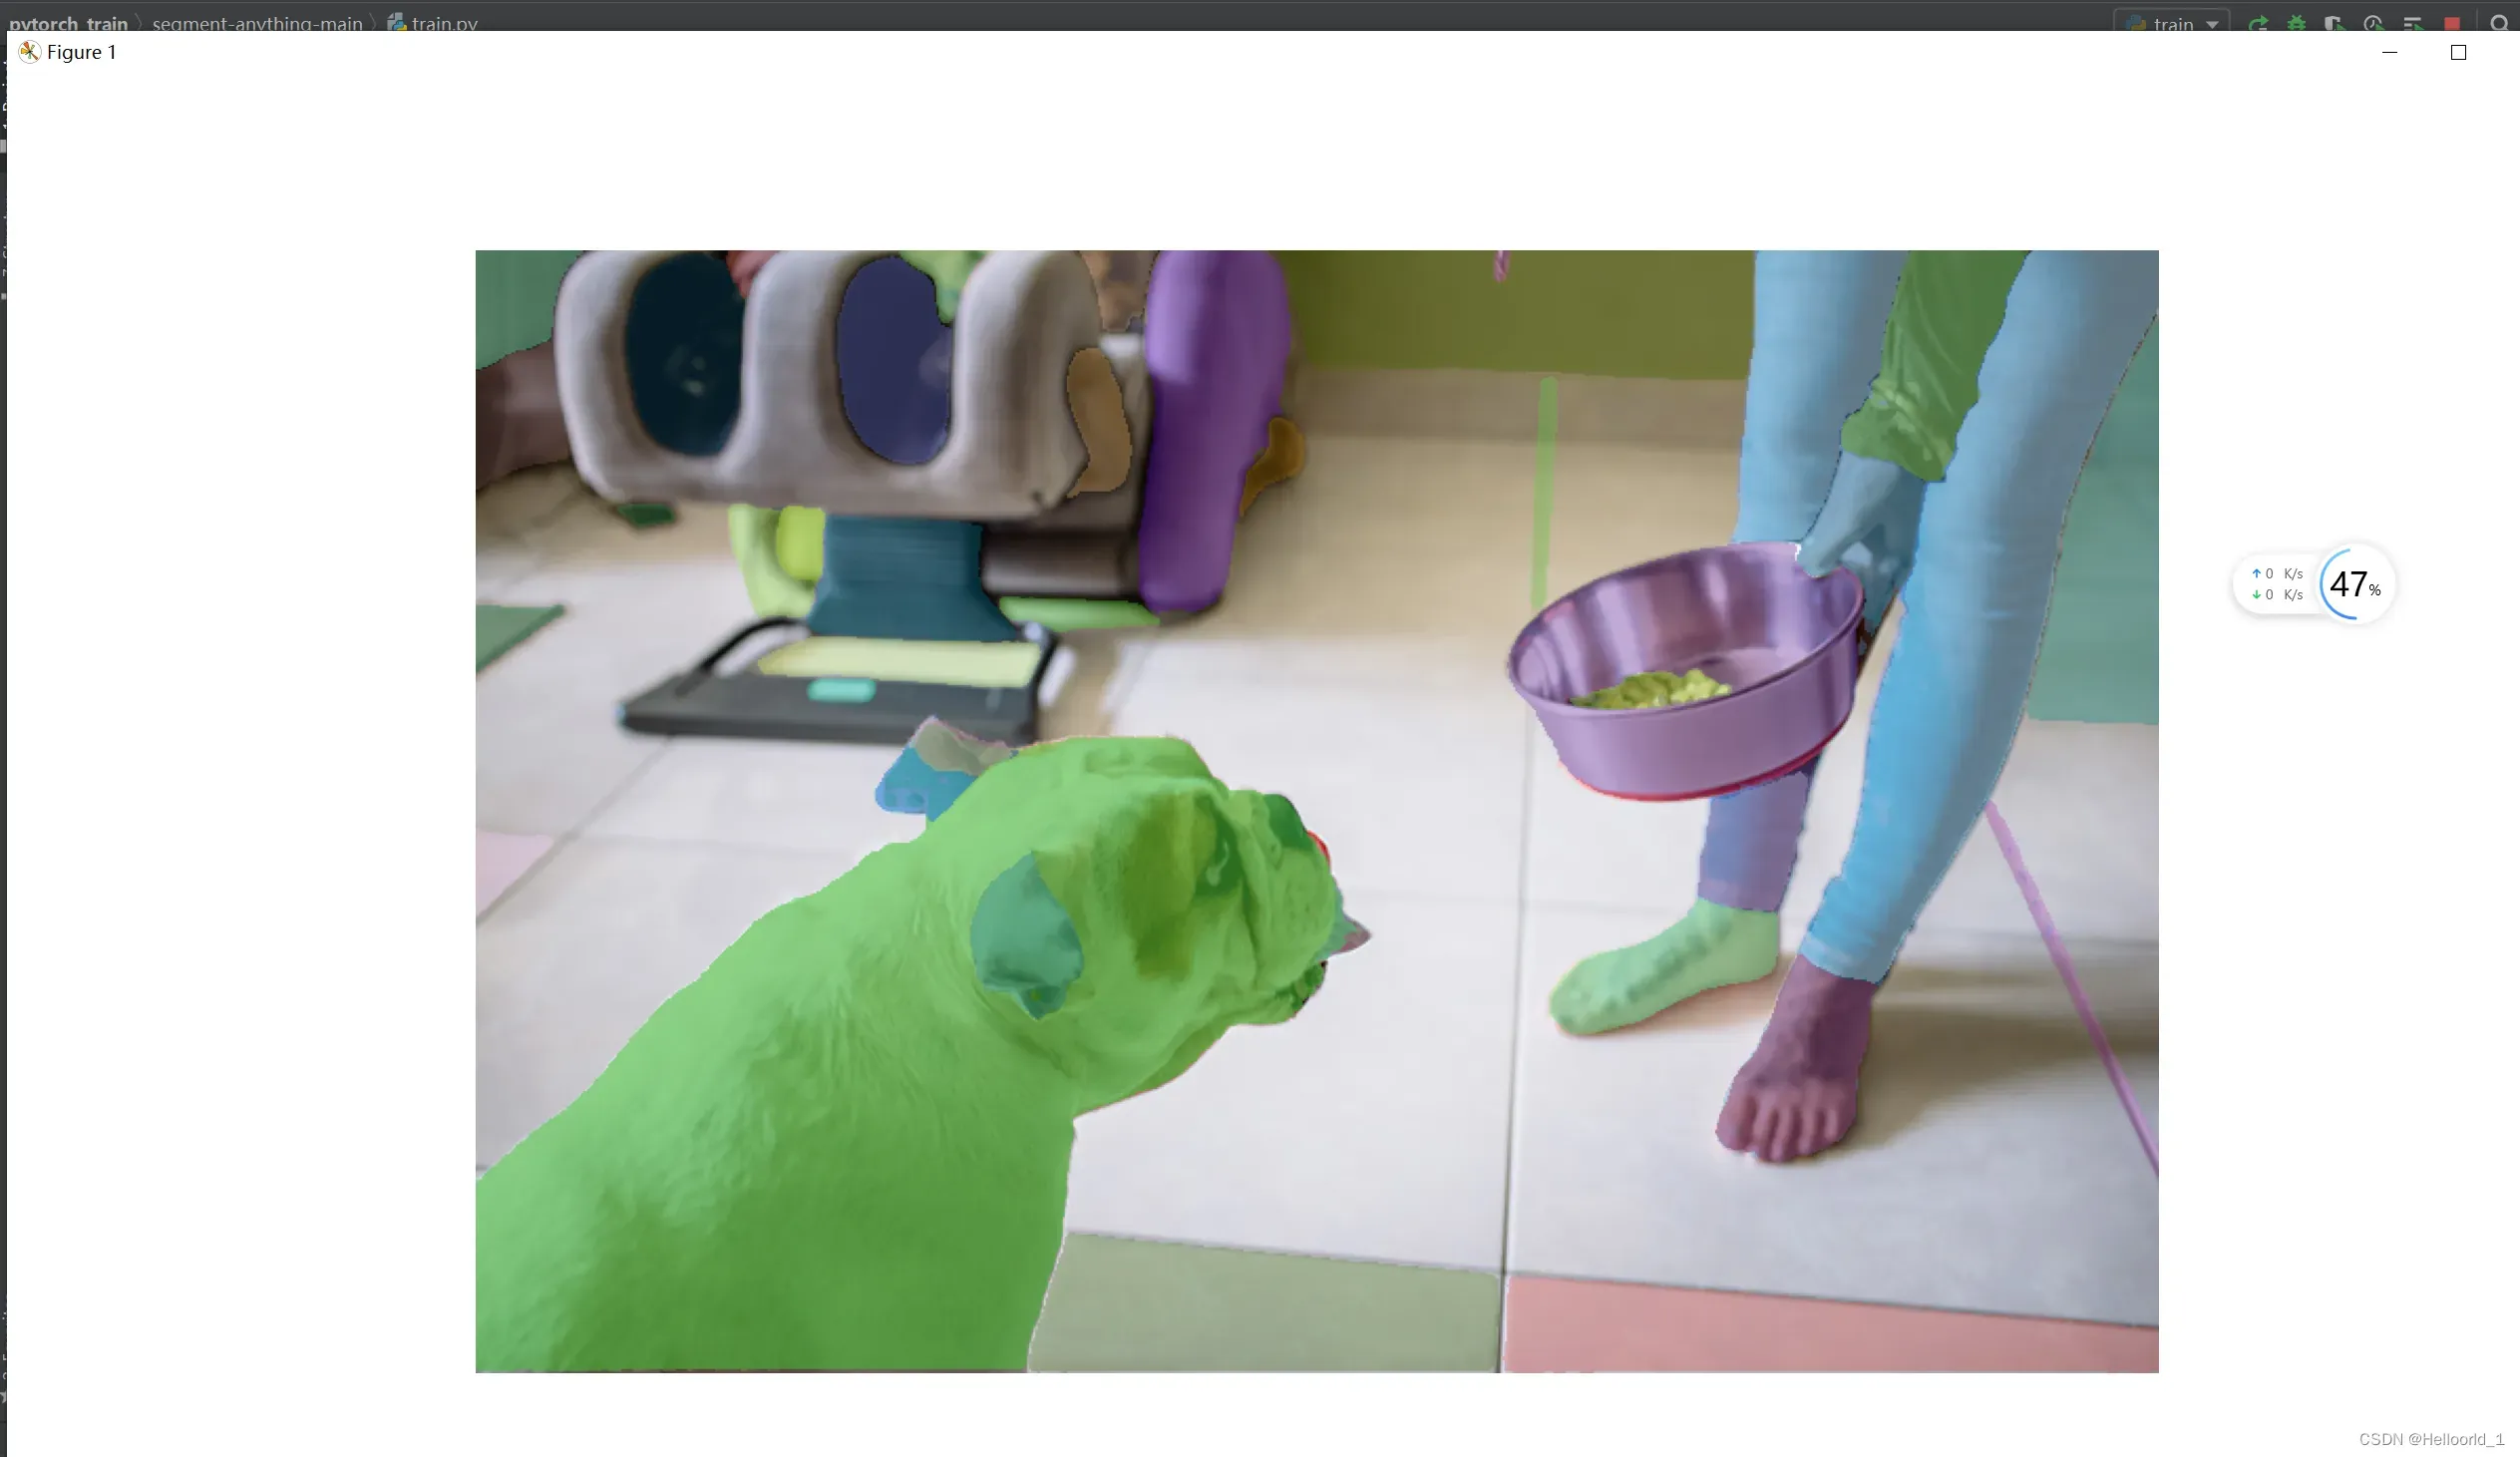
matplotlib.use('TkAgg')最后运行效果是这样的:
根据相关文档查明,如果需要导出onnx模型,也就是官方的下面命令:
python scripts/export_onnx_model.py --checkpoint sam_vit_b_01ec64.pth --model-type vit_b --output 输出文件路径会报错如下:

官方更新了导出onnx的配置文档,要求:
ONNX 导出函数使用 opset 版本 17,该版本需要 pytorch>=2.0 而不是pytorch>=1.7
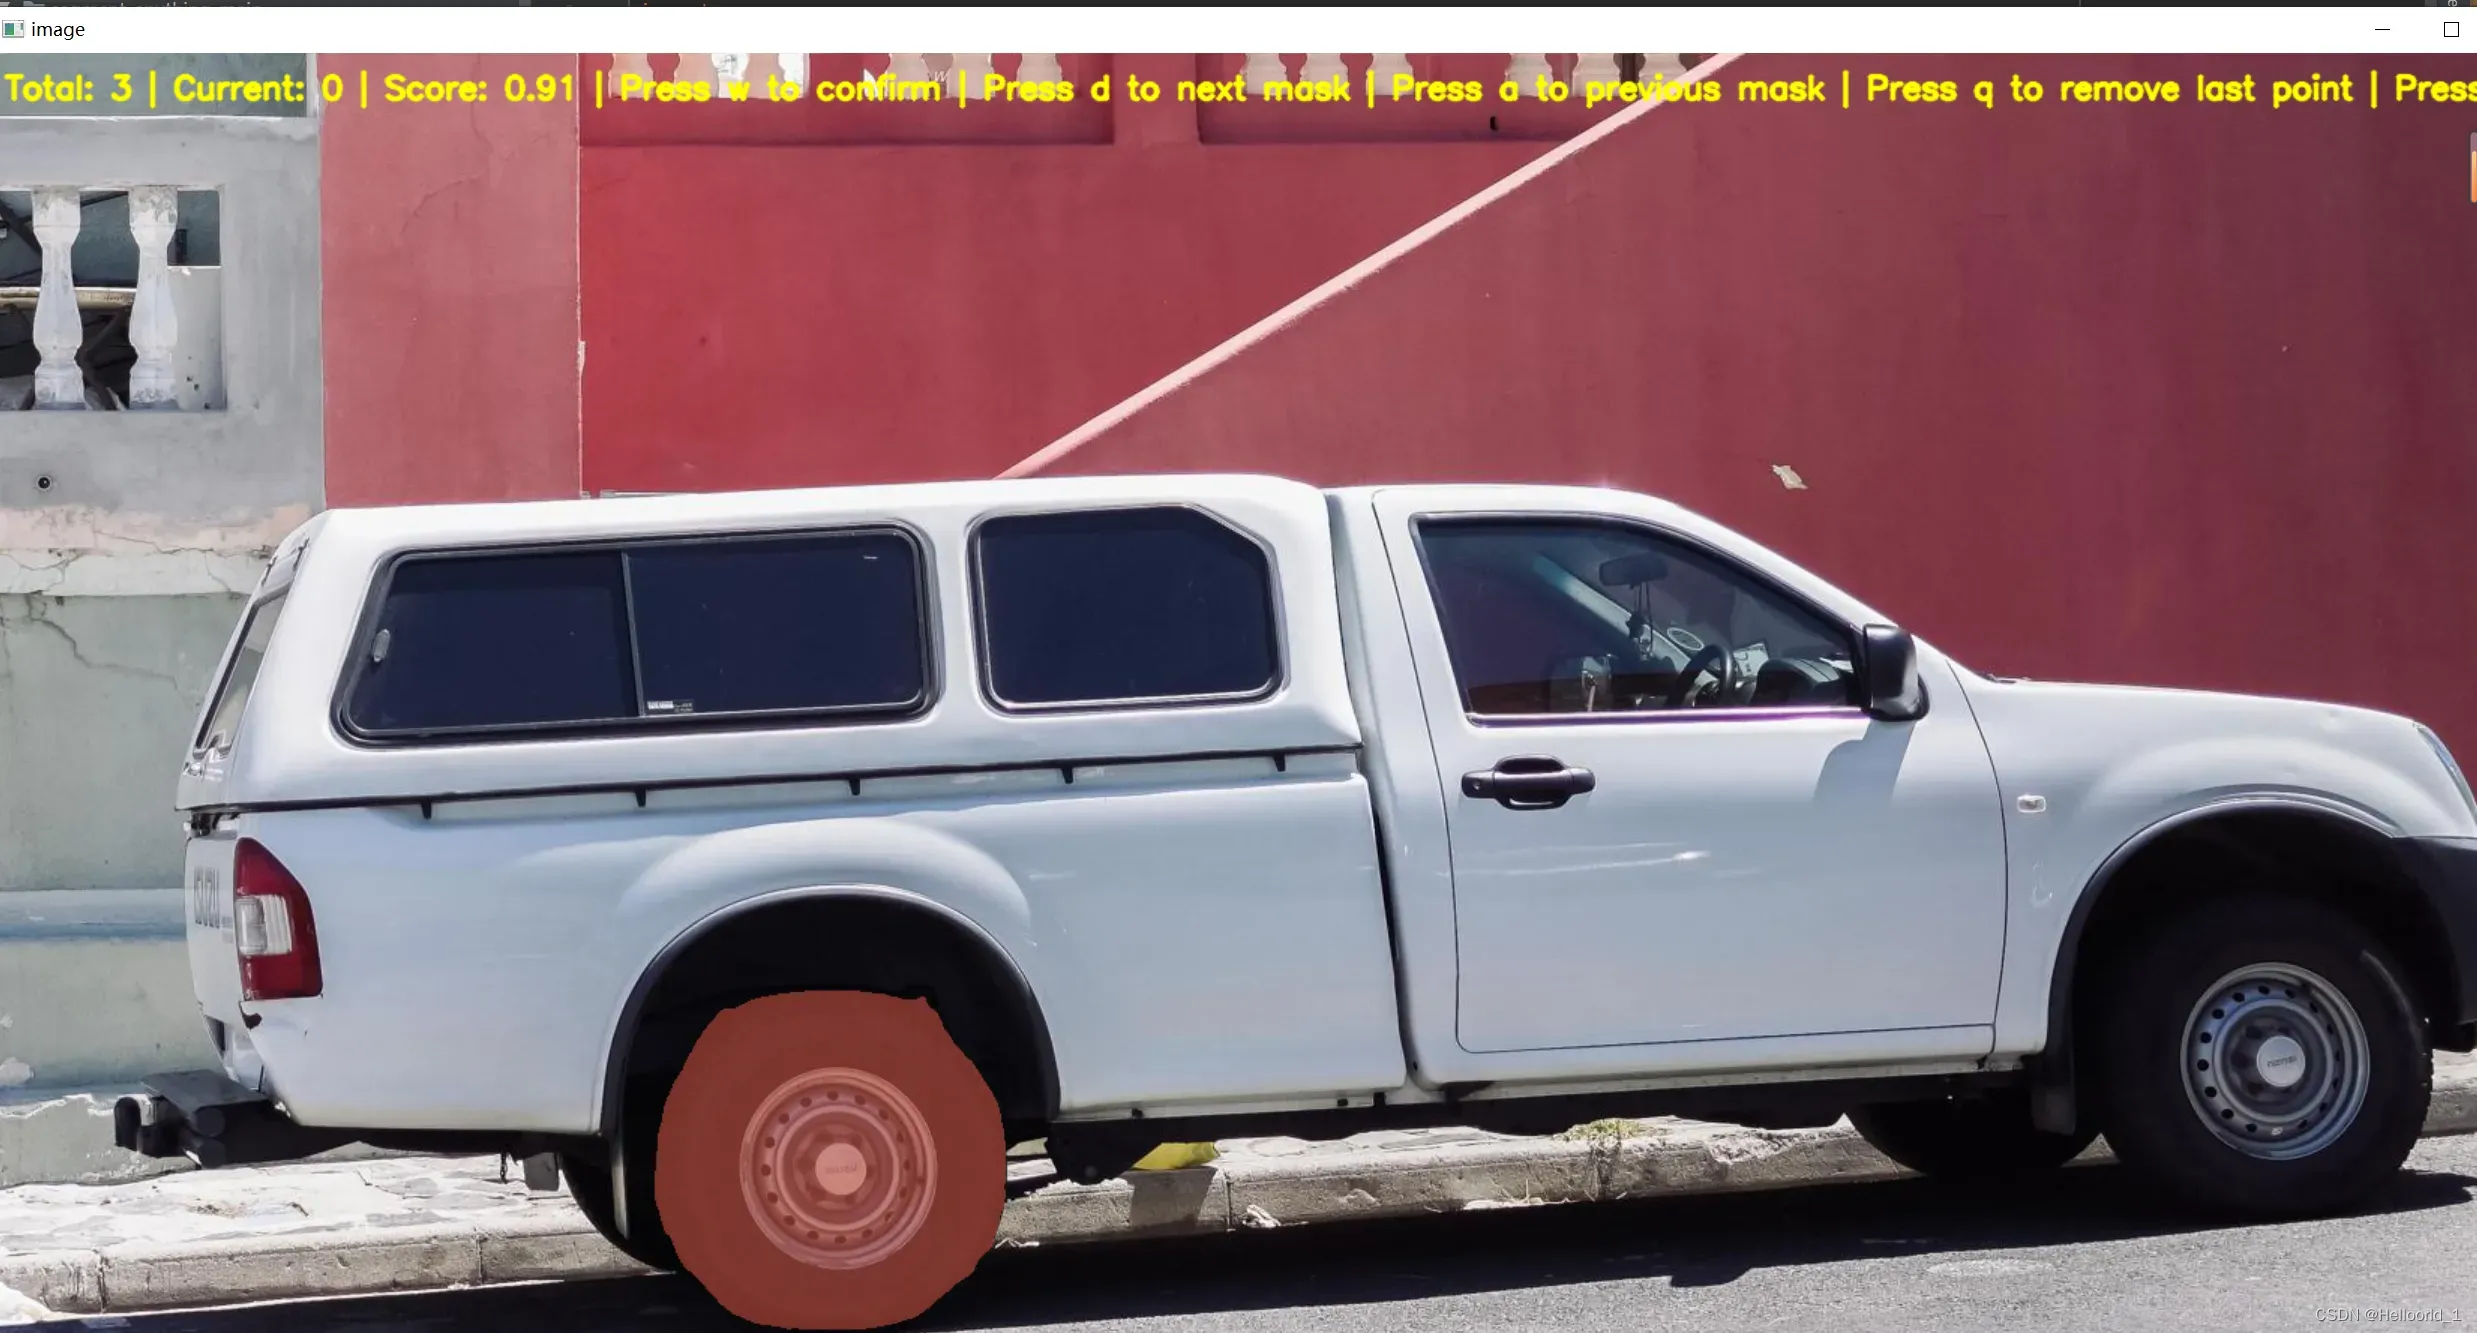
结合SAM,进行人机交互ui使用的案例介绍:
最近新发现的,可以利用这个模型,进行一个简单的UI使用,效果如下:
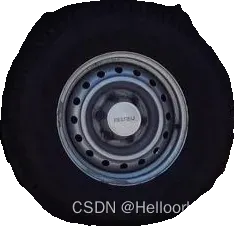
成功裁剪下来图片。
首先说明代码不是我最开始原创,这里只是作为分享的案例,代码中的注释为个人理解,如果侵权,可以联系删除。
首先导入头文件如下:
import cv2 #opencv为了读取图片和保存图片
import os #因为涉及到读取文件路径
import numpy as np #涉及到矩阵计算
from segment_anything import sam_model_registry, SamPredictor
 #不用多说,为了使用SAM,因此建议,新建一个test.py,放置到与setup在同一目录下。
按照原作者的想法是:
做一个抠图的UI界面,底层依赖SAM,通过鼠标点击进行人机交互。
因此首先定义了几个函数。
nput_dir = 'input'  #input文件夹名称,用来存放即将抠图的图像
output_dir = 'output' #输出图像的文件名称,用来抠图完毕的图像
crop_mode=True #是否裁剪到最小范围,在后面的判定里面会用到
#alpha_channel是否保留透明通道
print('最好是每加一个点就按w键predict一次')
os.makedirs(output_dir, exist_ok=True) #创建目录
image_files = [f for f in os.listdir(input_dir) if f.lower().endswith(('.png', '.jpg', '.jpeg','.JPG','.JPEG','.PNG'))] #os.lisdir   将以图片的格式保存的文件名,以数组的方式保存

sam = sam_model_registry["vit_b"](checkpoint="sam_vit_b_01ec64.pth")
_ = sam.to(device="cuda")#注释掉这一行,会用cpu运行,速度会慢很多
predictor = SamPredictor(sam)#SAM预测图像
写了自定义函数如下:
鼠标点击,这里运用了opencv里面的鼠标函数
EVENT_MOUSEMOVE 0 #滑动
EVENT_LBUTTONDOWN 1 #左键点击
EVENT_RBUTTONDOWN 2 #右键点击
EVENT_MBUTTONDOWN 3 #中键点击
EVENT_LBUTTONUP 4 #左键放开
EVENT_RBUTTONUP 5 #右键放开
EVENT_MBUTTONUP 6 #中键放开
EVENT_LBUTTONDBLCLK 7 #左键双击
EVENT_RBUTTONDBLCLK 8 #右键双击
EVENT_MBUTTONDBLCLK 9 #中键双击
def mouse_click(event, x, y, flags, param):#鼠标点击事件
    global input_point, input_label, input_stop#全局变量,输入点,
    if not input_stop:#判定标志是否停止输入响应了!
        if event == cv2.EVENT_LBUTTONDOWN :#鼠标左键
            input_point.append([x, y])
            input_label.append(1)#1表示前景点
        elif event == cv2.EVENT_RBUTTONDOWN :#鼠标右键
            input_point.append([x, y])
            input_label.append(0)#0表示背景点
    else:
        if event == cv2.EVENT_LBUTTONDOWN or event == cv2.EVENT_RBUTTONDOWN :#提示添加不了
            print('此时不能添加点,按w退出mask选择模式')
用来存放预测的mask
def apply_mask(image, mask, alpha_channel=True):#应用并且响应mask
    if alpha_channel:
        alpha = np.zeros_like(image[..., 0])#制作掩体
        alpha[mask == 1] = 255#兴趣地方标记为1,且为白色
        image = cv2.merge((image[..., 0], image[..., 1], image[..., 2], alpha))#融合图像
    else:
        image = np.where(mask[..., None] == 1, image, 0)
        #np.where(1,2,3) 是以1为条件,如果满足,执行2,否则执行3
    return image
赋予颜色到掩体上,展示到图像
def apply_color_mask(image, mask, color, color_dark = 0.5):#对掩体进行赋予颜色
    for c in range(3):#从0->3
        image[:, :, c] = np.where(mask == 1, image[:, :, c] * (1 - color_dark) + color_dark * color[c], image[:, :, c])
    return image
进行下一个图像
def get_next_filename(base_path, filename):#进行下一个图像
    name, ext = os.path.splitext(filename)
    for i in range(1, 101):
        new_name = f"{name}_{i}{ext}"
        if not os.path.exists(os.path.join(base_path, new_name)):
            return new_name
    return None
保存ROI区域
ef save_masked_image(image, mask, output_dir, filename, crop_mode_):#保存掩盖部分的图像(感兴趣的图像)
    if crop_mode_:
        y, x = np.where(mask)
        y_min, y_max, x_min, x_max = y.min(), y.max(), x.min(), x.max()
        cropped_mask = mask[y_min:y_max+1, x_min:x_max+1]
        cropped_image = image[y_min:y_max+1, x_min:x_max+1]
        masked_image = apply_mask(cropped_image, cropped_mask)
    else:
        masked_image = apply_mask(image, mask)
    filename = filename[:filename.rfind('.')]+'.png'
    new_filename = get_next_filename(output_dir, filename)

    if new_filename:
        if masked_image.shape[-1] == 4:
            cv2.imwrite(os.path.join(output_dir, new_filename), masked_image, [cv2.IMWRITE_PNG_COMPRESSION, 9])
        else:
            cv2.imwrite(os.path.join(output_dir, new_filename), masked_image)
        print(f"Saved as {new_filename}")
    else:
        print("Could not save the image. Too many variations exist.")
定义了后面循环会用到的变量:
current_index = 0 #图像序号
cv2.namedWindow("image") #UI窗口名称
cv2.setMouseCallback("image", mouse_click) #鼠标点击返回作用在image window的窗口
input_point = [] #定义空数组
input_label = []
input_stop=False #定义bool
利用了三个while循环
while True:
    filename = image_files[current_index]
    image_orign = cv2.imread(os.path.join(input_dir, filename))
    image_crop = image_orign.copy()#原图裁剪
    image = cv2.cvtColor(image_orign.copy(), cv2.COLOR_BGR2RGB)#原图色彩转变
    selected_mask = None
    logit_input= None
    while True:
        #print(input_point)
        input_stop=False
        image_display = image_orign.copy()
        display_info = f'{filename} | Press s to save | Press w to predict | Press d to next image | Press a to previous image | Press space to clear | Press q to remove last point '
        cv2.putText(image_display, display_info, (10, 30), cv2.FONT_HERSHEY_SIMPLEX, 0.7, (0, 255, 255), 2, cv2.LINE_AA)
        for point, label in zip(input_point, input_label):#输入点和输入类型
            color = (0, 255, 0) if label == 1 else (0, 0, 255)
            cv2.circle(image_display, tuple(point), 5, color, -1)
        if selected_mask is not None :
            color = tuple(np.random.randint(0, 256, 3).tolist())
            selected_image = apply_color_mask(image_display,selected_mask, color)

        cv2.imshow("image", image_display)
        key = cv2.waitKey(1)

        if key == ord(" "):
            input_point = []
            input_label = []
            selected_mask = None
            logit_input= None
        elif key == ord("w"):
            input_stop=True
            if len(input_point) > 0 and len(input_label) > 0:
                #todo 预测图像
                predictor.set_image(image)#设置输入图像
                input_point_np = np.array(input_point)#输入暗示点,需要转变array类型才可以输入
                input_label_np = np.array(input_label)#输入暗示点的类型
                #todo 输入暗示信息,将返回masks
                masks, scores, logits= predictor.predict(
                    point_coords=input_point_np,
                    point_labels=input_label_np,
                    mask_input=logit_input[None, :, :] if logit_input is not None else None,
                    multimask_output=True,
                )

                mask_idx=0
                num_masks = len(masks)#masks的数量
                while(1):
                    color = tuple(np.random.randint(0, 256, 3).tolist())#随机列表颜色,就是
                    image_select = image_orign.copy()
                    selected_mask=masks[mask_idx]#选择msks也就是,a,d切换
                    selected_image = apply_color_mask(image_select,selected_mask, color)
                    mask_info = f'Total: {num_masks} | Current: {mask_idx} | Score: {scores[mask_idx]:.2f} | Press w to confirm | Press d to next mask | Press a to previous mask | Press q to remove last point | Press s to save'
                    cv2.putText(selected_image, mask_info, (10, 30), cv2.FONT_HERSHEY_SIMPLEX, 0.7, (0, 255, 255), 2, cv2.LINE_AA)
                    #todo 显示在当前的图片,
                    cv2.imshow("image", selected_image)

                    key=cv2.waitKey(10)
                    if key == ord('q') and len(input_point)>0:
                        input_point.pop(-1)
                        input_label.pop(-1)
                    elif key == ord('s'):
                        save_masked_image(image_crop, selected_mask, output_dir, filename, crop_mode_=crop_mode)
                    elif key == ord('a') :
                        if mask_idx>0:
                            mask_idx-=1
                        else:
                            mask_idx=num_masks-1
                    elif key == ord('d') :
                        if mask_idx<num_masks-1:
                            mask_idx+=1
                        else:
                            mask_idx=0
                    elif key == ord('w') :
                        break
                    elif key == ord(" "):
                        input_point = []
                        input_label = []
                        selected_mask = None
                        logit_input= None
                        break
                logit_input=logits[mask_idx, :, :]
                print('max score:',np.argmax(scores),' select:',mask_idx)

        elif key == ord('a'):
            current_index = max(0, current_index - 1)
            input_point = []
            input_label = []
            break
        elif key == ord('d'):
            current_index = min(len(image_files) - 1, current_index + 1)
            input_point = []
            input_label = []
            break
        elif key == 27:
            break
        elif key == ord('q') and len(input_point)>0:
            input_point.pop(-1)
            input_label.pop(-1)
        elif key == ord('s') and selected_mask is not None :
            save_masked_image(image_crop, selected_mask, output_dir, filename, crop_mode_=crop_mode)

    if key == 27:
        break
完整代码如下:
import cv2
import os
import numpy as np
from segment_anything import sam_model_registry, SamPredictor

input_dir = 'input'
output_dir = 'output'
crop_mode=True#是否裁剪到最小范围
#alpha_channel是否保留透明通道
print('最好是每加一个点就按w键predict一次')
os.makedirs(output_dir, exist_ok=True)
image_files = [f for f in os.listdir(input_dir) if f.lower().endswith(('.png', '.jpg', '.jpeg','.JPG','.JPEG','.PNG'))]

sam = sam_model_registry["vit_b"](checkpoint="sam_vit_b_01ec64.pth")
_ = sam.to(device="cuda")#注释掉这一行,会用cpu运行,速度会慢很多
predictor = SamPredictor(sam)#SAM预测图像
def mouse_click(event, x, y, flags, param):#鼠标点击事件
    global input_point, input_label, input_stop#全局变量,输入点,
    if not input_stop:#判定标志是否停止输入响应了!
        if event == cv2.EVENT_LBUTTONDOWN :#鼠标左键
            input_point.append([x, y])
            input_label.append(1)#1表示前景点
        elif event == cv2.EVENT_RBUTTONDOWN :#鼠标右键
            input_point.append([x, y])
            input_label.append(0)#0表示背景点
    else:
        if event == cv2.EVENT_LBUTTONDOWN or event == cv2.EVENT_RBUTTONDOWN :#提示添加不了
            print('此时不能添加点,按w退出mask选择模式')


def apply_mask(image, mask, alpha_channel=True):#应用并且响应mask
    if alpha_channel:
        alpha = np.zeros_like(image[..., 0])#制作掩体
        alpha[mask == 1] = 255#兴趣地方标记为1,且为白色
        image = cv2.merge((image[..., 0], image[..., 1], image[..., 2], alpha))#融合图像
    else:
        image = np.where(mask[..., None] == 1, image, 0)
    return image

def apply_color_mask(image, mask, color, color_dark = 0.5):#对掩体进行赋予颜色
    for c in range(3):
        image[:, :, c] = np.where(mask == 1, image[:, :, c] * (1 - color_dark) + color_dark * color[c], image[:, :, c])
    return image

def get_next_filename(base_path, filename):#进行下一个图像
    name, ext = os.path.splitext(filename)
    for i in range(1, 101):
        new_name = f"{name}_{i}{ext}"
        if not os.path.exists(os.path.join(base_path, new_name)):
            return new_name
    return None

def save_masked_image(image, mask, output_dir, filename, crop_mode_):#保存掩盖部分的图像(感兴趣的图像)
    if crop_mode_:
        y, x = np.where(mask)
        y_min, y_max, x_min, x_max = y.min(), y.max(), x.min(), x.max()
        cropped_mask = mask[y_min:y_max+1, x_min:x_max+1]
        cropped_image = image[y_min:y_max+1, x_min:x_max+1]
        masked_image = apply_mask(cropped_image, cropped_mask)
    else:
        masked_image = apply_mask(image, mask)
    filename = filename[:filename.rfind('.')]+'.png'
    new_filename = get_next_filename(output_dir, filename)

    if new_filename:
        if masked_image.shape[-1] == 4:
            cv2.imwrite(os.path.join(output_dir, new_filename), masked_image, [cv2.IMWRITE_PNG_COMPRESSION, 9])
        else:
            cv2.imwrite(os.path.join(output_dir, new_filename), masked_image)
        print(f"Saved as {new_filename}")
    else:
        print("Could not save the image. Too many variations exist.")

current_index = 0

cv2.namedWindow("image")
cv2.setMouseCallback("image", mouse_click)
input_point = []
input_label = []
input_stop=False
while True:
    filename = image_files[current_index]
    image_orign = cv2.imread(os.path.join(input_dir, filename))
    image_crop = image_orign.copy()#原图裁剪
    image = cv2.cvtColor(image_orign.copy(), cv2.COLOR_BGR2RGB)#原图色彩转变
    selected_mask = None
    logit_input= None
    while True:
        #print(input_point)
        input_stop=False
        image_display = image_orign.copy()
        display_info = f'{filename} | Press s to save | Press w to predict | Press d to next image | Press a to previous image | Press space to clear | Press q to remove last point '
        cv2.putText(image_display, display_info, (10, 30), cv2.FONT_HERSHEY_SIMPLEX, 0.7, (0, 255, 255), 2, cv2.LINE_AA)
        for point, label in zip(input_point, input_label):#输入点和输入类型
            color = (0, 255, 0) if label == 1 else (0, 0, 255)
            cv2.circle(image_display, tuple(point), 5, color, -1)
        if selected_mask is not None :
            color = tuple(np.random.randint(0, 256, 3).tolist())
            selected_image = apply_color_mask(image_display,selected_mask, color)

        cv2.imshow("image", image_display)
        key = cv2.waitKey(1)

        if key == ord(" "):
            input_point = []
            input_label = []
            selected_mask = None
            logit_input= None
        elif key == ord("w"):
            input_stop=True
            if len(input_point) > 0 and len(input_label) > 0:
                #todo 预测图像
                predictor.set_image(image)#设置输入图像
                input_point_np = np.array(input_point)#输入暗示点,需要转变array类型才可以输入
                input_label_np = np.array(input_label)#输入暗示点的类型
                #todo 输入暗示信息,将返回masks
                masks, scores, logits= predictor.predict(
                    point_coords=input_point_np,
                    point_labels=input_label_np,
                    mask_input=logit_input[None, :, :] if logit_input is not None else None,
                    multimask_output=True,
                )

                mask_idx=0
                num_masks = len(masks)#masks的数量
                while(1):
                    color = tuple(np.random.randint(0, 256, 3).tolist())#随机列表颜色,就是
                    image_select = image_orign.copy()
                    selected_mask=masks[mask_idx]#选择msks也就是,a,d切换
                    selected_image = apply_color_mask(image_select,selected_mask, color)
                    mask_info = f'Total: {num_masks} | Current: {mask_idx} | Score: {scores[mask_idx]:.2f} | Press w to confirm | Press d to next mask | Press a to previous mask | Press q to remove last point | Press s to save'
                    cv2.putText(selected_image, mask_info, (10, 30), cv2.FONT_HERSHEY_SIMPLEX, 0.7, (0, 255, 255), 2, cv2.LINE_AA)
                    #todo 显示在当前的图片,
                    cv2.imshow("image", selected_image)

                    key=cv2.waitKey(10)
                    if key == ord('q') and len(input_point)>0:
                        input_point.pop(-1)
                        input_label.pop(-1)
                    elif key == ord('s'):
                        save_masked_image(image_crop, selected_mask, output_dir, filename, crop_mode_=crop_mode)
                    elif key == ord('a') :
                        if mask_idx>0:
                            mask_idx-=1
                        else:
                            mask_idx=num_masks-1
                    elif key == ord('d') :
                        if mask_idx<num_masks-1:
                            mask_idx+=1
                        else:
                            mask_idx=0
                    elif key == ord('w') :
                        break
                    elif key == ord(" "):
                        input_point = []
                        input_label = []
                        selected_mask = None
                        logit_input= None
                        break
                logit_input=logits[mask_idx, :, :]
                print('max score:',np.argmax(scores),' select:',mask_idx)

        elif key == ord('a'):
            current_index = max(0, current_index - 1)
            input_point = []
            input_label = []
            break
        elif key == ord('d'):
            current_index = min(len(image_files) - 1, current_index + 1)
            input_point = []
            input_label = []
            break
        elif key == 27:
            break
        elif key == ord('q') and len(input_point)>0:
            input_point.pop(-1)
            input_label.pop(-1)
        elif key == ord('s') and selected_mask is not None :
            save_masked_image(image_crop, selected_mask, output_dir, filename, crop_mode_=crop_mode)

    if key == 27:
        break
使用方法,如下:
使用gui(环境要配置好,再开始),另外注意下述的w,s,q按键均要在英文输入法下使用
1.将待抠图的图片放到input文件夹中,然后启动程序(运行test.py)。
2、在图像上左键单击选择前景点(绿色),右键单击选择背景点(红色)。
3、按下w键使用模型进行预测,进入Mask选取模式。
4、在Mask选取模式下,可以按下a和d键切换不同的Mask。
5、按下s键保存抠图结果。
6、按下w键返回选点模式,下次模型将会在此mask基础上进行预测
7、按 q 键删除最新一个选定的点
利用裁剪下来的图片进行,融合,也就是常说的换背景图:
博文链接如下:
实现图片的裁剪和融合。_Helloorld_1的博客-CSDN博客
新的研究思考:
可以结合labelimg和SAM进行半自动标注软件,虽然百度里面也有智能标注easy,但是下载数据集很麻烦。
labelimg结合SAM实现半自动标注软件
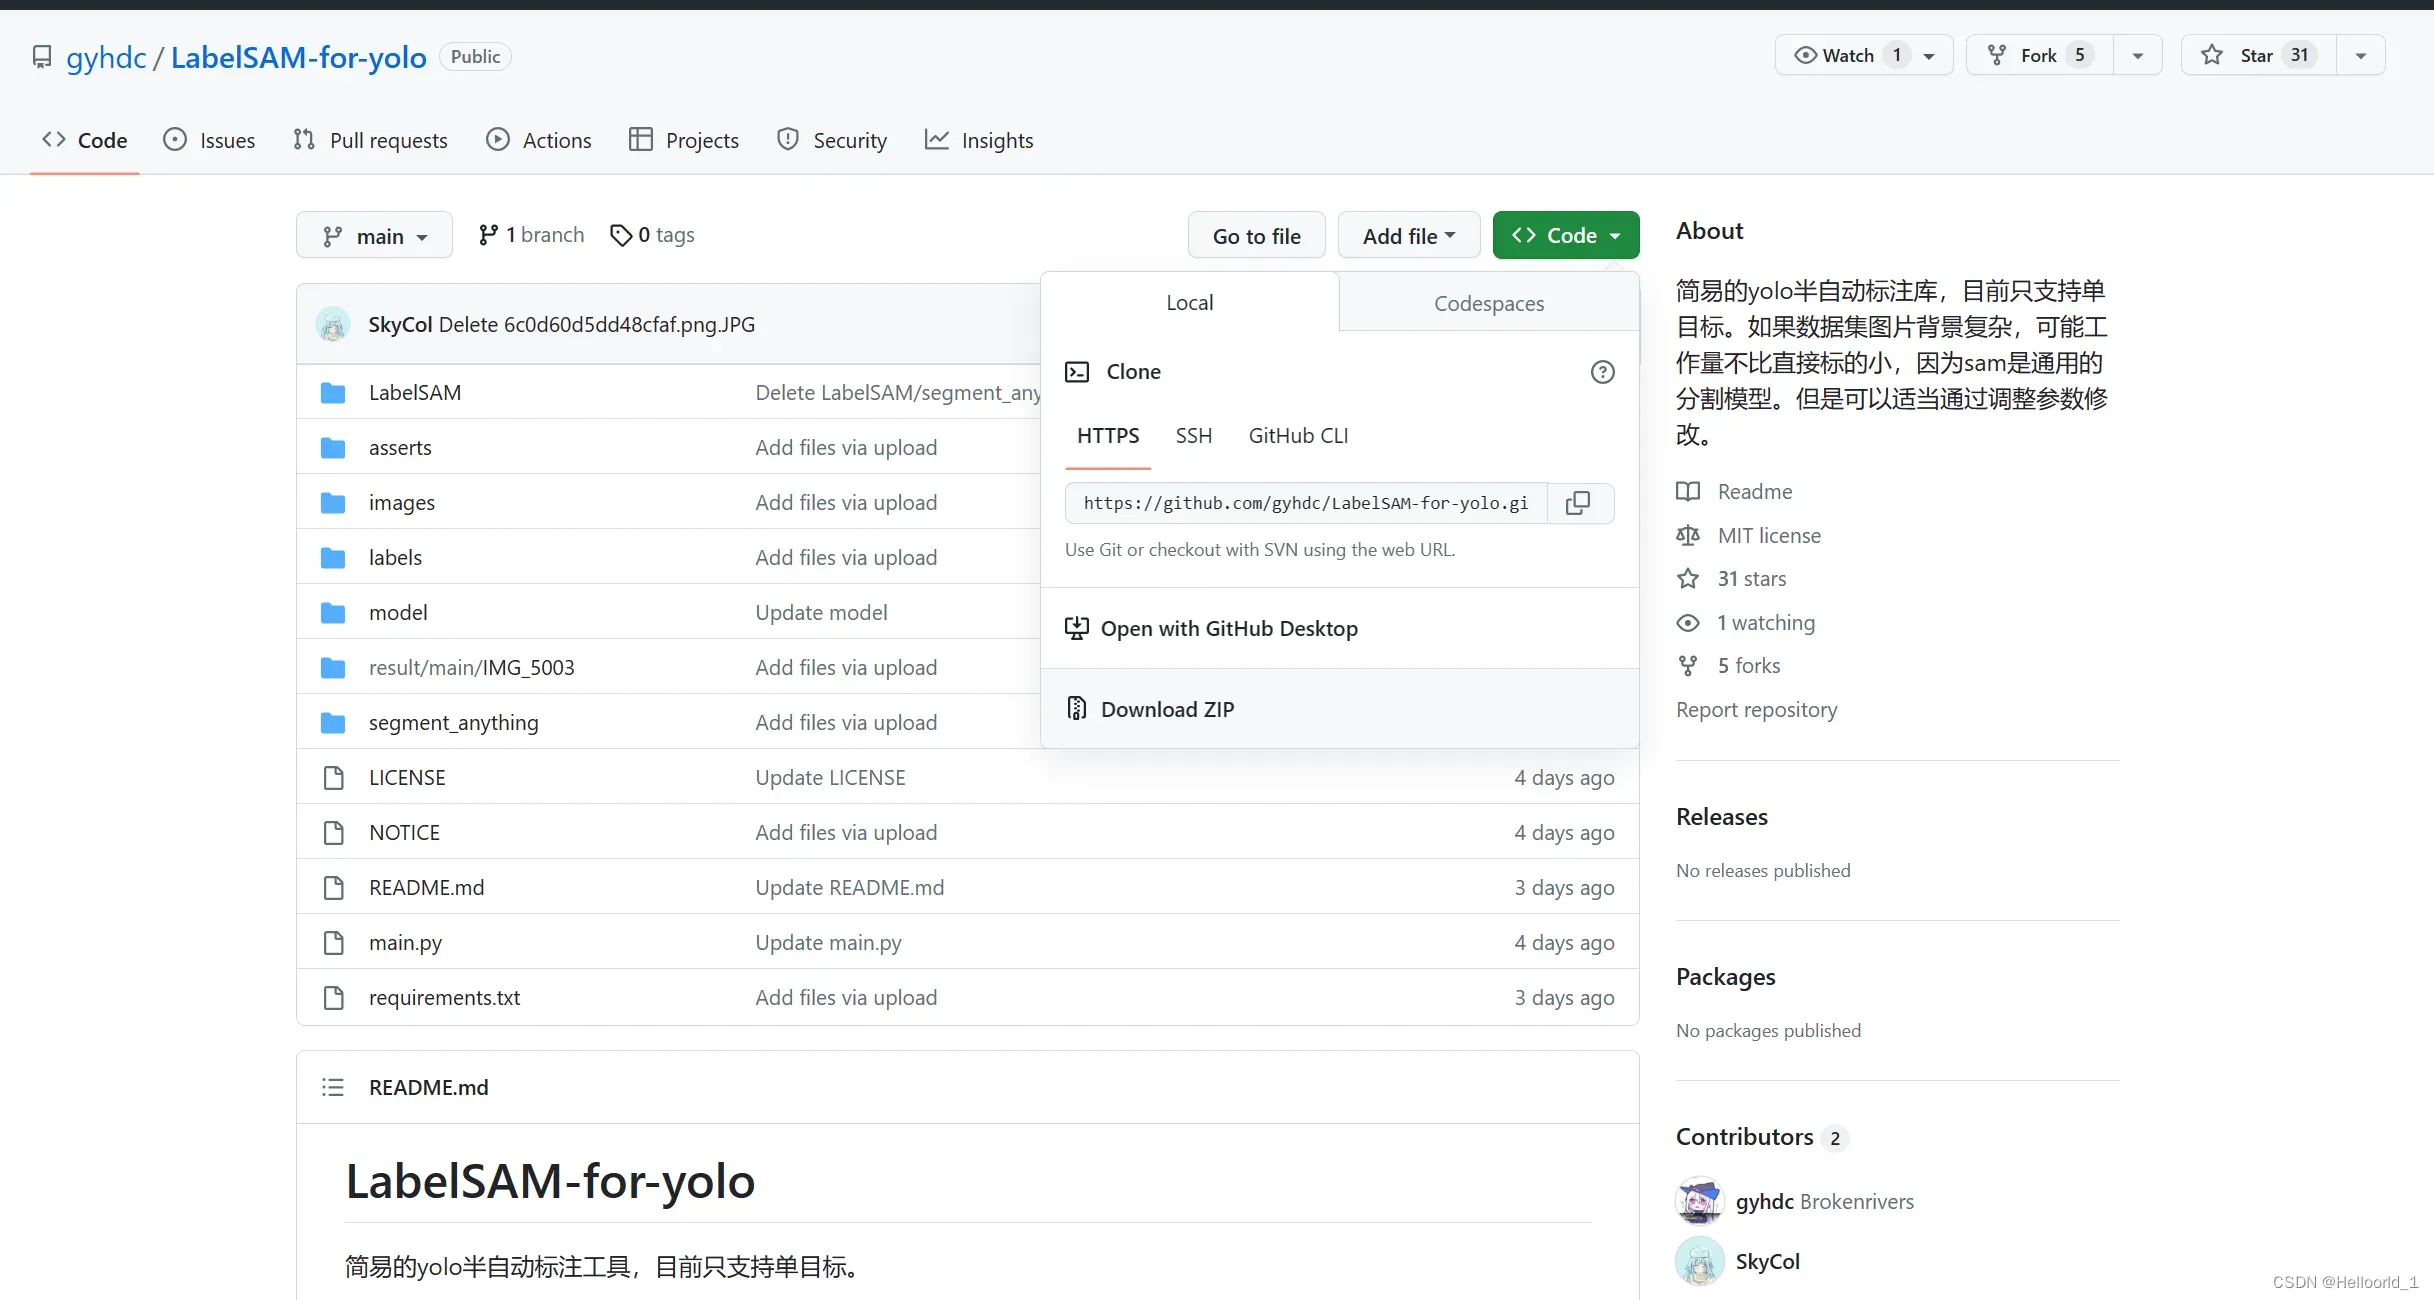
这里有一个案例希望可以帮助到大家,代码的地址:
gyhdc/LabelSAM-for-yolo: 简易的yolo半自动标注库,目前只支持单目标。如果数据集图片背景复杂,可能工作量不比直接标的小,因为sam是通用的分割模型。但是可以适当通过调整参数修改。 (github.com)![]() https://github.com/gyhdc/LabelSAM-for-yolo由一位UP博主开源的仓库,供大家学习,如上述所叙述,是结合labelimg和SAM来实现自动化标注。
https://github.com/gyhdc/LabelSAM-for-yolo由一位UP博主开源的仓库,供大家学习,如上述所叙述,是结合labelimg和SAM来实现自动化标注。
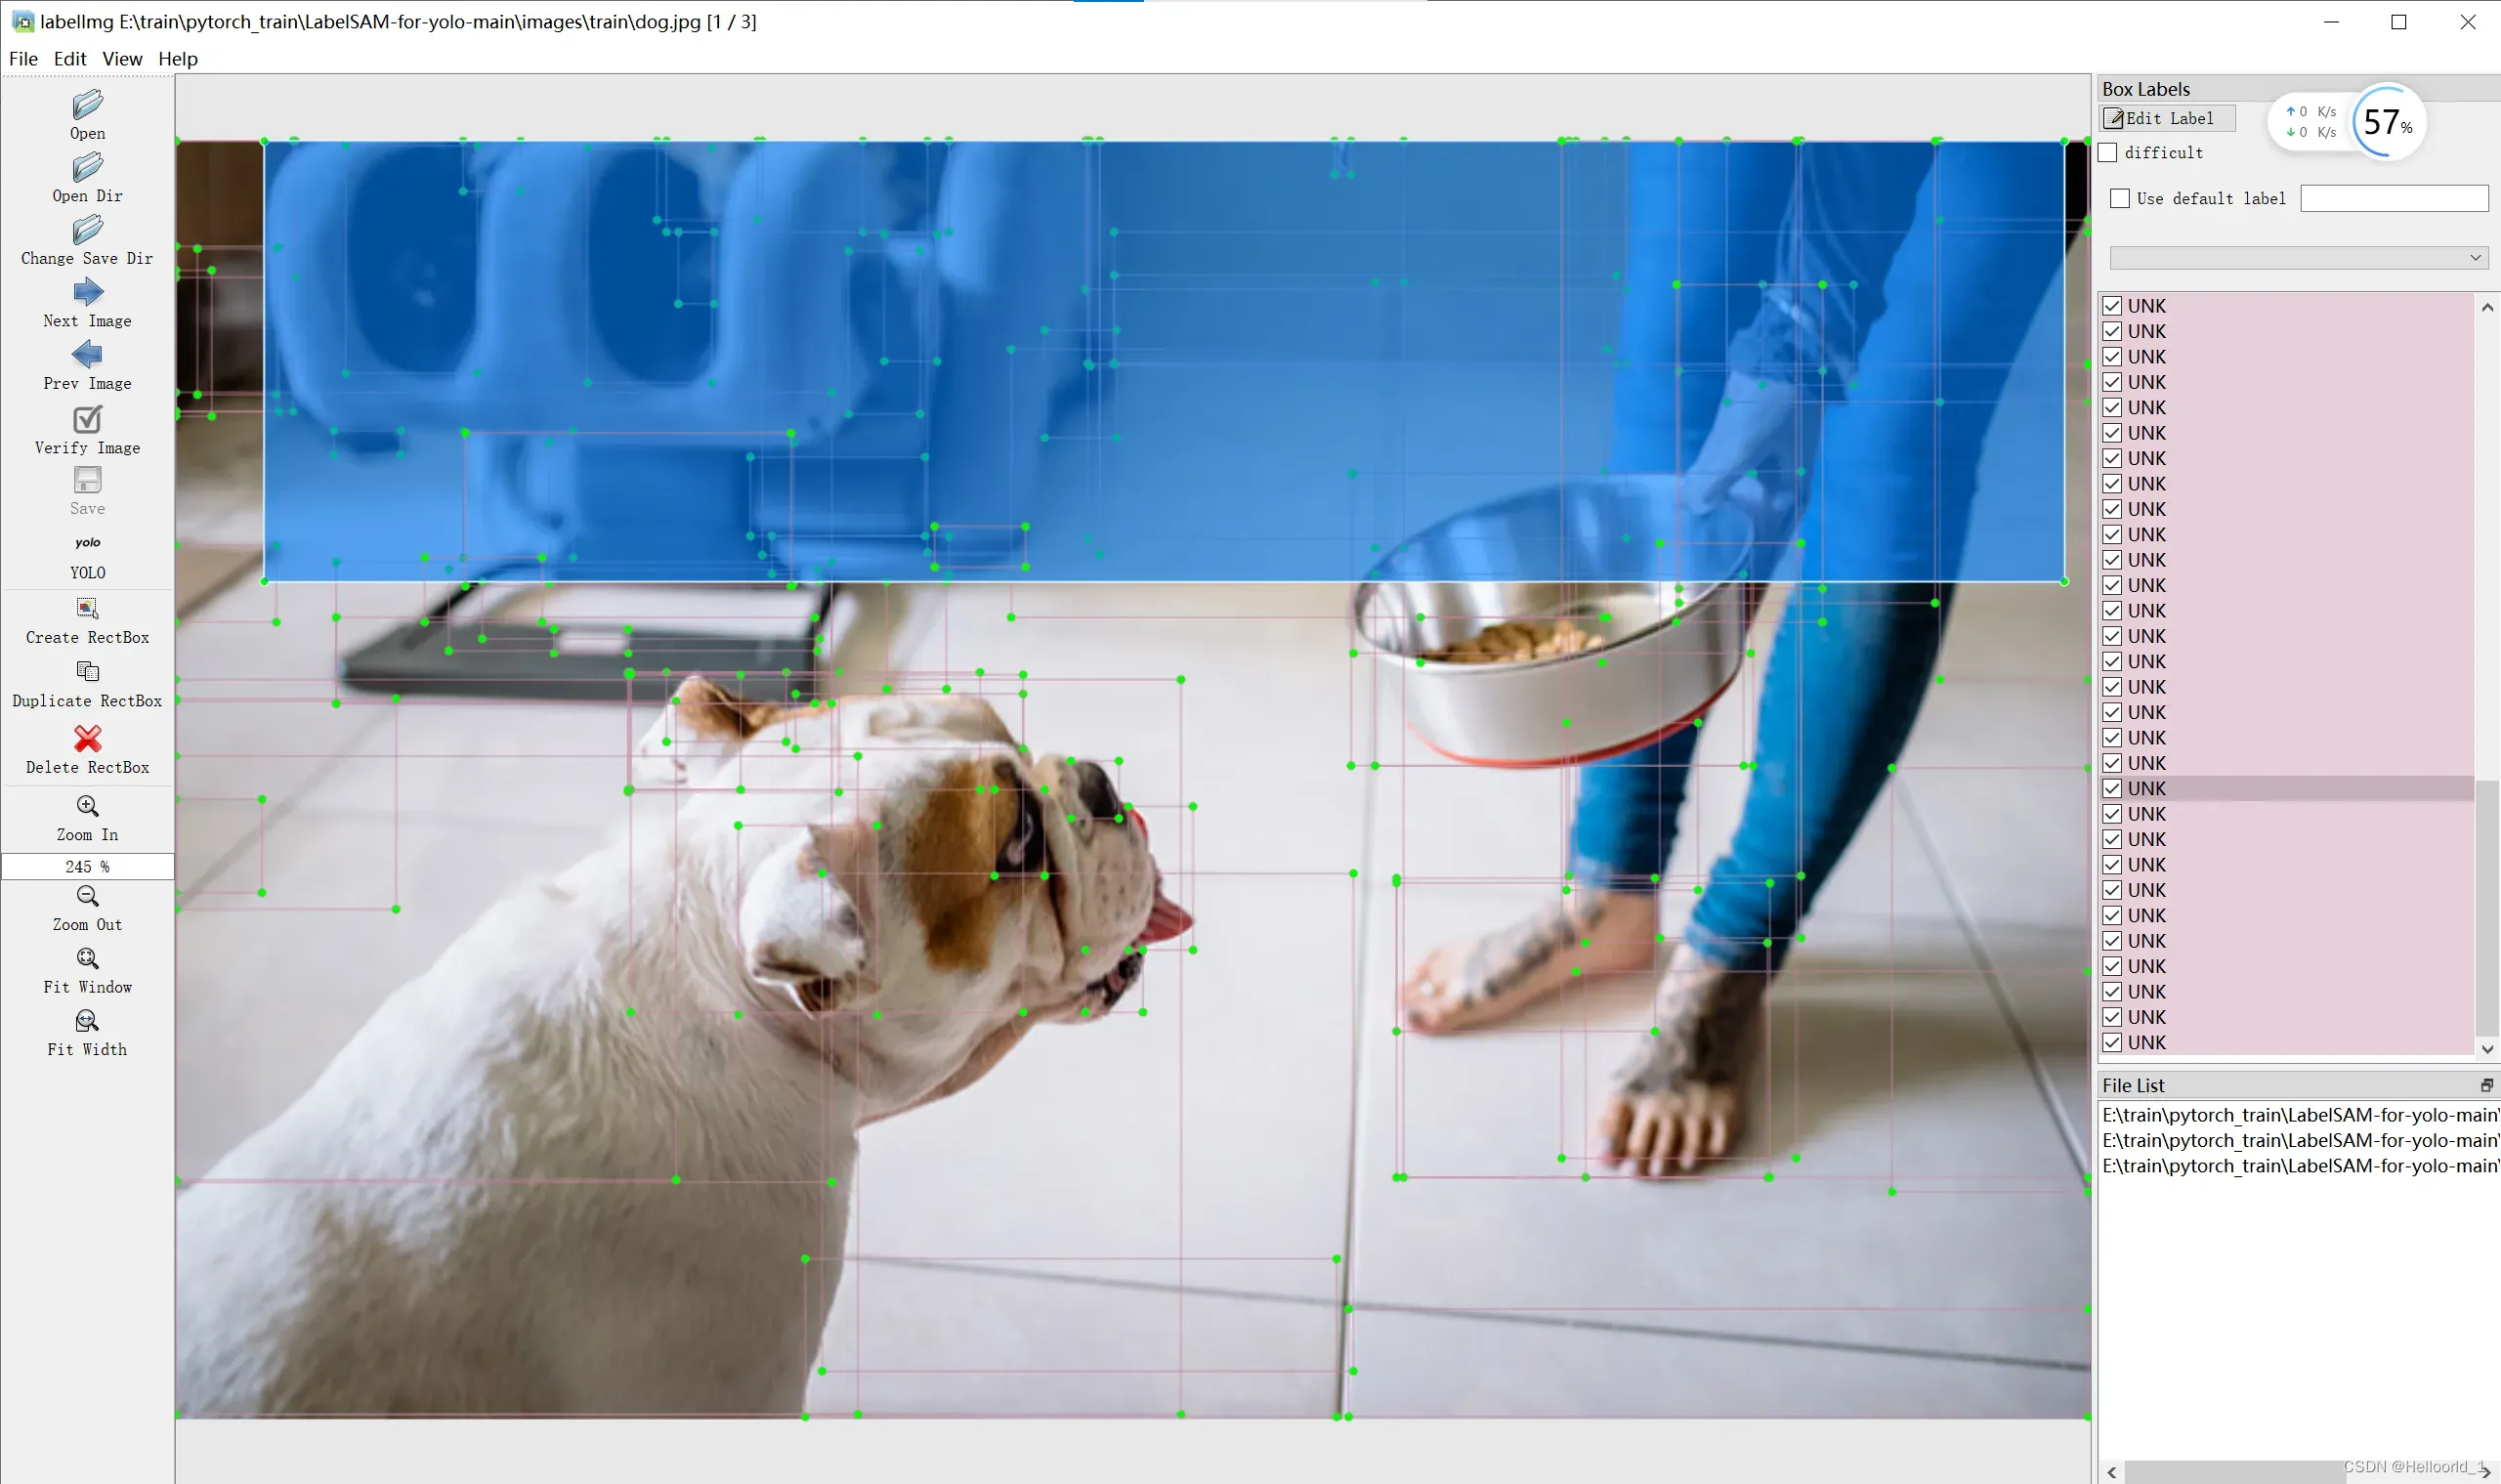
效果如下:
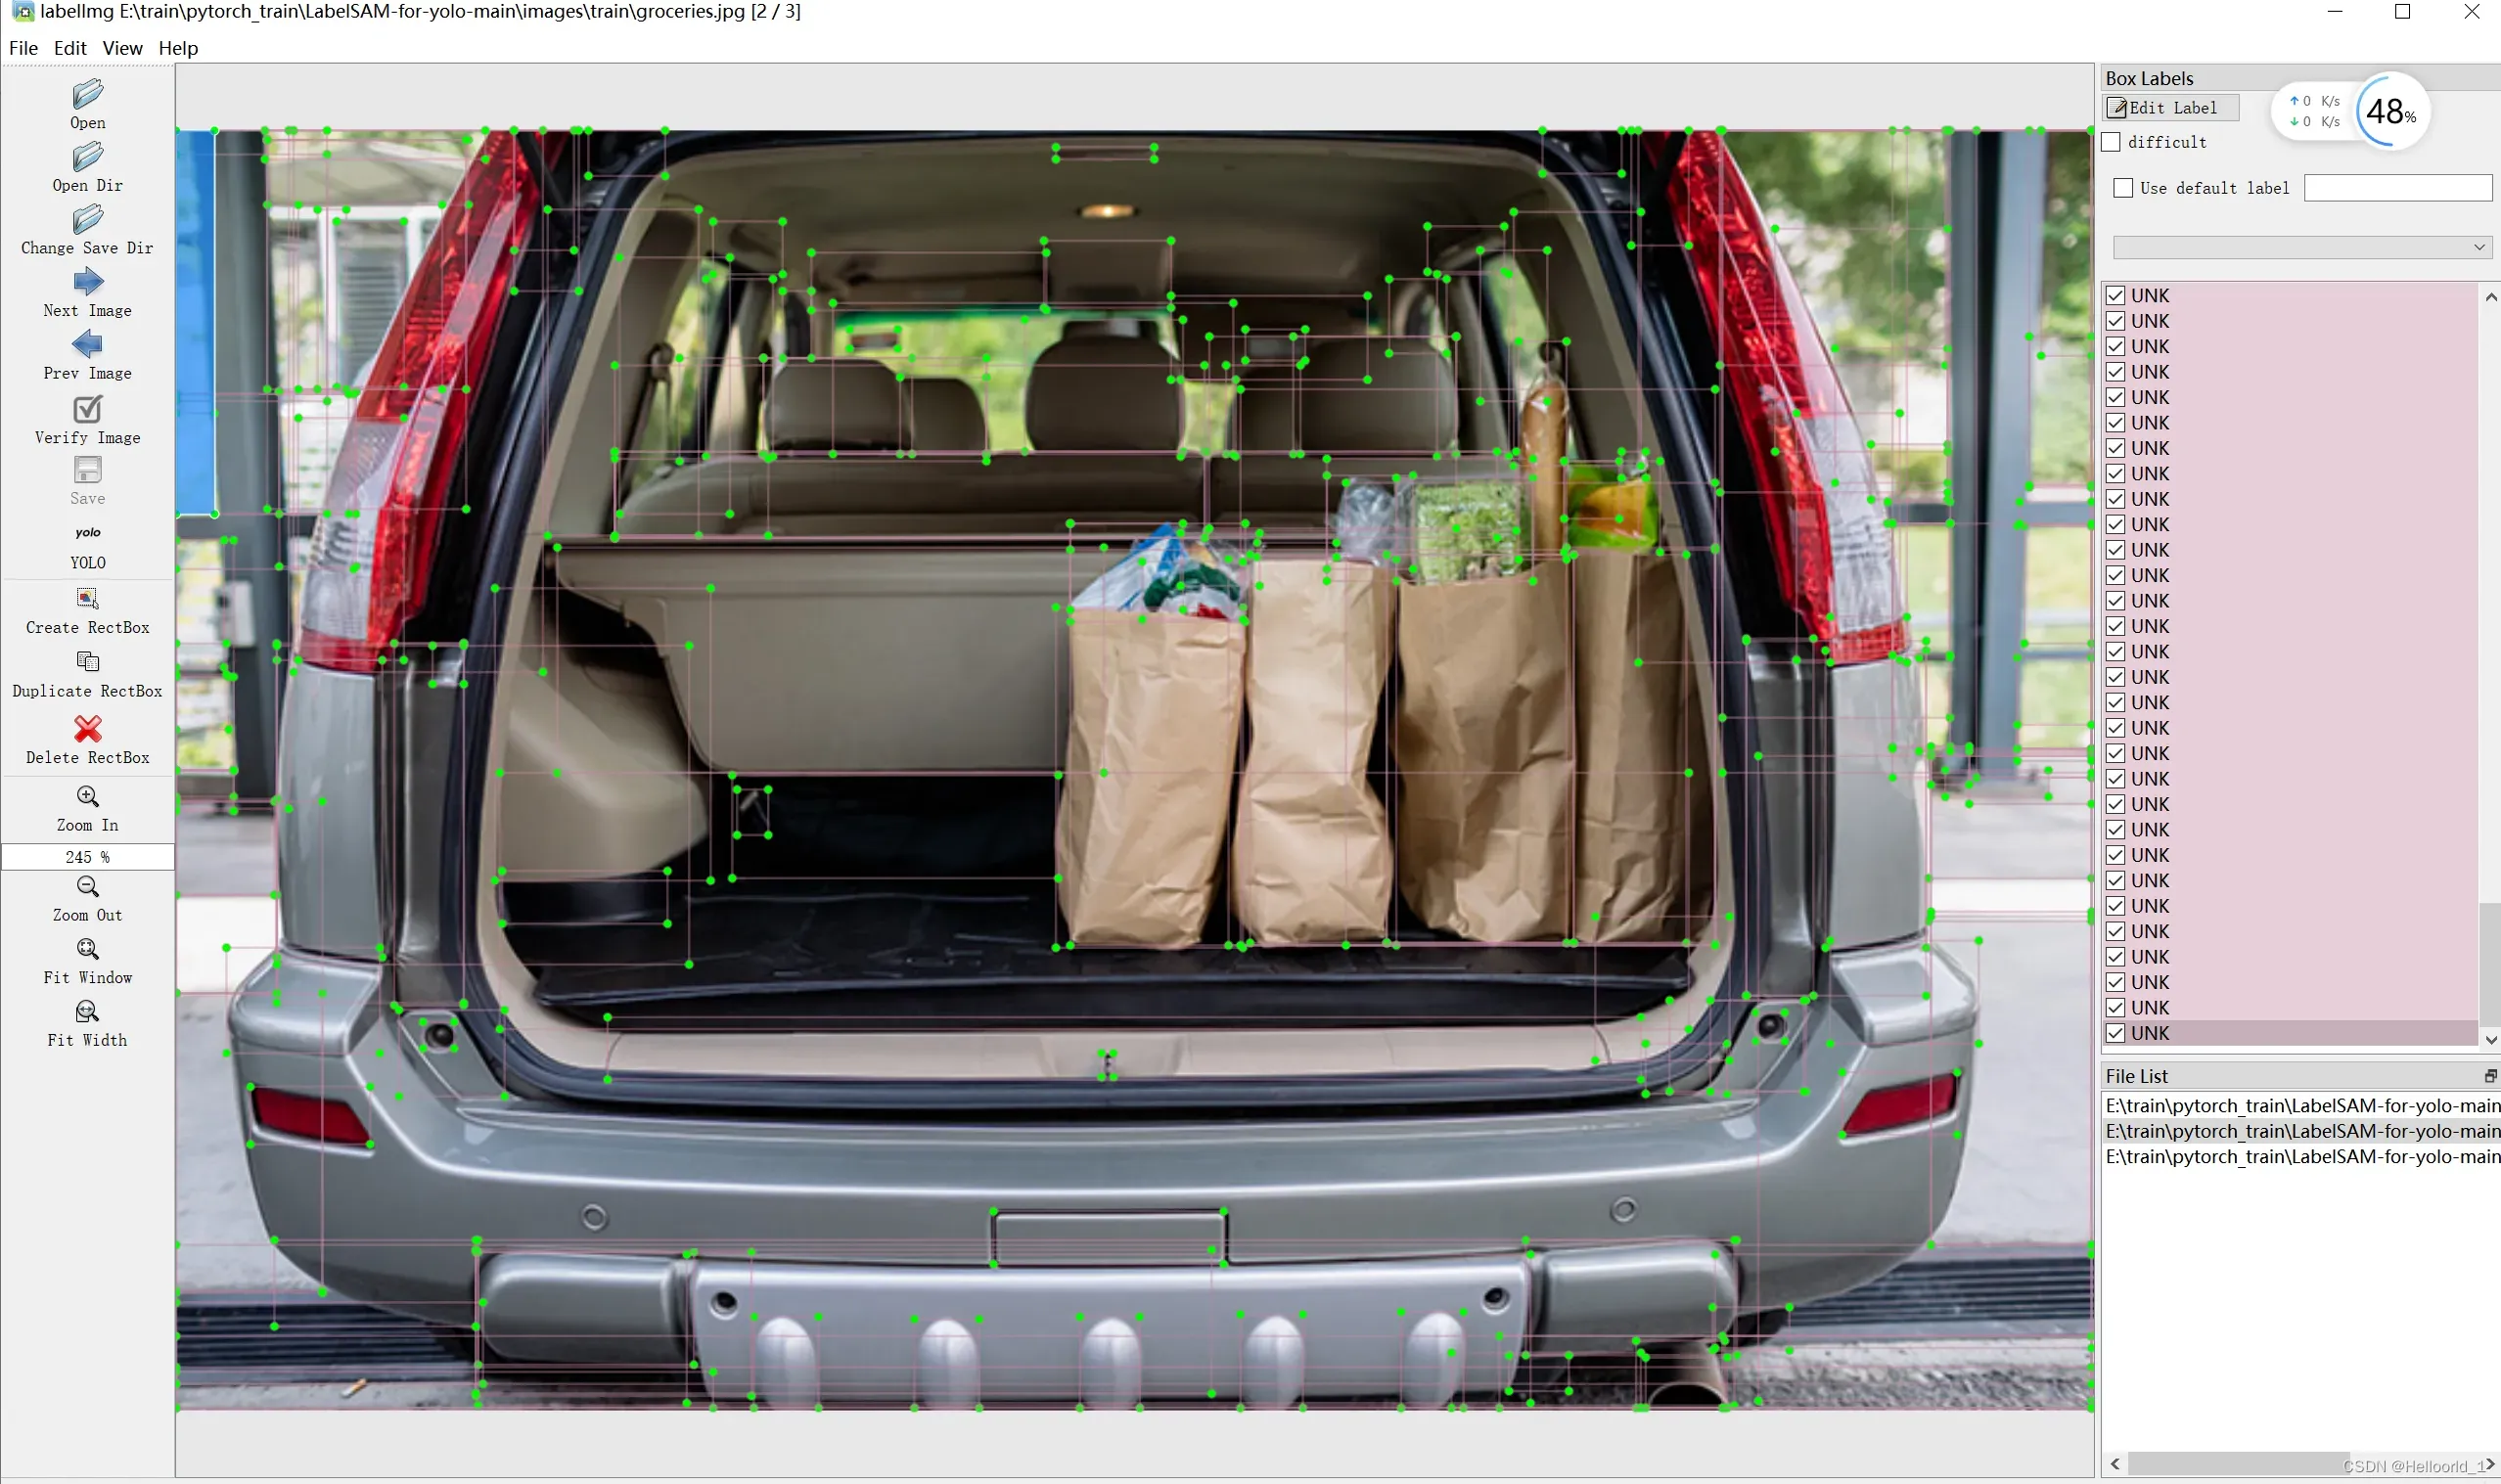
效果还行,这里是将的所有识别出来的物体,都进行标注了,所以看着会比较乱(因此,按照原文所述,这个工具适合单一目标物体的辅助标注,背景最好简单点)。
本文只是补充说明,开源代码的使用。
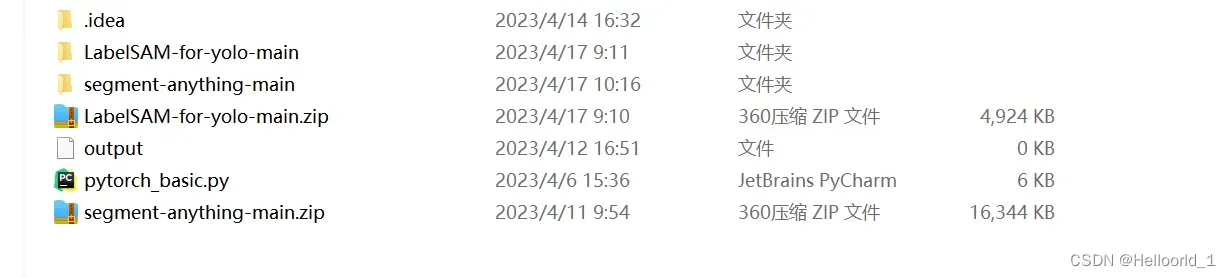
下载(download zip)上述仓库代码:
进行解压:
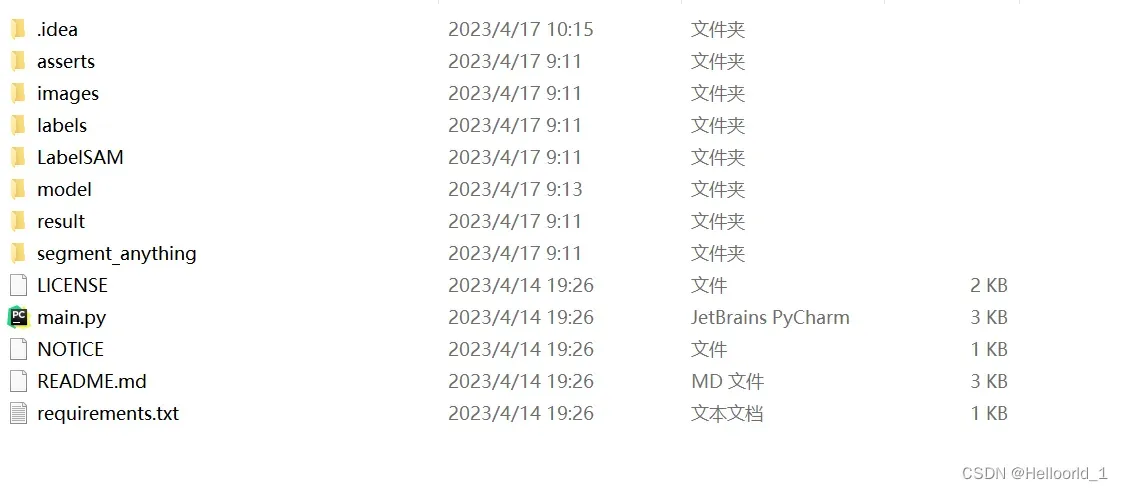
如果配置了SAM环境了,这里就可以不用管了。
将前面下载的vit-b模型放到文件夹model下面即可。
将要自动标注的图片放到images / train下即可
最后生成的标注数据会被放到labels/ train里面去。
pycharm打开并运行main.py
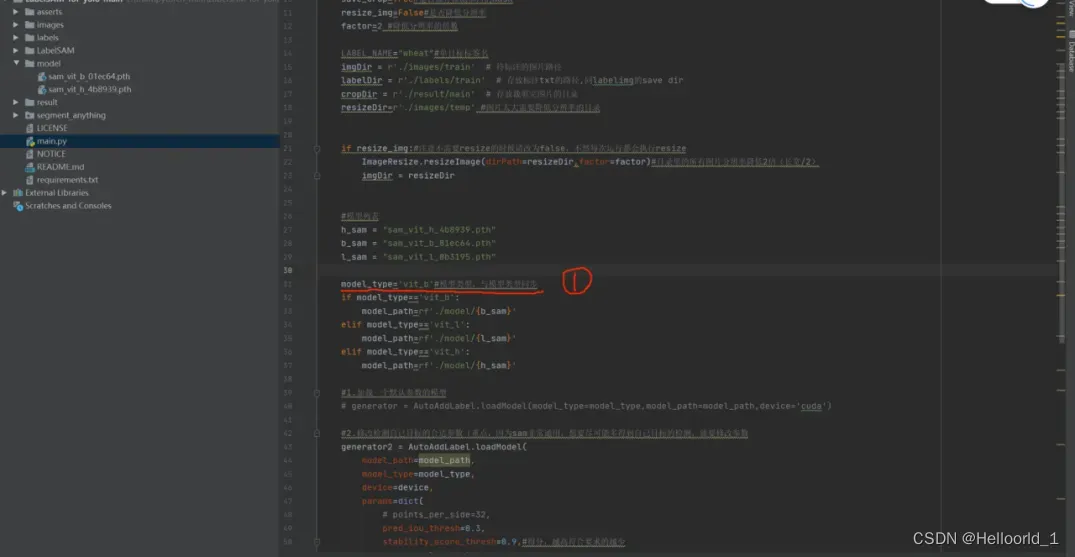
默认是vit-b模型,运行即可,会批量完成文件夹下的图片标注。
标注完成后会得到这些(txt-标注信息)文件:
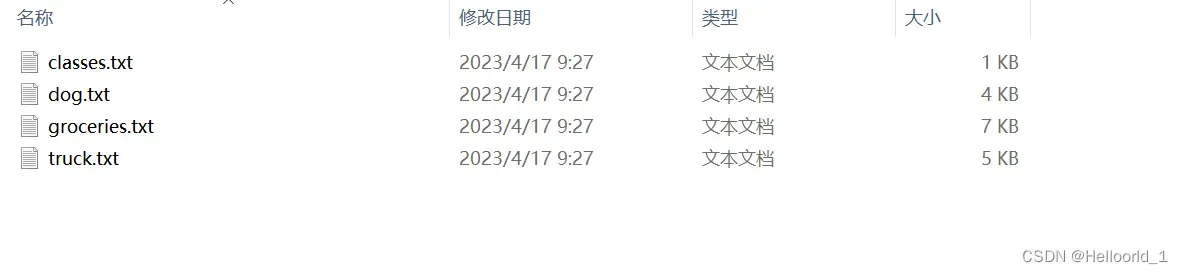
然后咱们就可以打开labelimg进行辅助标注了。
win+R,输入cmd,(也可以直接在上面txt文件夹上方输入cmd+enter回车键)

打开环境
conda activate 环境名(前面创建的)如果没有labelimg,可以安装:
pip install labelimg -i https://pypi.tuna.tsinghua.edu.cn/simple使用labelimg,只需要在cmd中输入:
labelimg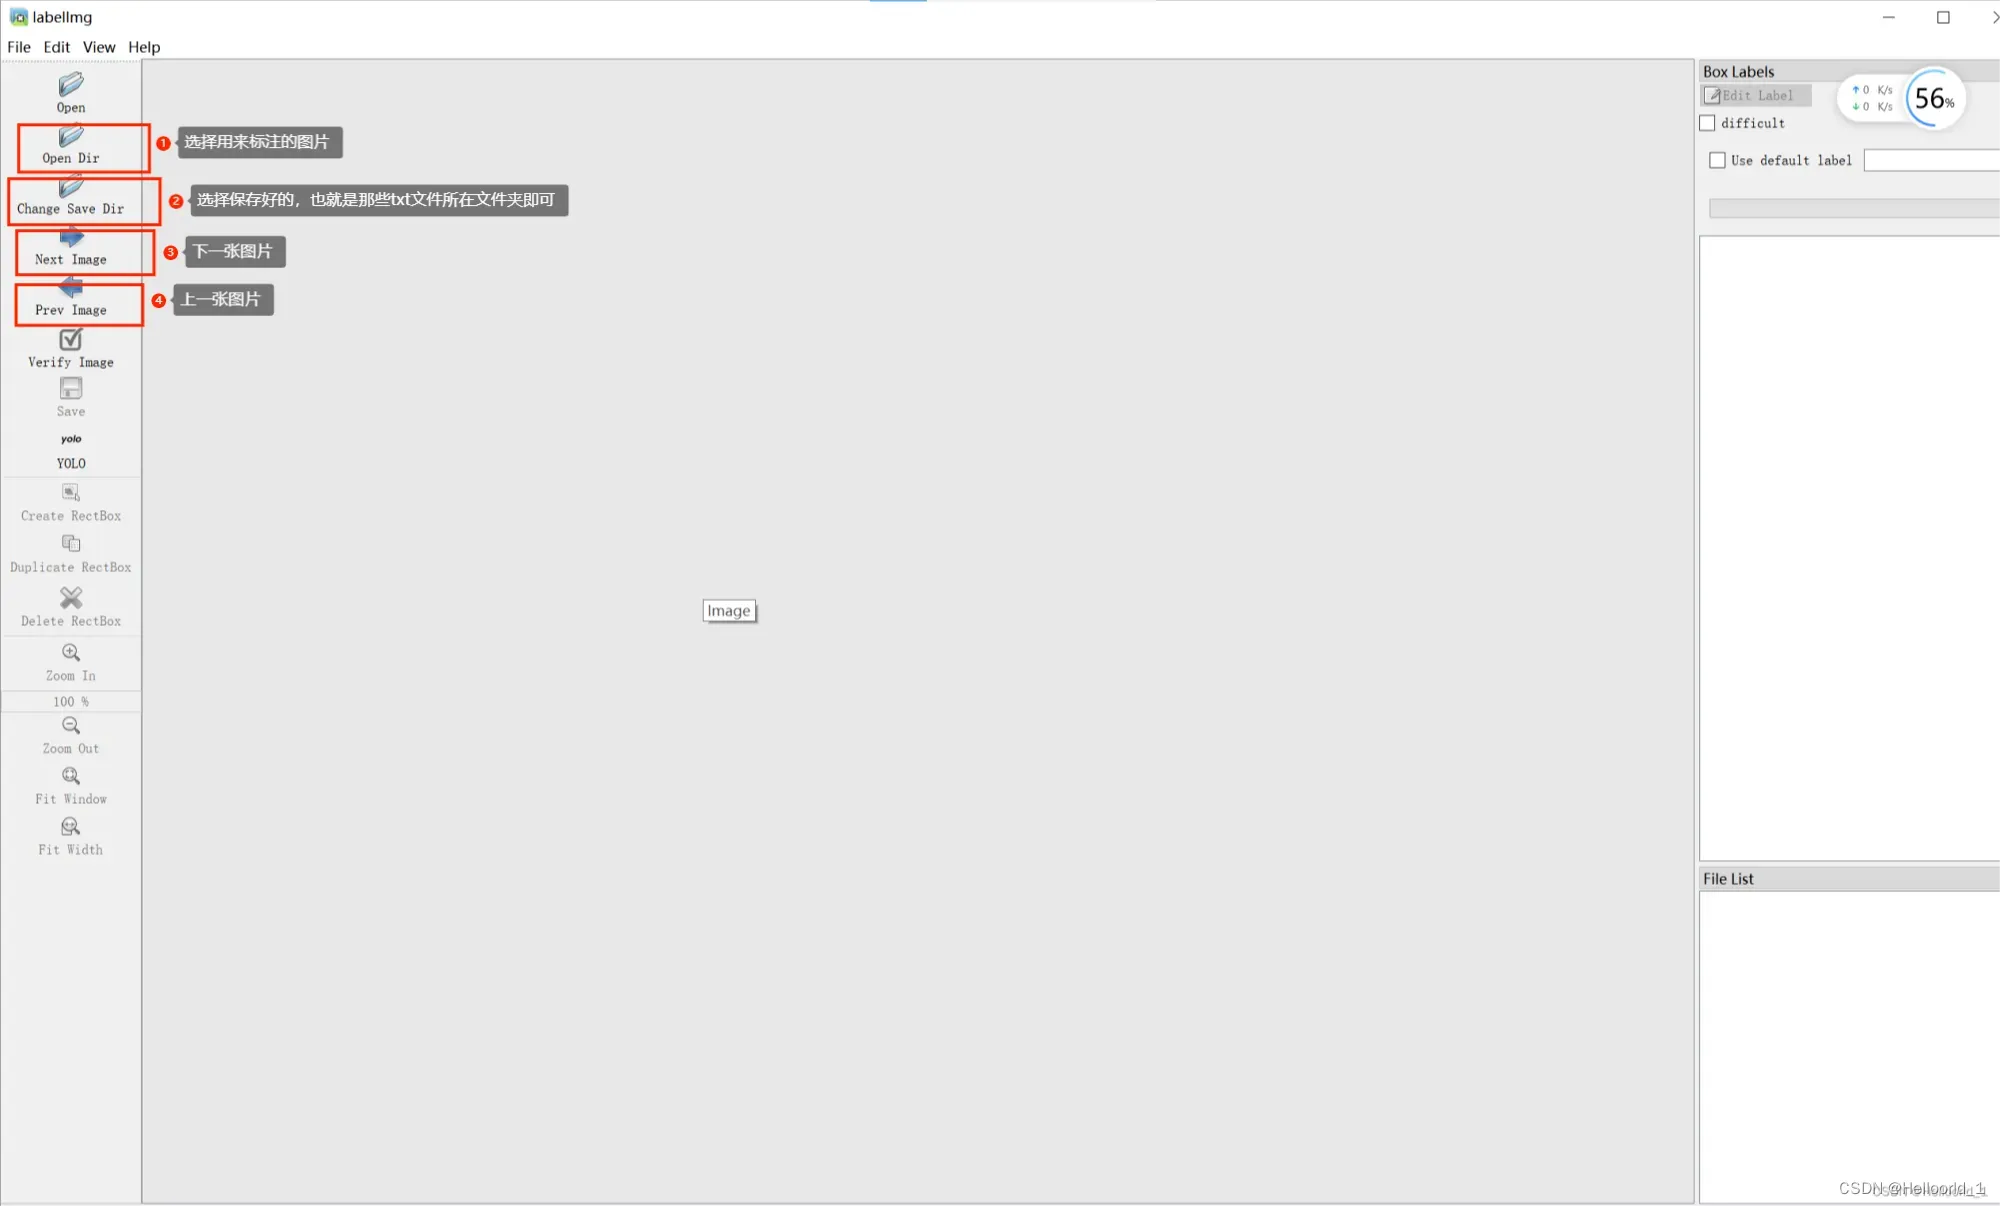
就会出来这个界面
按照上述标号,将路径选择完,就会出现:
可以delete进行多余标注删除。当然这个案例本身作用不大,但是带来了思考如何让SAM为我们服务,标注本来就是一件特别繁琐的事。
百度结合SAM,产生的PaddleSeg
参考链接如下:pasddleseg
文章出处登录后可见!