概述
在写OpenCV+TensorFlow简单的机器小车传统视觉寻迹之时,可以预见的是,由于环境因素,传统小车寻迹的效果可能会受到环境因素的影响,例如地上的污渍在进行二值化时就有可能出现噪音。本次将采用卷积神经网络,训练出一个简单较好的模型,在寻迹上会有更加突出的效果。以下图片操作由OpenCV完成。
接下来将分为数据集、卷积神经网络、神经网络训练、网络模型保存和测试。
废话不多说,我们去测试
数据集
初始数据集的构建
从智能小车寻迹任务来说,可以大致分为前进,左转,右转这三个命令。因此在制作数据集的时候就只需要3个label标签。
在制作时,我沿用的还是以前的想法,通过opencv将得到的图片进行二值化,然后将图片交给神经网络来处理。主要包含以下的考虑。
- 由于追踪过程中的站点光照等因素,在创建满足这些条件的数据集时会过大,环境因素的影响可能会导致神经网络的过拟合(记住一些无用的特征)。
- 在我目前的使用场景中,其实不需要这么复杂的数据集。当然,本文仅供参考,如有需要也很容易展开。
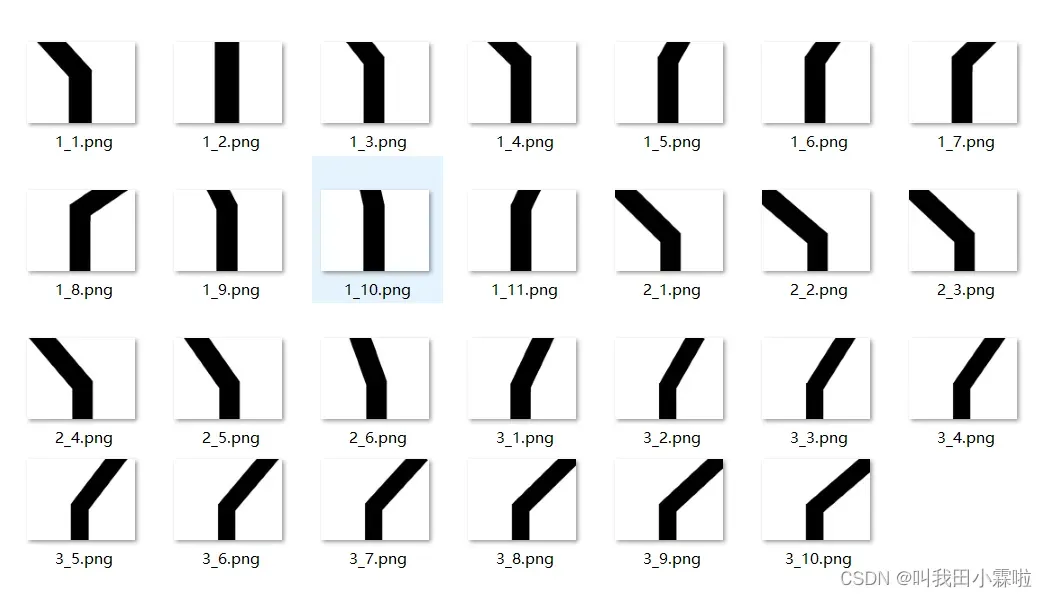
如上图,我是用电脑自带的绘图软件搭建的。这些图作为基础数据集,在此基础上进行旋转、平移等操作,进一步扩展数据集。生成的图形与跟踪过程中的完美二值化一致。
在学习机器学习的过程中,大多数的文章运用的mnist手写数字、CIFAR10数据集,但是在自己构建数据集的时候,基础数据集的构建需要自己完成。
数据集的扩展
如果数据集太小,在实际应用过程中可能会出现过拟合。模型死记硬背训练集,不了解数据背后的规律,泛化能力差。由于初始数据集是基于完美二值化图像创建的,因此训练数据的噪声干扰足够小;后续可以看出定制模型并不复杂;因此,解决过拟合的最佳方法是增加样本量。
增加样本数量的方法有很多:旋转、平移、遮挡、缩放等。对于智能汽车跟踪来说,旋转和平移是最合适、最直接的方法。
旋转
由于不影响小车正确的前进路线,这里的旋转只能进行稍微的旋转,否则容易引起方向的误判。我这里旋转角度为±4°之内。
# 开发作者   :Tian.Z.L
# 开发时间   :2022/3/14  14:48
# 文件名称   :PictureGetter.PY
# 开发工具   :PyCharm
import cv2
import os

index_1 = 1  # 直行的图片索引
index_2 = 1  # 左转图片的索引
index_3 = 1  # 右转图片的索引
path = "C:/Users/TianZhonglin/Desktop/labPatentProject/TensorFlowLearnning/AutoDriver/DataSet"  # 文件夹目录
files = os.listdir(path)  # 得到文件夹下的所有文件名称
for file in files:
    img = cv2.imread("./DataSet/" + str(file))  # 读取彩色图像(BGR)
    # 切割文件名称,例如1_1.png为直行,最前面的1为该图片的类别
    own = str(file).split('_')[0]
    center = (640 // 2, 480 // 2)
    if own == '1':
        index = index_1
        index_1 += 10
    elif own == '2':
        index = index_2
        index_2 += 10
    else:
        index = index_3
        index_3 += 10
    for i in range(5):
        M = cv2.getRotationMatrix2D(center, -i, 1.2)
        rotated = cv2.warpAffine(img, M, (640, 480), borderValue=(255, 255, 255))
        ret, binary = cv2.threshold(rotated, 200, 255, cv2.THRESH_BINARY)
        cv2.imwrite('./after/' + own + '_' + str(index).zfill(5) + '.jpg', binary)
        index += 1
    for i in range(5):
        M = cv2.getRotationMatrix2D(center, i, 1.2)
        rotated = cv2.warpAffine(img, M, (640, 480), borderValue=(255, 255, 255))
        ret, binary = cv2.threshold(rotated, 200, 255, cv2.THRESH_BINARY)
        cv2.imwrite('./after/' + own + '_' + str(index).zfill(5) + '.jpg', binary)
        index += 1
print('success')
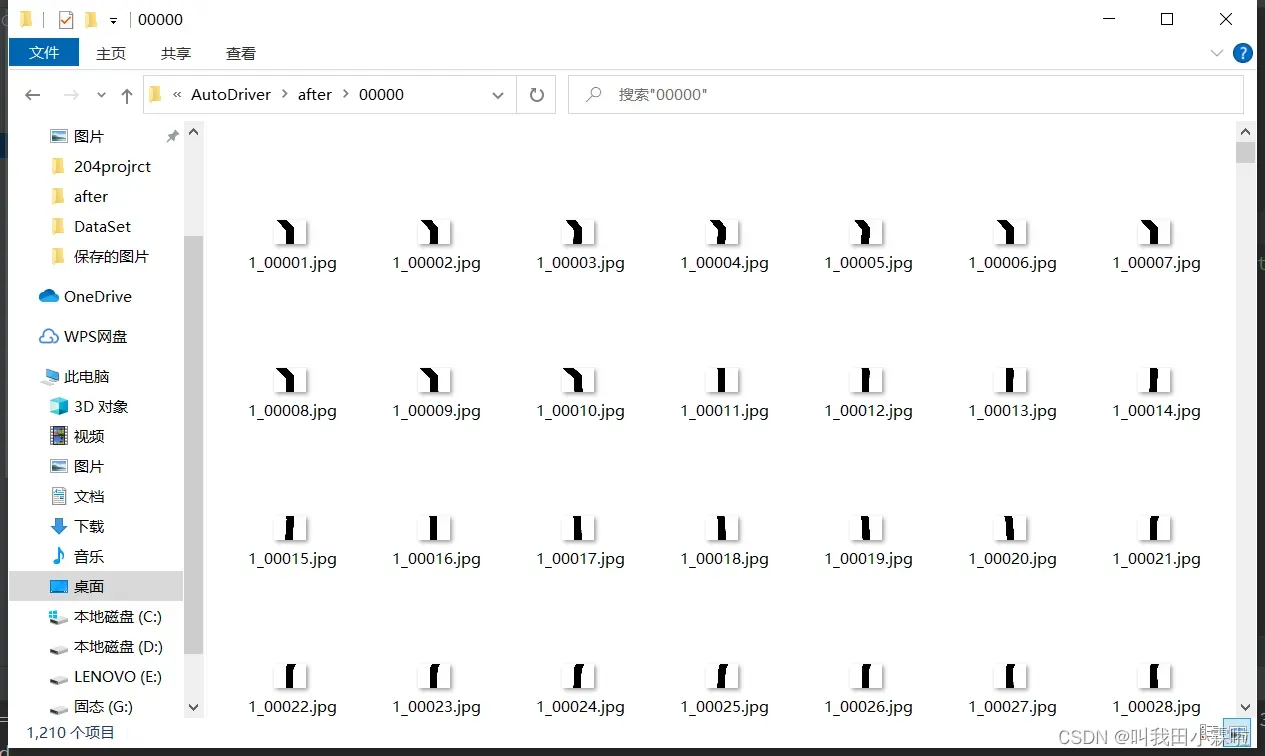
旋转所有图片,得到的图片被我放到另一个空文件夹中。因为后期制作数据集时为了方便样本图像的分类,需要对索引进行严格的管理,保证每个类别的样本名称有序。
图像平移
同样,为了尽可能满足小车实际的行使,平移的间距不宜过大也不宜太小。样本图片大小为640*480,我这里选择左右平移50像素以内。
# 开发作者   :Tian.Z.L
# 开发时间   :2022/3/14  20:23
# 文件名称   :move.PY
# 开发工具   :PyCharm
# 图像平移 (Translation transform)
import cv2
import numpy as np
import matplotlib.pyplot as plt
import os

index_1 = 111  # 接着旋转之后直行的索引
index_2 = 61  # 接着旋转之后左转的索引
index_3 = 101  # 接着旋转之后右转的索引
path = "C:/Users/TianZhonglin/Desktop/labPatentProject/TensorFlowLearnning/AutoDriver/after"  # 文件夹目录
files = os.listdir(path)  # 得到文件夹下的所有文件名称
for file in files:
    img = cv2.imread("./after/" + str(file))  # 读取彩色图像(BGR)
    own = str(file).split('_')[0]
    center = (640 // 2, 480 // 2)
    # index = 4
    if own == '1':
        index = index_1
        index_1 += 10
    elif own == '2':
        index = index_2
        index_2 += 10
    else:
        index = index_3
        index_3 += 10
    rows, cols, ch = img.shape
    for i in range(5):
        dx, dy = (i + 1) * 10, 0  # 向右偏移量,
        MAT = np.float32([[1, 0, dx], [0, 1, dy]])  # 构造平移变换矩阵
        # dst = cv2.warpAffine(img, MAT, (cols, rows))  # 默认为黑色填充
        dst = cv2.warpAffine(img, MAT, (cols, rows), borderValue=(255, 255, 255))  # 设置白色填充
        ret, binary = cv2.threshold(dst, 200, 255, cv2.THRESH_BINARY)
        cv2.imwrite('./after/' + own + '_' + str(index).zfill(5) + '.jpg', binary)
        index += 1
    for i in range(5):
        dx, dy = (i + 1) * -10, 0  # 向左偏移量
        MAT = np.float32([[1, 0, dx], [0, 1, dy]])  # 构造平移变换矩阵
        # dst = cv2.warpAffine(img, MAT, (cols, rows))  # 默认为黑色填充
        dst = cv2.warpAffine(img, MAT, (cols, rows), borderValue=(255, 255, 255))  # 设置白色填充
        ret, binary = cv2.threshold(dst, 200, 255, cv2.THRESH_BINARY)
        cv2.imwrite('./after/' + own + '_' + str(index).zfill(5) + '.jpg', binary)
        index += 1
这段代码是接着旋转之后运行的,将所有已经旋转的样本进行平移,至此就已经得到了足够的样本数量。但是在实际进行应用中,480P的图片过大,计算开销过大是不合适的,因此需要将这2970张图片进行缩小。
图像缩小
# 开发作者   :Tian.Z.L
# 开发时间   :2022/3/14  20:54
# 文件名称   :adjust.PY
# 开发工具   :PyCharm
import cv2
import os

path = "C:/Users/TianZhonglin/Desktop/labPatentProject/TensorFlowLearnning/AutoDriver/after"  # 文件夹目录
files = os.listdir(path)  # 得到文件夹下的所有文件名称
for file in files:
    img = cv2.imread('after/' + str(file))
    img = cv2.resize(img, (32, 24))
    cv2.imwrite('after/' + str(file), img)
根据mnist、CIFAR10的灵感,这里我将图片按比例缩小为32*24。其实根本原因是摄像头的分辨率就是为640*480。
数据集制作
这里采用的是TensorFlow2.0制作自己的数据集。提供的思路
首先,我们将不同类别的样本图片放在各自的文件夹下,如下图所示。
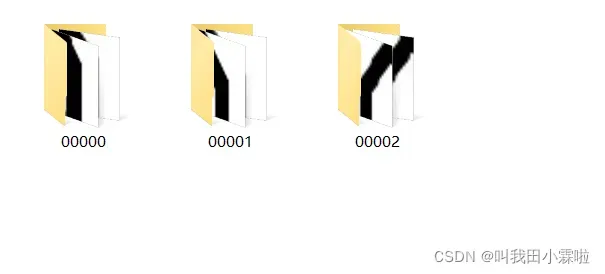
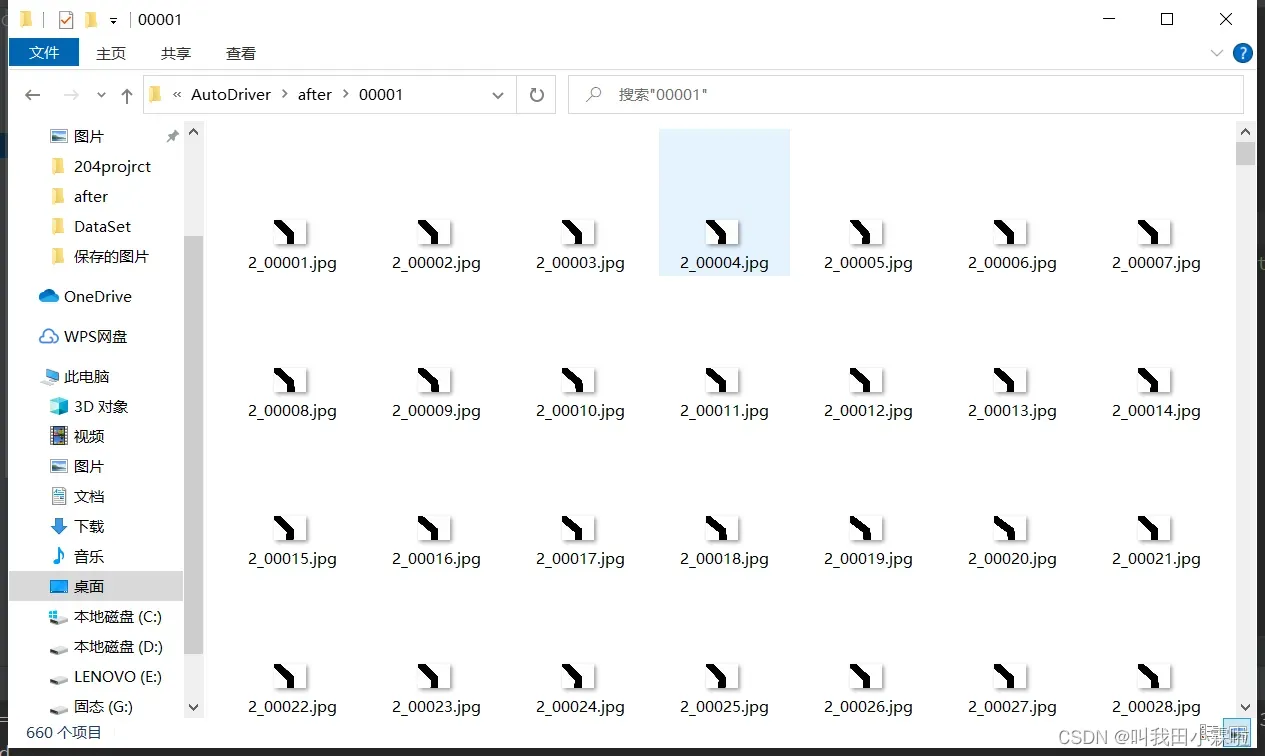
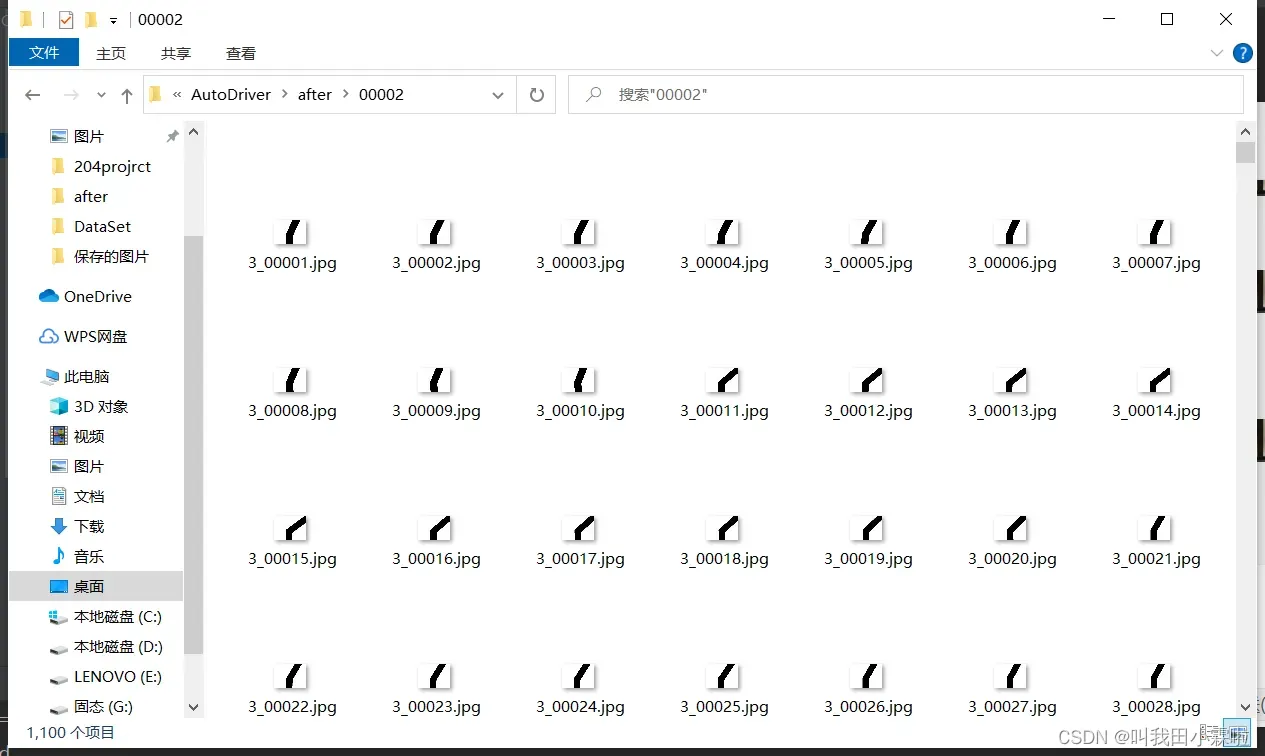
文件夹00000为直行样本,00001为左转样本,00002为右转样本。
接下来运行以下代码
# 开发作者   :Tian.Z.L
# 开发时间   :2022/3/14  20:26
# 文件名称   :test.PY
# 开发工具   :PyCharm
import csv

import tensorflow as tf
import os
import numpy as np

os.environ['TF_CPP_MIN_LOG_LEVEL'] = '2'

# 训练图片的路径
train_dir = 'C:\\Users\\TianZhonglin\\Desktop\\labPatentProject\\TensorFlowLearnning\\AutoDriver\\after'
AUTOTUNE = tf.data.experimental.AUTOTUNE


# 获取图片,存放到对应的列表中,同时贴上标签,存放到label列表中
def get_files(file_dir):
    # 存放图片类别和标签的列表:第0类
    list_0 = []
    label_0 = []
    # 存放图片类别和标签的列表:第1类
    list_1 = []
    label_1 = []
    # 存放图片类别和标签的列表:第2类
    list_2 = []
    label_2 = []

    for file in os.listdir(file_dir):
        # print(file)
        # 拼接出图片文件路径
        image_file_path = os.path.join(file_dir, file)
        for image_name in os.listdir(image_file_path):
            # print('image_name',image_name)
            # 图片的完整路径
            image_name_path = os.path.join(image_file_path, image_name)
            # print('image_name_path',image_name_path)
            # 将图片存放入对应的列表
            if image_file_path[-1:] == '0':
                list_0.append(image_name_path)
                label_0.append(0)
            elif image_file_path[-1:] == '1':
                list_1.append(image_name_path)
                label_1.append(1)
            else:
                list_2.append(image_name_path)
                label_2.append(2)

    # 合并数据
    image_list = np.hstack((list_0, list_1, list_2))
    label_list = np.hstack((label_0, label_1, label_2))
    # 利用shuffle打乱数据
    temp = np.array([image_list, label_list])
    temp = temp.transpose()  # 转置
    np.random.shuffle(temp)

    # 将所有的image和label转换成list
    image_list = list(temp[:, 0])
    image_list = [i for i in image_list]
    label_list = list(temp[:, 1])
    label_list = [int(float(i)) for i in label_list]
    return image_list, label_list


def get_tensor(image_list, label_list):
    ims = []
    for image in image_list:
        # 读取路径下的图片
        x = tf.io.read_file(image)
        # 将路径映射为照片,3通道
        x = tf.image.decode_jpeg(x, channels=1)
        # 修改图像大小
        x = tf.image.resize(x, [32, 24])
        # 将图像压入列表中
        ims.append(x)
    # 将列表转换成tensor类型
    img = tf.convert_to_tensor(ims)
    y = tf.convert_to_tensor(label_list)
    return img, y


def preprocess(x, y):
    # 归一化
    x = tf.cast(x, dtype=tf.float32) / 255.0
    y = tf.cast(y, dtype=tf.int32)
    return x, y


if __name__ == "__main__":
    # 训练图片与标签
    image_list, label_list = get_files(train_dir)
    x_train, y_train = get_tensor(image_list, label_list)
    print('--------------------------------------------------------')
    # 生成图片,对应标签的CSV文件(只用保存一次就可以了)
    with open('./image_label.csv', mode='w', newline='') as f:
        Write = csv.writer(f)
        for i in range(len(image_list)):
            Write.writerow([image_list[i], str(label_list[i])])
    f.close()
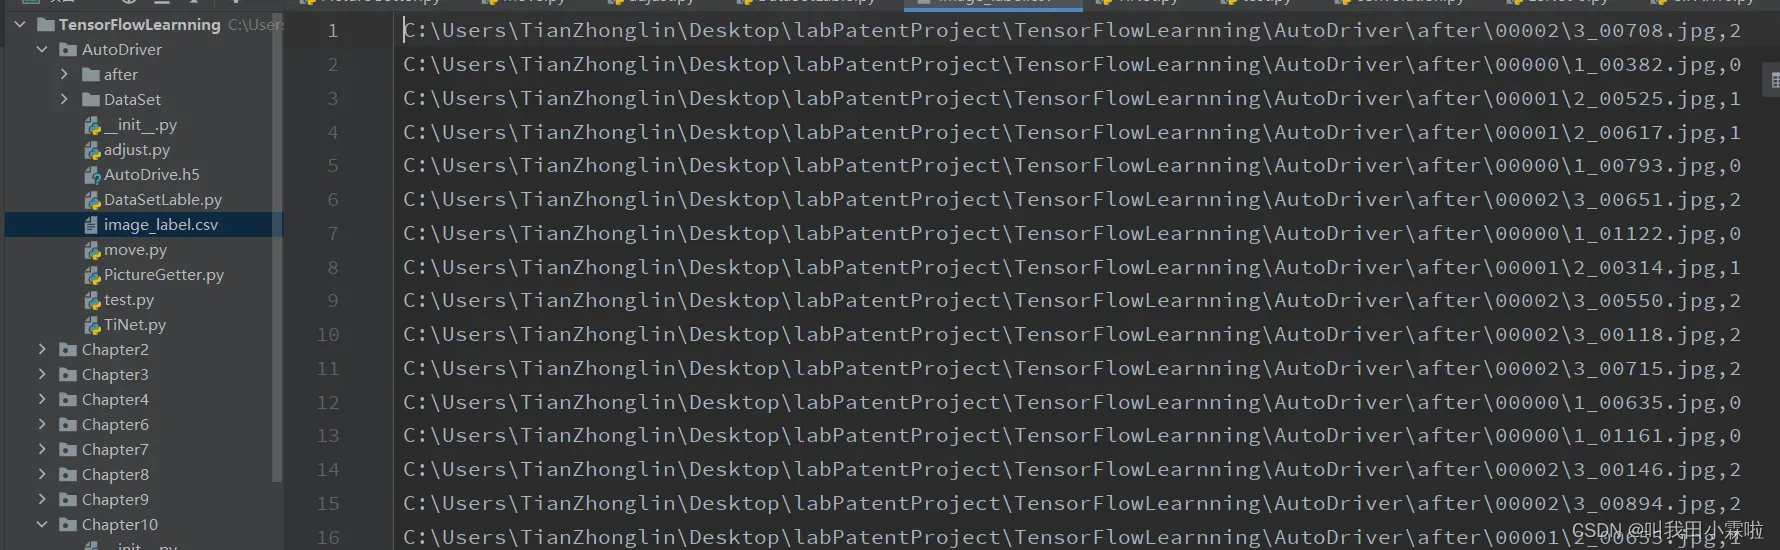
就可以在同级目录下生成一个.csv文件,里面记录着样本的信息。包括样本以及类别标签label。
至此,数据集就创建好了。接下来,我们将讨论神经网络和数据集的导入。
神经网络
训练模型的一般流程如下
- 加载数据集
- 自定义神经网络/现成的神经网络
- 训练
- 保存模型
加载数据集
在制作数据集供参考的文章中,已经提供了加载数据集的解决方案。
from tensorflow.keras import layers, optimizers, datasets, Sequential
import tensorflow as tf
import os
import numpy as np

os.environ['TF_CPP_MIN_LOG_LEVEL'] = '2'

# 训练图片的路径
train_dir = 'C:\\Users\\TianZhonglin\\Desktop\\labPatentProject\\TensorFlowLearnning\\AutoDriver\\after'
AUTOTUNE = tf.data.experimental.AUTOTUNE


# 获取图片,存放到对应的列表中,同时贴上标签,存放到label列表中
def get_files(file_dir):
    # 存放图片类别和标签的列表:第0类
    list_0 = []
    label_0 = []
    # 存放图片类别和标签的列表:第1类
    list_1 = []
    label_1 = []
    # 存放图片类别和标签的列表:第2类
    list_2 = []
    label_2 = []

    for file in os.listdir(file_dir):
        # print(file)
        # 拼接出图片文件路径
        image_file_path = os.path.join(file_dir, file)
        for image_name in os.listdir(image_file_path):
            # print('image_name',image_name)
            # 图片的完整路径
            image_name_path = os.path.join(image_file_path, image_name)
            # print('image_name_path',image_name_path)
            # 将图片存放入对应的列表
            if image_file_path[-1:] == '0':
                list_0.append(image_name_path)
                label_0.append(0)
            elif image_file_path[-1:] == '1':
                list_1.append(image_name_path)
                label_1.append(1)
            else:
                list_2.append(image_name_path)
                label_2.append(2)

    # 合并数据
    image_list = np.hstack((list_0, list_1, list_2))
    label_list = np.hstack((label_0, label_1, label_2))
    # 利用shuffle打乱数据
    temp = np.array([image_list, label_list])
    temp = temp.transpose()  # 转置
    np.random.shuffle(temp)

    # 将所有的image和label转换成list
    image_list = list(temp[:, 0])
    image_list = [i for i in image_list]
    label_list = list(temp[:, 1])
    label_list = [int(float(i)) for i in label_list]
    # print(image_list)
    # print(label_list)
    return image_list, label_list


def get_tensor(image_list, label_list):
    ims = []
    for image in image_list:
        # 读取路径下的图片
        x = tf.io.read_file(image)
        # 将路径映射为照片,3通道
        x = tf.image.decode_jpeg(x, channels=1)
        # 修改图像大小
        x = tf.image.resize(x, [32, 24])
        # 将图像压入列表中
        ims.append(x)
    # 将列表转换成tensor类型
    img = tf.convert_to_tensor(ims)
    y = tf.convert_to_tensor(label_list)
    return img, y


def preprocess(x, y):
    # 归一化
    x = tf.cast(x, dtype=tf.float32) / 255.0
    y = tf.cast(y, dtype=tf.int32)
    return x, y

    # 训练图片与标签


image_list, label_list = get_files(train_dir)
x_train, y_train = get_tensor(image_list, label_list)
# 载入训练数据集
db_train = tf.data.Dataset.from_tensor_slices((x_train, y_train))
db_train = db_train.map(preprocess).batch(2970)
db_train = next(iter(db_train))
通过上述代码,将2970个样本全部加载到db_train中,此时的db_train为列表类型,其中包含了样本以及样本对应的标签。样本张量为db_train[0]。
自定义神经网络
这是最重要也是最能体现个人思考与特点的地方了。在tensorflow中,封装完备的API已经帮我们处理好了所有的矩阵操作,设计人员只需要专注于神经网络的设计即可。这对于新手来说是一件非常容易上手的好事,不过最好还是探究背后的底层实现,再次不过多叙述了。
这里采用的是Sequential容器,将自定义的网络放在这个容器内。
network = Sequential([
# Conv - Conv - Pooling单元1
# 64个 3*3 的卷积核,输入输出同大小
layers.Conv2D(64, kernel_size=[3, 3], padding='SAME', activation=tf.nn.relu, input_shape=(32, 24, 1)),
layers.Conv2D(64, kernel_size=[3, 3], padding='SAME', activation=tf.nn.relu),
# 宽高减半
layers.MaxPooling2D(pool_size=[2, 2], strides=2, padding='SAME'),
# Conv - Conv - Pooling单元2,输出通道提升至128,宽高减半
layers.Conv2D(128, kernel_size=[3, 3], padding='SAME', activation=tf.nn.relu),
layers.Conv2D(128, kernel_size=[3, 3], padding='SAME', activation=tf.nn.relu),
layers.MaxPooling2D(pool_size=[2, 2], strides=2, padding='SAME'),
# Conv - Conv - Pooling单元3,输出通道提升至256,宽高减半
layers.Conv2D(256, kernel_size=[3, 3], padding='SAME', activation=tf.nn.relu),
layers.Conv2D(256, kernel_size=[3, 3], padding='SAME', activation=tf.nn.relu),
layers.MaxPooling2D(pool_size=[2, 2], strides=2, padding='SAME'),
# Conv - Conv - Pooling单元4,输出通道提升至512,宽高减半
layers.Conv2D(512, kernel_size=[3, 3], padding='SAME', activation=tf.nn.relu),
layers.Conv2D(512, kernel_size=[3, 3], padding='SAME', activation=tf.nn.relu),
layers.MaxPooling2D(pool_size=[2, 2], strides=2, padding='SAME'),
layers.Flatten(),
# 全连接层
layers.Dense(256, activation=tf.nn.relu),
layers.Dense(128, activation=tf.nn.relu),
layers.Dense(64, activation=tf.nn.relu),
layers.Dense(10, activation=tf.nn.softmax)
])
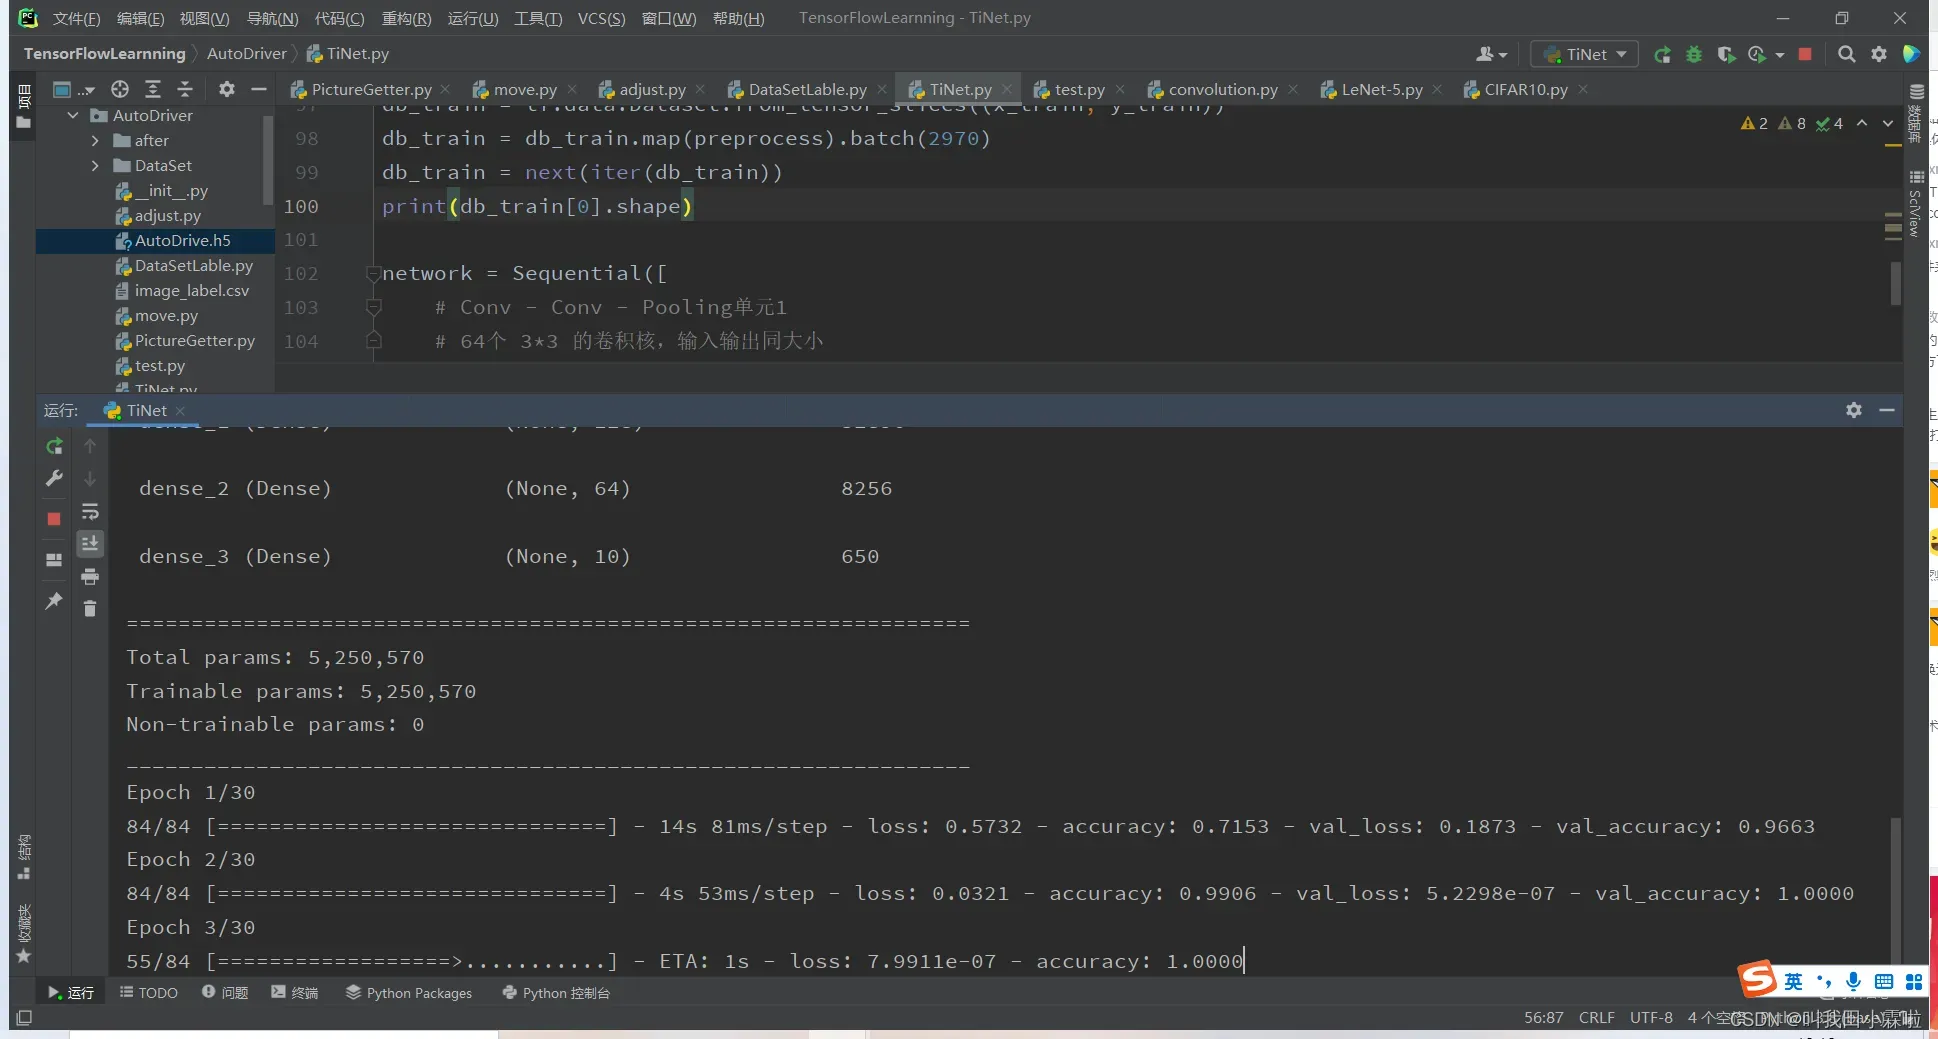
network.summary()上面的代码有几点需要注意:
- 第一个卷积层的input_shape的值需要跟样本的宽、高、通道数一一对应。
- 在卷积之后与全连接层交接的地方,需要用layers.Flatten()将张量打平,提供全连接层计算。
- 由于是分类问题,全连接层输出的激活函数建议使用softmax,他能将所属概率落在0~1中间,并且能拉开不同可能之间的差距,与我们的认知相符。
- network.summary()可以在控制台打印神经网络的结构信息。
layers.Conv2D()是卷积函数
- 第一个参数:卷积核的个数
- 第二个参数:卷积核的大小
- 第三个参数:是否需要边框填充
- 第四个参数:选择激活函数
layers.Dense()是全连接函数
- 第一个参数:神经元个数
- 第二个参数:选择激活函数
细节可以自己找,这里是我在代码中使用的。
训练并保存模型
# 模型训练 训练30个epoch
network.compile(optimizer='adam', loss="sparse_categorical_crossentropy", metrics=["accuracy"])
network.fit(db_train[0], y_train, epochs=30, validation_split=0.1)

# 模型保存
network.save('./AutoDrive.h5')
print('model saved')
del network
由于TensorFlow提供了高度集成的API方便用于模型的训练。有需要获取每个epoch的mse,mae值等就需要自己在底层实现中添加了,有兴趣的朋友可以去了解背后的实现。大致的思路就是:
- 初始化共享权重矩阵,偏执向量
- 前向传播(梯度跟踪)
- 反向传播,求此时的导数
- 根据当前导数×学习率更新权重矩阵
这样就得到了极值,补充一下,对于多个极值的情况,不同的初始化权重得到的最终效果是不同的。这需要凭经验初始化权重矩阵。
在保存模型中,tensorflow提供了3种保存模型的方法。
- 张量法,直接保存网络张量数据是最轻量级的方法,但不保存网络结构参数,并且重新导入时需要使用相同的网络结构进行复现。
Model.save_weights(path)- 网络模式,该模式不保存模型的参数,还保存了网络结构的信息。
Model.save(path)- SaveModel方式,这种方式是为了跨平台部署出现的
tf.saved_model.save(Model, path)为方便起见,不考虑跨平台,这里采用网络模式。
测试
# 开发作者 :Tian.Z.L
# 开发时间 :2022/3/15 10:00
# 文件名称 :test.PY
# 开发工具 :PyCharm
import tensorflow as tf
from tensorflow import keras
import matplotlib.pyplot as plt
import os
import numpy as np
# 网络加载
network = keras.models.load_model('AutoDrive.h5')
network.summary()
label = ['直行', '左转', '右转']
os.environ['TF_CPP_MIN_LOG_LEVEL'] = '2'
# 训练图片的路径
train_dir = 'C:\\Users\\TianZhonglin\\Desktop\\labPatentProject\\TensorFlowLearnning\\AutoDriver\\after'
AUTOTUNE = tf.data.experimental.AUTOTUNE
# 获取图片,存放到对应的列表中,同时贴上标签,存放到label列表中
def get_files(file_dir):
# 存放图片类别和标签的列表:第0类
list_0 = []
label_0 = []
# 存放图片类别和标签的列表:第1类
list_1 = []
label_1 = []
# 存放图片类别和标签的列表:第2类
list_2 = []
label_2 = []
for file in os.listdir(file_dir):
# print(file)
# 拼接出图片文件路径
image_file_path = os.path.join(file_dir, file)
for image_name in os.listdir(image_file_path):
# print('image_name',image_name)
# 图片的完整路径
image_name_path = os.path.join(image_file_path, image_name)
# print('image_name_path',image_name_path)
# 将图片存放入对应的列表
if image_file_path[-1:] == '0':
list_0.append(image_name_path)
label_0.append(0)
elif image_file_path[-1:] == '1':
list_1.append(image_name_path)
label_1.append(1)
else:
list_2.append(image_name_path)
label_2.append(2)
# 合并数据
image_list = np.hstack((list_0, list_1, list_2))
label_list = np.hstack((label_0, label_1, label_2))
# 利用shuffle打乱数据
temp = np.array([image_list, label_list])
temp = temp.transpose() # 转置
np.random.shuffle(temp)
# 将所有的image和label转换成list
image_list = list(temp[:, 0])
image_list = [i for i in image_list]
label_list = list(temp[:, 1])
label_list = [int(float(i)) for i in label_list]
# print(image_list)
# print(label_list)
return image_list, label_list
def get_tensor(image_list, label_list):
ims = []
for image in image_list:
# 读取路径下的图片
x = tf.io.read_file(image)
# 将路径映射为照片,3通道
x = tf.image.decode_jpeg(x, channels=1)
# 修改图像大小
x = tf.image.resize(x, [32, 24])
# 将图像压入列表中
ims.append(x)
# 将列表转换成tensor类型
img = tf.convert_to_tensor(ims)
y = tf.convert_to_tensor(label_list)
return img, y
def preprocess(x, y):
# 归一化
x = tf.cast(x, dtype=tf.float32) / 255.0
y = tf.cast(y, dtype=tf.int32)
return x, y
# 训练图片与标签
image_list, label_list = get_files(train_dir)
x_test, y_test = get_tensor(image_list, label_list)
print('--------------------------------------------------------')
# 载入训练数据集
db_test = tf.data.Dataset.from_tensor_slices((x_test, y_test))
db_test = db_test.map(preprocess).batch(2970)
db_test = next(iter(db_test))
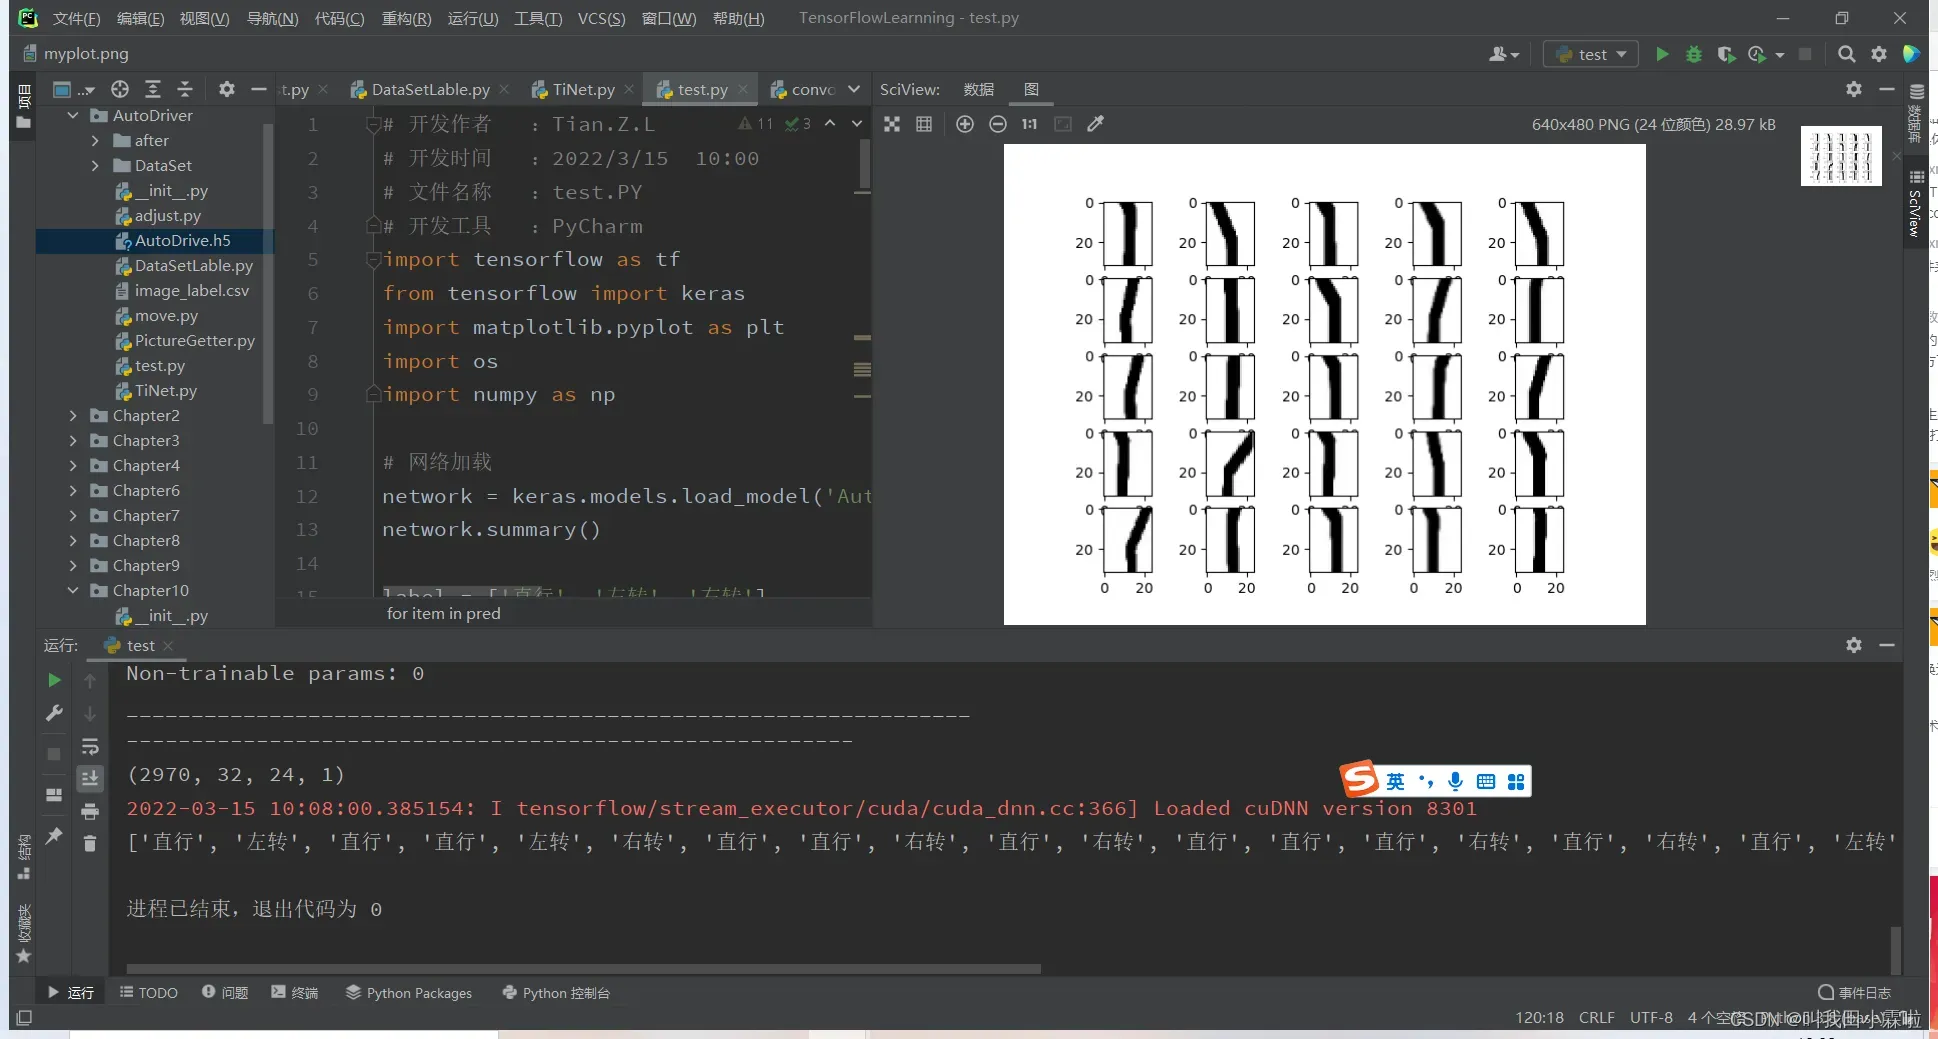
print(db_test[0].shape)
db_test = db_test[0]
# 显示前25张图片
for i in range(25):
plt.subplot(5, 5, i + 1)
plt.imshow(db_test[i], cmap='gray')
plt.show()
# 改变维度
# testImage = tf.reshape(db_train, (10000, 28, 28, 1))
# 结果预测
result = network.predict(db_test)[0:25]
pred = tf.argmax(result, axis=1)
pred_list = []
for item in pred:
pred_list.append(label[item.numpy()])
print(pred_list)
测试结果

文章出处登录后可见!