前言
技术栈是Fastapi。
FastAPI 是一个现代、快速(基于 Starlette 和 Pydantic)、易于使用的 Python web 框架,主要用于构建 RESTful API。以下是 FastAPI 的一些优势:
-
性能卓越: FastAPI 基于 Starlette 框架,并使用 Pydantic 进行数据验证,因此具有出色的性能。它通过异步编程利用 Python 3.7+ 中的
async/await特性,使其能够处理大量并发请求。 -
自动文档生成: FastAPI 自动生成交互式 API 文档(Swagger UI 和 ReDoc),让开发者能够轻松地查看和测试 API 端点,同时提供即时的反馈和文档。
-
强类型注解: FastAPI 使用 Python 的类型提示来定义 API,同时利用 Pydantic 模型进行请求和响应的验证,这提供了强大的静态类型检查和自动文档的支持。
-
自动验证: 使用 Pydantic 模型,FastAPI 自动验证请求的数据,并在数据不符合预期时返回错误。这有助于提高代码的稳健性和可维护性。
-
异步支持: 支持异步处理请求,可以使用异步函数来处理请求,使得 FastAPI 在处理高并发时表现出色。
-
便捷的依赖注入系统: FastAPI 提供了一个灵活的依赖注入系统,让你能够方便地注入和管理依赖项,使代码更加清晰和可测试。
-
WebSocket 支持: FastAPI 提供了对 WebSocket 的原生支持,能够轻松地实现实时通信。
-
易于学习: FastAPI 的语法和设计理念使其易于学习和使用,特别是对于熟悉 Python 的开发者。
安装modelscope
conda create -n modelscope python=3.8
conda activate modelscope
pip install modelscope
激活虚拟环境
conda activate modelscope
server.py代码
import argparse

import uvicorn
from fastapi import FastAPI

from modelscope.server.api.routers.router import api_router
from modelscope.server.core.event_handlers import (start_app_handler,
                                                   stop_app_handler)


def get_app(args) -> FastAPI:
    app = FastAPI(
        title='modelscope_server',
        version='0.1',
        debug=True,
        swagger_ui_parameters={'tryItOutEnabled': True})
    app.state.args = args
    app.include_router(api_router)

    app.add_event_handler('startup', start_app_handler(app))
    app.add_event_handler('shutdown', stop_app_handler(app))
    return app


def add_server_args(parser):
    parser.add_argument(
        '--model_id', required=True, type=str, help='The target model id')
    parser.add_argument(
        '--revision', required=True, type=str, help='Model revision')
    parser.add_argument('--host', default='0.0.0.0', help='Host to listen')
    parser.add_argument('--port', type=int, default=8000, help='Server port')
    parser.add_argument('--debug', default='debug', help='Set debug level.')
    parser.add_argument(
        '--llm_first',
        type=bool,
        default=True,
        help='Use LLMPipeline first for llm models.')


if __name__ == '__main__':
    parser = argparse.ArgumentParser('modelscope_server')
    add_server_args(parser)
    args = parser.parse_args()
    app = get_app(args)
    uvicorn.run(app, host=args.host, port=args.port)
任务一:人脸检测
命令行中虚拟环境中运行脚本
python server.py --model_id damo/cv_resnet50_face-detection_retinaface --revision v2.0.2
访问http://127.0.0.1:8000/docs打开文档

- describe方法描述请求参数和输出形式
{
  "schema": {
    "task_name": "face-detection",
    "schema": {
      "input": {
        "type": "object",
        "properties": {
          "image": {
            "type": "string",
            "description": "Base64 encoded image file or url string."
          }
        }
      },
      "parameters": {},
      "output": {
        "type": "object",
        "properties": {
          "scores": {
            "type": "array",
            "items": {
              "type": "number"
            }
          },
          "boxes": {
            "type": "array",
            "items": {
              "type": "number"
            }
          },
          "keypoints": {
            "type": "array",
            "items": {
              "type": "number"
            }
          }
        }
      }
    }
  },
  "sample": null
}-
call方法(是模型推理的入口)
-
两种请求方式(post)
-
curl方式(encode_base64表示图片转换为base64后的形式)
-
-
图片转换base64的链接可以使用在线转https://tool.jisuapi.com/pic2base64.html
curl -X 'POST' \ 'http://127.0.0.1:8000/call' \ -H 'accept: application/json' \ -H 'Content-Type: application/json' \ -d '{ "input":{"image":"encode_base64"}' -
face-detection_retinaface请求参数体(界面请求)直接使用fastapi界面请求或者使用apifox等
-
{"input":{"image":"encode_base64"}}请求结果
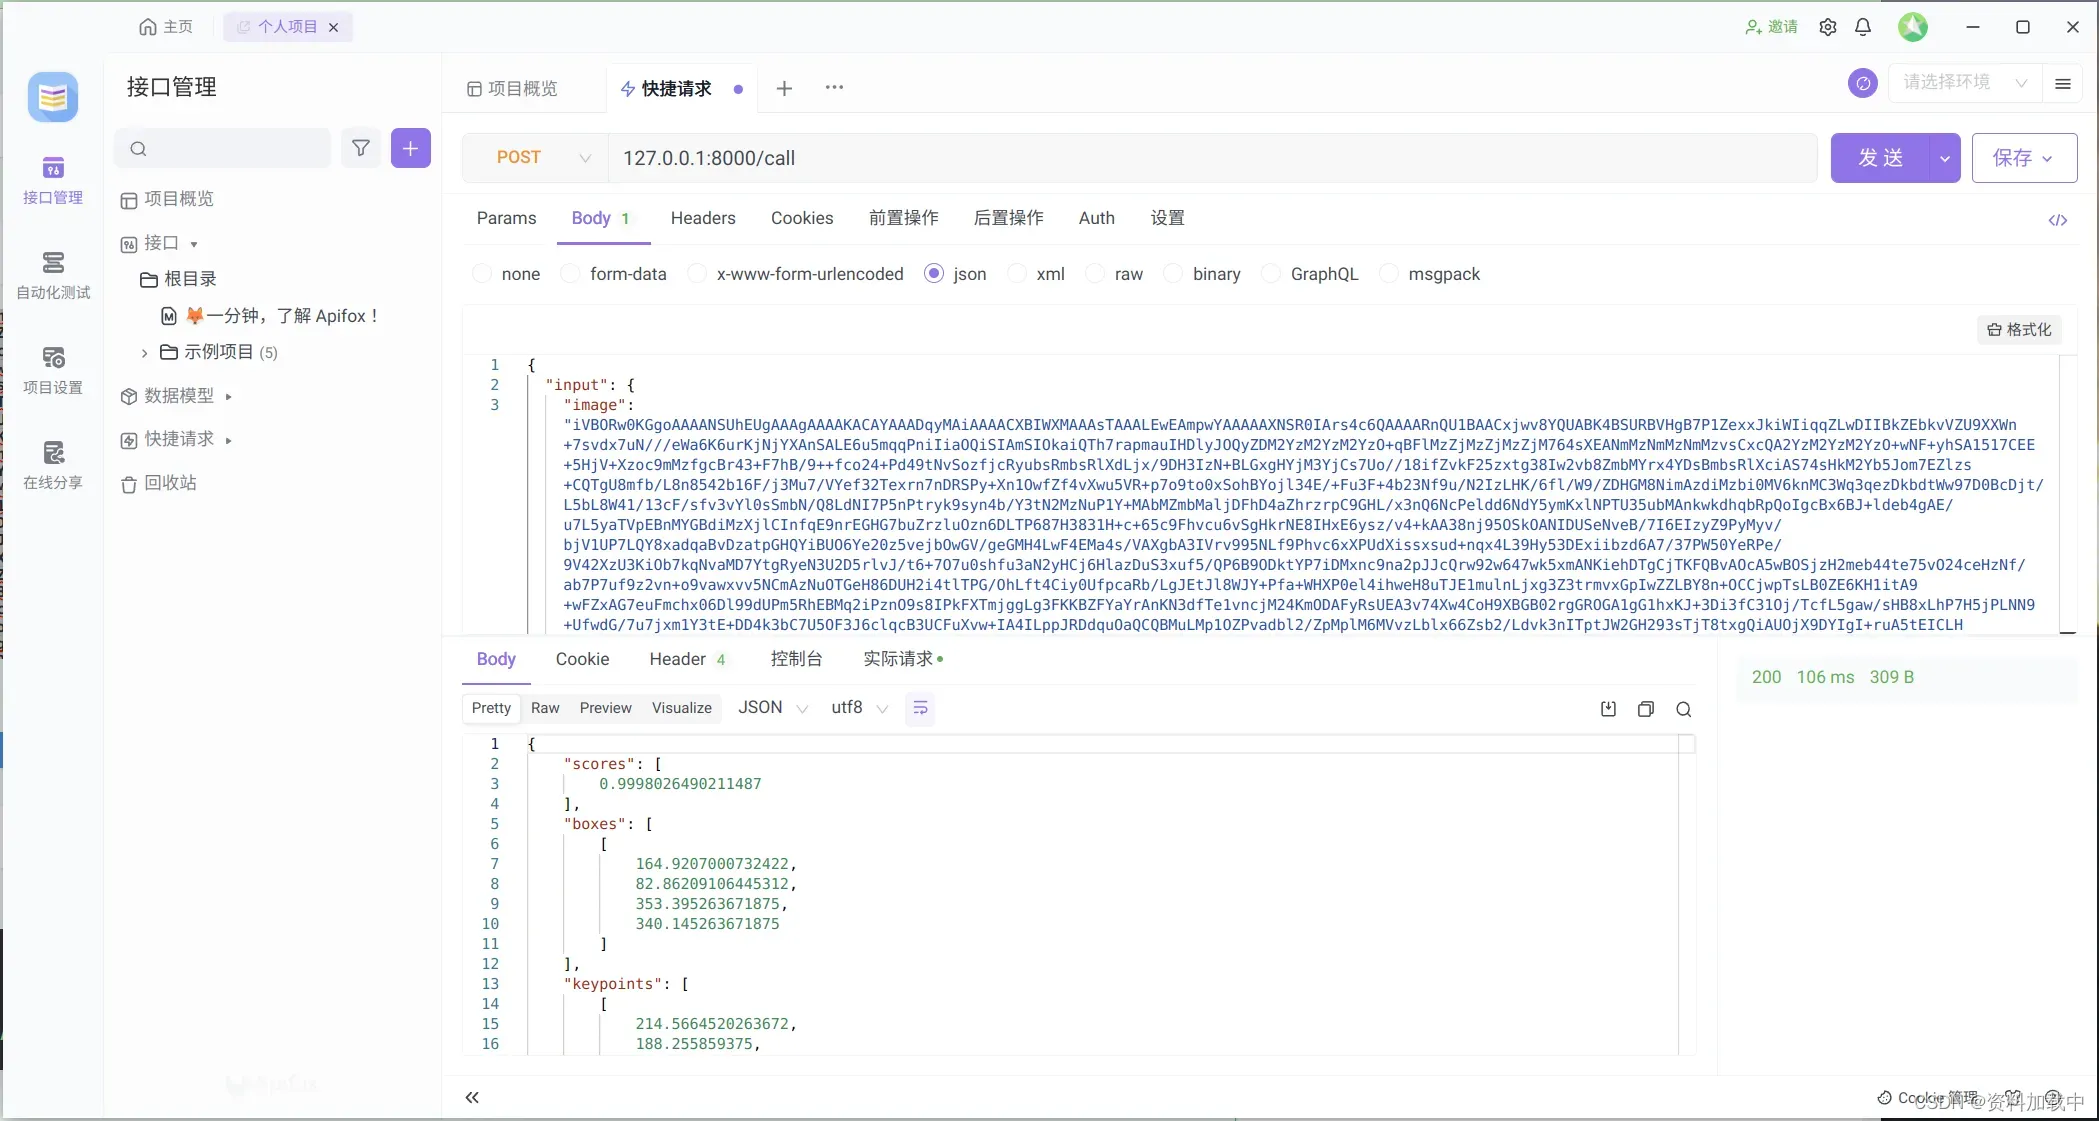
返回结果解释
{
    "scores": [
        0.9998026490211487
    ],
    "boxes": [
        [
            164.9207000732422,
            82.86209106445312,
            353.395263671875,
            340.145263671875
        ]
    ],
    "keypoints": [
        [
            214.5664520263672,
            188.255859375,
            303.5237121582031,
            190.91671752929688,
            256.9284362792969,
            242.95065307617188,
            223.42758178710938,
            283.54241943359375,
            287.28448486328125,
            286.402587890625
        ]
    ]
}
返回图像中人脸的分数,越大表示有人脸的可能性越大,boxes表示人脸的矩形框,左上角x,y坐标和右下角x,y坐标,keypoints返回左眼、右眼、鼻尖、左嘴角、右嘴角的坐标值x,y。
输入图片

根据boxes和keypoints画图
import cv2

# 读取图像
image = cv2.imread('0.png')

# 定义矩形框的坐标和大小

x, y, x1, y1 = 164,82,353,340
w = 353-164
h = 340-82

# 画矩形框
cv2.rectangle(image, (x, y), (x + w, y + h), (0, 255, 0), 2)

# 显示结果
# cv2.imshow('Rectangle', image)
# cv2.waitKey(0)
# cv2.destroyAllWindows()
cv2.imwrite('0_rectangle.png', image)
import cv2

# 读取图像
image = cv2.imread('0.png')


radius = 5  # 点的半径
color = (0, 0, 255)  # 点的颜色,通常使用BGR格式
thickness = -1  # 为了画一个实心圆,线条宽度设置为-1
keypoints = [214.5664520263672,
188.255859375,
303.5237121582031,
190.91671752929688,
256.9284362792969,
242.95065307617188,
223.42758178710938,
283.54241943359375,
287.28448486328125,
286.402587890625]
print(len(keypoints))
for i in range(0,len(keypoints),2):

    cv2.circle(image, (int(keypoints[i]),int(keypoints[i+1])), radius, color, thickness)

# 显示结果
# cv2.imshow('Point', image)
# cv2.waitKey(0)
# cv2.destroyAllWindows()
cv2.imwrite('0_keypoints.png', image)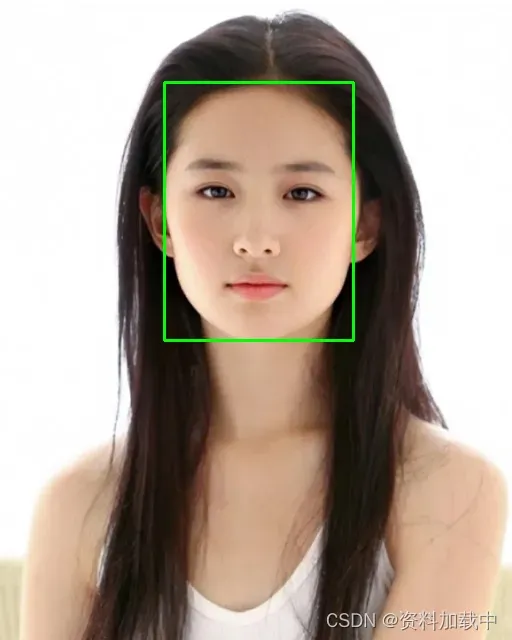

需要注意的是不同的任务请求体的内容不一样,需要明确每个任务的请求参数具体有哪些。
任务二:人脸融合
第二种任务,人脸融合,需要重启服务,将model_id和revision替换。
python server.py --model_id damo/cv_unet-image-face-fusion_damo --revision v1.3此时访问http://127.0.0.1/docs
执行一下describe方法
{
  "schema": {
    "task_name": "image-face-fusion",
    "schema": {
      "input": {
        "type": "object",
        "properties": {
          "template": {
            "type": "string",
            "description": "Base64 encoded image file or url string."
          },
          "user": {
            "type": "string",
            "description": "Base64 encoded image file or url string."
          }
        }
      },
      "parameters": {
        "type": "object",
        "properties": {
          "user": {
            "type": "object",
            "default": null
          }
        }
      },
      "output": {
        "type": "object",
        "properties": {
          "output_img": {
            "type": "string",
            "description": "The base64 encoded image."
          }
        }
      }
    }
  },
  "sample": null
}
input有两个参数,第一个是template,表示模版;第二个参数是user,表示用户的图片,最终的目的就是将用户的图片的脸替换到模版上
parameters参数一般使用默认的就行,不填,如果有特殊需求可自行尝试
output会返回一个换好脸图像的base64编码
请求体
{
  "input": {
    "template": "base64_template",
    "user":"bas64_user"
  }
}
template

User

Ourput

参考链接:
https://github.com/modelscope/modelscope/blob/master/modelscope/server/api_server.py
版权声明:本文为博主作者:资料加载中原创文章,版权归属原作者,如果侵权,请联系我们删除!
原文链接:https://blog.csdn.net/qq_44091004/article/details/135378474