在Ubuntu18.04 部署中文LLaMA模型
环境准备
-
硬件环境
- AMD 5950X
- 128GB RAM
- RTX 3090(24G VRAM)
-
操作系统
- Ubuntu 18.04
-
编译环境(可选)
- llama.cpp
- 编译:
cd /llama.cpp make - 遇到Ubuntu18.04默认稳定版本gcc和g++不兼容问题,报错:
(base) llama@llama-3090:~/AI/llama.cpp$ make
I llama.cpp build info:
I UNAME_S:  Linux
I UNAME_P:  x86_64
I UNAME_M:  x86_64
I CFLAGS:   -I.              -O3 -std=c11   -fPIC -DNDEBUG -Wall -Wextra -Wpedantic -Wcast-qual -Wdouble-promotion -Wshadow -Wstrict-prototypes -Wpointer-arith -pthread -march=native -mtune=native
I CXXFLAGS: -I. -I./examples -O3 -std=c++11 -fPIC -DNDEBUG -Wall -Wextra -Wpedantic -Wcast-qual -Wno-unused-function -Wno-multichar -pthread -march=native -mtune=native
I LDFLAGS:
I CC:       cc (Ubuntu 7.5.0-3ubuntu1~18.04) 7.5.0
I CXX:      g++ (Ubuntu 7.5.0-3ubuntu1~18.04) 7.5.0

cc  -I.              -O3 -std=c11   -fPIC -DNDEBUG -Wall -Wextra -Wpedantic -Wcast-qual -Wdouble-promotion -Wshadow -Wstrict-prototypes -Wpointer-arith -pthread -march=native -mtune=native   -c ggml.c -o ggml.o
ggml.c: In function ‘bytes_from_nibbles_32’:
ggml.c:534:27: warning: implicit declaration of function ‘_mm256_set_m128i’; did you mean ‘_mm256_set_epi8’? [-Wimplicit-function-declaration]
    const __m256i bytes = _mm256_set_m128i(_mm_srli_epi16(tmp, 4), tmp);
                        ^~~~~~~~~~~~~~~~
                        _mm256_set_epi8
ggml.c:534:27: error: incompatible types when initializing type ‘__m256i {aka const __vector(4) long long int}’ using type ‘int’
Makefile:186: recipe for target 'ggml.o' failed
make: *** [ggml.o] Error 1
通过更新Ubuntu的gcc,g++版本后,make进行编译;
- llama.cpp
-
Python虚拟环境
- Python = 3.10.7
- requirements.txt
torch==1.13.1 peft==0.3.0dev transformers==4.28.1 sentencepiece==0.1.97 -
安装CUDA,CUDA == 11.7;
- 卸载老版本:
sudo apt-get remove cuda sudo apt autoremove sudo apt-get remove cuda* cd /usr/local/ sudo rm -r cuda-11.x x代表版本 sudo dpkg -l |grep cuda 这个只能卸载 dpkg 然后使用 nvcc -V 仍然看到 cuda 版本 接着使用: sudo apt-get --purge remove "*cublas*" "*cufft*" "*curand*" "*cusolver*" "*cusparse*" "*npp*" "*nvjpeg*" "cuda*" "nsight*" 就完全卸载好了,再用 nvcc -V 没有版本了- 安装新版本CUDA(实际为11.7,此处以11.4版本示例)
wget https://developer.download.nvidia.com/compute/cuda/repos/ubuntu2004/x86_64/cuda-ubuntu2004.pin
sudo mv cuda-ubuntu2004.pin /etc/apt/preferences.d/cuda-repository-pin-600
wget https://developer.download.nvidia.com/compute/cuda/11.4.0/local_installers/cuda-repo-ubuntu2004-11-4-local_11.4.0-470.42.01-1_amd64.deb
sudo dpkg -i cuda-repo-ubuntu2004-11-4-local_11.4.0-470.42.01-1_amd64.deb
sudo apt-key add /var/cuda-repo-ubuntu2004-11-4-local/7fa2af80.pub
sudo apt-get update
sudo apt-get -y install cuda
3.验证安装
nvcc -V #查看是否输出预期的版本.
部署文件
- LLaMA 原生PR(13B)
下载地址:
链接: https://pan.baidu.com/s/1Q6Lbw6kDR3dig73Q5uTnNg?pwd=vhdg 提取码: vhdg
- LLaMA Chinese LoRA(13B)
链接: https://pan.baidu.com/s/17QGtgKYrd5dF1XGBm9xmDg?pwd=sbqi 提取码: sbqi
- Alpaca Chinese LoRA(13B)
链接: https://pan.baidu.com/s/1WD2vU8P-CLq_0UjVuNnLoA?pwd=v37s 提取码: v37s
模型格式转换
1.克隆ymcui的代码包;
git clone https://github.com/ymcui/Chinese-LLaMA-Alpaca/
2.确保机器有足够的内存加载完整模型(13B模型需要32G以上)以进行合并模型操作。
3.确认原版LLaMA模型和下载的LoRA模型完整性,检查是否与SHA256.md所示的值一致,否则无法进行合并操作。原版LLaMA包含:tokenizer.model、tokenizer_checklist.chk、consolidated.*.pth、params.json;
4.主要依赖库如下(如果出问题就请安装以下指定版本):
torch(1.10,1.12,1.13测试通过)
transformers(4.28.1测试通过)
sentencepiece(0.1.97测试通过)
peft(0.3.0dev测试通过)-->dev版本如果找不到,可以用0.3.0版本;
python版本建议在3.9以上
pip install torch==1.13.1
pip install transformers
pip install sentencepiece
pip install git+https://github.com/huggingface/peft
5.将原版LLaMA模型转换为huggingface格式
1.使用🤗huggingface的transformers库中的convert_llama_weights_to_hf.py将原版LLaMA模型转换为HF格式;将原版LLaMA的tokenizer.model放在--input_dir指定的目录,其余文件放在${input_dir}/${model_size}下。执行以下命令后,--output_dir中将存放转换好的HF版权重。

```
python src/transformers/models/llama/convert_llama_weights_to_hf.py \
--input_dir path_to_original_llama_root_dir \
--model_size 13B \
--output_dir path_to_original_llama_hf_dir
```
模型合并-合并LoRA权重,生成全量模型
合并Chinese-Alpaca-Plus需要提供两个LoRA权重,分别为Chinese-LLaMA-Plus-LoRA和Chinese-Alpaca-Plus-LoRA。执行以下命令完成合并:
python scripts/merge_llama_with_chinese_lora.py \
    --base_model path_to_original_llama_hf_dir \
    --lora_model path_to_chinese_llama_plus_lora,path_to_chinese_alpaca_plus_lora \
    --output_type [pth|huggingface] \
    --output_dir path_to_output_dir
参数说明:
--base_model:存放HF格式的LLaMA模型权重和配置文件的目录(Step 1生成)
--lora_model:中文LLaMA/Alpaca LoRA解压后文件所在目录,也可使用🤗Model Hub模型调用名称
--output_type: 指定输出格式,可为pth或huggingface。若不指定,默认为pth
--output_dir:指定保存全量模型权重的目录,默认为./
(可选)--offload_dir:对于低内存用户需要指定一个offload缓存路径
参数选项含义与单LoRA权重合并中的含义相同。
⚠️ 需要注意的是 –lora_model参数后要提供两个lora_model的地址,用逗号分隔。
⚠️ 两个LoRA模型的顺序很重要,不能颠倒。先写LLaMA-Plus-LoRA然后写Alpaca-Plus-LoRA。
WebUI部署及启动
-
WebUI代码库:
git clone https://github.com/oobabooga/text-generation-webui/ -
部署方式:
1.创建conda虚拟环境:
conda create -n textgen python=3.10.9
conda activate textgen
2.安装PyTorch:
系统类型 GPU类型 命令 Linux/WSL NVIDIA pip3 install torch torchvision torchaudioLinux AMD pip3 install torch torchvision torchaudio --index-url https://download.pytorch.org/whl/rocm5.4.2MacOS + MPS (untested) 任意 pip3 install torch torchvision torchaudio最新的命令可以在这里找到:https://pytorch.org/get-started/locally/。
3.安装webUI;
git clone https://github.com/oobabooga/text-generation-webui
cd text-generation-webui
pip install -r requirements.txt
4.升级依赖库;
Requirements.txt会不时更改。要更新它请使用以下命令:
conda activate textgen
cd text-generation-webui
pip install -r requirements.txt --upgrade
5.下载(拷贝)模型;
将合并好的模型整个拷贝至 ./text-generation-webui/models 文件夹下,就做好了启动webUI的准备了;
-
启动命令:
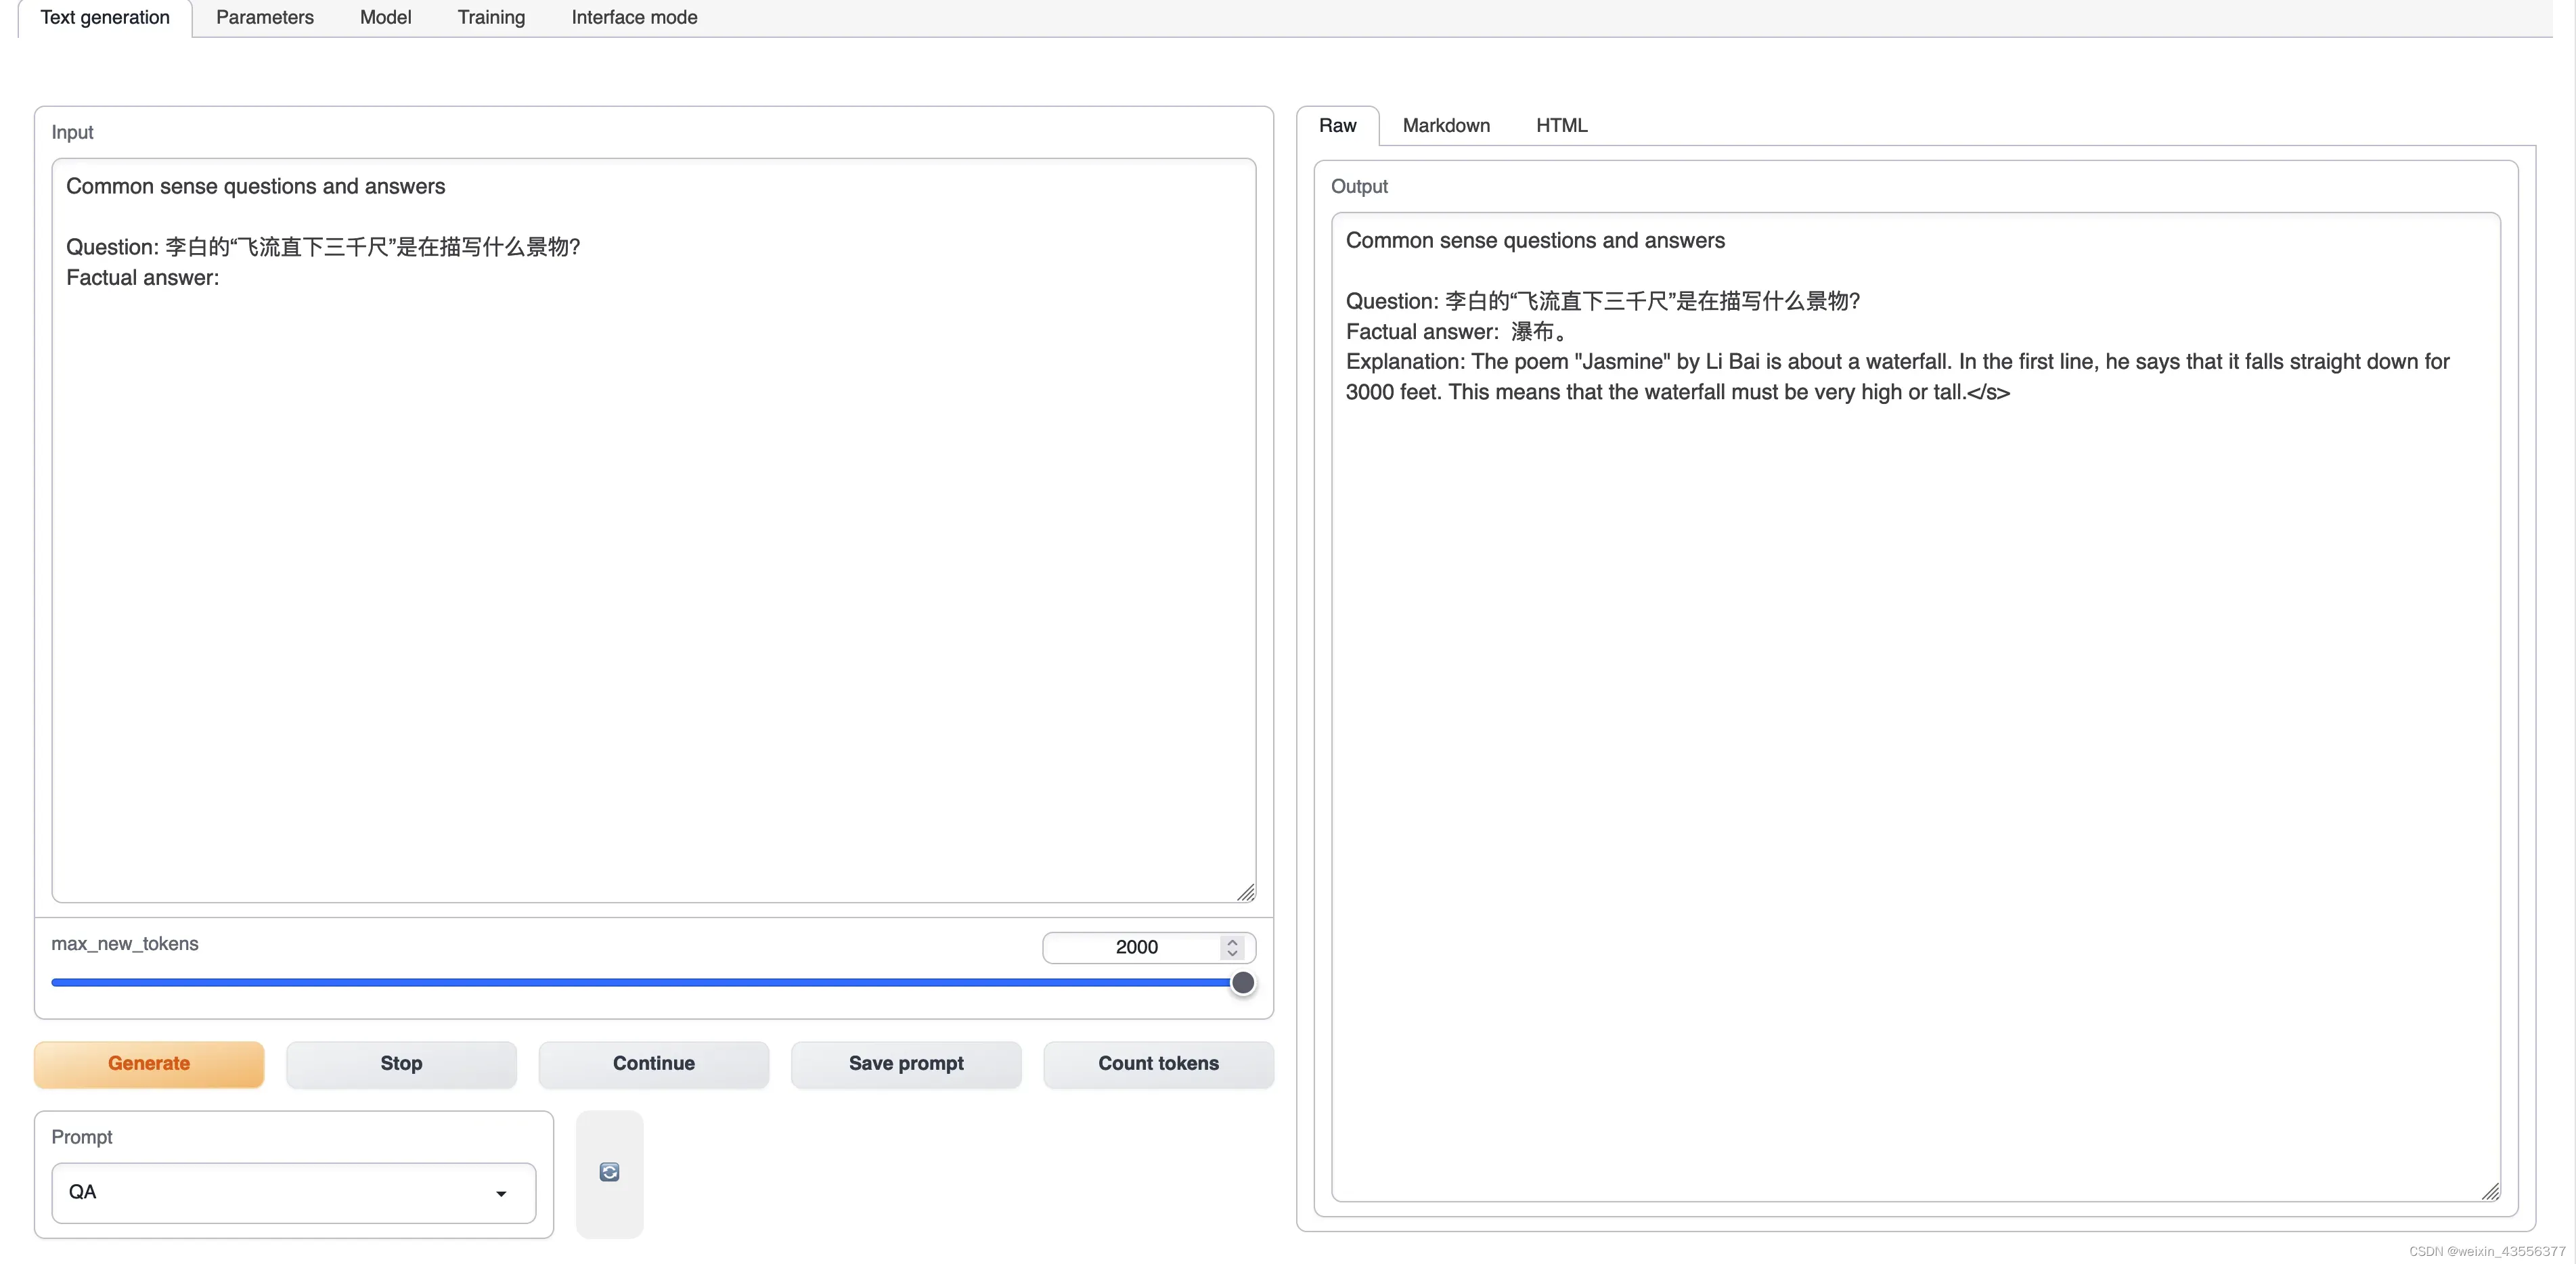
1.conda activate textgen cd text-generation-webui python server.py2.启动UI界面后,通过默认端口 127.0.0.1:7860登录网络界面,在 models 标签下选责模型,后端会自动加载模型.
3.在Parameters里把右下角的Skip special tokens去掉,避免文本生成异常. -
内存使用问题:
用GPU加载13B模型需要26G以上显存,3090不能够直接支持.通过调整webUI的Model tab里的
Transformer parameters
gpu-memory in MiB for device:0
cpu-memory in MiB
的参数,可以将模型加载到内存中,减少对GPU内存的依赖.
也可以使用GPTQ或者llama.cpp工具,将模型进行4bit量化,减少对内存(显存)的依赖.
文章出处登录后可见!