卷积神经网络识别人脸项目的详细过程
整个项目需要的准备文件:
下载链接:
链接:https://pan.baidu.com/s/1WEndfi14EhVh-8Vvt62I_w
提取码:7777
链接:https://pan.baidu.com/s/10weqx3r_zbS5gNEq-xGrzg
提取码:7777
1、模型推理文件
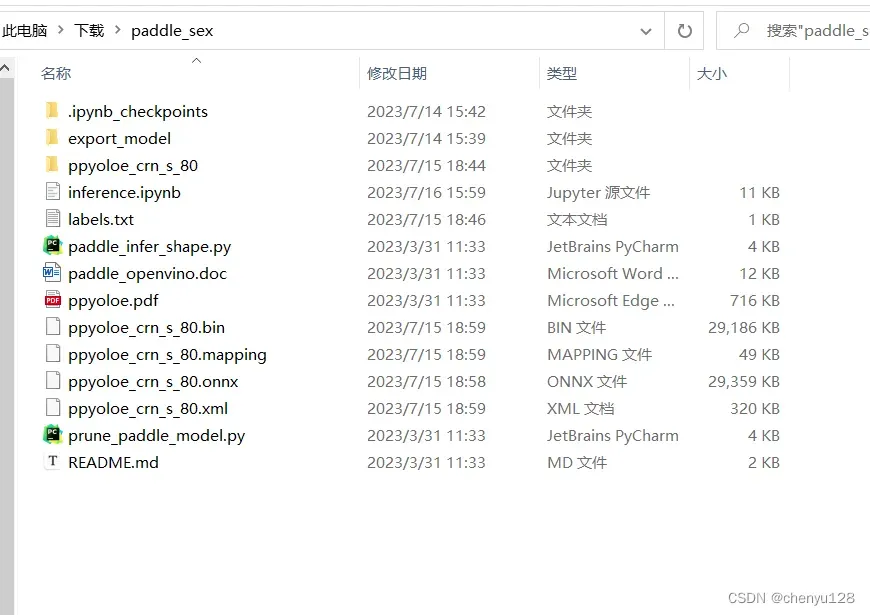
2、模型转换文件
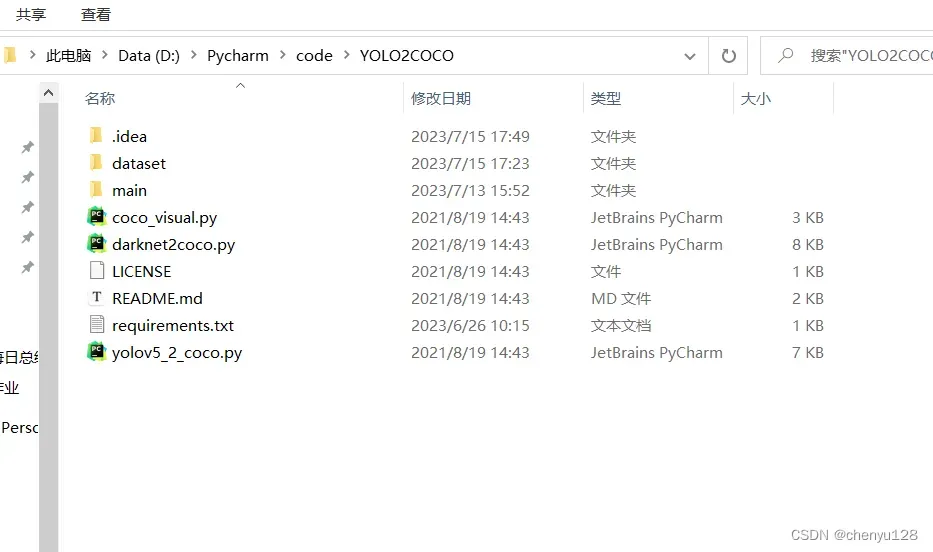
1、数据集准备
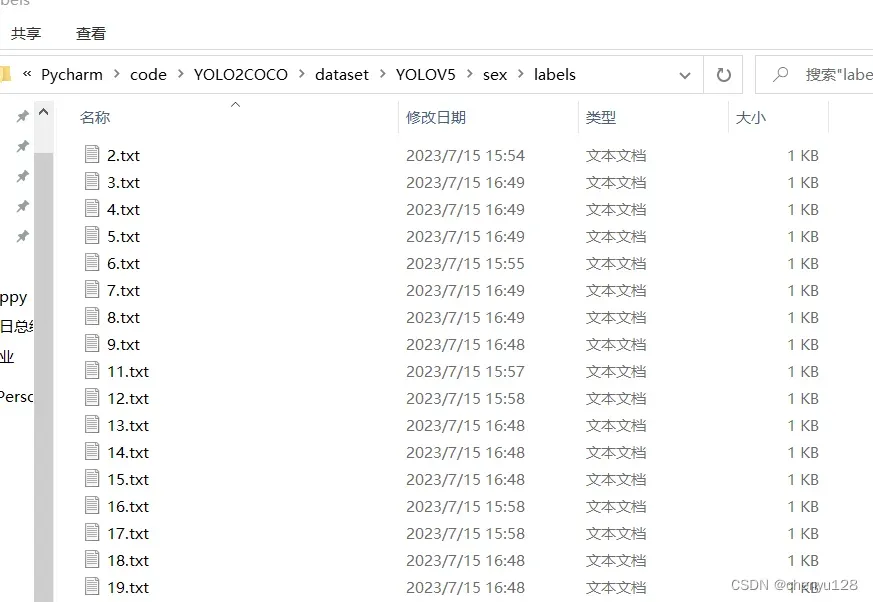
数据集的文件夹格式如下图:一共两个文件夹
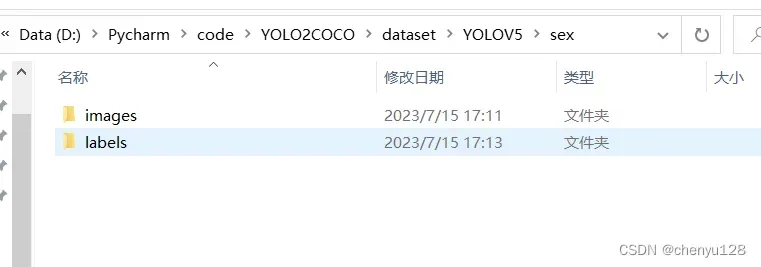
images文件夹装所有的图片,图片需随机打乱和编号
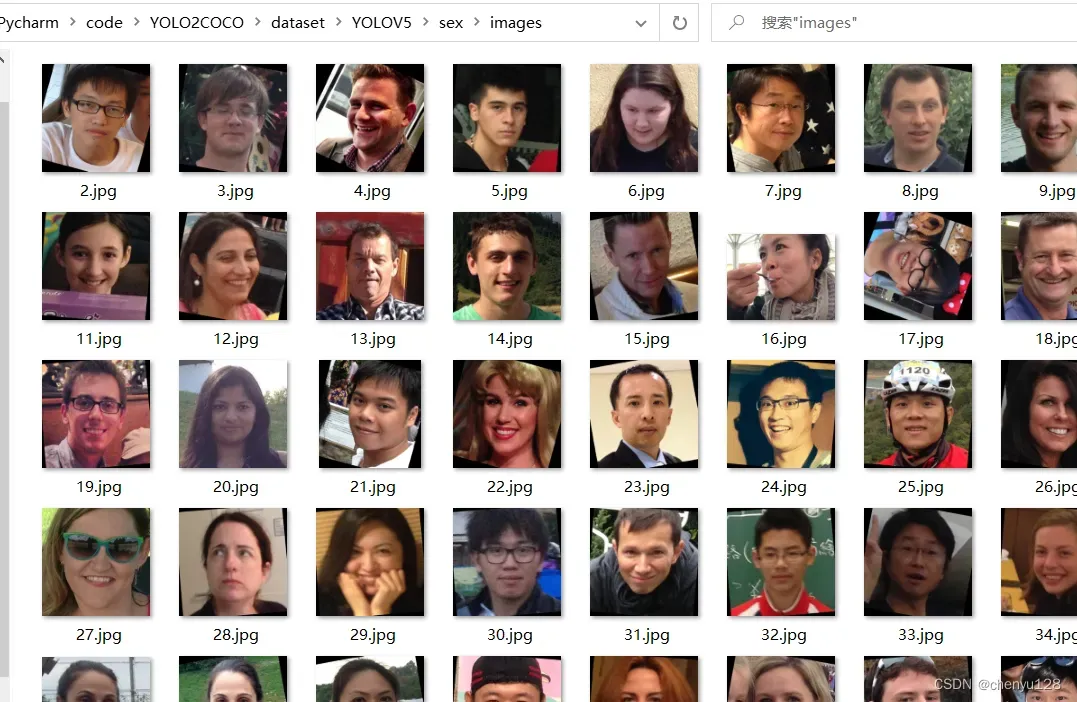
labels文件夹内是对图片进行打标签操作的标签
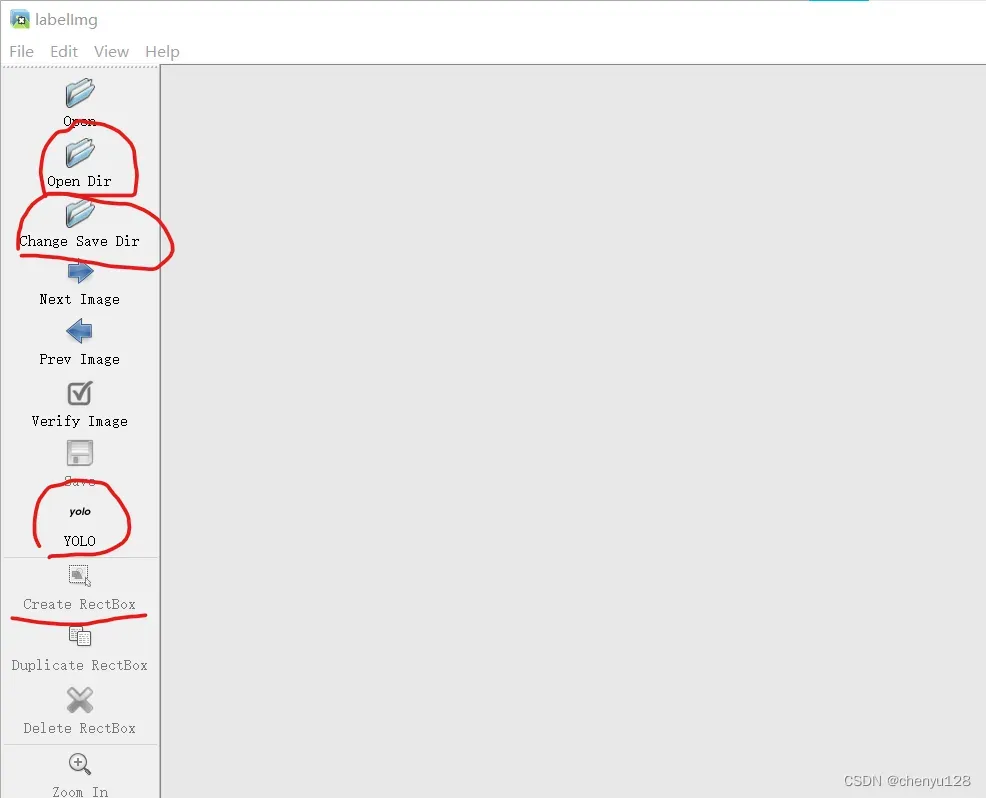
打标签使用的是labelimg,安装过程可自行百度
open Dir是打开存放图片的路径,我们这里就是images文件夹
Change Save Dir是存放标签的路径,我们这里选择labels文件夹
打标签模式选择YOLO
然后点击Create RectBox选择关键位置就可以打标签了。
然后是上一级文件夹格式:
其中sex文件夹包括了上面两个文件夹
classes.txt是打标签是生成的,包括了标签的顺序和种类,这里的男女识别classes.txt内部就是:
man

woman
gen.py是用于随机提取出训练集和测试集
运行gen.py后,生成了train.txt,val.txt两个txt
train.txt就是训练集,包括了训练集的图片路径名称
val.txt同理
![[外链图片转存失败,源站可能有防盗链机制,建议将图片保存下来直接上传(img-pVbSEcox-1689495250366)(C:\Users\vers\AppData\Roaming\Typora\typora-user-images\image-20230716111500162.png)]](https://aitechtogether.com/wp-content/uploads/2023/08/de023b73-cd42-4c88-91bd-603fe2d496f4.webp)
然后来到主文件夹中:
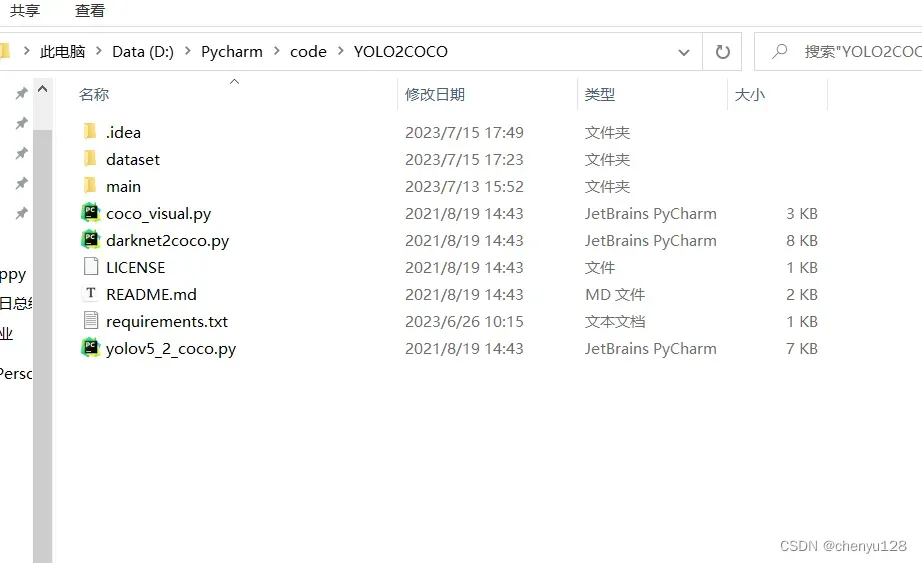
点击路径,运行cmd:

运行python yolov5_2_coco.py ,生成的文件夹保存到相应路径中
python yolov5_2_coco.py --dir_path D:\Pycharm\code\YOLO2COCO\dataset\YOLOV5

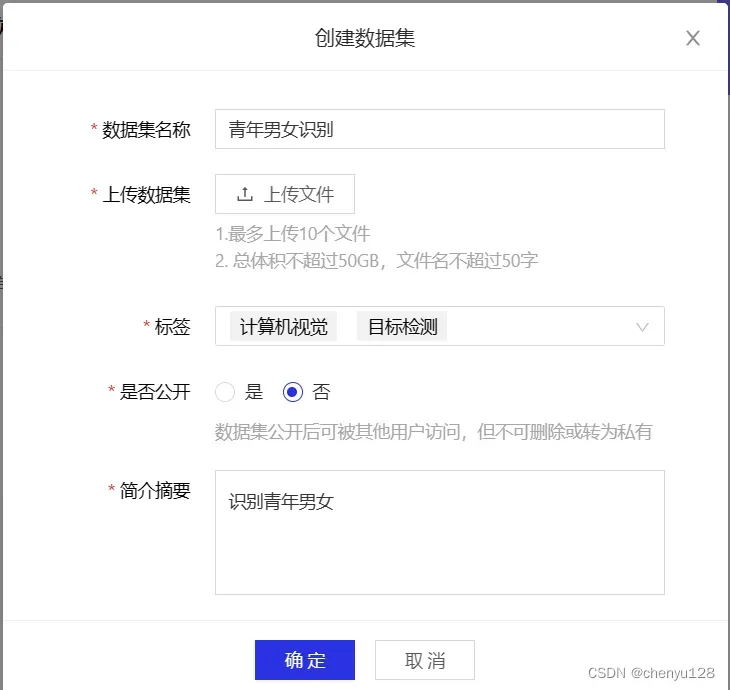
打包数据集,然后压缩后上传到百度飞桨ai数据集平台
2、模型训练
点击创建项目:
![[外链图片转存失败,源站可能有防盗链机制,建议将图片保存下来直接上传(img-dUdGgNWz-1689495250370)(C:\Users\vers\AppData\Roaming\Typora\typora-user-images\image-20230716121747564.png)]](https://aitechtogether.com/wp-content/uploads/2023/08/fb363014-9625-49e6-8aa8-39e4f91076aa.webp)

项目创建成功后,启动环境,选择一个GPU:
![[外链图片转存失败,源站可能有防盗链机制,建议将图片保存下来直接上传(img-cpE6hFmC-1689495250371)(C:\Users\vers\AppData\Roaming\Typora\typora-user-images\image-20230716122037028.png)]](https://aitechtogether.com/wp-content/uploads/2023/08/7c4a47de-3b32-4f68-8e80-e288501e8ac3.webp)
新建一个notebook文件,然后重命名为ppyoloe
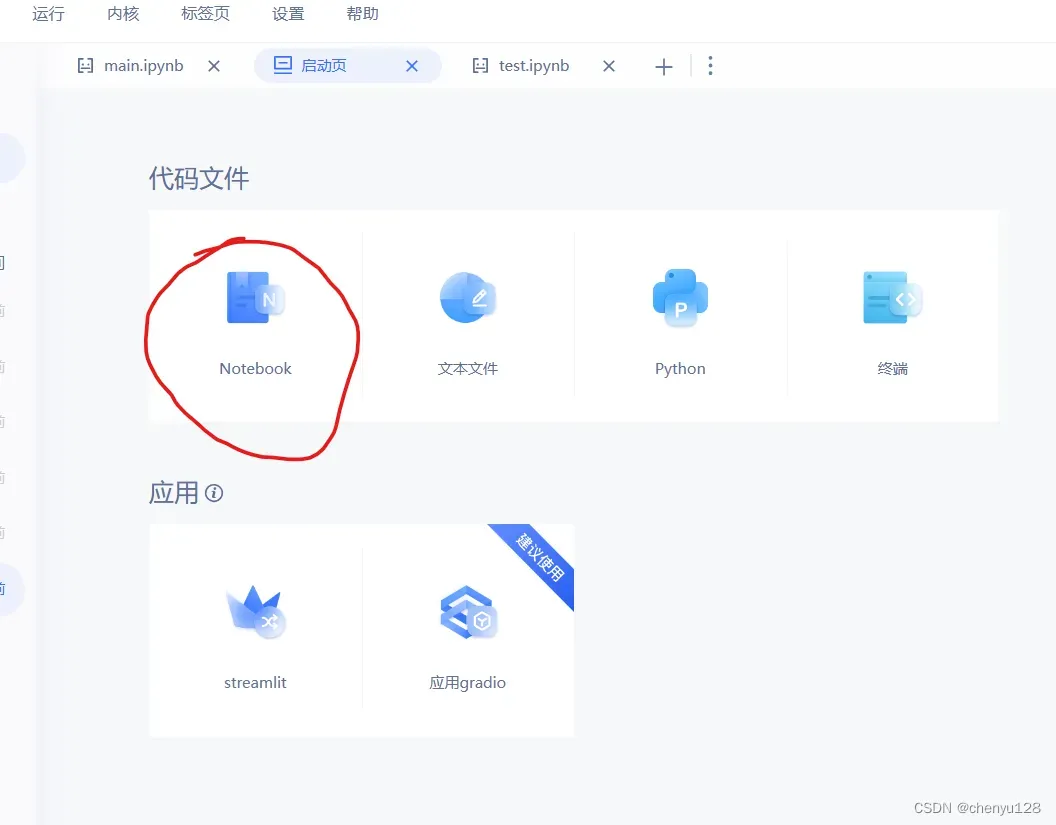
上传PaddleYOLO文件
![[外链图片转存失败,源站可能有防盗链机制,建议将图片保存下来直接上传(img-0lJYBIUJ-1689495250372)(C:\Users\vers\AppData\Roaming\Typora\typora-user-images\image-20230716122458800.png)]](https://aitechtogether.com/wp-content/uploads/2023/08/df19113a-34d3-4f42-b935-2c4a37265ef2.webp)
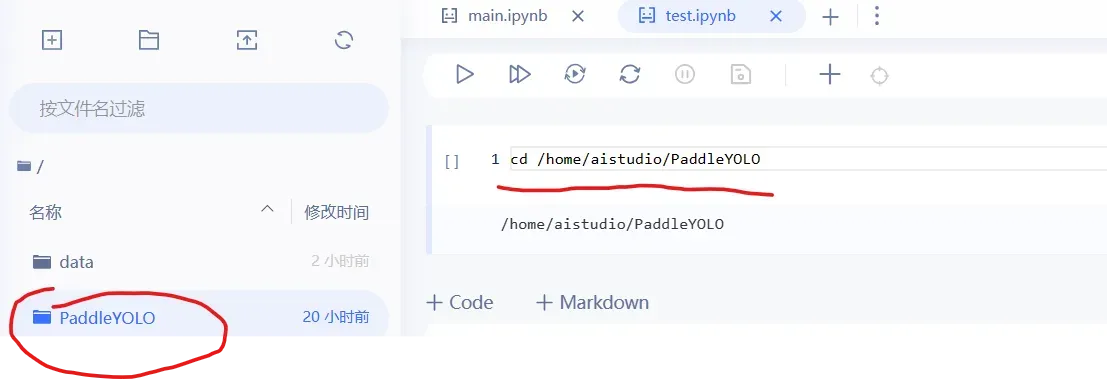
然后将上传的文件重命名为PaddleYOLO
然后进入此文件夹
cd /home/aistudio/PaddleYOLO
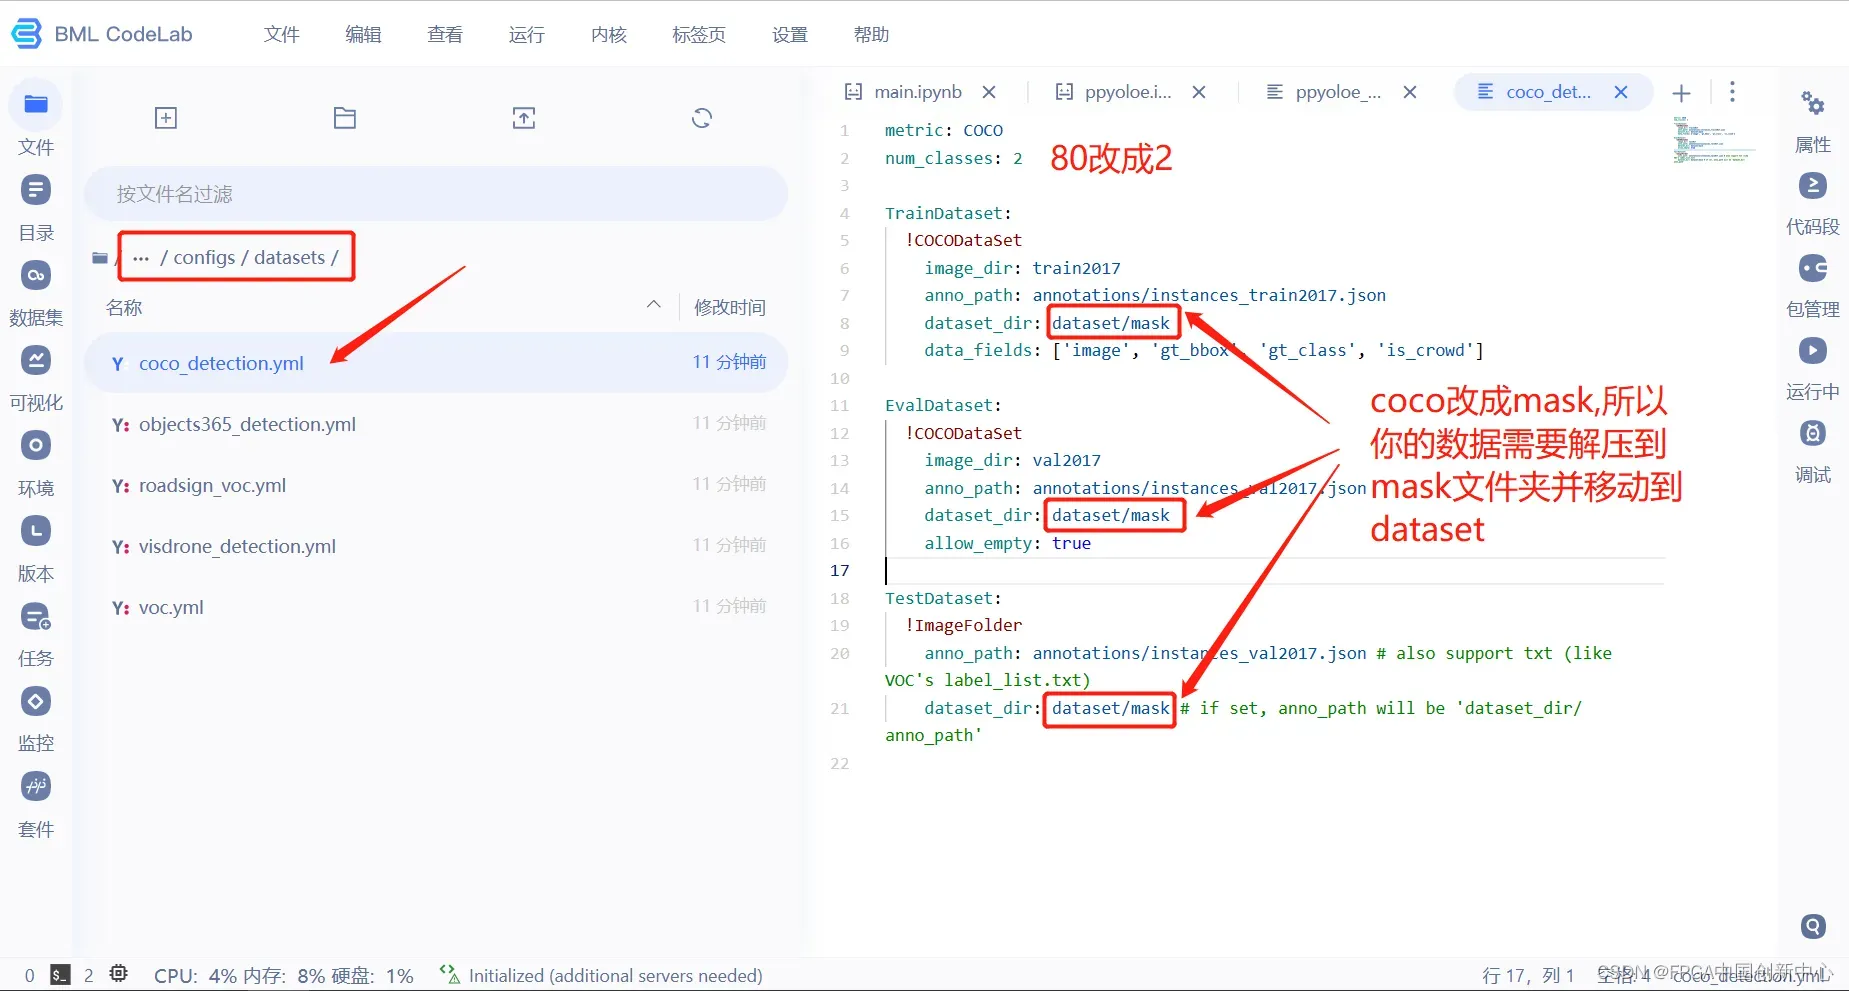
然后根据自己的模型实际情况,修改下图文件,num_classes是分类的种类,这里一共两种,所以改为2
dataset/sex是存放数据的位置,按实际情况修改,我这里是男女识别数据集,所以文件夹命名为sex
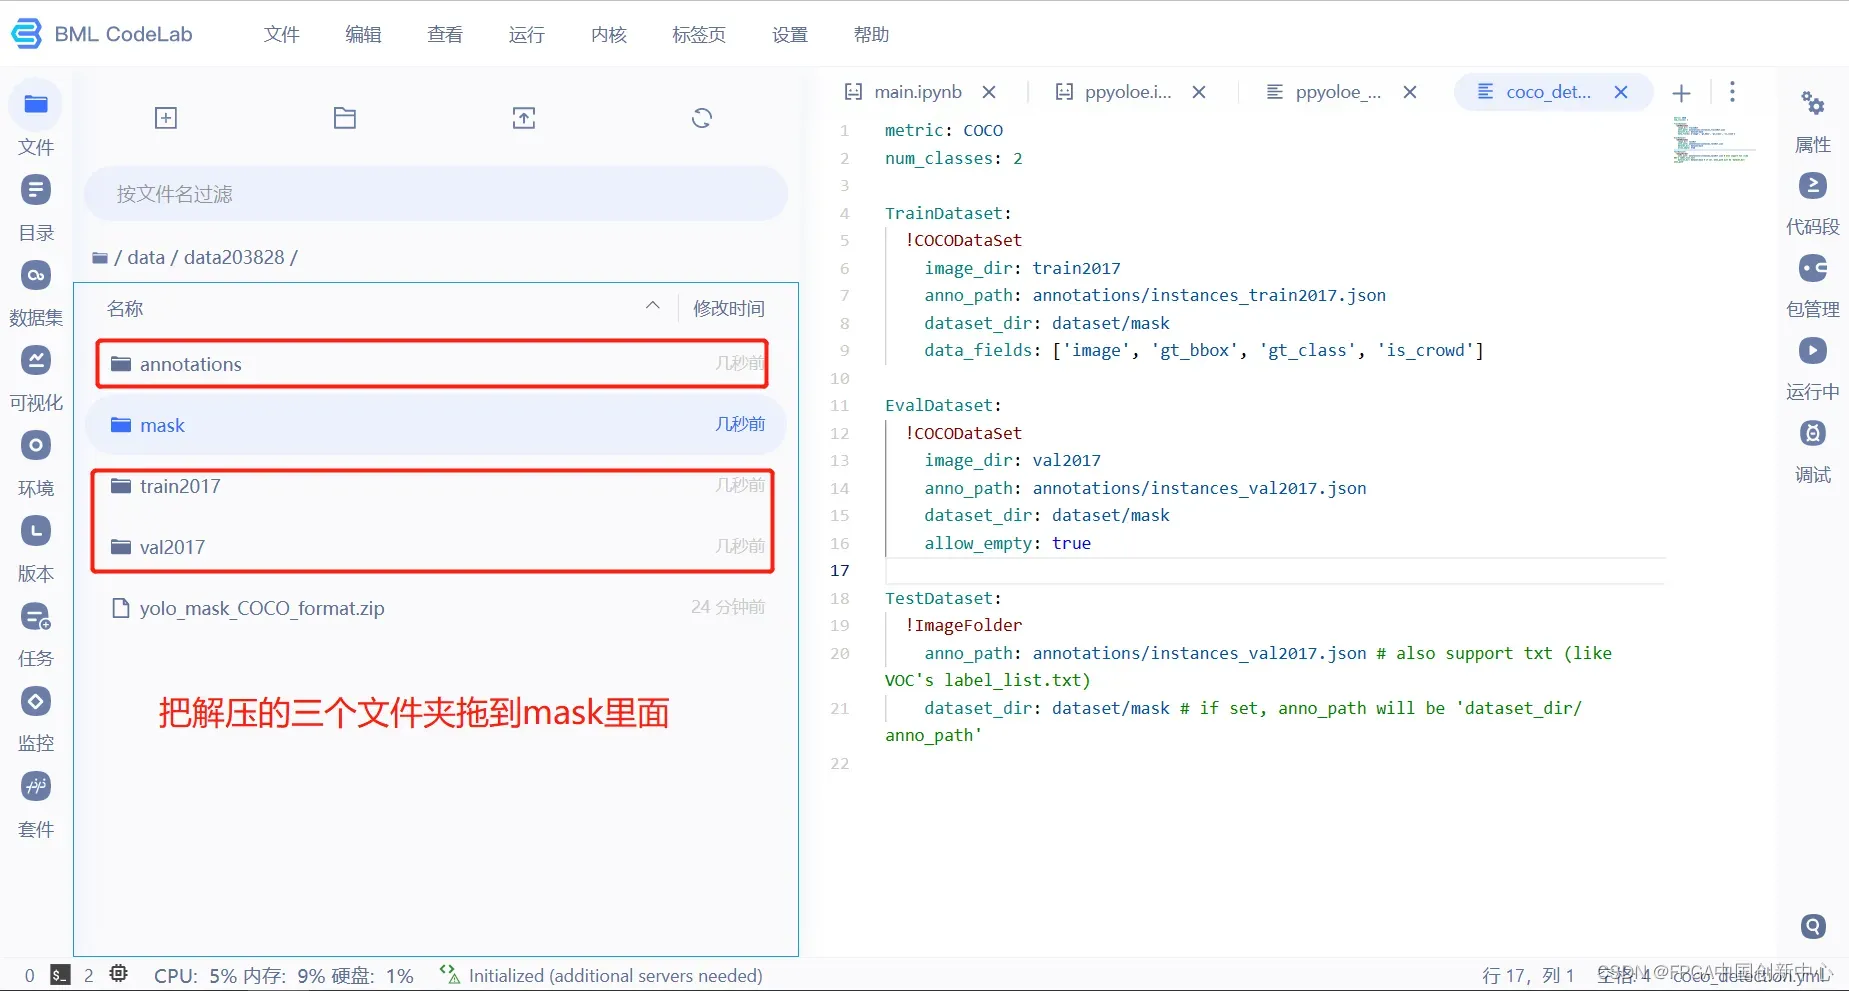
因为配置文件中要求数据放到dataset/sex里面,所以需要把数据集放置到此处。
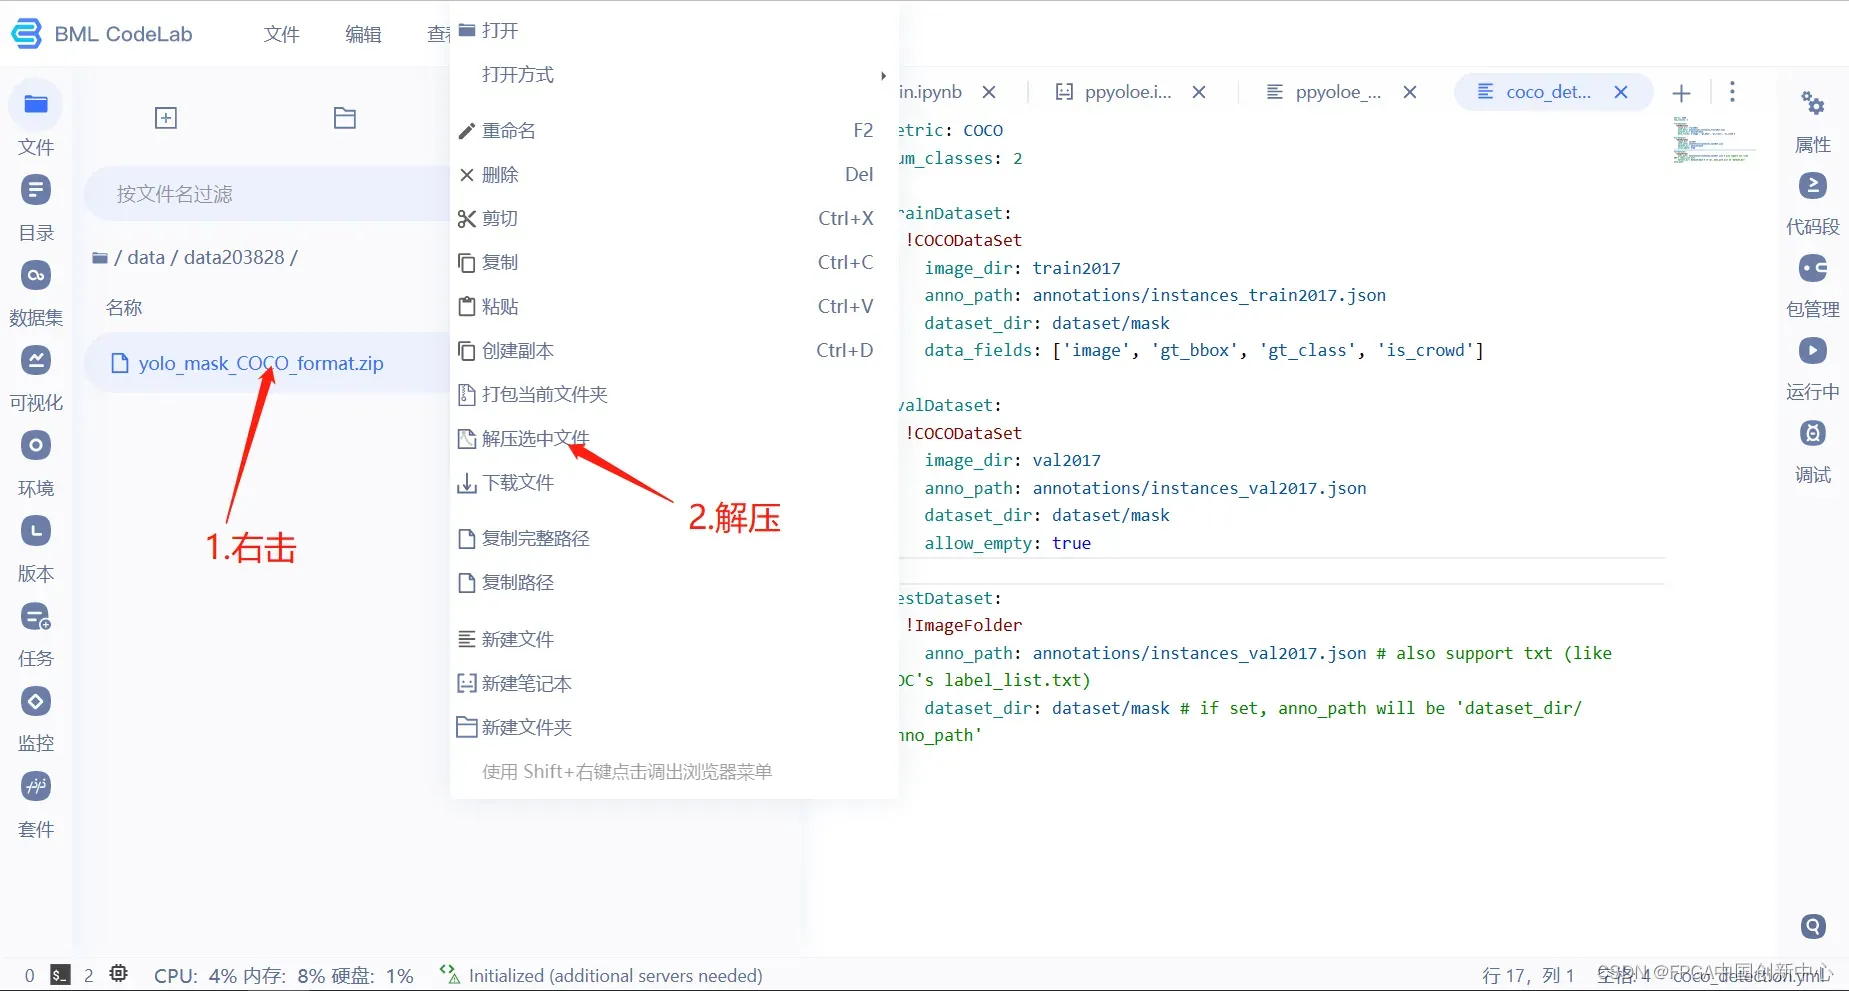
新建一个mask文件夹,把解压过后的数据文件夹拖到mask里面。
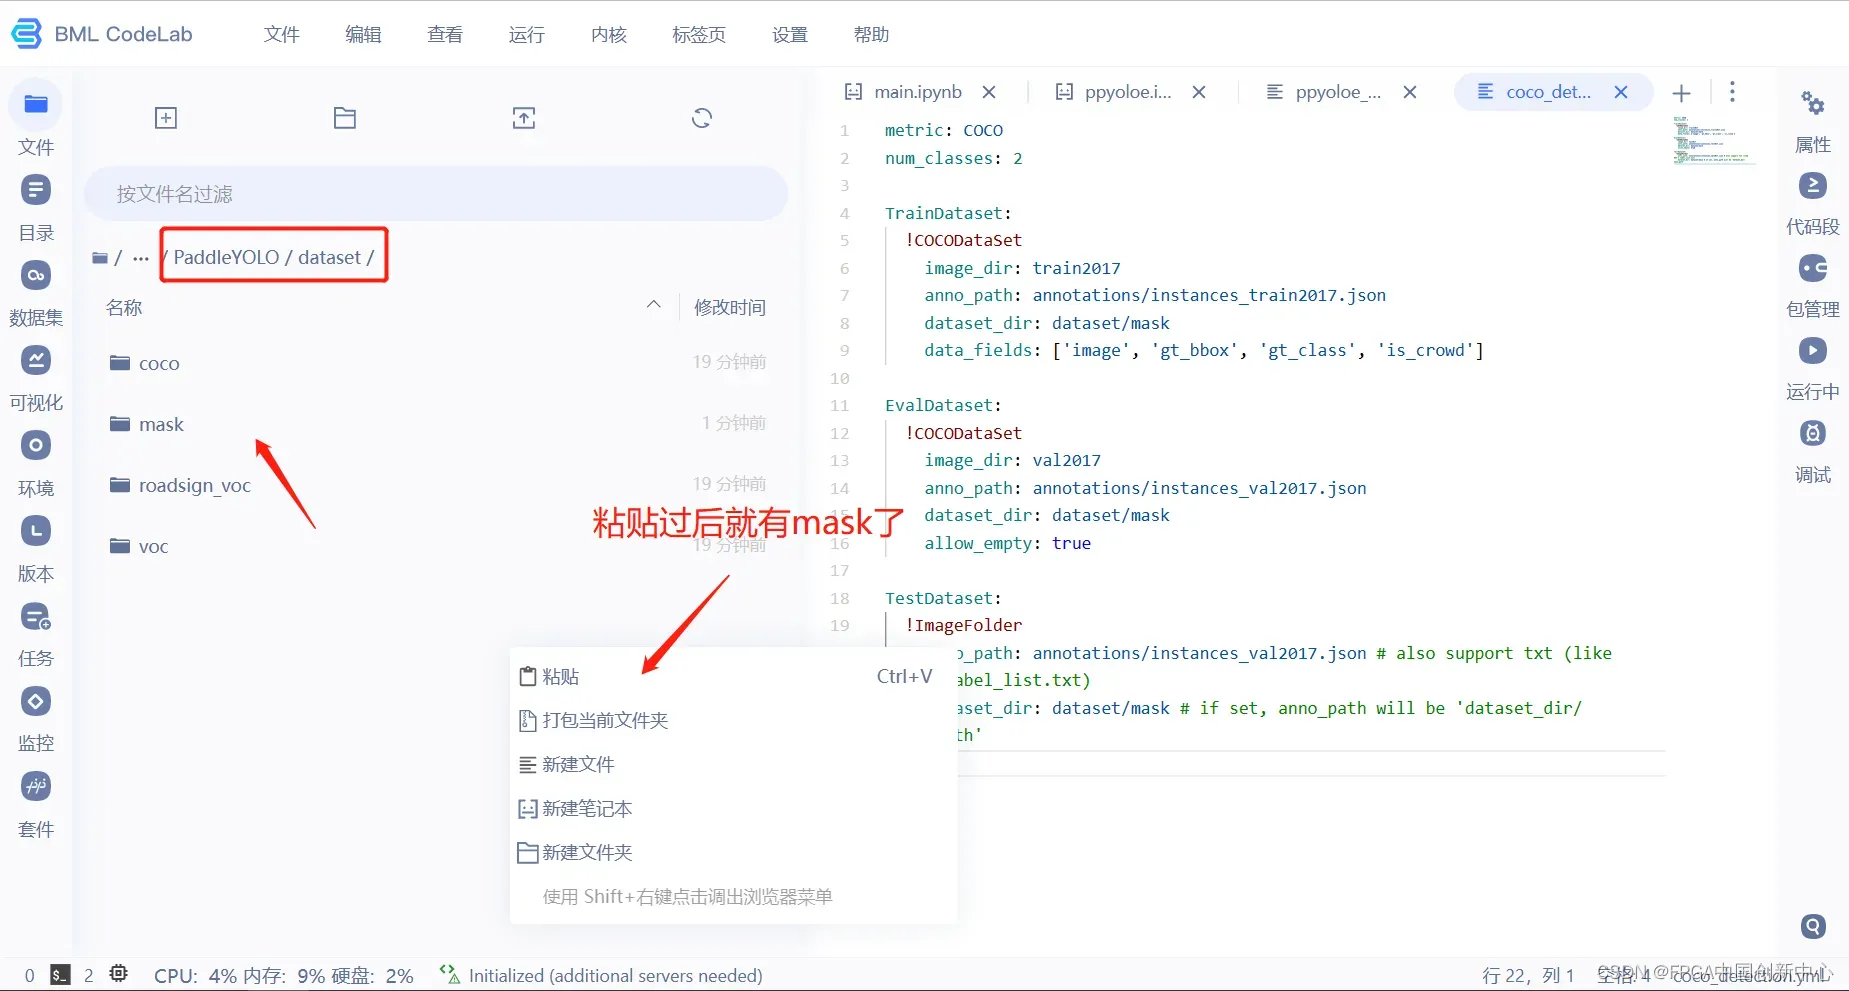
粘贴到dataset文件夹下,注意红色框的路径。
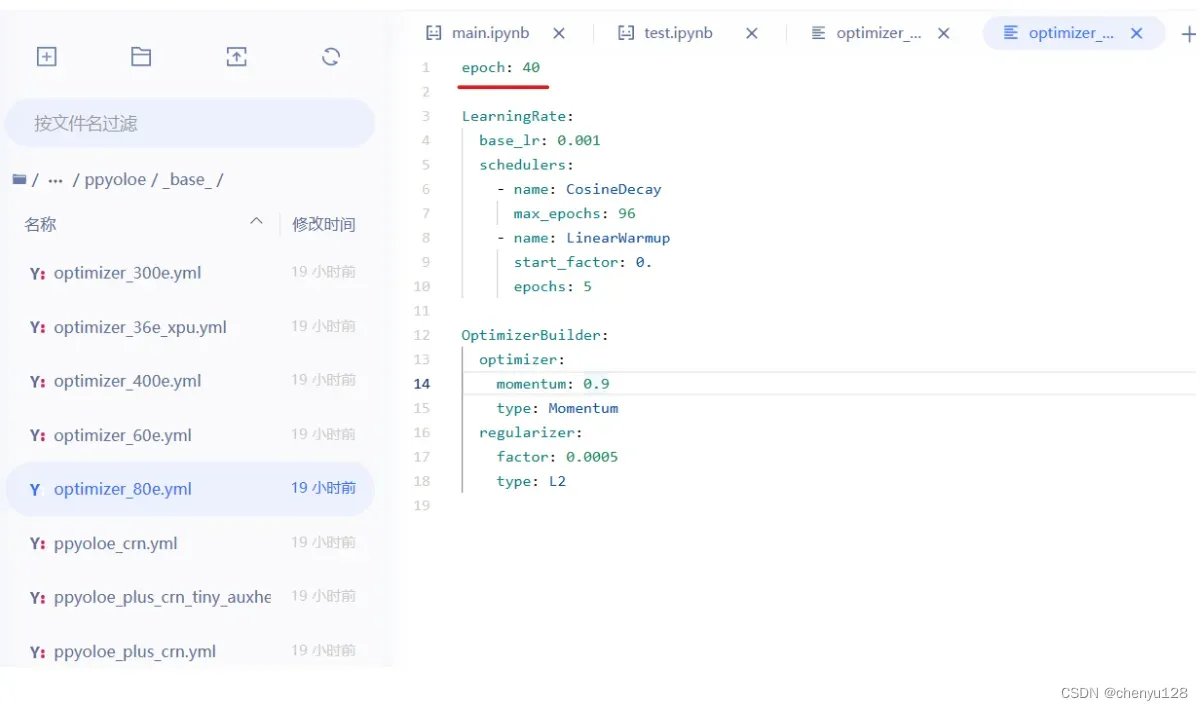
如果想要修改迭代次数,在此处修改:
/home/aistudio/PaddleYOLO/configs/ppyoloe/_base_/optimizer_80e.yml
epoch: 40 表示迭代次数为40次
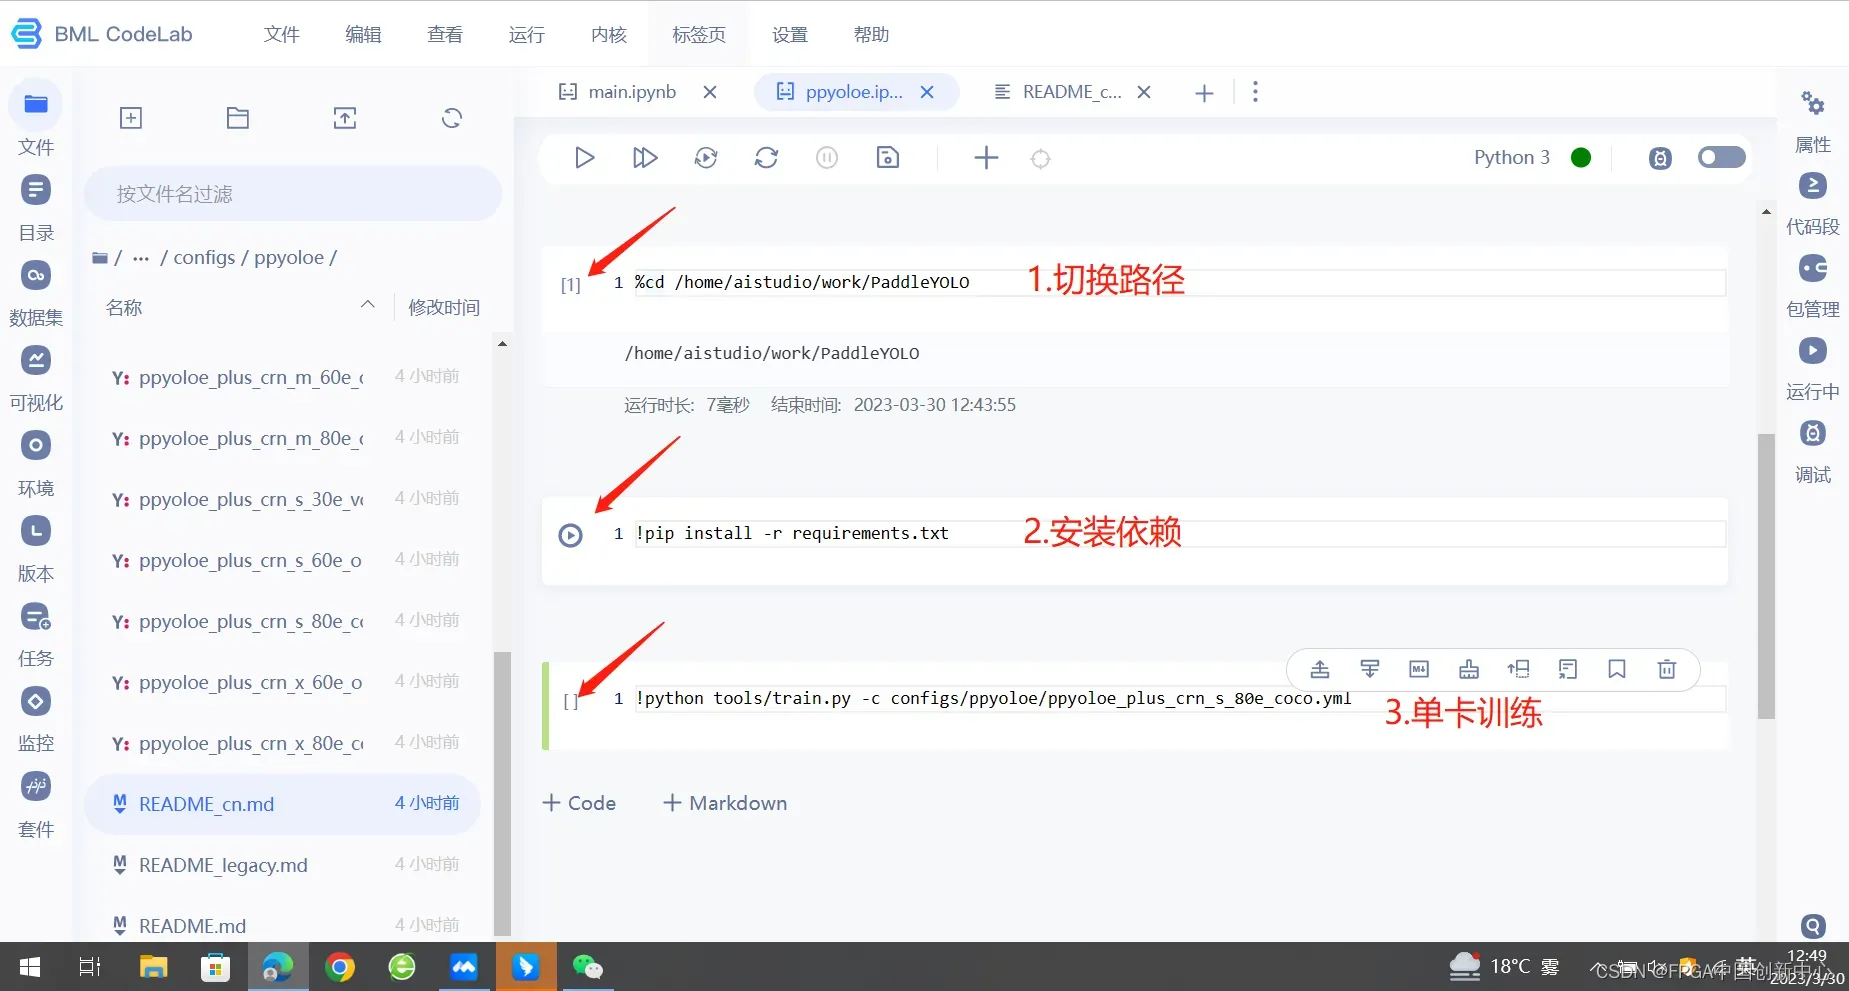
输入下列代码,开始训练
第二行代码如果出错,权限不够,后面加上 –user
pip install -r requirements.txt --user
模型训练标志,此时是0 epoch
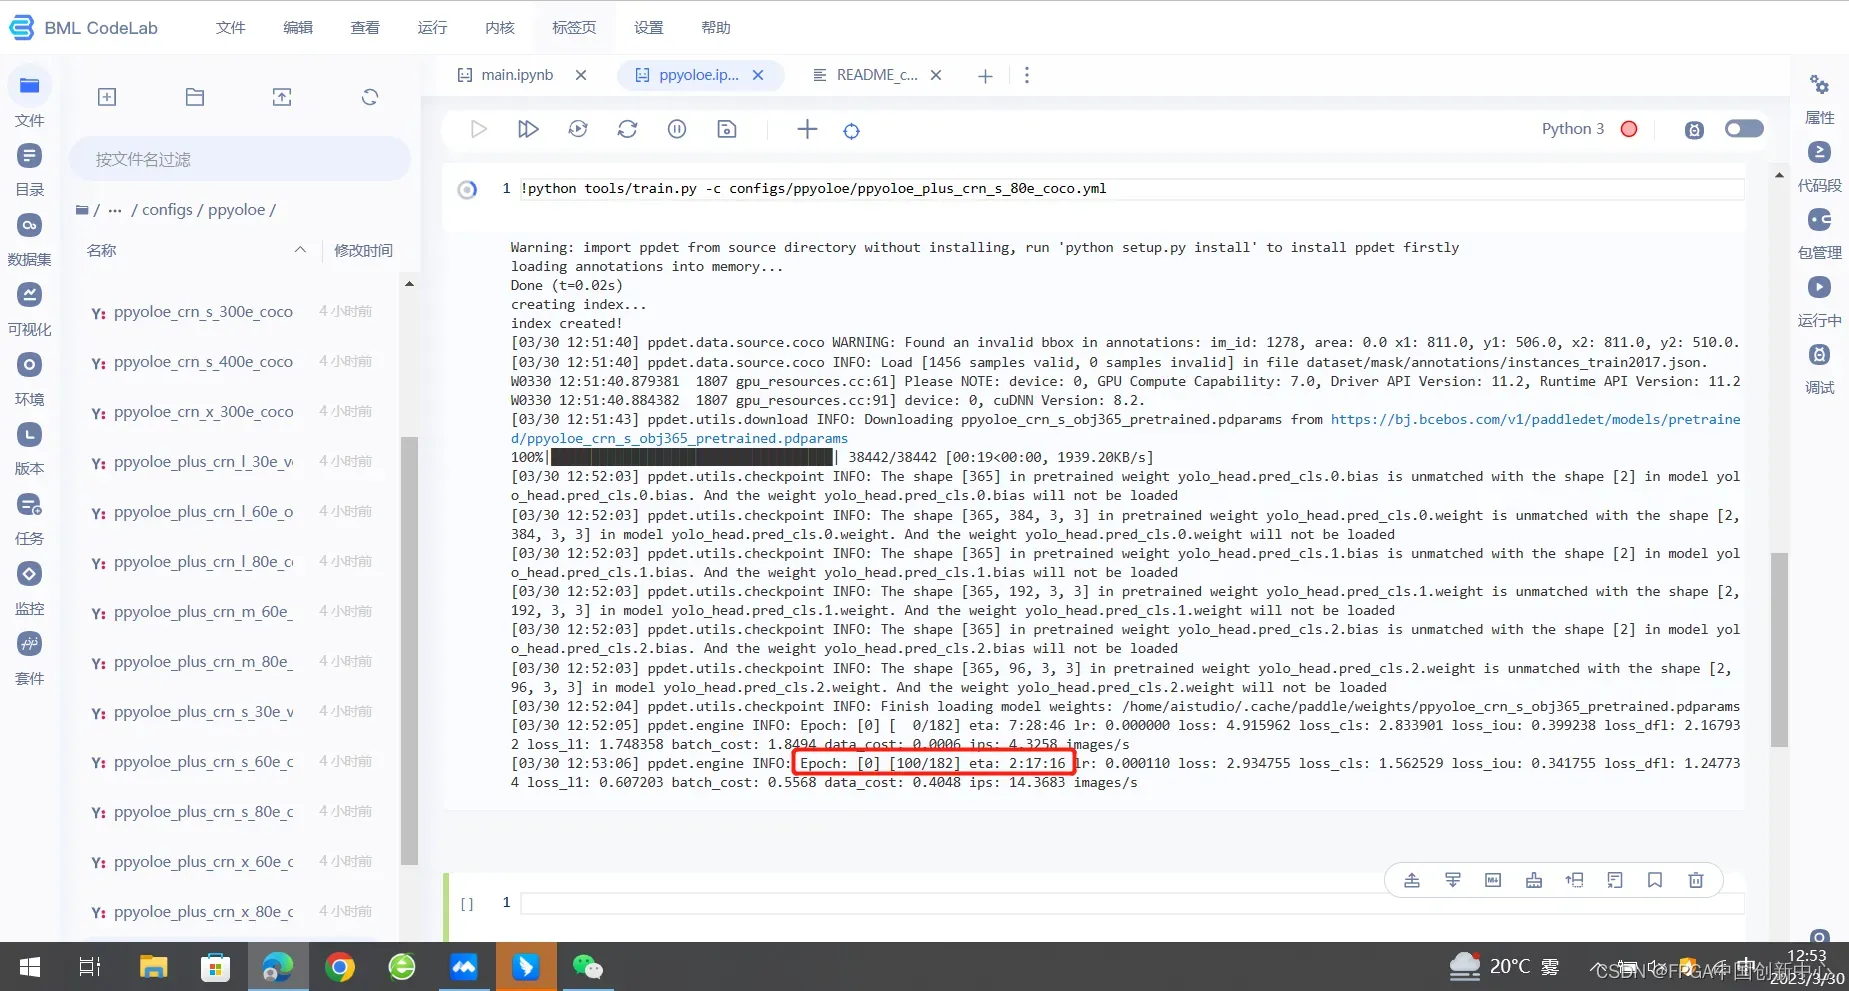
等待40次迭代完成:

训练完毕后,需要导出训练数据文件:
!python tools/export_model.py -c configs/ppyoloe/ppyoloe_plus_crn_s_80e_coco.yml -o weights=/home/aistudio/PaddleYOLO/output/ppyoloe_plus_crn_s_80e_coco/model_final.pdparams
![[外链图片转存失败,源站可能有防盗链机制,建议将图片保存下来直接上传(img-QlvXe2NL-1689495250376)(C:\Users\vers\AppData\Roaming\Typora\typora-user-images\image-20230716143851858.png)]](https://aitechtogether.com/wp-content/uploads/2023/08/7070aafc-9ee1-44df-8a47-764c9b9b1e11.webp)
导出成功后,保存在以下路径中:
/home/aistudio/PaddleYOLO/output_inference/ppyoloe_plus_crn_s_80e_coco
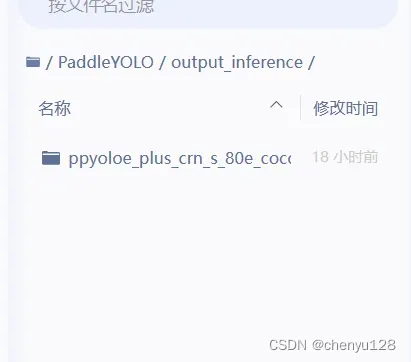
然后下载以下的四个文件到电脑中:
![[外链图片转存失败,源站可能有防盗链机制,建议将图片保存下来直接上传(img-dsgYtujP-1689495250377)(C:\Users\vers\AppData\Roaming\Typora\typora-user-images\image-20230716123546754.png)]](https://aitechtogether.com/wp-content/uploads/2023/08/7a30463c-2791-4d67-8739-f26c917e43ba.webp)
3、模型转换
将上一步获得的四个文件放入下图的文件夹中
![[外链图片转存失败,源站可能有防盗链机制,建议将图片保存下来直接上传(img-oyx5Cju8-1689495250379)(C:\Users\vers\AppData\Roaming\Typora\typora-user-images\image-20230716135057966.png)]](https://aitechtogether.com/wp-content/uploads/2023/08/5a772cb8-3e97-43aa-8965-02fc104a1fc1.webp)
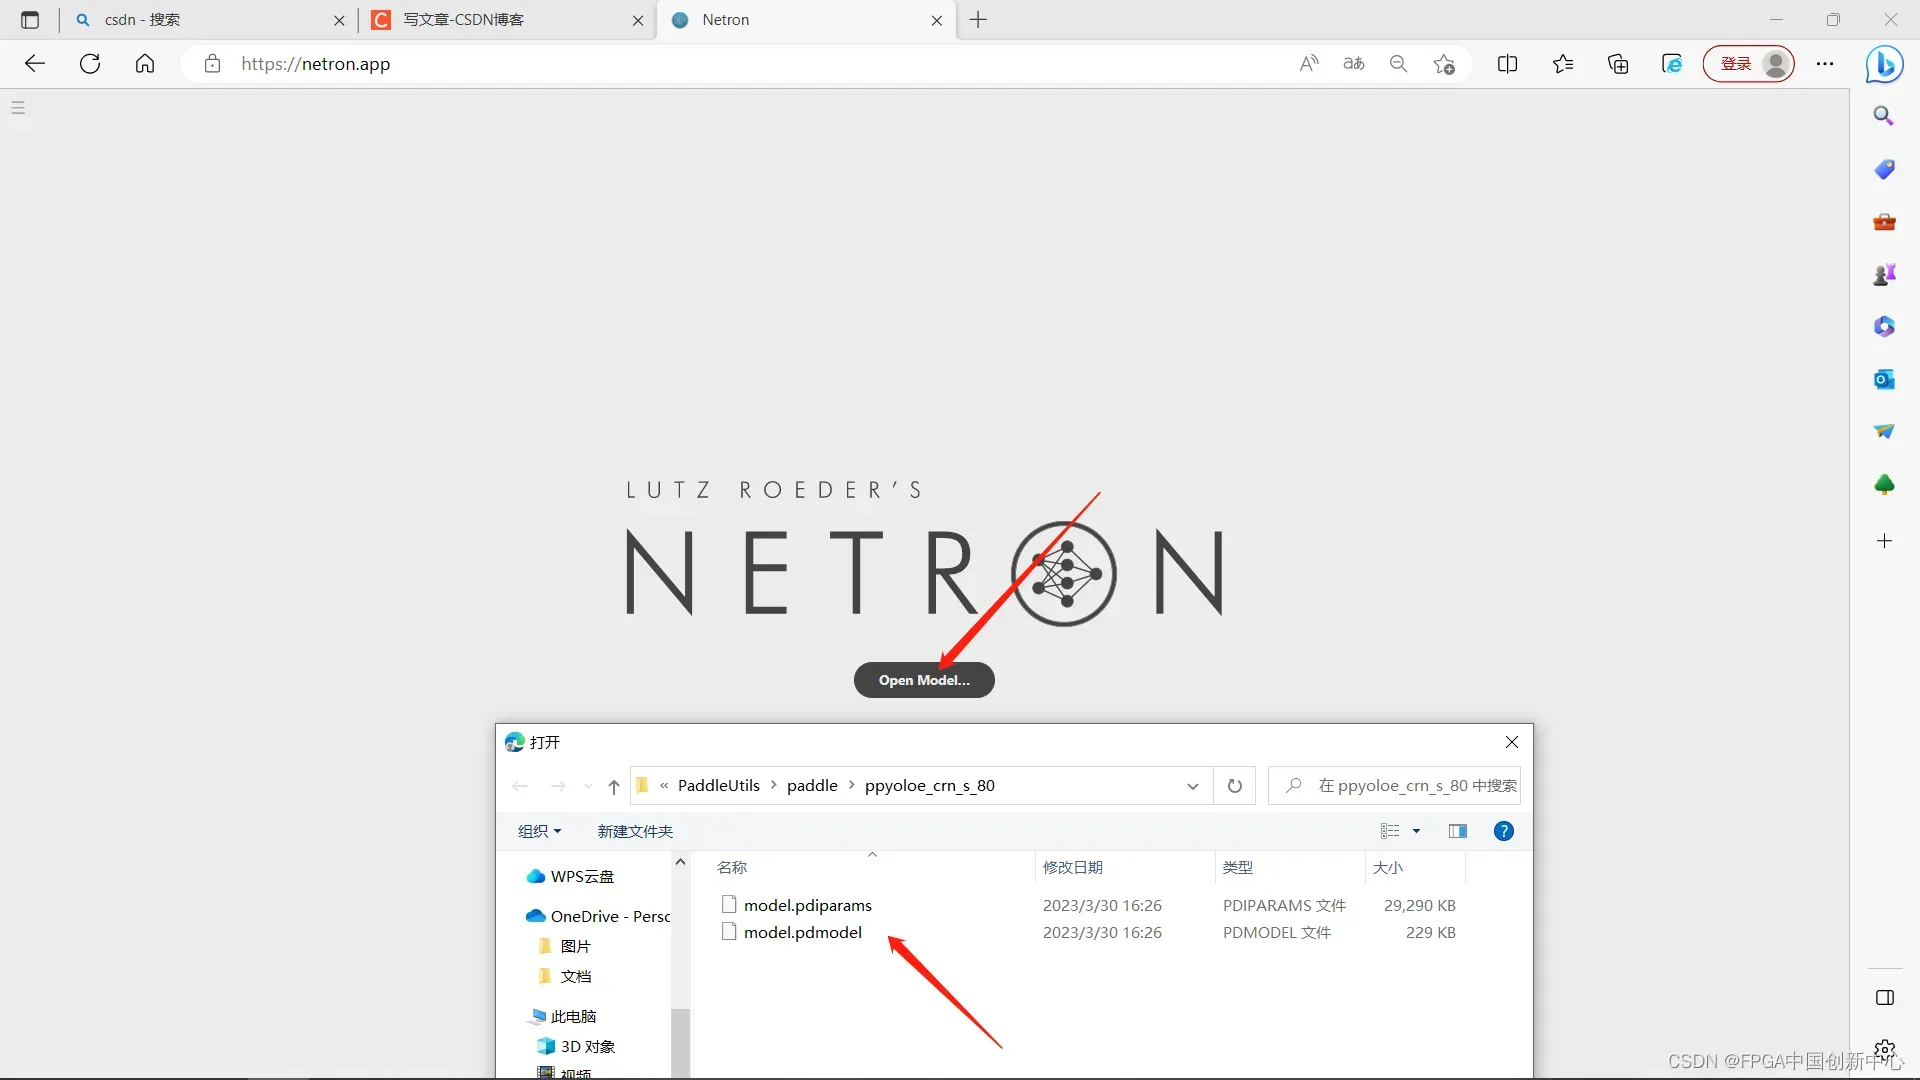
进入模型可视化网站查看模型:Netron 选择模型
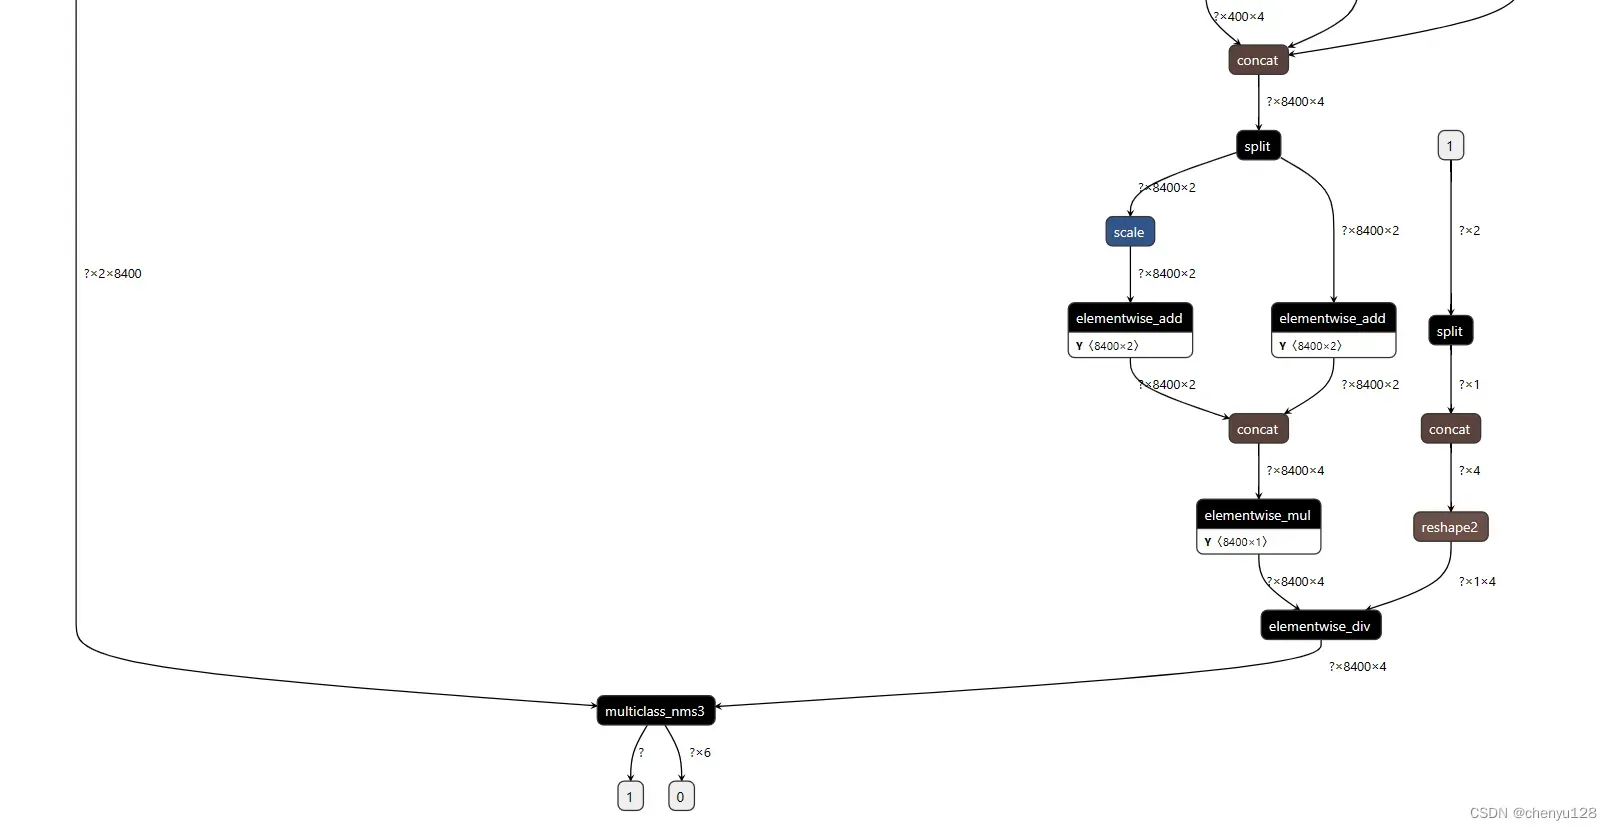
然后进行模型剪枝,在如下目录下打开cmd:
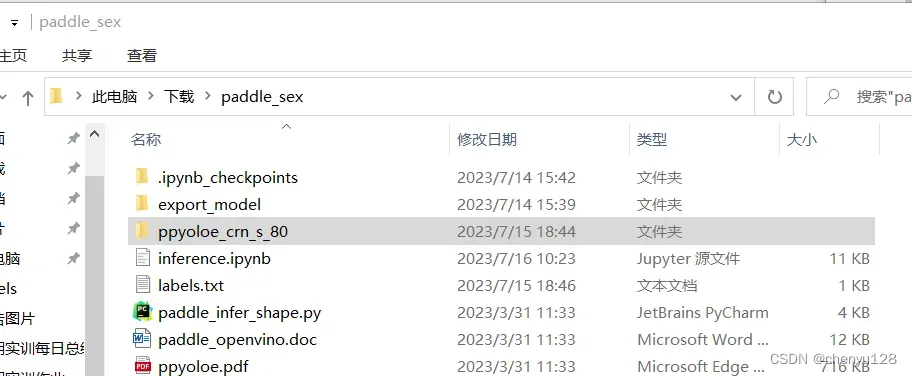
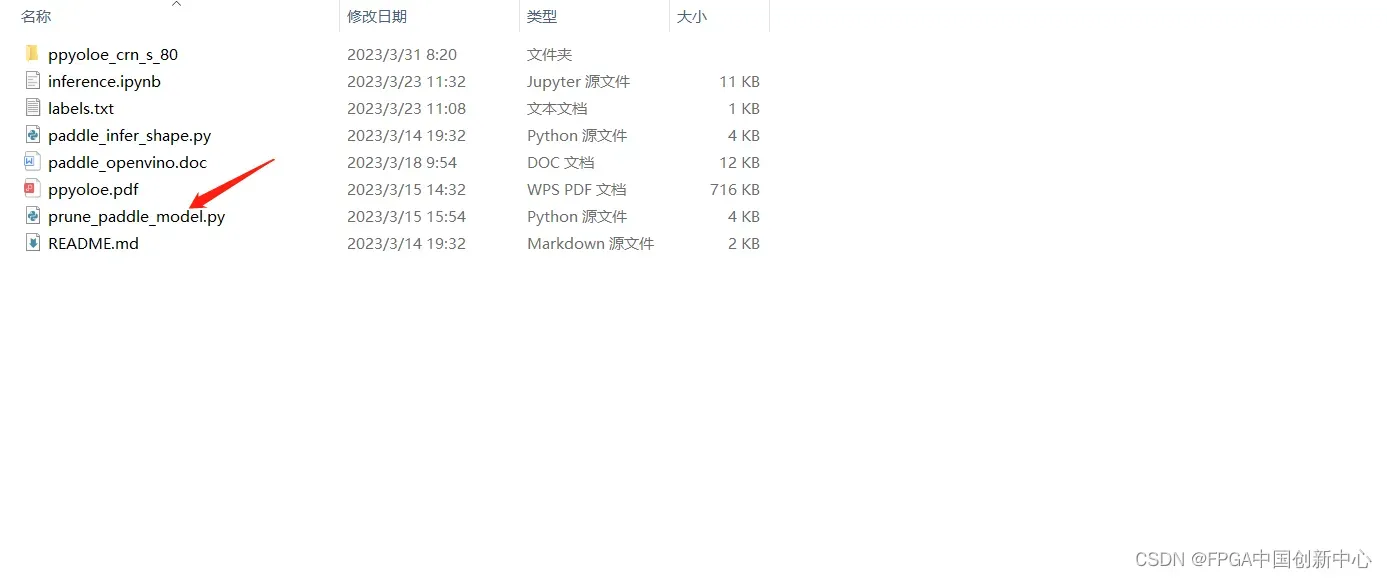
运行这个模型剪枝文件
python prune_paddle_model.py --model_dir ppyoloe_crn_s_80 --model_filename model.pdmodel --params_filename model.pdiparams --output_names tmp_16 concat_14.tmp_0 --save_dir export_model
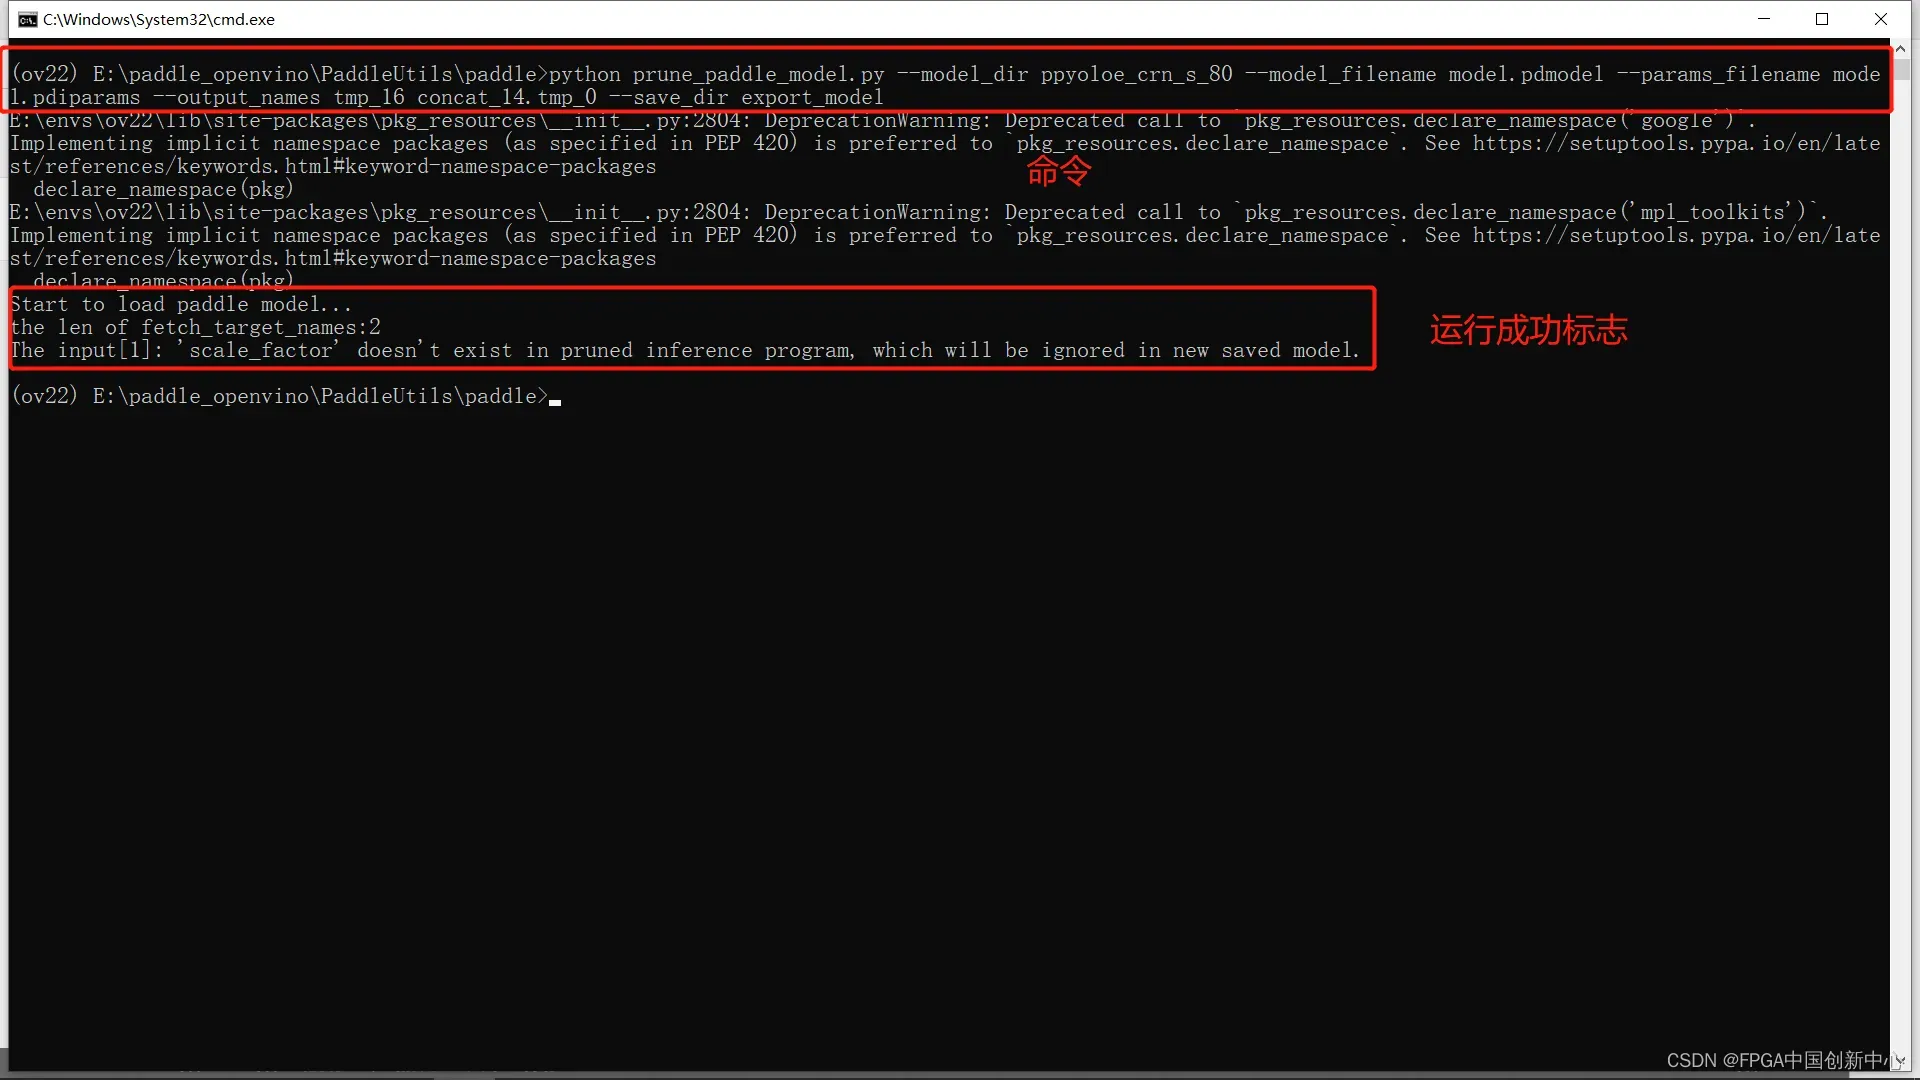
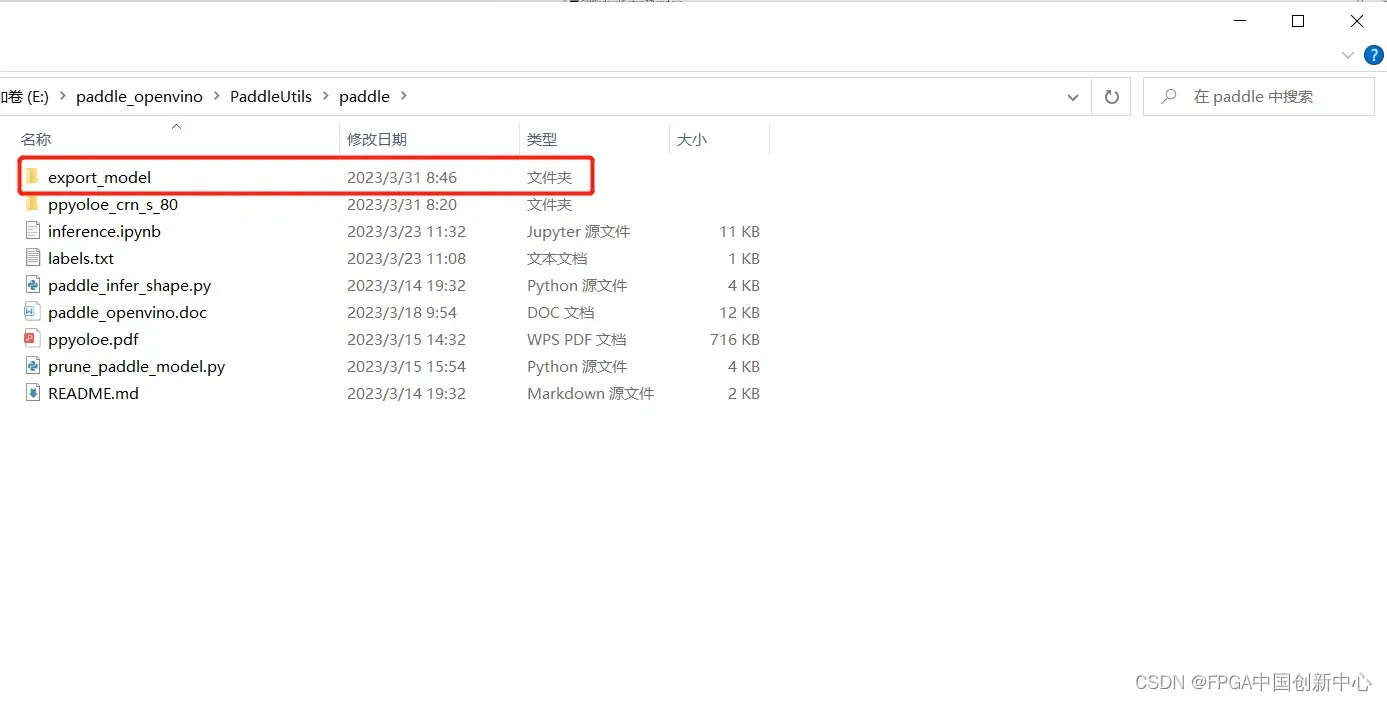
运行过后新增一个减支完成的模型文件夹
然后进行模型转换,把Paddle模型转换为onnx,需要在环境中提前安装好paddle2onnx。
执行以下命令进行模型转换:
paddle2onnx --model_dir export_model --model_filename model.pdmodel --params_filename model.pdiparams --input_shape_dict "{'image':[1,3,640,640]}" --opset_version 11 --save_file ppyoloe_crn_s_80.onnx
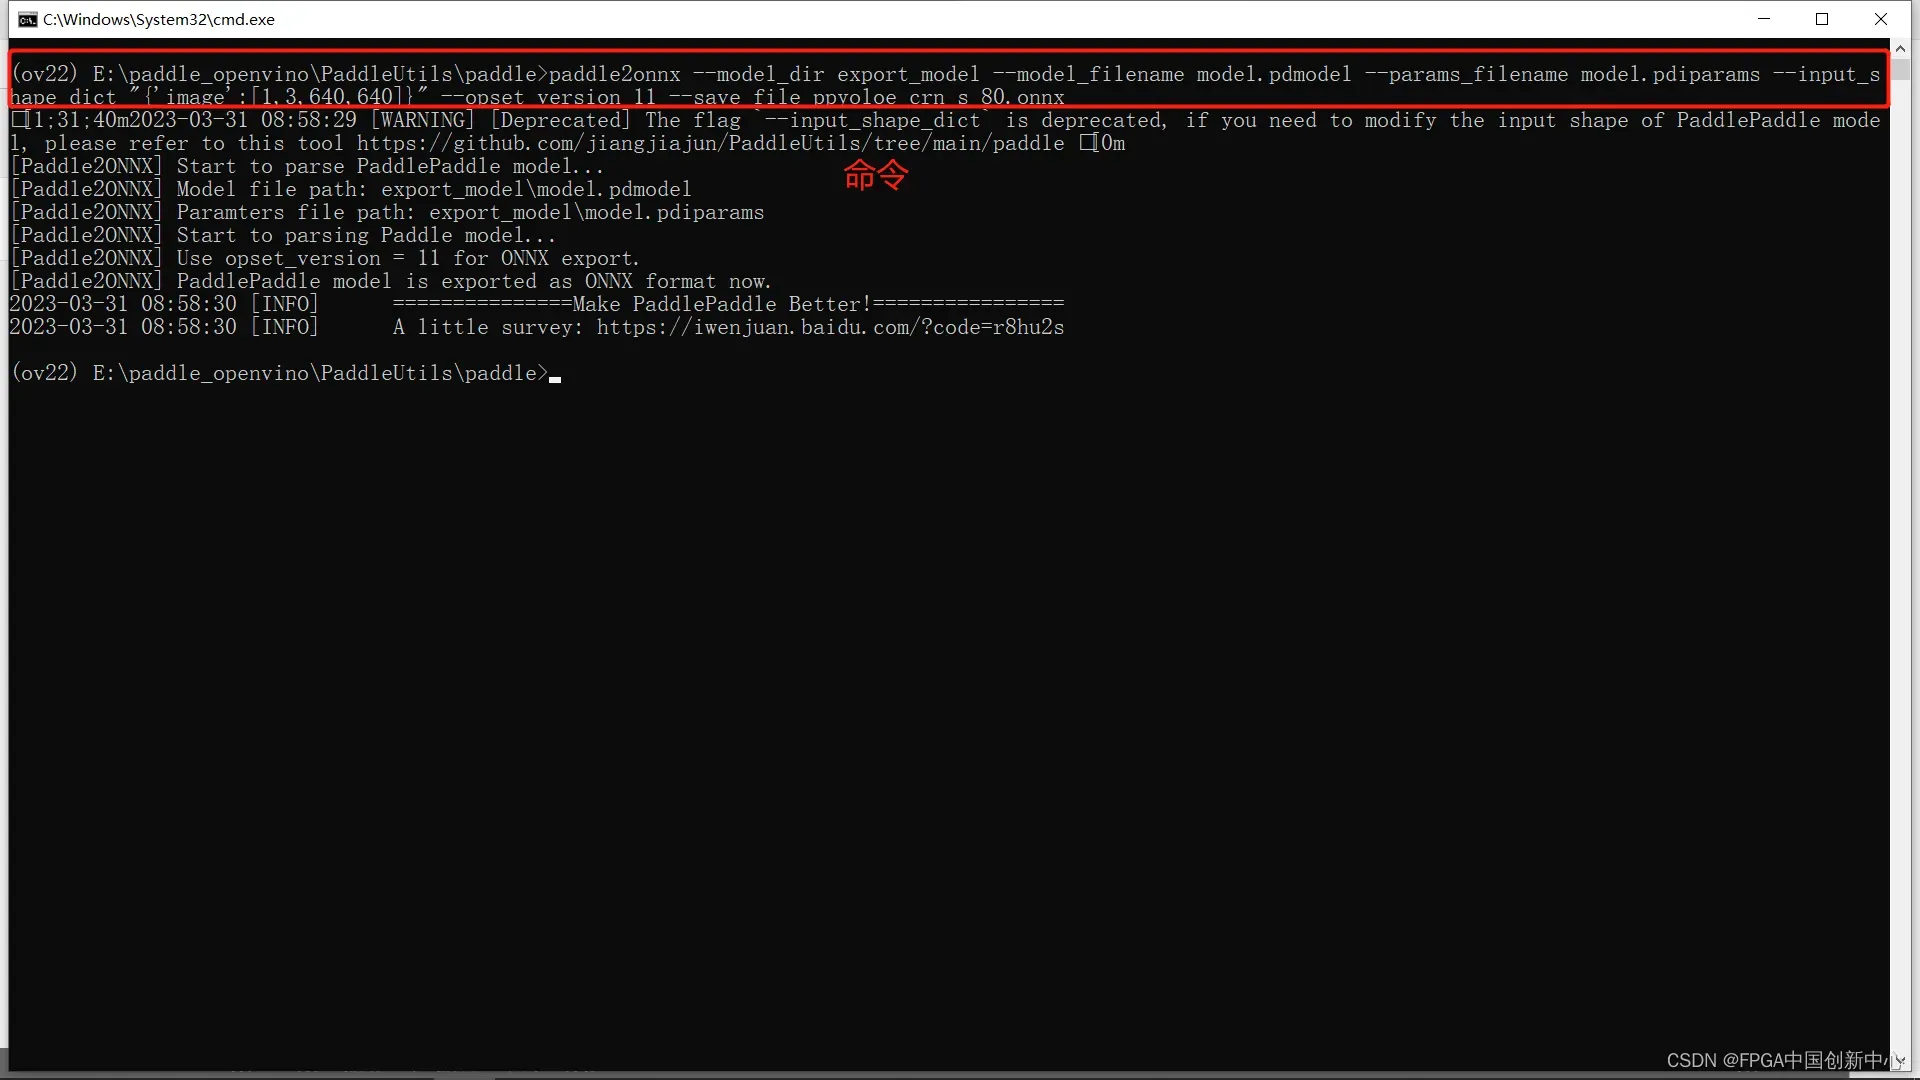
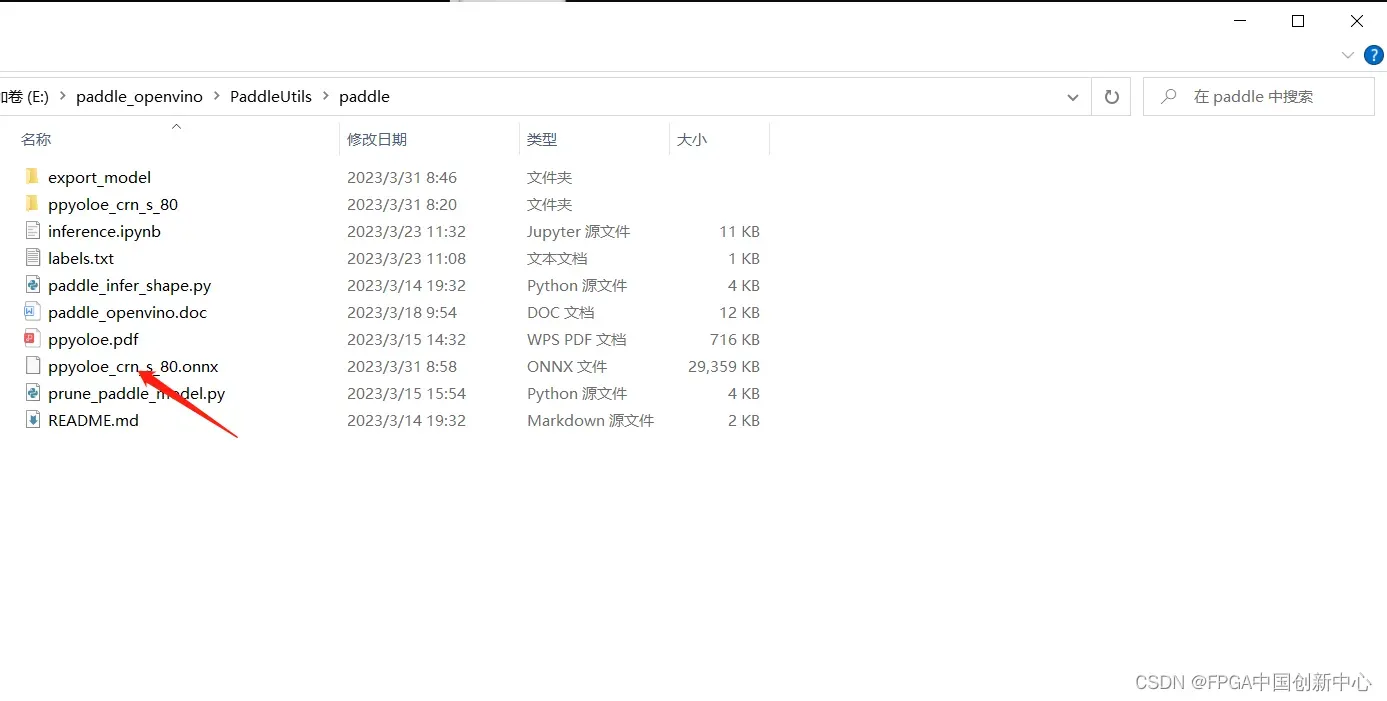
执行生成的ppyoloe_crn_s_80.onnx
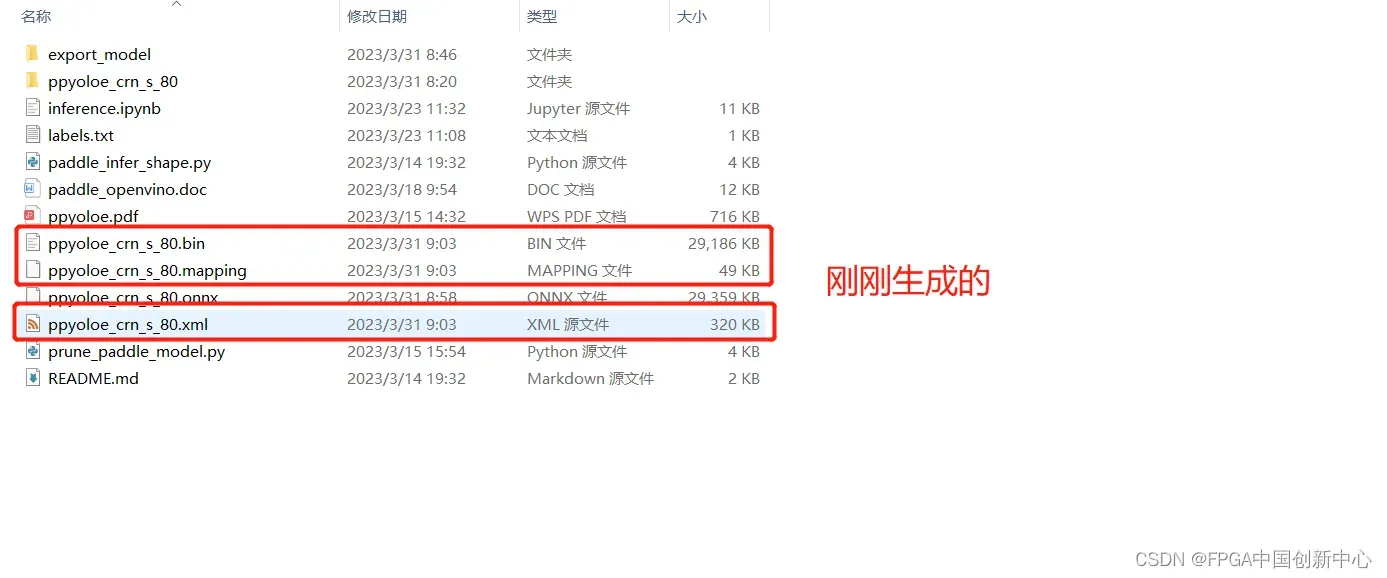
mo --input_model ppyoloe_crn_s_80.onnx
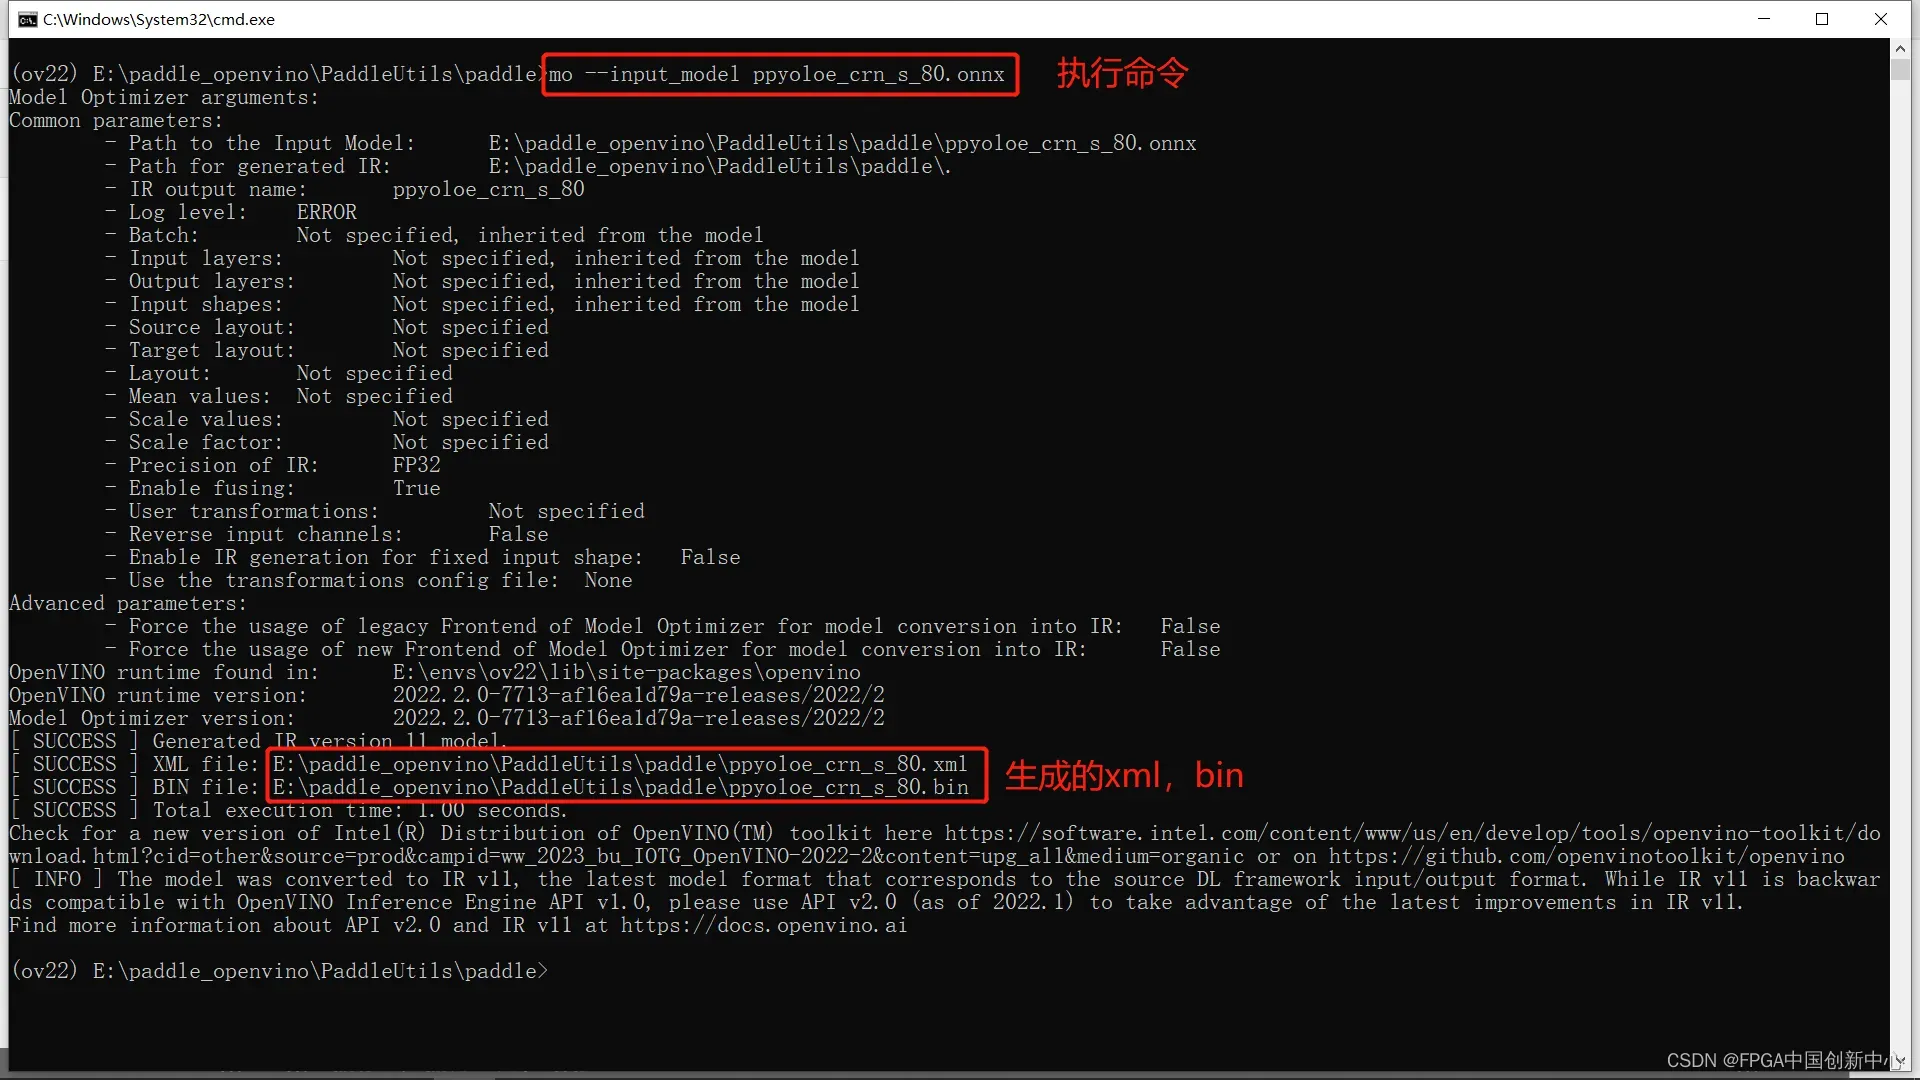
执行结果如下:
4、模型推理
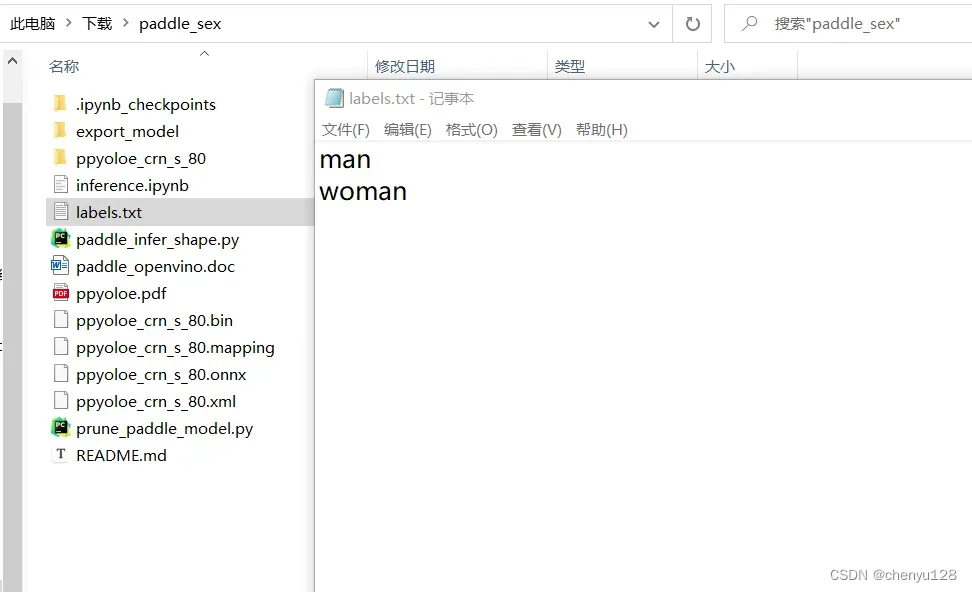
增加一个文件labels.txt,内容是我们的标签,注意存放路径
增加一个inference.ipynb用于编写推理代码,注意存放路径
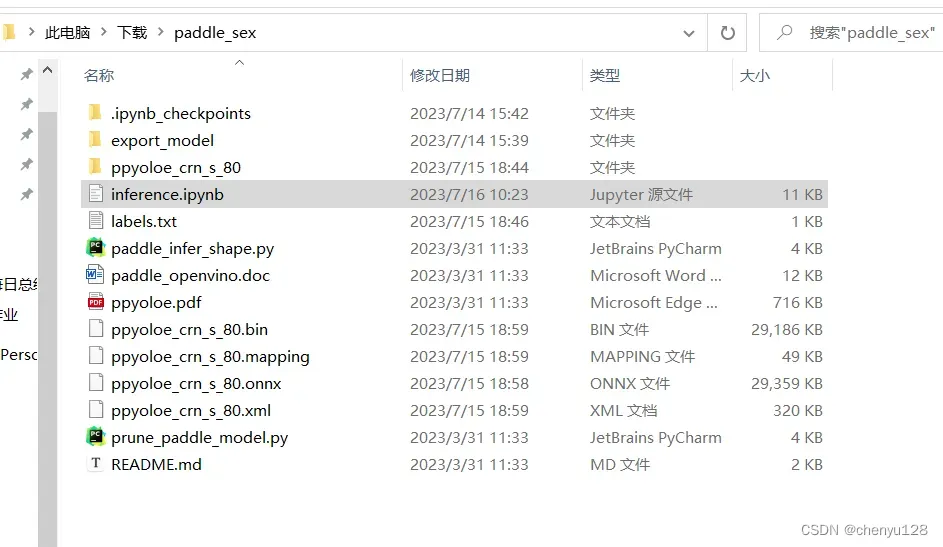
inference.ipynb 文件代码如下:
from openvino.runtime import Core
import openvino.runtime as ov
import cv2 as cv
import numpy as np
import tensorflow as tf
OpenVINO 模型推理器(class)
class Predictor:
    """
    OpenVINO 模型推理器
    """
    def __init__(self, model_path):
        ie_core = Core()
        model = ie_core.read_model(model=model_path)
        self.compiled_model = ie_core.compile_model(model=model, device_name="CPU")
    def get_inputs_name(self, num):
        return self.compiled_model.input(num)

    def get_outputs_name(self, num):
        return self.compiled_model.output(num)

    def predict(self, input_data):
        return self.compiled_model([input_data])

    def get_request(self):
        return self.compiled_model.create_infer_request()
图像预处理
def process_image(input_image, size):
    """输入图片与处理方法,按照PP-Yoloe模型要求预处理图片数据

    Args:
        input_image (uint8): 输入图片矩阵
        size (int): 模型输入大小

    Returns:
        float32: 返回处理后的图片矩阵数据
    """
    max_len = max(input_image.shape)
    img = np.zeros([max_len,max_len,3],np.uint8)
    img[0:input_image.shape[0],0:input_image.shape[1]] = input_image # 将图片放到正方形背景中
    img = cv.cvtColor(img,cv.COLOR_BGR2RGB)  # BGR转RGB
    img = cv.resize(img, (size, size), cv.INTER_NEAREST) # 缩放图片
    img = np.transpose(img,[2, 0, 1]) # 转换格式
    img = img / 255.0 # 归一化
    img = np.expand_dims(img,0) # 增加维度
    return img.astype(np.float32)
图像后处理
def process_result(box_results, conf_results):
    """按照PP-Yolove模型输出要求,处理数据,非极大值抑制,提取预测结果

    Args:
        box_results (float32): 预测框预测结果
        conf_results (float32): 置信度预测结果
    Returns:
        float: 预测框
        float: 分数
        int: 类别
    """
    conf_results = np.transpose(conf_results,[0, 2, 1]) # 转置
    # 设置输出形状
    box_results =box_results.reshape(8400,4)
    conf_results = conf_results.reshape(8400,2)
    scores = []
    classes = []
    boxes = []
    for i in range(8400):
        conf = conf_results[i,:] # 预测分数
        score = np.max(conf) # 获取类别
        # 筛选较小的预测类别
        if score > 0.5:
            classes.append(np.argmax(conf))
            scores.append(score)
            boxes.append(box_results[i,:])
    scores = np.array(scores)
    boxes = np.array(boxes)

    result_box = []
    result_score = []
    result_class = []
    # 非极大值抑制筛选重复的预测结果
    if len(boxes) != 0:
        # 非极大值抑制结果
        indexs = tf.image.non_max_suppression(boxes,scores,len(scores),0.25,0.35)
        for i, index in enumerate(indexs):
            result_score.append(scores[index])
            result_box.append(boxes[index,:])
            result_class.append(classes[index])
    # 返回结果
    return np.array(result_box),np.array(result_score),np.array(result_class)
画出预测框
def draw_box(image, boxes, scores, classes, labels):
    """将预测结果绘制到图像上

    Args:
        image (uint8): 原图片
        boxes (float32): 预测框
        scores (float32): 分数
        classes (int): 类别
        lables (str): 标签

    Returns:
        uint8: 标注好的图片
    """
    colors = [(0, 0, 255), (0, 255, 0)]
    scale = max(image.shape) / 640.0 # 缩放比例
    if len(classes) != 0:
        for i in range(len(classes)):
            box = boxes[i,:]
            x1 = int(box[0] * scale)
            y1 = int(box[1] * scale)
            x2 = int(box[2] * scale)
            y2 = int(box[3] * scale)
            label = labels[classes[i]]
            score = scores[i]
            cv.rectangle(image, (x1, y1), (x2, y2), colors[classes[i]], 2, cv.LINE_8)
            cv.putText(image,label+":"+str(score),(x1,y1-10),cv.FONT_HERSHEY_SIMPLEX, 0.55, colors[classes[i]], 2)

    return image
读取标签
def read_label(label_path):
    with open(label_path, 'r') as f:
        labels = f.read().split()
    return labels
同步推理
label_path = "labels.txt"
yoloe_model_path = "ppyoloe_crn_s_80.xml"
predictor = Predictor(model_path = yoloe_model_path)
boxes_name = predictor.get_outputs_name(0)
conf_name = predictor.get_outputs_name(1)
labels = read_label(label_path=label_path)
cap = cv.VideoCapture(0)
while cap.isOpened():
    ret, frame = cap.read()
    frame = cv.flip(frame, 180)
    cv.namedWindow("MaskDetection", 0)  # 0可调大小,注意:窗口名必须imshow里面的一窗口名一直
    cv.resizeWindow("MaskDetection", 640, 480)    # 设置长和宽
    input_frame = process_image(frame, 640)
    results = predictor.predict(input_data=input_frame)
    boxes, scores, classes = process_result(box_results=results[boxes_name], conf_results=results[conf_name])
    result_frame = draw_box(image=frame, boxes=boxes, scores=scores, classes=classes, labels=labels)
    cv.imshow('MaskDetection', result_frame)
    key = cv.waitKey(1)
    if key == 27: #esc退出
        break
cap.release()
cv.destroyAllWindows()
异步推理
label_path = "labels.txt"
yoloe_model_path = "ppyoloe_crn_s_80.xml"
predictor = Predictor(model_path = yoloe_model_path)
input_layer = predictor.get_inputs_name(0)
labels = read_label(label_path=label_path)
cap = cv.VideoCapture(0)
curr_request = predictor.get_request()
next_request = predictor.get_request()
ret, frame = cap.read()
curr_frame = process_image(frame, 640)
curr_request.set_tensor(input_layer, ov.Tensor(curr_frame))
curr_request.start_async()
while cap.isOpened():
    ret, next_frame = cap.read()
    next_frame = cv.flip(next_frame, 180)
    cv.namedWindow("MaskDetection", 0)  # 0可调大小,注意:窗口名必须imshow里面的一窗口名一直
    cv.resizeWindow("MaskDetection", 640, 480)    # 设置长和宽
    in_frame = process_image(next_frame, 640)
    next_request.set_tensor(input_layer, ov.Tensor(in_frame))
    next_request.start_async()
    if curr_request.wait_for(-1) == 1:
        boxes_name = curr_request.get_output_tensor(0).data
        conf_name = curr_request.get_output_tensor(1).data
        boxes, scores, classes = process_result(box_results=boxes_name, conf_results=conf_name)
        frame = draw_box(image=frame, boxes=boxes, scores=scores, classes=classes, labels=labels)
        cv.imshow('MaskDetection', frame)
    frame = next_frame
    curr_request, next_request = next_request, curr_request
    key = cv.waitKey(1)
    if key == 27: #esc退出
        break
cap.release()
cv.destroyAllWindows()
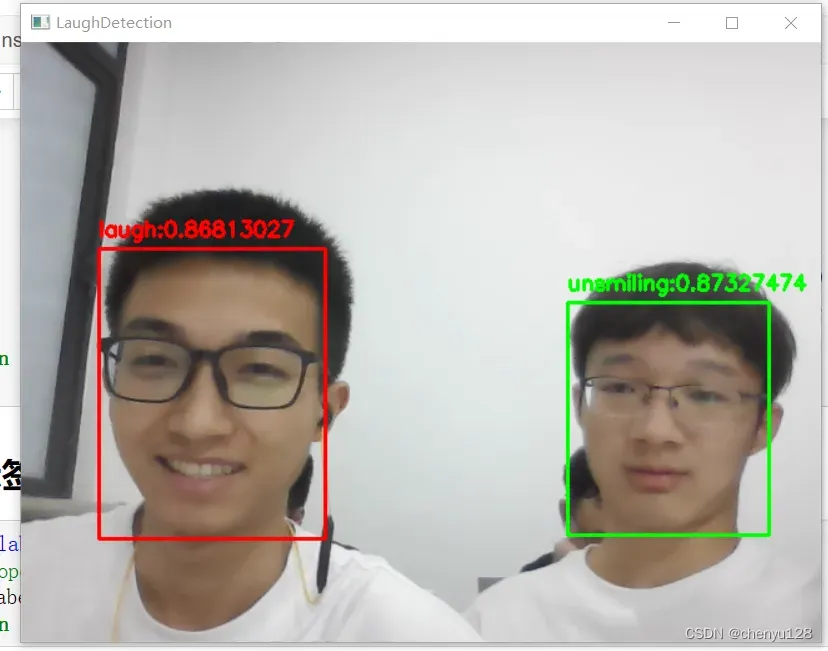
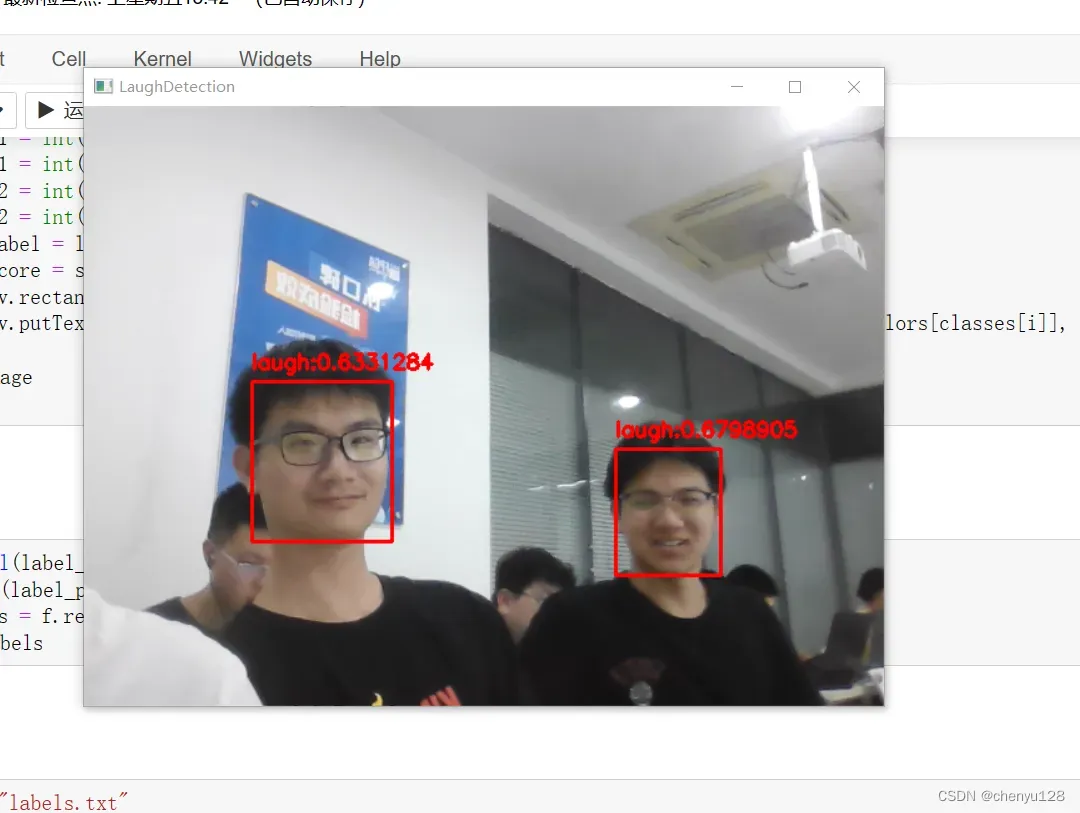
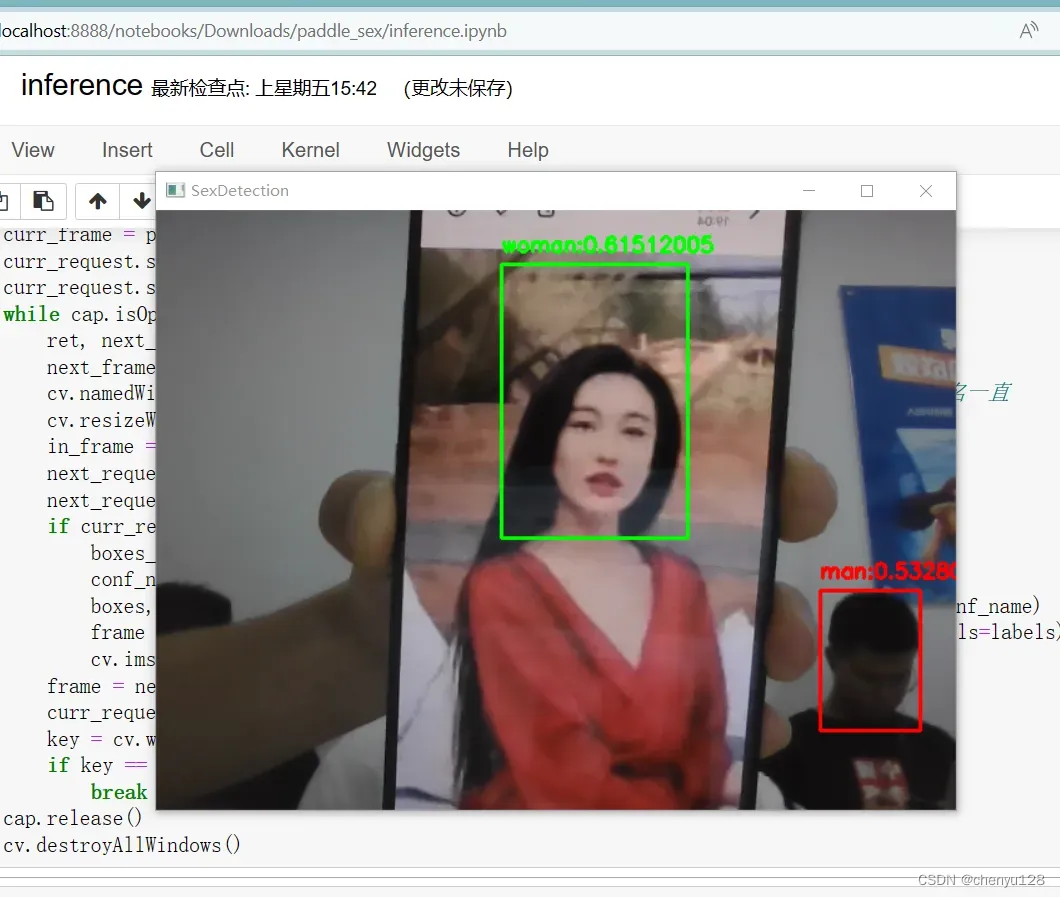
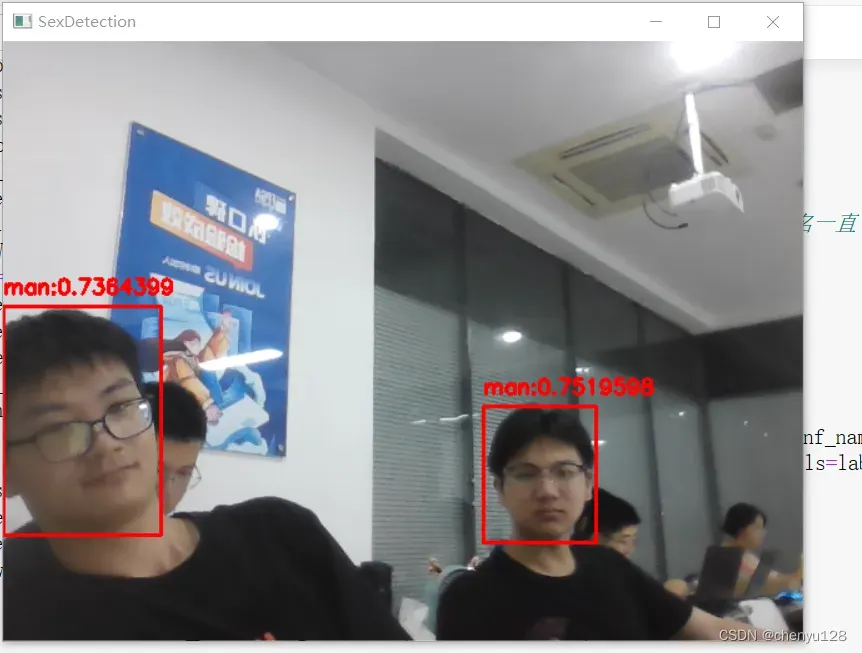
最终实现效果如图:
笑容识别:
性别识别:
文章出处登录后可见!
