文章目录
- 一、概述
- 二、购买服务器
- 1、简单介绍
- 2、为什么使用Linux系统
- 3、使用Xshell连接服务器
- 三、配置服务器
- 1、关于端口
- 2、配置服务器的安全组(入方向)
- 四、上传代码
- 1、下载并安装git
- 2、将项目代码上传gitee仓库
- 3、本地项目,用一个简单的flask项目示例
- 4、在项目的根目录下配置一个.gitignore文件,使得使用git上传代码时可以忽略一些文件,比如.venv,.idea是本机的虚拟文件不需要上传
- 5、使用git的相关命令进行上传
- 1)配置自己的相关信息(便于协同项目区分是谁上传的)
- 2)进入自己项目的目录(pycharm中右键–》打开于–》Explorer)
- 3)继续在git bash here中输入:
- 4)提交之后如果后期有修改,同样到项目根目录,git bash here再输入以上三个命令:
- 五、服务器拉取远程仓库的代码
- 1、使用xShell连接服务器,安装git
- 2、为你的项目在服务器上创建一个文件夹,比如在/data/www/下创建
- 3、从远程仓库拉取项目代码
- 六、服务器中安装环境
- 1、安装Python3.9.5
- 2、虚拟环境配置
- 1)安装 virtualenv
- 2)创建虚拟环境(一般是一个项目一个虚拟环境)
- 3)激活虚拟环境
- 4)在虚拟环境中运行代码(类似本地运行)
- 3、uwsgi安装
- 1)安装uwsgi
- 2)基于uwsgi配置文件的方式运行flask项目
- 3)启动uwsgi的方式:
- 4、Nginx安装
- 1)安装nginx
- 2)修改配置nginx
- 3)设置nginx开机自启动并启动nginx服务
- 七、服务器运行程序并通过公网进行访问测试
- 注意:
- 文章参考
一、概述
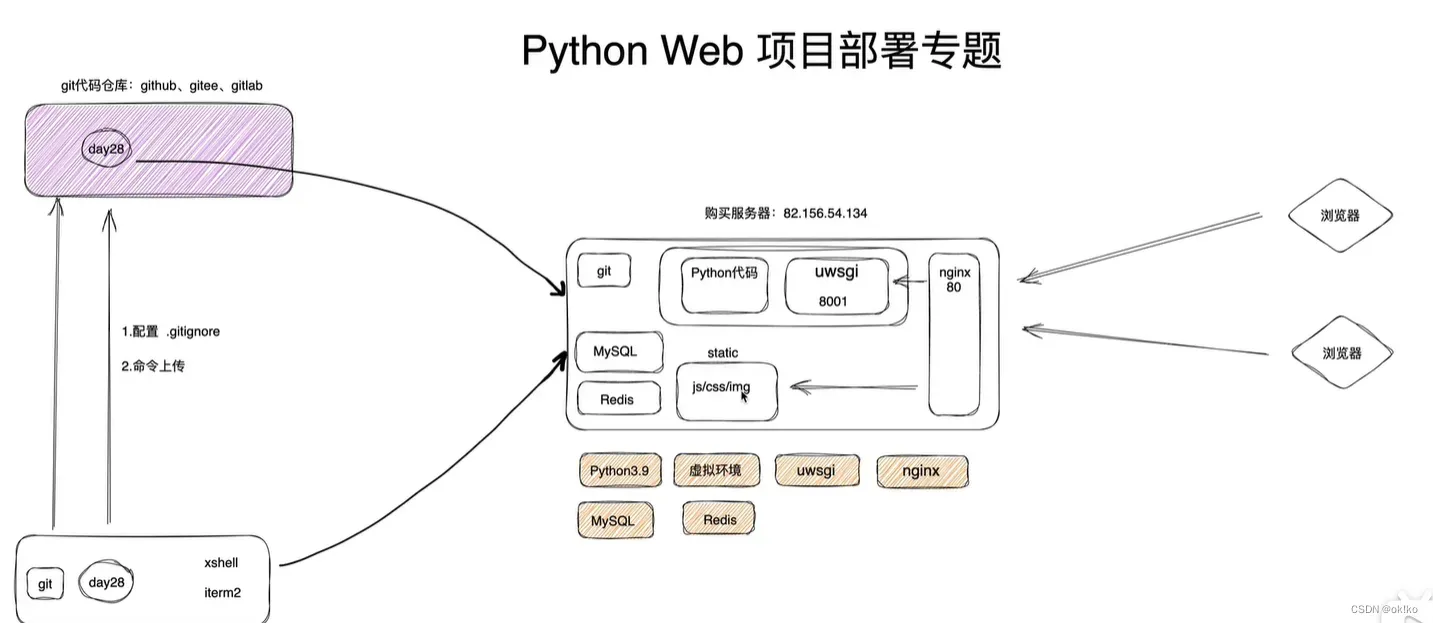
本质三件事:
- 租个服务器(含公网ip) + 配置项目运行所需环境
- 代码上传服务器
- 程序运行起来
二、购买服务器
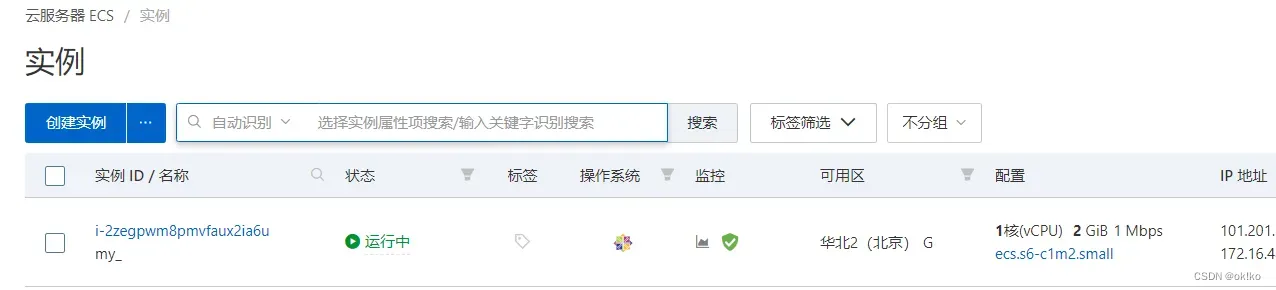
1、简单介绍
在阿里云、腾讯云或者其他平台购买一台服务器。
本文以 阿里云 + centos 7.9操作系统来进行操作。
根据需要为服务器选择合适的:CPU内核数量、内存大小、磁盘大小、带宽大小…
同时为该服务器设置登录的用户名和密码,后期登录该服务器。同时获得一个公网ip,用于连接该服务器。
2、为什么使用Linux系统
- Windows系统:收费 + 图形化界面慢
- Linux系统:开源+可以选择非图形化
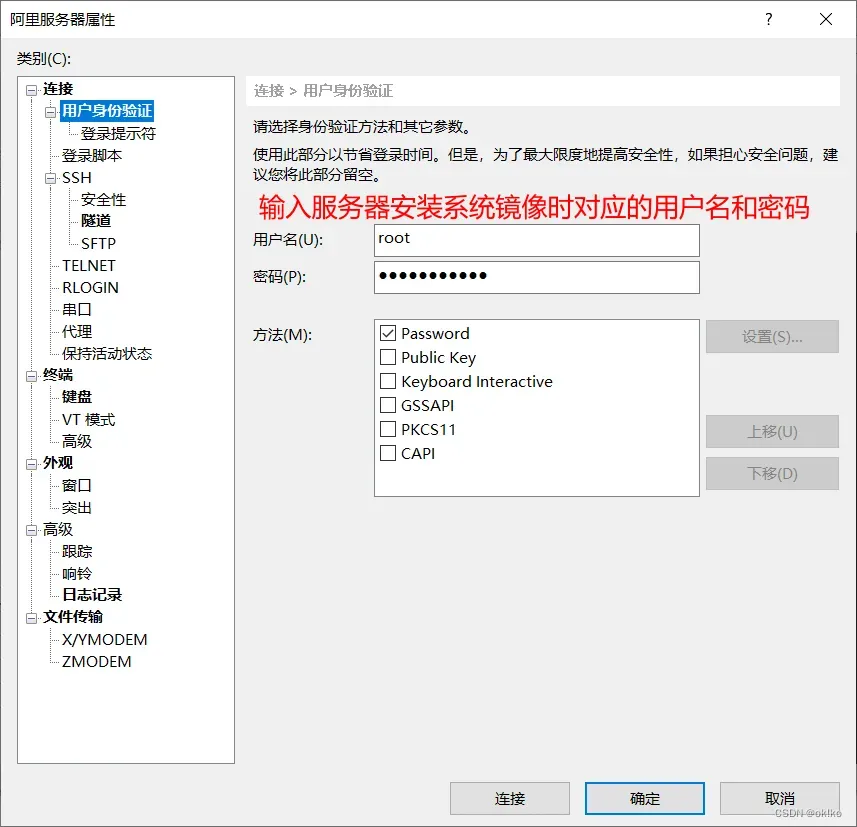
3、使用Xshell连接服务器
本地下载安装Xshell:https://www.xshell.com/zh/xshell-download/
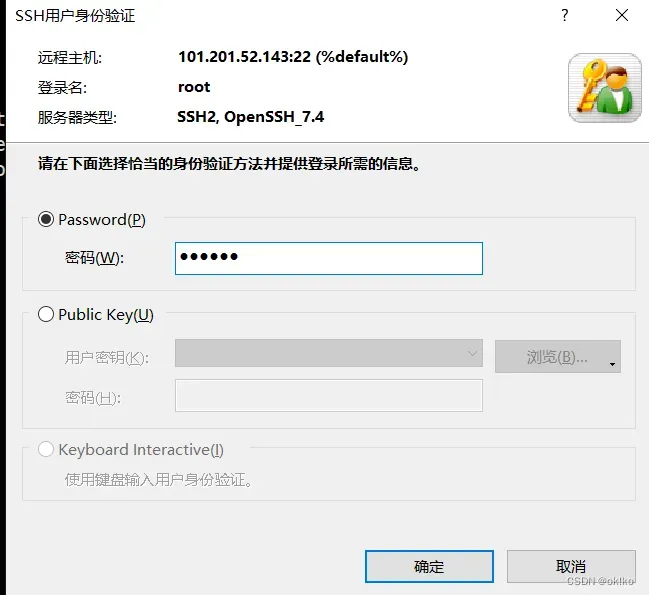
方式一:
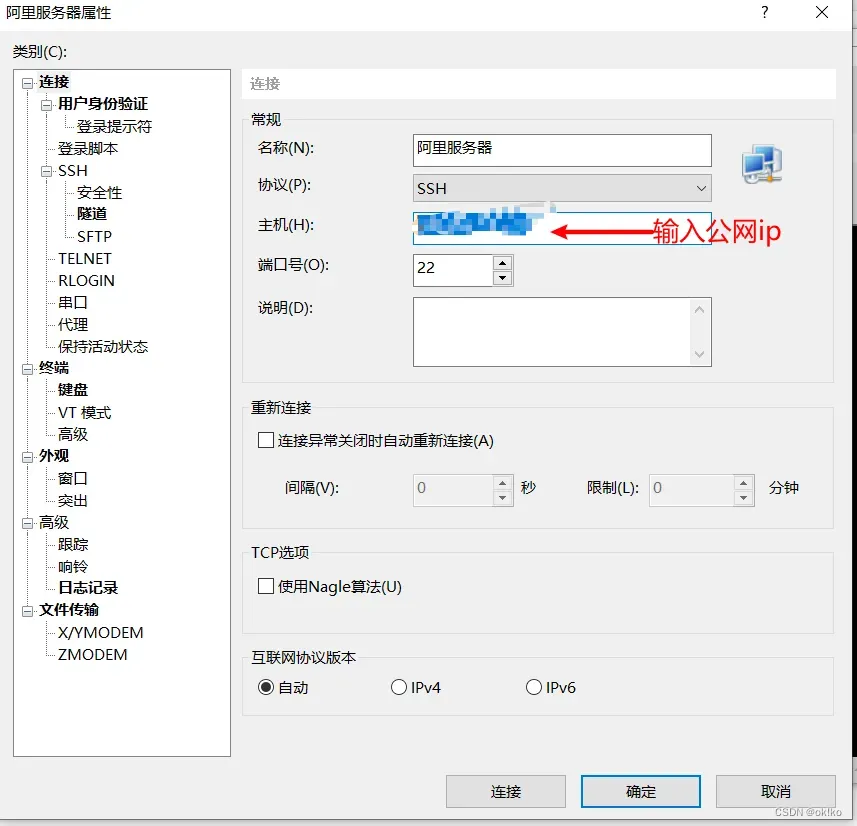
方式二:也可以直接Xshell命令行中直接输入:
ssh root@101.201.52.143
弹出的验证框中输入密码即可
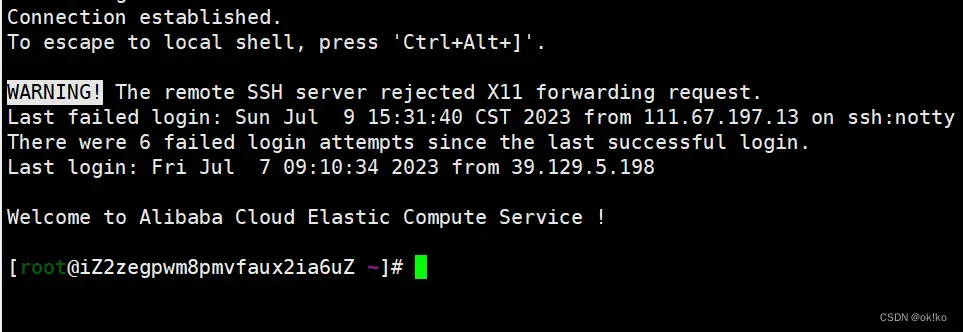
出现这个界面则表示连接成功:
三、配置服务器
1、关于端口
ip地址:定位电脑(服务器)
端口:定位程序
| 端口 | 应用程序 |
|---|---|
| 22 | SSH |
| 3306 | MySQL |
| 6379 | Redis |
| 80 | http |
| 443 | https |
2、配置服务器的安全组(入方向)
目的:配置服务器的开放端口,使得可以通过ip+端口远程连接对应的服务。
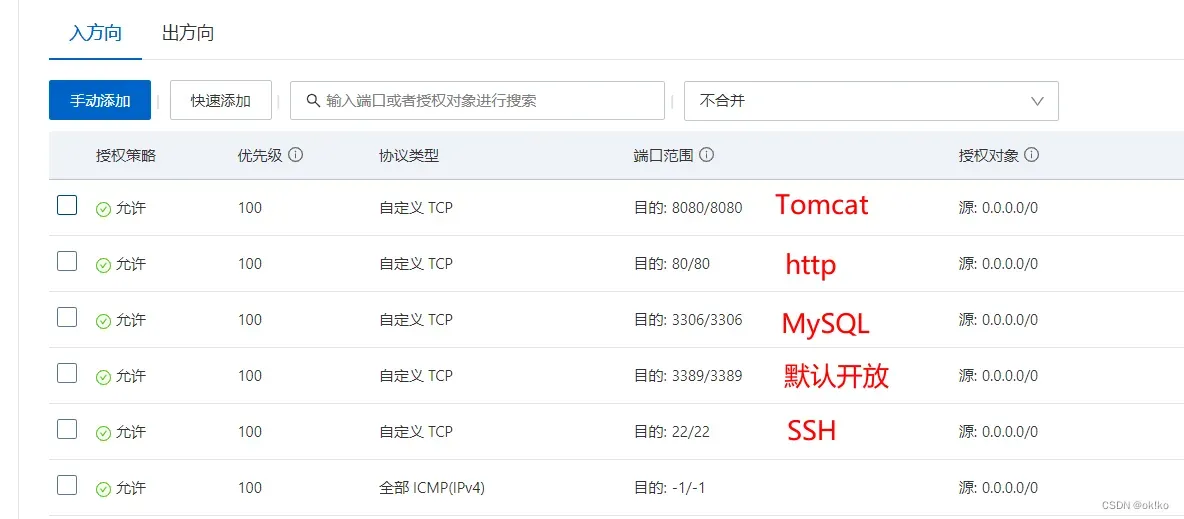
根据需要开放对应的端口。
四、上传代码
1、下载并安装git
百度网盘链接:https://pan.baidu.com/s/1MWce-lSTlnt5xRP1VGXFBw
提取码:ggit
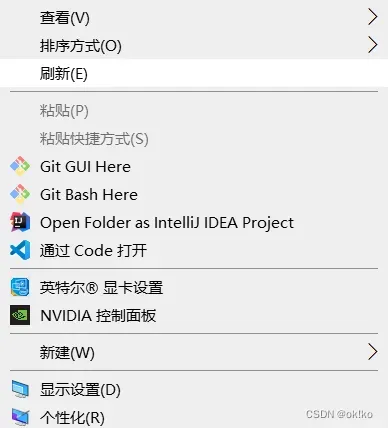
安装成功在电脑任意位置右键出现git bash here和git gui here如下:
2、将项目代码上传gitee仓库
gitee官网:https://gitee.com/
完成登录后,点击右上角创建仓库:
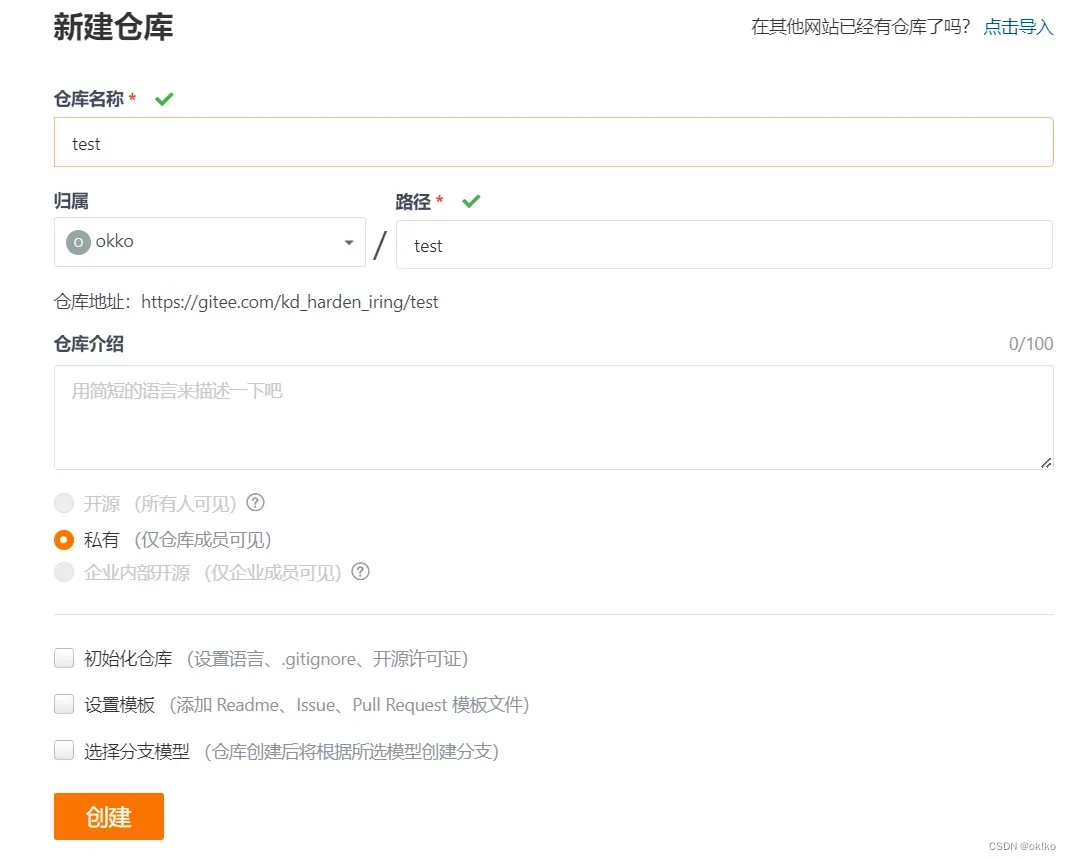
仓库名称一般就是项目代码名称,方便对应,填好名称点击创建即可。
仓库地址:https://gitee.com/kd_harden_iring/test
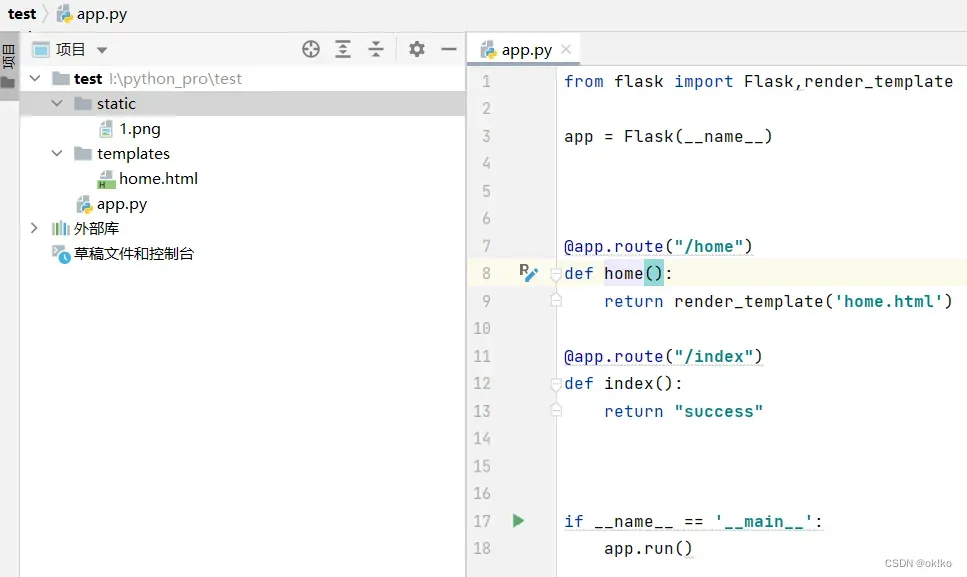
3、本地项目,用一个简单的flask项目示例
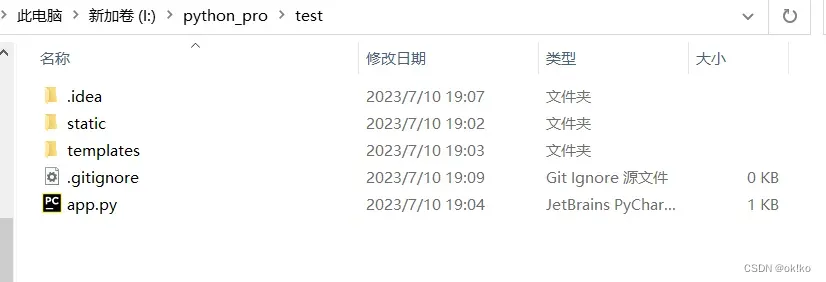
4、在项目的根目录下配置一个.gitignore文件,使得使用git上传代码时可以忽略一些文件,比如.venv,.idea是本机的虚拟文件不需要上传
直接使用别人写好的:https://github.com/github/gitignore/blob/main/Python.gitignore
# Byte-compiled / optimized / DLL files
__pycache__/
*.py[cod]
*$py.class

# C extensions
*.so

# Distribution / packaging
.Python
build/
develop-eggs/
dist/
downloads/
eggs/
.eggs/
lib/
lib64/
parts/
sdist/
var/
wheels/
share/python-wheels/
*.egg-info/
.installed.cfg
*.egg
MANIFEST

# PyInstaller
#  Usually these files are written by a python script from a template
#  before PyInstaller builds the exe, so as to inject date/other infos into it.
*.manifest
*.spec

# Installer logs
pip-log.txt
pip-delete-this-directory.txt

# Unit test / coverage reports
htmlcov/
.tox/
.nox/
.coverage
.coverage.*
.cache
nosetests.xml
coverage.xml
*.cover
*.py,cover
.hypothesis/
.pytest_cache/
cover/

# Translations
*.mo
*.pot

# Django stuff:
*.log
local_settings.py
db.sqlite3
db.sqlite3-journal

# Flask stuff:
instance/
.webassets-cache

# Scrapy stuff:
.scrapy

# Sphinx documentation
docs/_build/

# PyBuilder
.pybuilder/
target/

# Jupyter Notebook
.ipynb_checkpoints

# IPython
profile_default/
ipython_config.py

# pyenv
#   For a library or package, you might want to ignore these files since the code is
#   intended to run in multiple environments; otherwise, check them in:
# .python-version

# pipenv
#   According to pypa/pipenv#598, it is recommended to include Pipfile.lock in version control.
#   However, in case of collaboration, if having platform-specific dependencies or dependencies
#   having no cross-platform support, pipenv may install dependencies that don't work, or not
#   install all needed dependencies.
#Pipfile.lock

# poetry
#   Similar to Pipfile.lock, it is generally recommended to include poetry.lock in version control.
#   This is especially recommended for binary packages to ensure reproducibility, and is more
#   commonly ignored for libraries.
#   https://python-poetry.org/docs/basic-usage/#commit-your-poetrylock-file-to-version-control
#poetry.lock

# pdm
#   Similar to Pipfile.lock, it is generally recommended to include pdm.lock in version control.
#pdm.lock
#   pdm stores project-wide configurations in .pdm.toml, but it is recommended to not include it
#   in version control.
#   https://pdm.fming.dev/#use-with-ide
.pdm.toml

# PEP 582; used by e.g. github.com/David-OConnor/pyflow and github.com/pdm-project/pdm
__pypackages__/

# Celery stuff
celerybeat-schedule
celerybeat.pid

# SageMath parsed files
*.sage.py

# Environments
.env
.venv
env/
venv/
ENV/
env.bak/
venv.bak/

# Spyder project settings
.spyderproject
.spyproject

# Rope project settings
.ropeproject

# mkdocs documentation
/site

# mypy
.mypy_cache/
.dmypy.json
dmypy.json

# Pyre type checker
.pyre/

# pytype static type analyzer
.pytype/

# Cython debug symbols
cython_debug/

# PyCharm
#  JetBrains specific template is maintained in a separate JetBrains.gitignore that can
#  be found at https://github.com/github/gitignore/blob/main/Global/JetBrains.gitignore
#  and can be added to the global gitignore or merged into this file.  For a more nuclear
#  option (not recommended) you can uncomment the following to ignore the entire idea folder.
#.idea/
5、使用git的相关命令进行上传
1)配置自己的相关信息(便于协同项目区分是谁上传的)
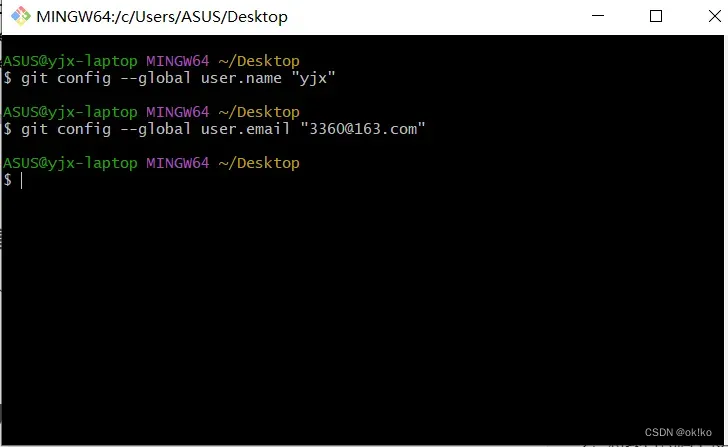
任意位置右键,git bash here出现git命令行窗口输入(一次性命令):
git config –global user.name “yjx”
git config –global user.email “3360@163.com”
2)进入自己项目的目录(pycharm中右键–》打开于–》Explorer)
在该位置右键,点击git bash here再依次输入:
git init
git remote add origin https://gitee.com/kd_harden_iring/test
注意:git  init执行后可以看到在当前目录下生成了一个空的.git本地仓库
git remote add 别名代指远程仓库地址(下次使用)  远程仓库的地址(注意替换为自己在gitee中生成的远程仓库链接)

3)继续在git bash here中输入:
git add .
git commit -m 'init'
git push origin master
'init'为了标识每次提交的说明,输入以上三句即可完成将代码提交到gitee远程仓库。
注意:执行第三句会弹出输入账号和密码,这个账号和密码是gitee网站的账号和密码
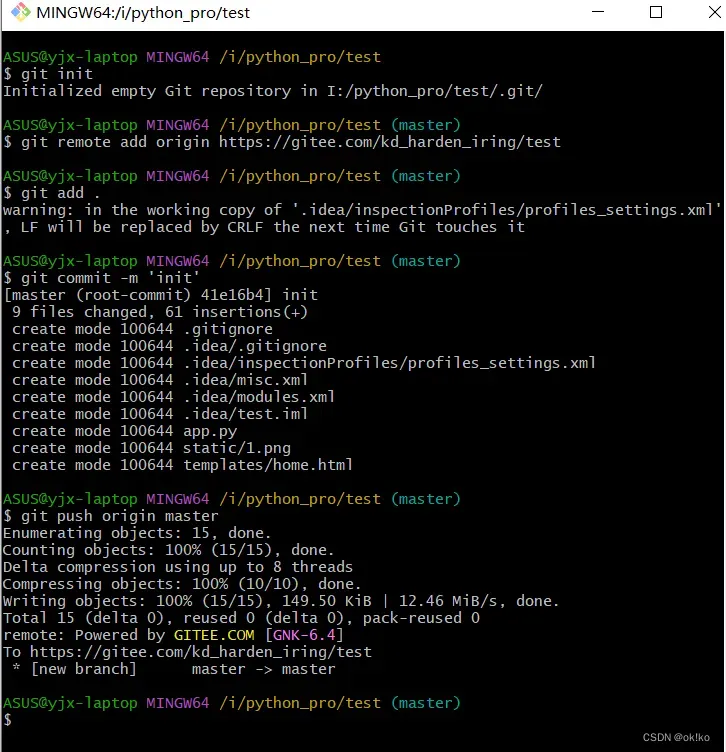
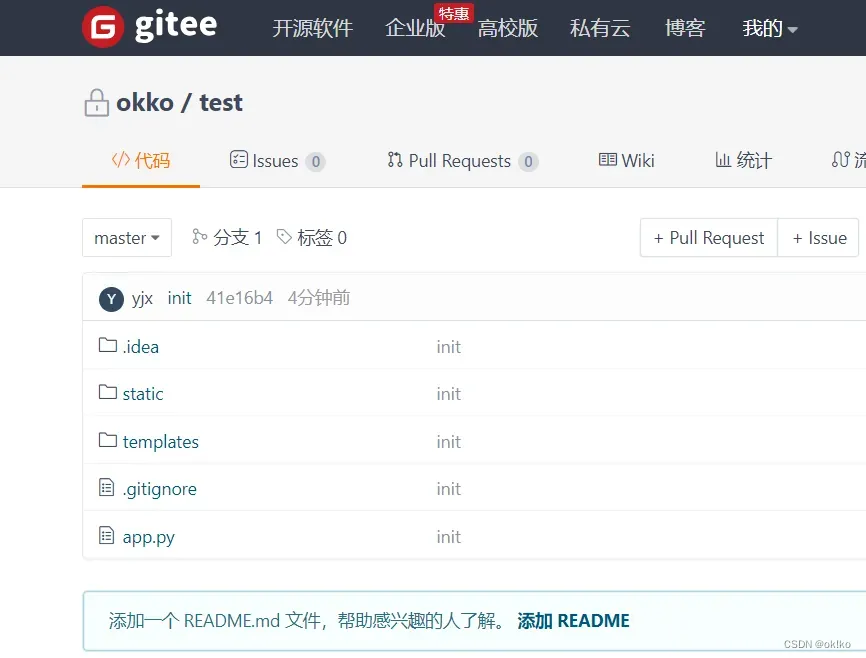
执行后即可在gitee仓库中看到如下内容:
4)提交之后如果后期有修改,同样到项目根目录,git bash here再输入以上三个命令:
git add .
git commit -m 'update_module'
git push origin master
即可更新仓库,同步本地和远程仓库的代码。
五、服务器拉取远程仓库的代码
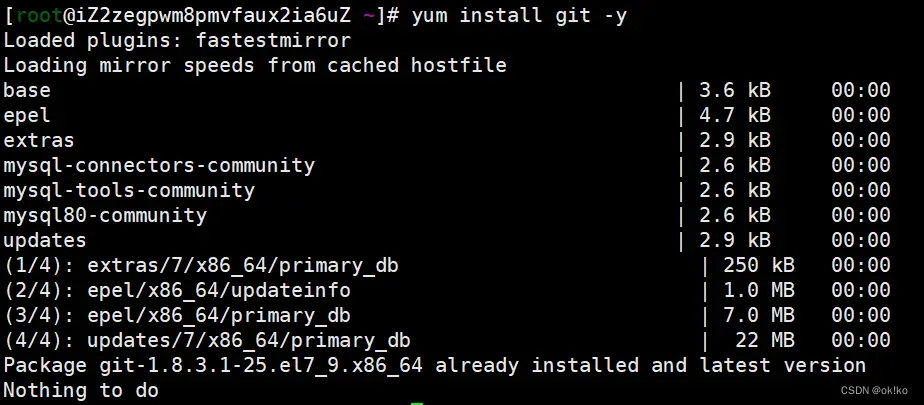
1、使用xShell连接服务器,安装git
yum install git -y
2、为你的项目在服务器上创建一个文件夹,比如在/data/www/下创建
cd /data/
mkdirs www
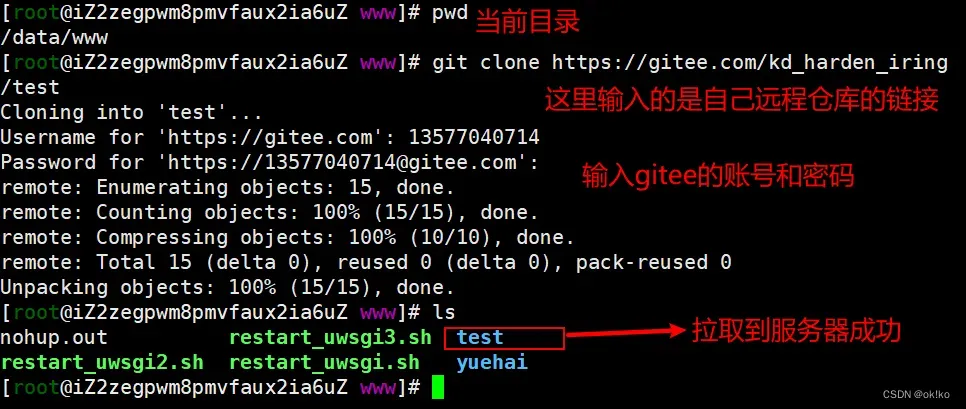
cd /data/www/
3、从远程仓库拉取项目代码
git clone https://gitee.com/kd_harden_iring/test
前面生成的gitee仓库的连接,切换为自己的
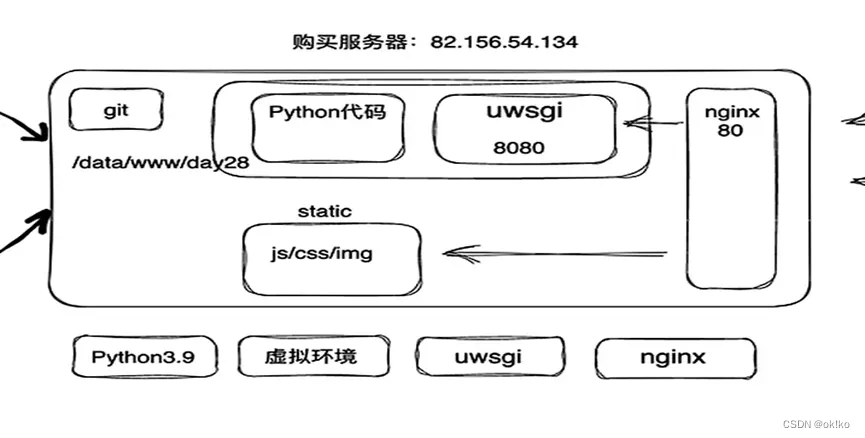
六、服务器中安装环境
Python3.9.5
虚拟环境
uwsgi:接收用户的请求,高效
nginx:反向代理请求,分类用户请求,转发用户请求
1、安装Python3.9.5
在Xshell中运行以下命令:
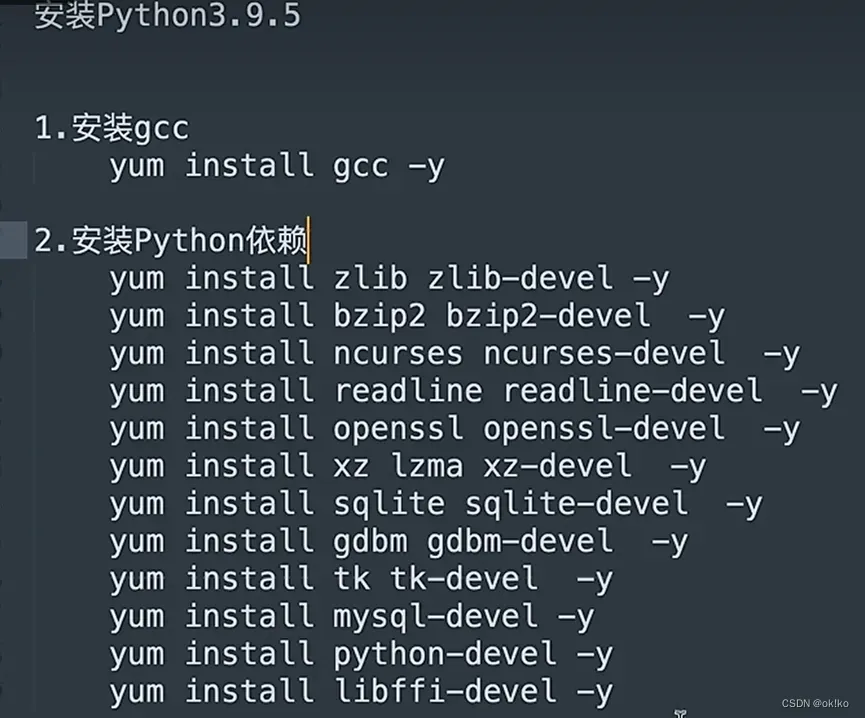
注:执行yum install mysql-devel -y可能会报错,具体解决:
- 先执行wget http://repo.mysql.com/mysql57-community-release-el7-8.noarch.rpm
- 再执行rpm –import https://repo.mysql.com/RPM-GPG-KEY-mysql-2022
- 最后执行yum install mysql-devel -y
下载Python3.9.5源码:
yum install wget -y
cd /data/
wget https://www.python.org/ftp/python/3.9.5/Python-3.9.5.tgz
解压—编译—安装:
tar -xvf Python-3.9.5.tgz
cd Python-3.9.5.tgz
./configure
make all
make install
Python解释器配置豆瓣源:
pip3.9 config set global.index-url https://pypi.douban.com/simple/
2、虚拟环境配置
1)安装 virtualenv
pip3.9 install virtualenv
2)创建虚拟环境(一般是一个项目一个虚拟环境)
mkdir /envs
cd /envs/
virtualenv /envs/test --python=python3.9
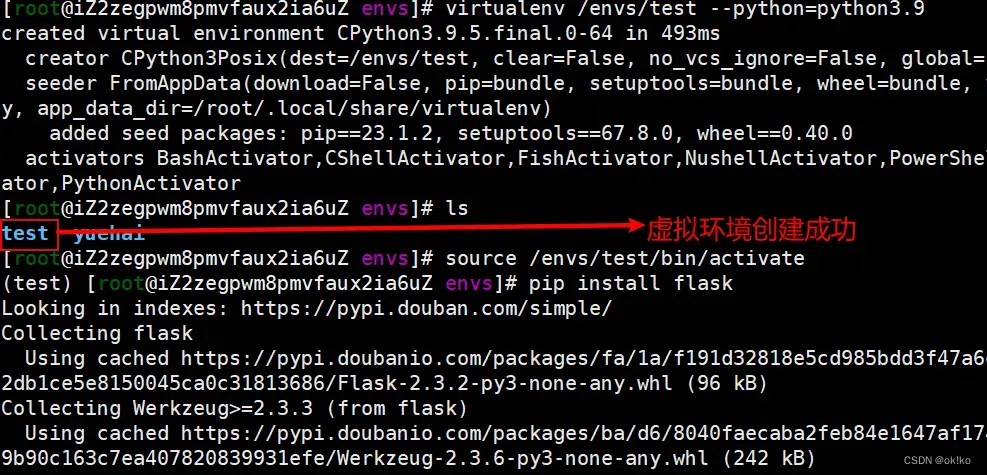
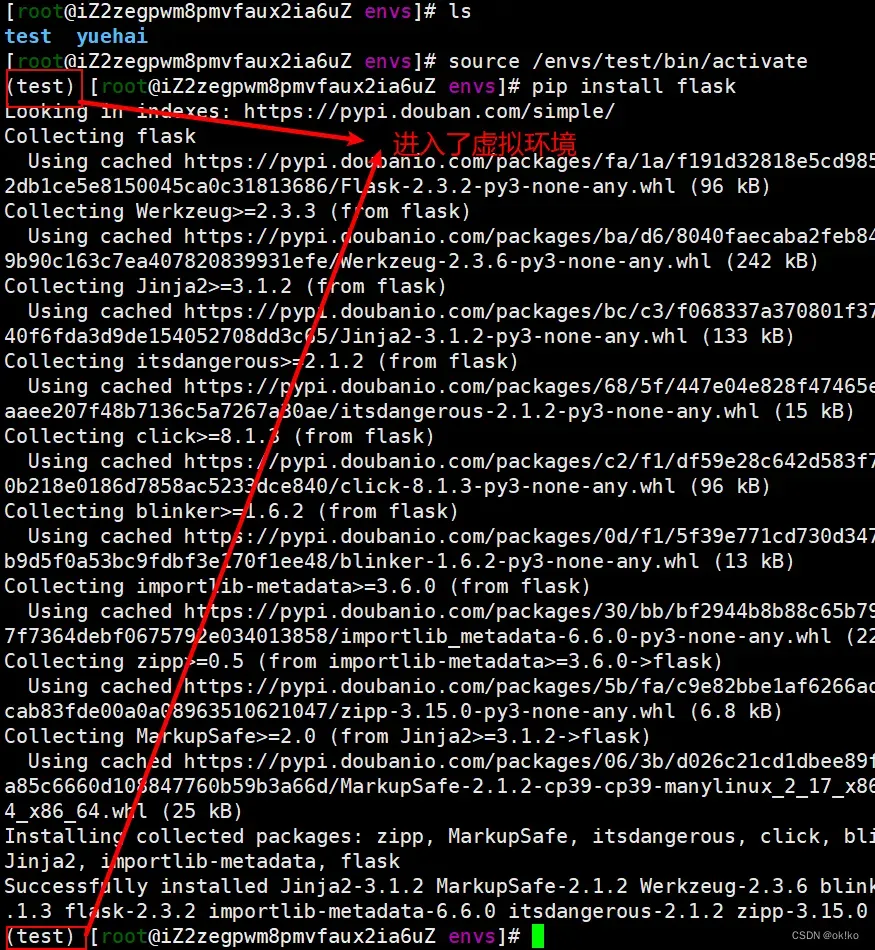
3)激活虚拟环境
source  /envs/test/bin/activate
pip install flask
4)在虚拟环境中运行代码(类似本地运行)
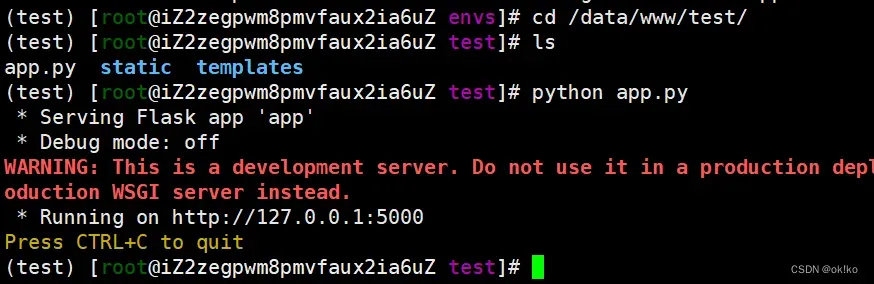
3、uwsgi安装
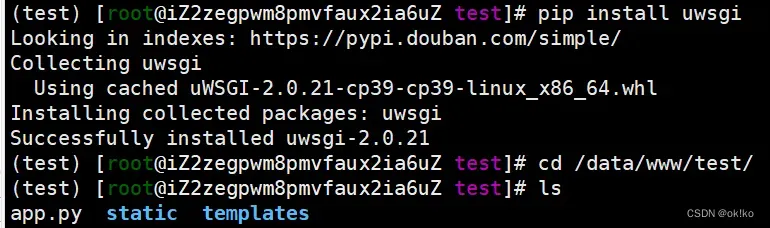
1)安装uwsgi
激活虚拟环境,在虚拟环境中安装
source  /envs/test/bin/activate
pip install uwsgi
2)基于uwsgi配置文件的方式运行flask项目
cd /data/www/test/
vim test_uwsgi.ini
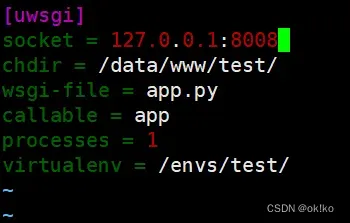
编写uwsgi的配置文件:
	[uwsgi]
	socket = 127.0.0.1:8001
	chdir = /data/www/test/
	wsgi-file = app.py
	callable = app
	processes = 1
	virtualenv = /envs/test/

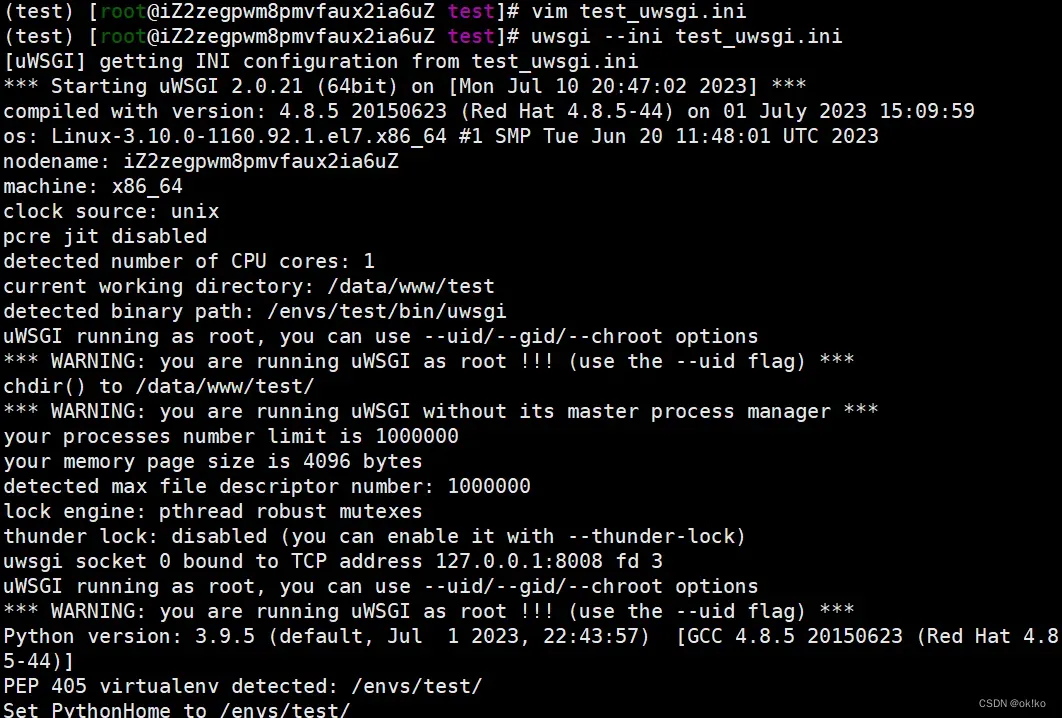
3)启动uwsgi的方式:
uwsgi --ini test _uwsgi.ini
4、Nginx安装
1)安装nginx
yum install nginx -y
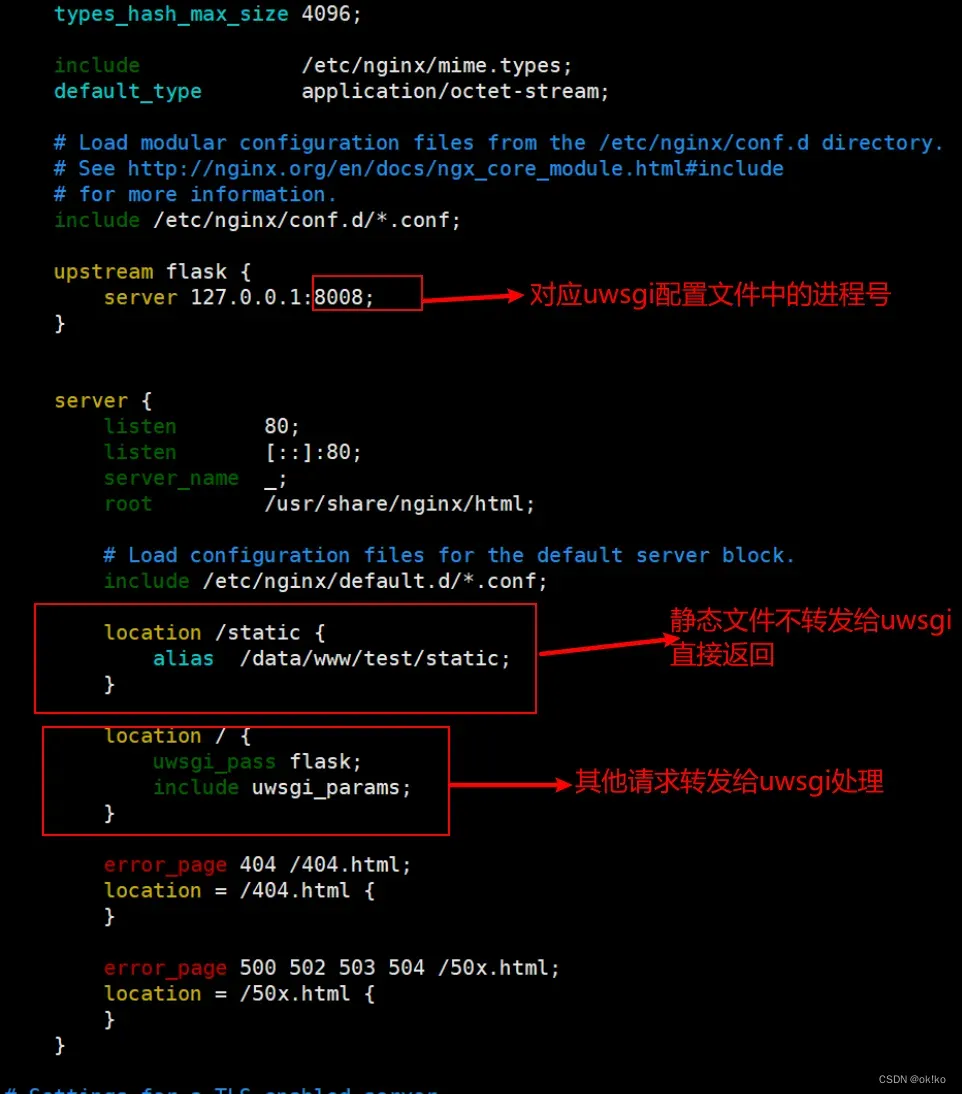
2)修改配置nginx
vim /etc/nginx/nginx.conf
3)设置nginx开机自启动并启动nginx服务
systemctl enable nginx
systemctl start nginx
如果无法启动80端口被占用,输入以下命令查看并关闭相关进程:
lsof -i:80 80端口被占用的问题查看
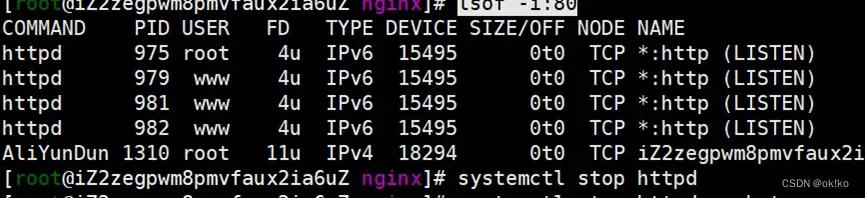
如上:关闭httpd即可
再次启动nginx即可成功:systemctl start nginx
七、服务器运行程序并通过公网进行访问测试
nginx启动后,依次执行以下语句即可拉起test项目
source /envs/test/bin/activate
cd /data/www/test/
uwsgi --ini test_uwsgi.ini >nohup.out
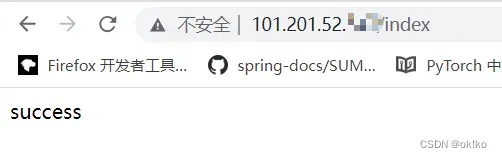
浏览器中输入你服务器的公网ip,即可看到你的项目

注意:
每个项目所依赖的库不同,需要你在虚拟环境中下载对应的使用到的库。
文章参考
B站链接:
https://www.bilibili.com/video/BV1gR4y1D7qe?p=1&vd_source=d017010c9713a9f8e98390906782f3ef
文章出处登录后可见!