文章目录
- 什么是 Amazon CodeWhisperer?
- 快速上手CodeWhisperer
- 安装
- 配置
- 如何使用 Amazon CodeWhisperer
- CodeWhisperer初体验:hello world
- Python语言快速入门
- 向文件写入数据
- 读取csv文件
- 排序算法之冒泡排序
- 设计模式之单例模式
- 使用CodeWhisperer快速上手Pytorch
- pytorch版本的卷积
- Conv+BN+Relu激活函数
- 残差Block
- 上大餐:Reset18
- NMS(非极大值抑制)
- 总结
什么是 Amazon CodeWhisperer?
亚马逊云科技在2023年4月18日宣布,实时 AI 编程助手 Amazon CodeWhisperer 正式可用,同时推出的还有供所有开发人员免费使用的个人版(CodeWhisperer Individual)。CodeWhisperer 经过数十亿行代码的训练,可以根据您的评论和现有代码实时生成从代码片段到全函数的代码建议。CodeWhisperer 帮助开发者基于注释生成代码,追踪开源参考,扫描查找漏洞。确保了开发人员可以专注于敏捷开发,不会由于搜索示例代码等工作而打断思绪。在创建复杂代码和面对不断变化的开发环境时,开发人员可以在自己喜欢的 IDE(集成开发环境)中使用 CodeWhisperer,例如 Visual Studio Code、IntelliJ IDEA 及其他 IDE,从而提高工作效率、简化工作任务。
具有以下特点:
-
1、免费:对所有开发人员都可以免费使用。这点很重要!!!
-
2、为您量身定制的实时 AI 代码生成器,极大提高工作效率。在预览期间,Amazon 举办了一场工作效率挑战赛,使用 Amazon CodeWhisperer 的参与者成功完成任务的可能性要比未使用 CodeWhisperer 的参与者高 27%,平均完成任务的速度快 57%。
-
3、 支持热门编程语言和 IDE。Amazon CodeWhisperer 支持开发语言有: Python、Java、JavaScript、TypeScript、C#、Go、Rust、PHP、Ruby、Kotlin、C、C++、Shell 脚本、SQL 和 Scala 等开发语言;支持的IDE有Visual Studio Code、IntelliJ IDEA 等。所有开发人员(不仅仅是拥有亚马逊云服务账户或使用亚马逊云服务的人),只需一个电子邮箱地址即可注册。so easy!!!
-
4、针对 AWS 服务的优质建议:可以帮助程序员过滤出有偏见或不公正的代码建议,提高代码的安全性和准确性。CodeWhisperer 是唯一具备该功能的编程助手。当生成的代码类似于训练集中的参考代码时,它会为代码提供额外的提示(比如代码库 URL 和许可证),帮助降低使用代码的风险,并使开发人员重复利用代码。
-
5、内置安全扫描:可以对开发人员编写的代码进行安全扫描,找到并建议修复难以检测的漏洞。例如十大开放式 Web 应用程序安全项目 (OWASP) 中的漏洞以及不符合加密库最佳实践的漏洞等。如果 CodeWhisperer 发现了漏洞,它会提供解决问题的建议。

快速上手CodeWhisperer
安装
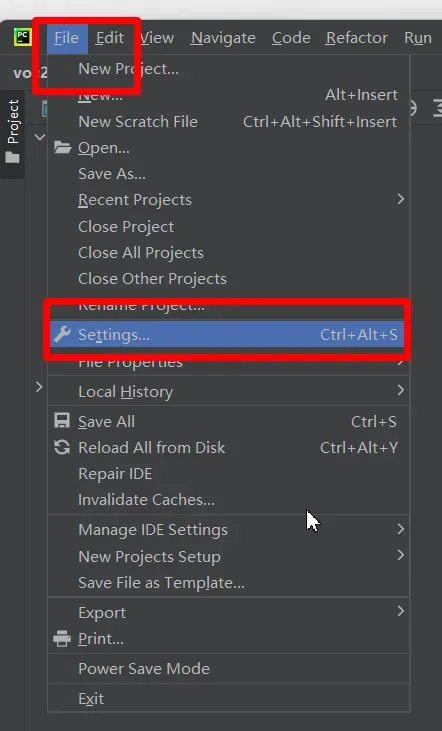
打开pytcharm,点击File——Settings,如下图:
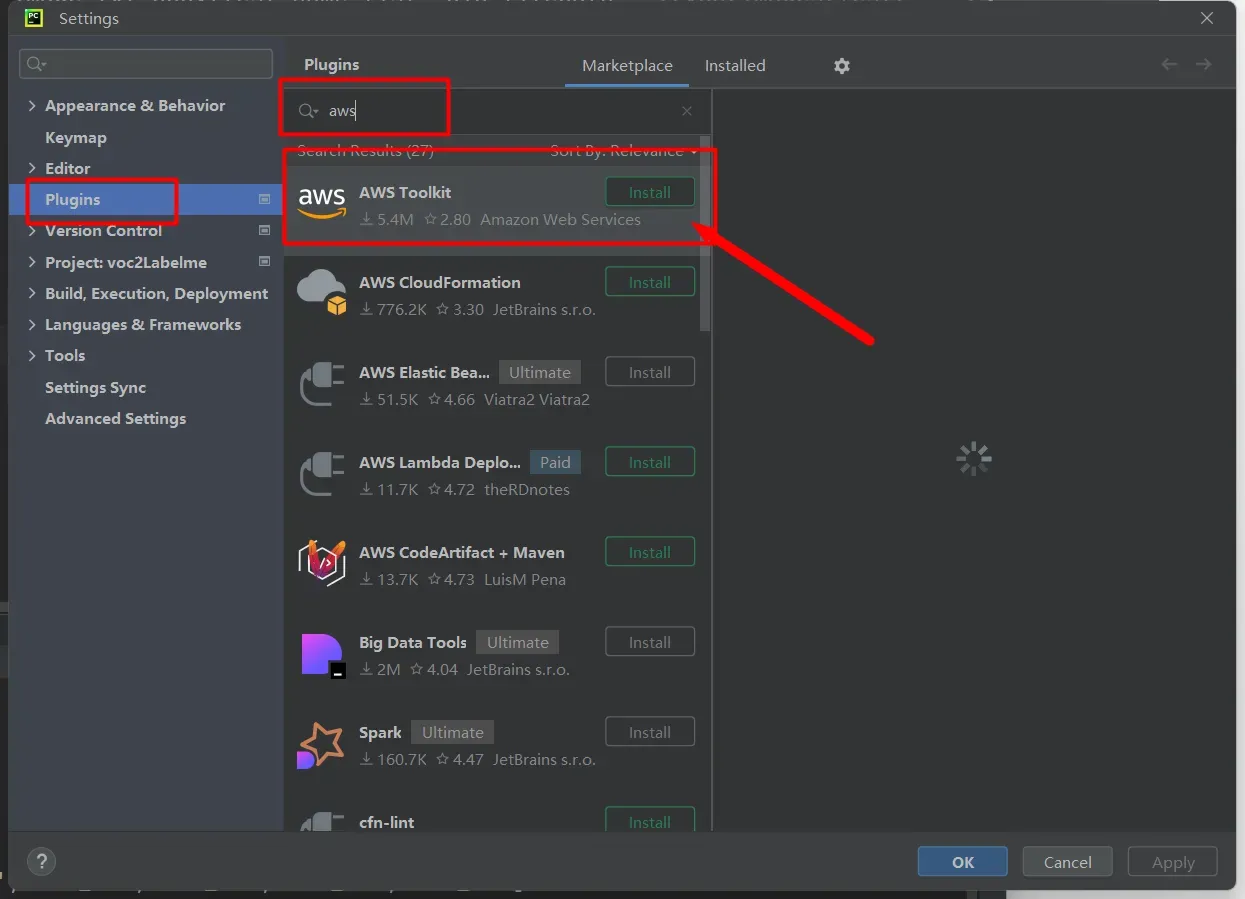
点击Plugins,然后,在搜索栏里输入aws,找到AWS Toolkit,点击Install安装,如下图:
弹出警告框,如下图:
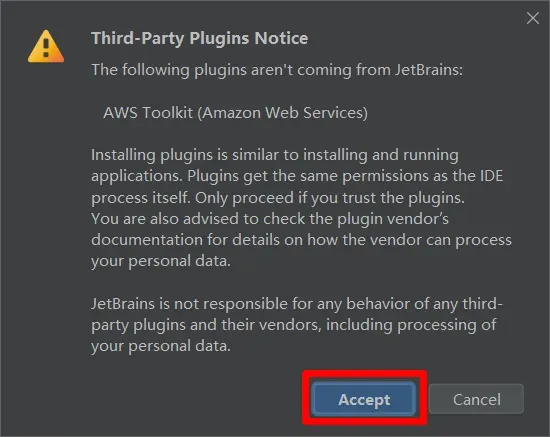
点击Accept,继续下一步。等待安装完成。
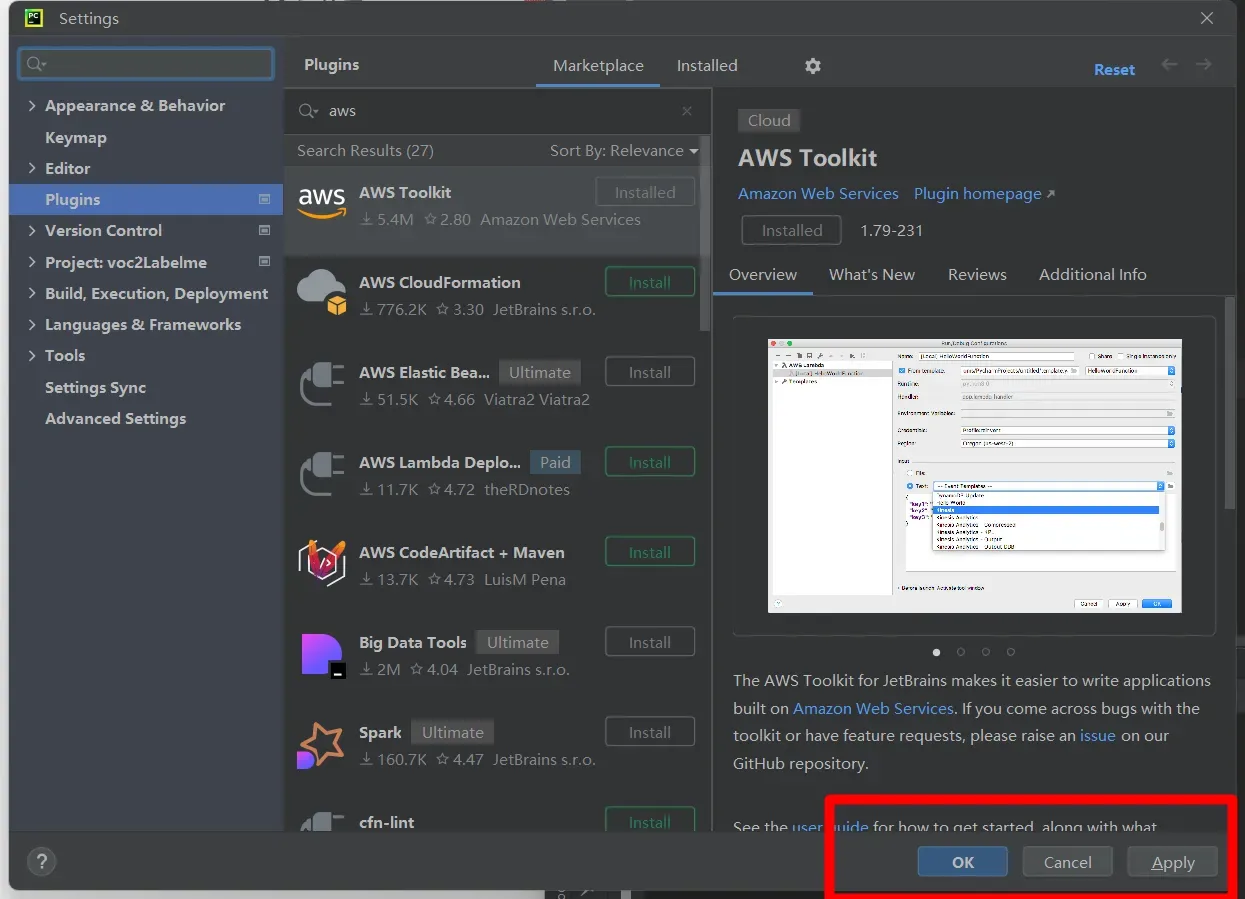
安装完成后,点击Apply。
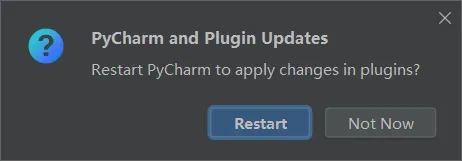
重启Pycharm。到这里就安装完成了。非常easy!!!
配置
重启Pycharm后,在左下角就能看到AWS Toolkit。我们开始配置CodeWhisperer,如下图
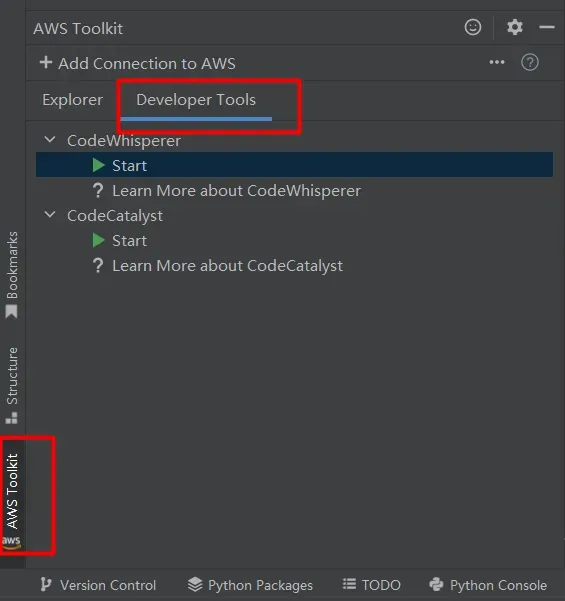
点击AWS Toolkit——Developer Tools,选择CodeWhisperer,点击Start。

选择使用email登录,如上如图.然后,点击Connect
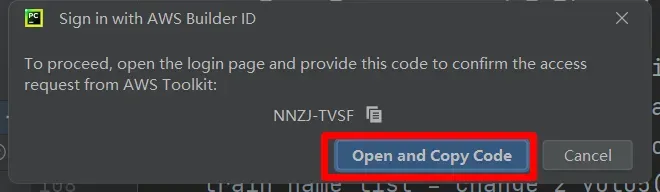
点击Open and Copy Code。

然后将Code粘贴进去。点击Submit and continue。继续下一步!

输入注册的电子邮箱,如果没有请注册一个账号!继续下一步!

输入邮箱和姓名!下一步!

新建密码,和新建账号时的要求一样,可以设置一样的密码!
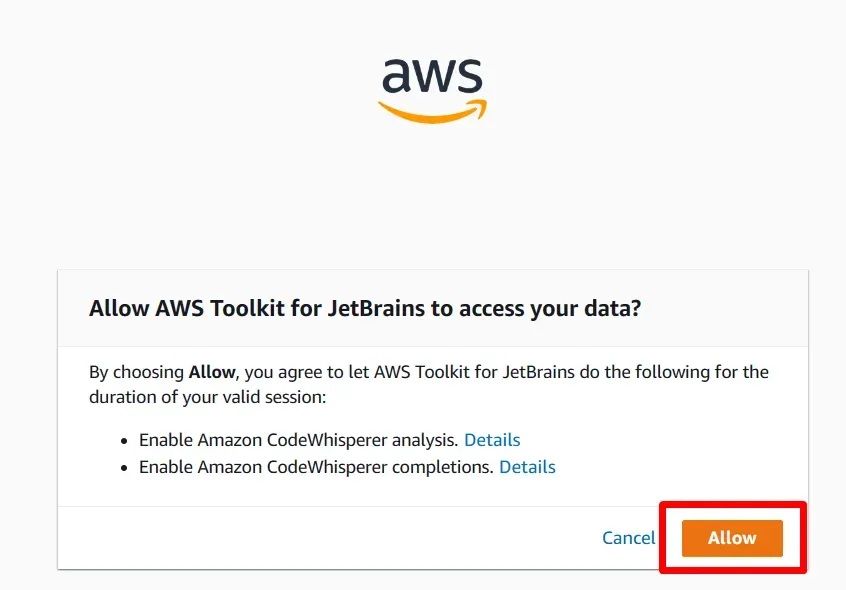
点击Allow。然后网页和Pycharm弹出如下界面:


一切OK!Are you OK?
如何使用 Amazon CodeWhisperer
-
1、将光标放在注释或代码行后面,点击 Enter 键,激活 CodeWhisperer。
-
2、您可以使用向左箭头键 / 向右箭头键,浏览多个建议(如果可用)。通过按 Tab 键,接受代码建议。通过按 Esc 键 或键入一个字符,放弃建议。
-
3、在接受或编写新代码后,再次点击 Enter 键,获取下一行建议代码。
-
4、手动触发 Amazon CodeWhisperer;或者如果未显示建议,可在 MacOS 上点击 Option + C,或在 Windows 上点击 Alt + C。
CodeWhisperer初体验:hello world
配置完成就可以上手了! 体验一下Python的hello world。如下图:
先写一行注释,如下图:
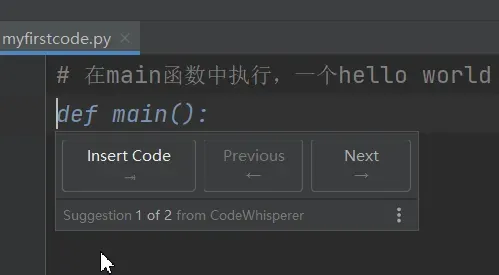
然后,点击Enter键,生成函数名。如果你觉得满意,点击Tab键即可使用!在点击Enter键,生成函数体,如下图:
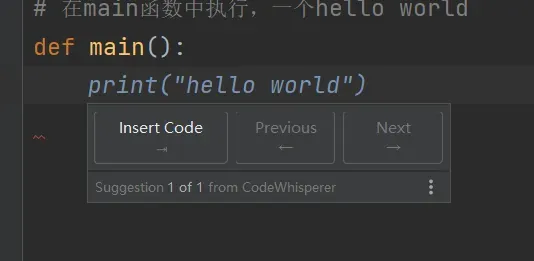
点击Tab键,写入代码。几个按键就可以完成!代码如下:
# 在main函数中执行,一个hello world
def main():
    print("hello world")
中文和英文混着用,CodeWhisperer可以识别!
Python语言快速入门
我选一些常用的代码作为例子,比如一些文件的读写操作和一些经典的算法,体验CodeWhisperer代码生成能力!
向文件写入数据
将结果保存到txt文件中,这是常用的代码,代码如下:
# 向result.txt文件写入多行数据
def write_lines(lines):
    with open('result.txt', 'a') as f:
        for line in lines:
            f.write(line + '\n')
我说的写入,但是CodeWhisperer给的是追加。这可能是在中文理解上的问题。改成英文的试试,代码如下:
# To write multiple lines of data to the result.txt file
def write_lines(lines):
    with open('result.txt', 'a') as f:
        for line in lines:
            f.write(line + '\n')
好吧!确实有问题!
再试试其他的平台的代码:
with open("result.txt", "w") as file:
    file.write("第一行数据\n")
    file.write("第二行数据\n")
    file.write("第三行数据\n")
我想输入一万行咋办呢?
读取csv文件
使用pandas读取csv文件,代码如下:
# 写一个使用pandas读取csv文件
import pandas as pd

def read_csv(file_path):
    df = pd.read_csv(file_path)
    print(df)
    return df

if __name__ == "__main__":
    read_csv("data.csv")
基本上,写出了大致的逻辑,还帮你写了if __name__ == "__main__":。同样对比其他平台。
import pandas as pd

# 读取CSV文件
data = pd.read_csv('your_file.csv')

# 打印数据框的前几行
print(data.head())
这个就比较简单了!
排序算法之冒泡排序
代码如下:
# 写一个冒泡排序
def bubble_sort(alist):
    n = len(alist)
    for j in range(n-1):
        count = 0
        for i in range(0, n-1-j):
            if alist[i] > alist[i+1]:
                alist[i], alist[i+1] = alist[i+1], alist[i]
                count += 1
        if count == 0:
            return
        print(alist)
        print("第%d趟排序后的结果:" % (j+1))
        print(alist)
        print("=====================")

    return alist
alist = [54,26,93,17,77,31,44,55,20]
print(bubble_sort(alist))
基本上能完整生成!还打印出了中间结果,结果如下:
[26, 54, 17, 77, 31, 44, 55, 20, 93]
第1趟排序后的结果:
[26, 54, 17, 77, 31, 44, 55, 20, 93]
=====================
[26, 17, 54, 31, 44, 55, 20, 77, 93]
第2趟排序后的结果:
[26, 17, 54, 31, 44, 55, 20, 77, 93]
=====================
[17, 26, 31, 44, 54, 20, 55, 77, 93]
第3趟排序后的结果:
[17, 26, 31, 44, 54, 20, 55, 77, 93]
=====================
[17, 26, 31, 44, 20, 54, 55, 77, 93]
第4趟排序后的结果:
[17, 26, 31, 44, 20, 54, 55, 77, 93]
=====================
[17, 26, 31, 20, 44, 54, 55, 77, 93]
第5趟排序后的结果:
[17, 26, 31, 20, 44, 54, 55, 77, 93]
=====================
[17, 26, 20, 31, 44, 54, 55, 77, 93]
第6趟排序后的结果:
[17, 26, 20, 31, 44, 54, 55, 77, 93]
=====================
[17, 20, 26, 31, 44, 54, 55, 77, 93]
第7趟排序后的结果:
[17, 20, 26, 31, 44, 54, 55, 77, 93]
=====================
None
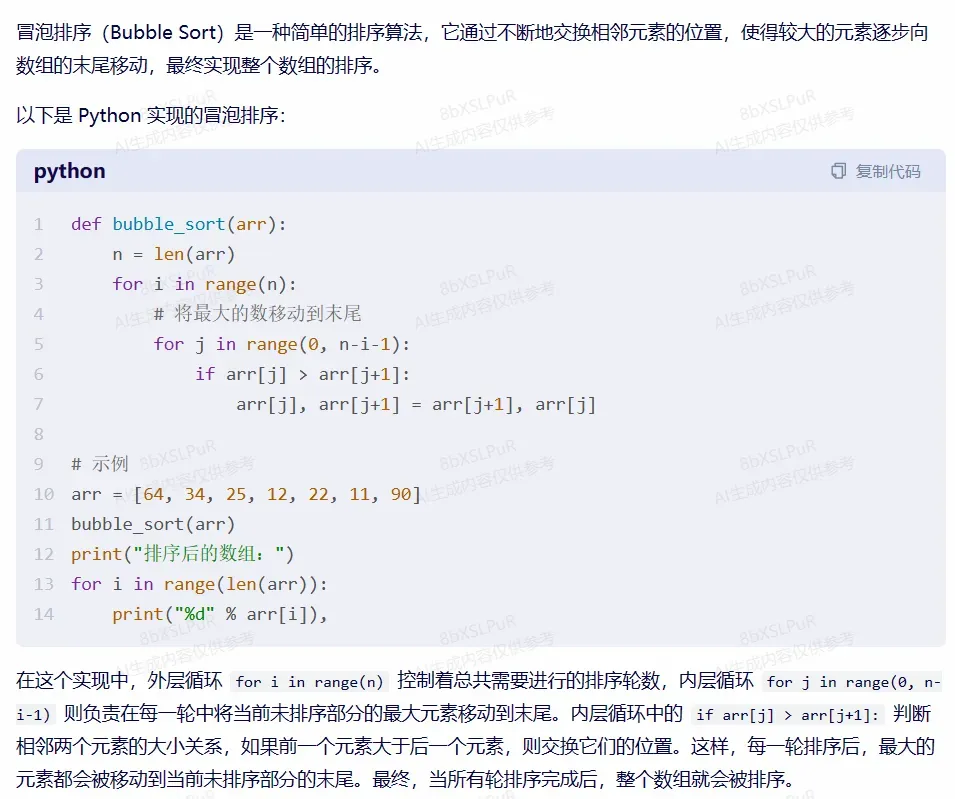
对比其他平台的,代码如下:
def bubble_sort(arr):
    n = len(arr)
    for i in range(n):
        # 将最大的数移动到末尾
        for j in range(0, n - i - 1):
            if arr[j] > arr[j + 1]:
                arr[j], arr[j + 1] = arr[j + 1], arr[j]
            # 示例


arr = [64, 34, 25, 12, 22, 11, 90]
bubble_sort(arr)
print("排序后的数组:")
for i in range(len(arr)):
    print("%d" % arr[i]),
运行结果:
排序后的数组:
11
12
22
25
34
64
90
设计模式之单例模式
模式设计也是日常编程经常用到的,我选择单例模式来测验一下CodeWhisperer,代码如下:
class Singleton(object):
    def __new__(cls, *args, **kwargs):
        if not hasattr(cls, '_instance'):
            orig = super(Singleton, cls)
            cls._instance = orig.__new__(cls, *args, **kwargs)
        return cls._instance
    def __init__(self):
        print('init')
        pass
    def __str__(self):
        return 'Singleton'
    __repr__ = __str__
    pass
class MyClass(Singleton):
    a = 1
    pass
if __name__ == '__main__':
    a = MyClass()
    b = MyClass()
    print(a)
    print(b)
    print(a is b)
    pass
运行结果:
init
init
Singleton
Singleton
True
可以看到a和b是同一个对象,代码是没有问题的!
使用CodeWhisperer快速上手Pytorch
目前,python语言广泛应用在AI上,其中最著名的AI框架是Pytorch。试试CodeWhisperer生成Pytorch代码的能力如何?
pytorch版本的卷积
# 写一个pytorch的卷积
import torch
import torch.nn as nn


class Conv(nn.Module):
    def __init__(self):
        super(Conv, self).__init__()
        self.conv = nn.Conv2d(3, 3, 3)

    def forward(self, x):
        x = self.conv(x)
        return x
Conv+BN+Relu激活函数
Conv+BN+Relu是CNN的标准配置!我们一起看看CodeWhisperer生成的代码怎么样,代码如下:
# 写一个pytorch的block,由卷积、BN和relu激活函数组成
import torch
import torch.nn as nn


class ConvBNReLU(nn.Module):
    def __init__(self, in_channels, out_channels, kernel_size, stride=1, padding=0, dilation=1, groups=1):
        super(ConvBNReLU, self).__init__()
        self.conv = nn.Conv2d(in_channels, out_channels, kernel_size, stride, padding, dilation, groups, bias=False)
        self.bn = nn.BatchNorm2d(out_channels)
        self.relu = nn.ReLU(inplace=True)

    def forward(self, x):
        return self.relu(self.bn(self.conv(x)))
轻松搞定!!!
残差Block
ResNet Block,这种残差结构主宰着深度学习模型,无论是CNN还是Transformer都是这种残差结构,我们尝试使用CodeWhisperer生成ResNet的Block,代码如下:
# 写一个pytorch的残差block
import torch
import torch.nn as nn


class ResidualBlock(nn.Module):
    def __init__(self, inchannel, outchannel, stride=1):
        super(ResidualBlock, self).__init__()
        self.left = nn.Sequential(
            nn.Conv2d(inchannel, outchannel, kernel_size=3, stride=stride, padding=1, bias=False),
            nn.BatchNorm2d(outchannel),
            nn.ReLU(inplace=True),
            nn.Conv2d(outchannel, outchannel, kernel_size=3, stride=1, padding=1, bias=False),
            nn.BatchNorm2d(outchannel)
        )
        self.shortcut = nn.Sequential()
        if stride != 1 or inchannel != outchannel:
            self.shortcut = nn.Sequential(
                nn.Conv2d(inchannel, outchannel, kernel_size=1, stride=stride, bias=False),
                nn.BatchNorm2d(outchannel)
            )

    def forward(self, x):
        out = self.left(x)
        out += self.shortcut(x)
        out = nn.ReLU(out)
        return out
毫无压力!!!
上大餐:Reset18
让CodeWhisperer直接写一个pytorch版的ResNet18。
# 写一个pytorch的Resnet18
import torch
from torch import nn
from torch.nn import functional as F
class ResnetBlock(nn.Module):
    def __init__(self, in_channels, out_channels, stride=1):
        super(ResnetBlock, self).__init__()
        self.conv1 = nn.Conv2d(in_channels, out_channels, kernel_size=3, stride=stride, padding=1)
        self.bn1 = nn.BatchNorm2d(out_channels)
        self.conv2 = nn.Conv2d(out_channels, out_channels, kernel_size=3, stride=1, padding=1)
        self.bn2 = nn.BatchNorm2d(out_channels)
        self.shortcut = nn.Sequential()
        if stride != 1 or in_channels != out_channels:
            self.shortcut = nn.Sequential(
                nn.Conv2d(in_channels, out_channels, kernel_size=1, stride=stride),
                nn.BatchNorm2d(out_channels)
            )
    def forward(self, x):
        out = F.relu(self.bn1(self.conv1(x)))
        out = self.bn2(self.conv2(out))
        out += self.shortcut(x)
        out = F.relu(out)
        return out

class Resnet18(nn.Module):
    def __init__(self):
        super(Resnet18, self).__init__()
        self.conv1 = nn.Conv2d(3, 64, kernel_size=7, stride=2, padding=3)
        self.bn1 = nn.BatchNorm2d(64)
        self.maxpool = nn.MaxPool2d(kernel_size=3, stride=2, padding=1)
        self.layer1 = self.make_layer(64, 64, 2, stride=1)
        self.layer2 = self.make_layer(64, 128, 2, stride=2)
        self.layer3 = self.make_layer(128, 256, 2, stride=2)
        self.layer4 = self.make_layer(256, 512, 2, stride=2)

    def make_layer(self, in_channels, out_channels, blocks, stride=1):
        layers = []
        layers.append(ResnetBlock(in_channels, out_channels, stride))
        for i in range(1, blocks):
            layers.append(ResnetBlock(out_channels, out_channels))
            return nn.Sequential(*layers)
        return nn.Sequential(*layers)
    def forward(self, x):
        x = self.conv1(x)
        x = self.bn1(x)
        x = F.relu(x)
        x = self.maxpool(x)
        x = self.layer1(x)
        x = self.layer2(x)
        x = self.layer3(x)
        x = self.layer4(x)
        return x
只需使用Enter+Tab+方向键就可以完成ResNet18网络的编译!
NMS(非极大值抑制)
NMS是物体检测常用的代码,我们使用CodeWhisperer可以轻松写出来,代码如下:
# NMS函数
import numpy as np


def bbox_iou(bboxes1, bboxes2):
    if bboxes1.shape[1] != 4 or bboxes2.shape[1] != 4:
        raise IndexError

    # 两两框的位置差
    bboxes1_area = (bboxes1[:, 2] - bboxes1[:, 0]) * (bboxes1[:, 3] - bboxes1[:, 1])
    bboxes2_area = (bboxes2[:, 2] - bboxes2[:, 0]) * (bboxes2[:, 3] - bboxes2[:, 1])

    # 两两框的重叠面积后面进行目标检�n
    left_up = np.maximum(bboxes1[:, :2], bboxes2[:, :2])
    right_down = np.minimum(bboxes1[:, 2:], bboxes2[:, 2:])

    # 两两框的重叠面种
    inter_section = np.maximum(right_down - left_up, 0)
    inter_area = inter_section[:, 0] * inter_section[:, 1]

    # 两两框的IOU
    union_area = bboxes1_area + bboxes2_area - inter_area
    ious = inter_area / union_area
    return ious
def nms(bboxes, iou_threshold, sigma=0.3, method='nms'):
    classes_in_img = list(set(bboxes[:, 5]))
    best_bboxes = []

    for cls in classes_in_img:
        cls_mask = (bboxes[:, 5] == cls)
        cls_bboxes = bboxes[cls_mask]

        while len(cls_bboxes) > 0:
            max_ind = np.argmax(cls_bboxes[:, 4])
            best_bbox = cls_bboxes[max_ind]
            best_bboxes.append(best_bbox)
            cls_bboxes = np.concatenate([cls_bboxes[: max_ind], cls_bboxes[max_ind + 1:]])
            iou = bbox_iou(best_bbox[np.newaxis, :4], cls_bboxes[:, :4])
            weight = np.ones((len(iou),), dtype=np.float32)
            assert method in ['nms', 'soft-nms']
            if method == 'nms':
                iou_mask = iou > iou_threshold
                weight[iou_mask] = 0.0
            if method == 'soft-nms':
                weight = np.exp(-(1.0 * iou ** 2 / sigma))
            cls_bboxes[:, 4] = cls_bboxes[:, 4] * weight
            score_mask = cls_bboxes[:, 4] > 0.
            cls_bboxes = cls_bboxes[score_mask]
    return best_bboxes
总结
在这个AI技术飞速发展的时代,我们邀请你一同踏上“用 AI 助力,提升编程效率 —— Amazon CodeWhisperer 探索之旅”的征程。这不仅是一次向AI编程助手——Amazon CodeWhisperer的探索,也是一次向更高效、更智能编程方式的探索。
在这次旅程中,我们一同领略了Amazon CodeWhisperer带来的革命性改变,它以人工智能为驱动,极大地提升了开发者的生产力,降低了开发时间,并提供了一种全新的编程体验。从代码的生成到智能建议,再到错误检测和代码优化,CodeWhisperer都展现出了强大的能力。
通过上面的介绍,相信你已经亲身体验到AI技术在编程中的应用,感受到了CodeWhisperer带来的便捷与高效。让我们共同开启这个全新的编程世界,拥抱AI的变革,用智能编程助力我们的未来。
我们在这里等你,一起开启这场AI与编程的探索之旅,一起见证AI技术在软件开发中的美好未来!
活动地址:https://dev.amazoncloud.cn/experience/codewhisperer-2?sc_medium=corecontent&sc_campaign=product&sc_channel=CSDN
文章出处登录后可见!