开源地址:
https://github.com/fundamentalvision/deformable-detr
超级小白,摸索了几天,感谢批评指正!!!
一、数据集准备
1.下载数据集:
train_2017:
http://images.cocodataset.org/zips/train2017.zip
val_2017:
http://images.cocodataset.org/zips/val2017.zip
2.下载标注文件(instances_train2017.json instances_val2017.json)
http://images.cocodataset.org/annotations/annotations_trainval2017.zip
3.数据集文件夹
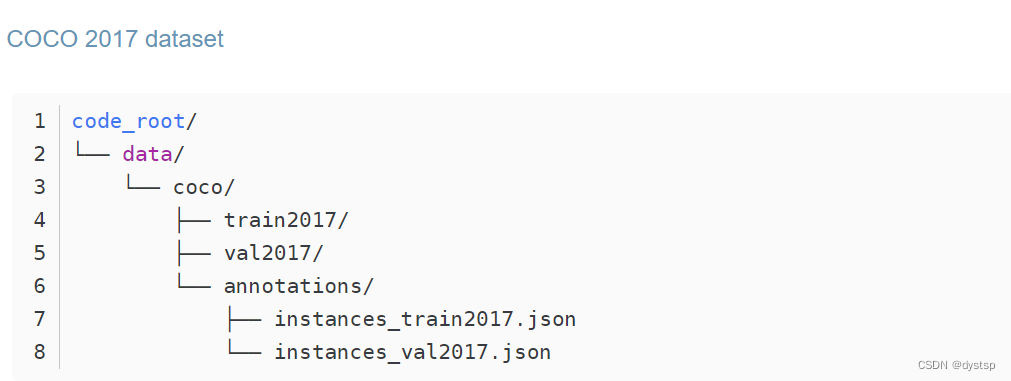
二、环境配置(命令)
1. 创建python环境:
conda create -n deformable_detr python=3.7 pip
2. 激活环境:
conda activate deformable_detr
PyTorch>=1.5.1, torchvision>=0.6.1,自行配置,不赘述

3. 安装必要的包:
pip install -r requirements.txt
4. 编译cuda操作:
cd ./models/ops
sh ./make.sh
编译成功后可 pip list 结果如下:
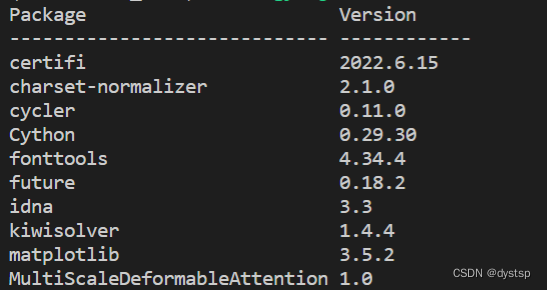
有 MultiScaleDeformableAttention 包
5. 测试 python test.py (可省略):
运行test.py的时间太长,我直接Kill了
6. 运行 python main.py
也可以使用官方给的命令:
GPUS_PER_NODE=8 ./tools/run_dist_launch.sh 8 ./configs/r50_deformable_detr.sh
进行修改,如两张卡进行训练:
GPUS_PER_NODE=2 ./tools/run_dist_launch.sh 2 ./configs/r50_deformable_detr.sh
(我的环境是Linux,此处会出现chmod文件权限问题,百度即可自行解决,用到了chmod 777)
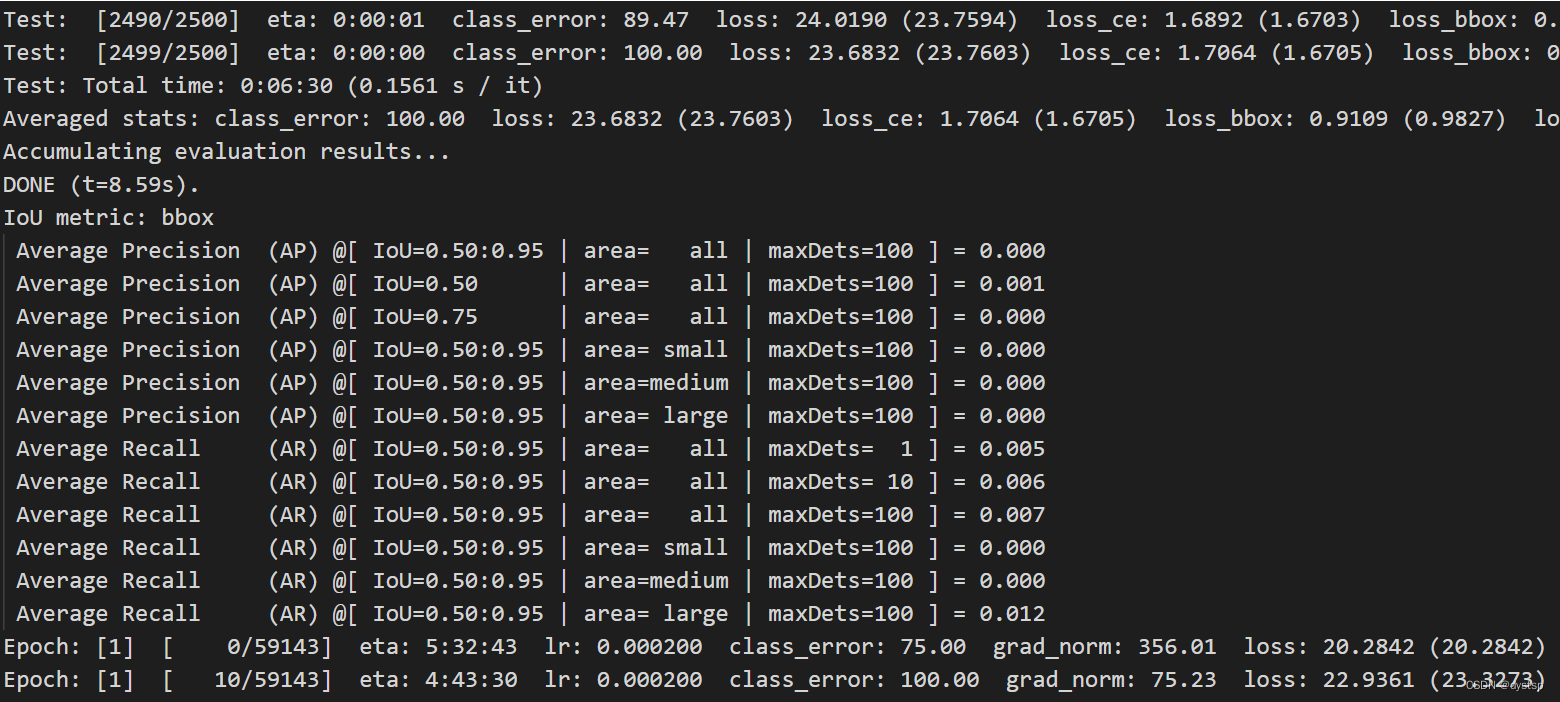
7. 训练过程:训练Epoch:[0] 结束后会进行Test,然后接着Epoch:[1]训练
三、预测
由于训练时间太长,我直接Kill了,使用官方给的权重进行预测
1. 下载权重文件:r50_deformable_detr-checkpoint.pth
如图点击model下载(需要梯子)
https://drive.google.com/file/d/1nDWZWHuRwtwGden77NLM9JoWe-YisJnA/view

2. 待预测图片及其位置:
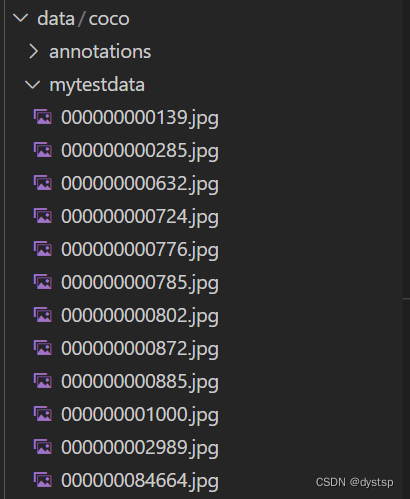
(我自己从COCO数据集随机复制的几张图片)
3. 运行如下代码 predict.py(代码非原创,参考网上修改):
import cv2
from PIL import Image
import numpy as np
import os
import time
import torch
from torch import nn
import torchvision.transforms as T
from main import get_args_parser as get_main_args_parser
from models import build_model
torch.set_grad_enabled(False)
device = torch.device("cuda:0" if torch.cuda.is_available() else "cpu")
print("[INFO] 当前使用{}做推断".format(device))
# 图像数据处理
transform = T.Compose([
T.Resize(800),
T.ToTensor(),
T.Normalize([0.485, 0.456, 0.406], [0.229, 0.224, 0.225])
])
# plot box by opencv
def plot_result(pil_img, prob, boxes, save_name=None, imshow=False, imwrite=False):
opencvImage = cv2.cvtColor(np.array(pil_img), cv2.COLOR_RGB2BGR)
LABEL =['N/A', 'person', 'bicycle', 'car', 'motorcycle', 'airplane', 'bus',
'train', 'truck', 'boat', 'traffic light', 'fire hydrant', 'N/A',
'stop sign', 'parking meter', 'bench', 'bird', 'cat', 'dog', 'horse',
'sheep', 'cow', 'elephant', 'bear', 'zebra', 'giraffe', 'N/A', 'backpack',
'umbrella', 'N/A', 'N/A', 'handbag', 'tie', 'suitcase', 'frisbee', 'skis',
'snowboard', 'sports ball', 'kite', 'baseball bat', 'baseball glove',
'skateboard', 'surfboard', 'tennis racket', 'bottle', 'N/A', 'wine glass',
'cup', 'fork', 'knife', 'spoon', 'bowl', 'banana', 'apple', 'sandwich',
'orange', 'broccoli', 'carrot', 'hot dog', 'pizza', 'donut', 'cake',
'chair', 'couch', 'potted plant', 'bed', 'N/A', 'dining table', 'N/A',
'N/A', 'toilet', 'N/A', 'tv', 'laptop', 'mouse', 'remote', 'keyboard',
'cell phone', 'microwave', 'oven', 'toaster', 'sink', 'refrigerator', 'N/A',
'book', 'clock', 'vase', 'scissors', 'teddy bear', 'hair drier', 'toothbrush']
for p, (xmin, ymin, xmax, ymax) in zip(prob, boxes):
cl = p.argmax()
label_text = '{}: {}%'.format(LABEL[cl], round(p[cl] * 100, 2))
cv2.rectangle(opencvImage, (int(xmin), int(ymin)), (int(xmax), int(ymax)), (255, 255, 0), 2)
cv2.putText(opencvImage, label_text, (int(xmin) + 10, int(ymin) + 30), cv2.FONT_HERSHEY_SIMPLEX, 1,
(255, 255, 0), 2)
if imshow:
cv2.imshow('detect', opencvImage)
cv2.waitKey(0)
if imwrite:
if not os.path.exists("./result/pred"):
os.makedirs('./result/pred')
cv2.imwrite('./result/pred/{}'.format(save_name), opencvImage)
# 将xywh转xyxy
def box_cxcywh_to_xyxy(x):
x_c, y_c, w, h = x.unbind(1)
b = [(x_c - 0.5 * w), (y_c - 0.5 * h),
(x_c + 0.5 * w), (y_c + 0.5 * h)]
return torch.stack(b, dim=1)
def rescale_bboxes(out_bbox, size):
img_w, img_h = size
b = box_cxcywh_to_xyxy(out_bbox)
b = b.cpu().numpy()
b = b * np.array([img_w, img_h, img_w, img_h], dtype=np.float32)
return b
def load_model(model_path , args):
model, _, _ = build_model(args)
model.cuda()
model.eval()
state_dict = torch.load(model_path) # <-----------修改加载模型的路径
model.load_state_dict(state_dict["model"])
model.to(device)
print("load model sucess")
return model
# 图像的推断
def detect(im, model, transform, prob_threshold=0.7):
# mean-std normalize the input image (batch-size: 1)
img = transform(im).unsqueeze(0)
# propagate through the model
img = img.to(device)
start = time.time()
outputs = model(img)
# keep only predictions with 0.7+ confidence
print(outputs['pred_logits'].softmax(-1)[0, :, :-1])
probas = outputs['pred_logits'].softmax(-1)[0, :, :-1]
keep = probas.max(-1).values > prob_threshold
probas = probas.cpu().detach().numpy()
keep = keep.cpu().detach().numpy()
# convert boxes from [0; 1] to image scales
bboxes_scaled = rescale_bboxes(outputs['pred_boxes'][0, keep], im.size)
end = time.time()
return probas[keep], bboxes_scaled, end - start
if __name__ == "__main__":
main_args = get_main_args_parser().parse_args()
# 加载模型
dfdetr = load_model('DDETR/r50_deformable_detr-checkpoint.pth',main_args) # <--修改为自己加载模型的路径
files = os.listdir("DDETR/data/coco/mytestdata/") # <--修改为待预测图片所在文件夹路径
cn = 0
waste=0
for file in files:
img_path = os.path.join("DDETR/data/coco/mytestdata/", file) # <--修改为待预测图片所在文件夹路径
im = Image.open(img_path)
scores, boxes, waste_time = detect(im, dfdetr, transform)
plot_result(im, scores, boxes, save_name=file, imshow=False, imwrite=True)
print("{} [INFO] {} time: {} done!!!".format(cn,file, waste_time))
cn+=1
waste+=waste_time
waste_avg = waste/cn
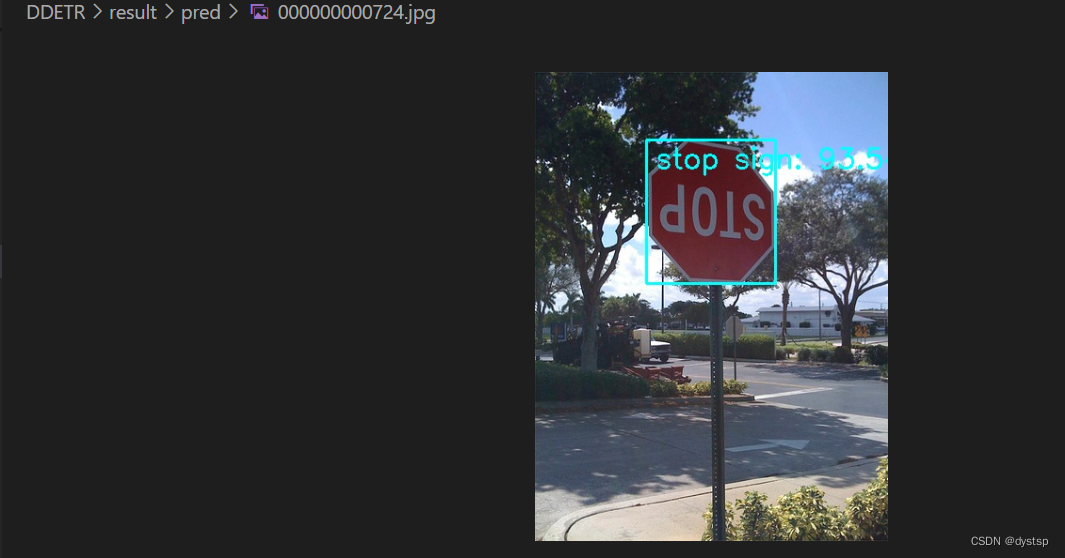
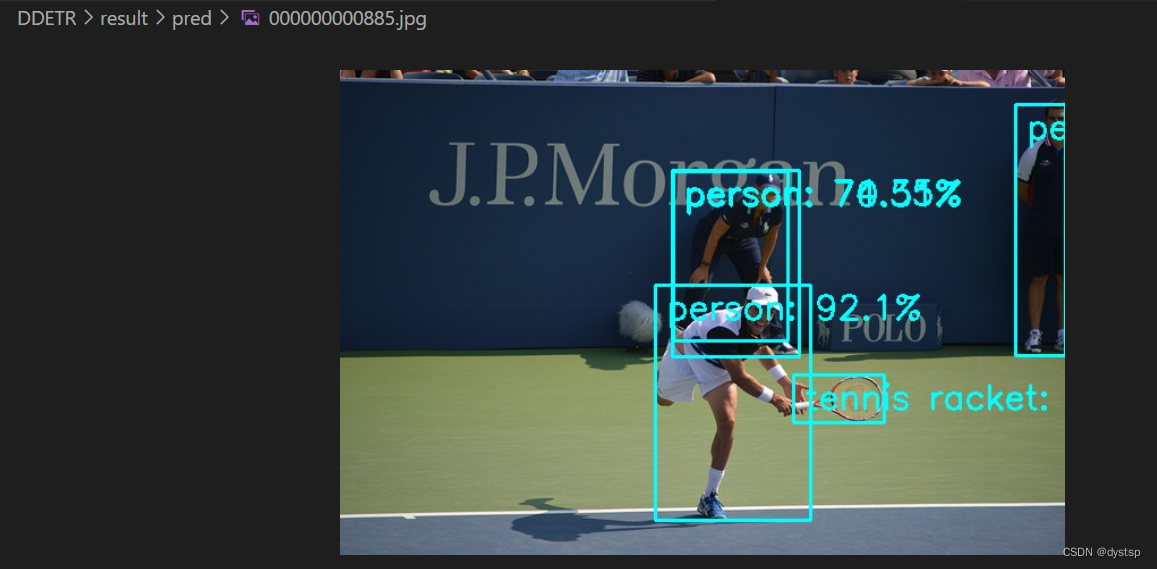
print(waste_avg)4. 预测结果及预览:
使用Deformable DETR进行预测:
参考:
https://www.jianshu.com/p/b364534fd0a7
Windows下运行Deformable-DETR_harold_du的博客-CSDN博客_deformable detr
文章出处登录后可见!