最近在学习Golang,写了个微信公众号项目练练手。
一、开发前准备
1、注册微信公众号
百度搜索微信公众号进入官网,注册一个订阅号,其他信息按要求填写即可。
注册完成后进入个人公众号主页,下拉至设置与开发
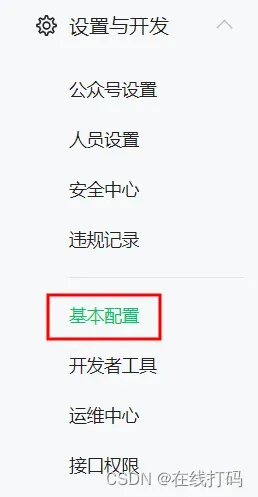
点击基本配置,查看AppID和AppSecret(之后进行代码开发会用到)。
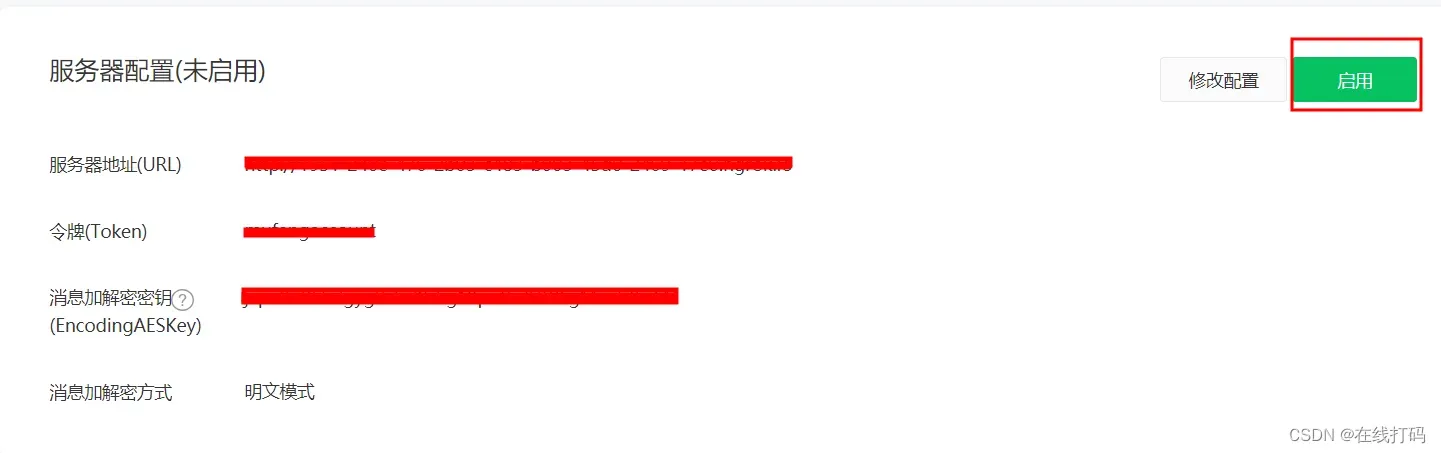
2、服务器配置
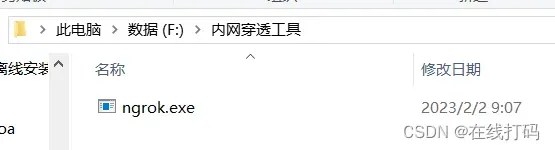
然后进行服务器配置,由于是本地开发,为了方便调试,可以暂时使用内网穿透工具ngork映射公网地址,具体的使用方法网上都有,在此就不多赘述。
下载完成后是一个可执行文件
在当前目录打开命令行窗口输入命令启动ngork
ngork.exe http 80将本地80端口映射到公网地址
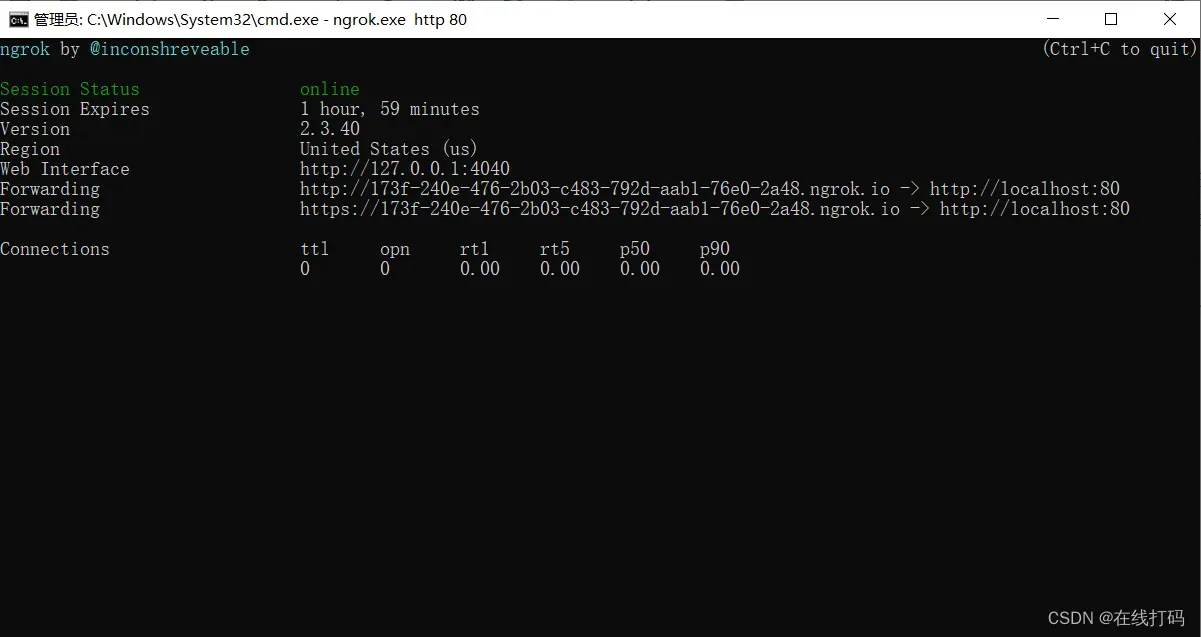
将映射的公网地址填入服务器URL,令牌Token填写一个自定义的字符串(之后进行代码编写时会用到),然后使用明文模式。
至此基本配置完成,接下来就是代码开发。
二、代码编写
使用Golang的http包创建一个web服务器
package main
import (
"fmt"
"net/http"
"wechat-oa/route"
)
func main() {
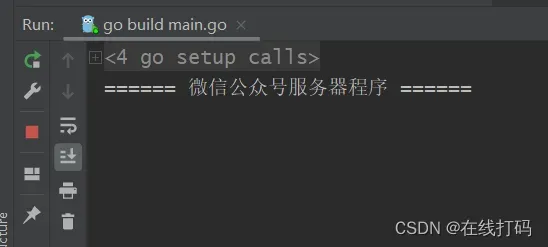
fmt.Println("====== 微信公众号服务器程序 ======")
http.HandleFunc("/", route.WechatServer) // 处理微信服务器请求
err := http.ListenAndServe(":80", nil)
if err != nil {
fmt.Println("wechat server start error", err)
}
}
微信服务器发送请求都会带上4个参数,以此判断请求是否来自微信服务器。
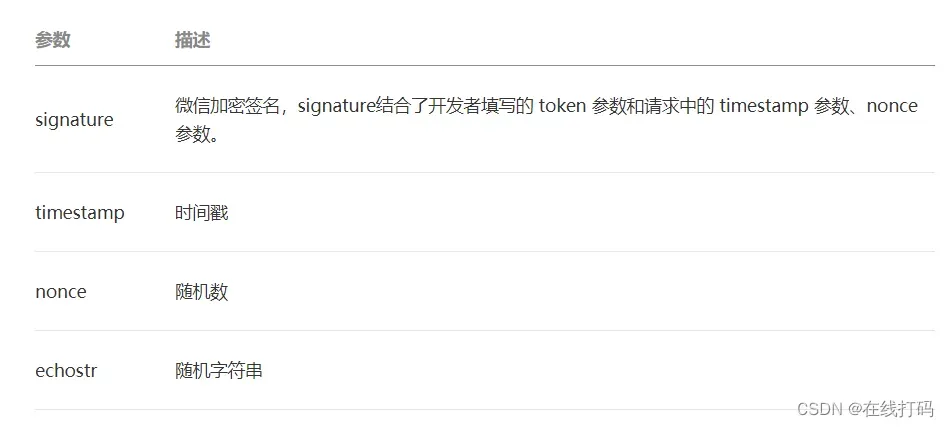
开发者通过检验 signature 对请求进行校验(下面有校验方式)。若确认此次 GET 请求来自微信服务器,请原样返回 echostr 参数内容,则接入生效,成为开发者成功,否则接入失败。加密/校验流程如下:
1)将token、timestamp、nonce三个参数进行字典序排序
2)将三个参数字符串拼接成一个字符串进行sha1加密
3)开发者获得加密后的字符串可与 signature 对比,标识该请求来源于微信
公众号配置
// 微信公众号平台配置
const (
	appId          = "xxxxxxxxxx" // 公众号开发识别码
	appSecret      = "xxxxxxxxxx" // 公众号开发者密码
	encodingAESKey = "xxxxxxxxxx" // 消息加密秘钥
	token          = "xxxxxxxxxx" // 跟微信公众平台的token一样即可
)
服务处理代码
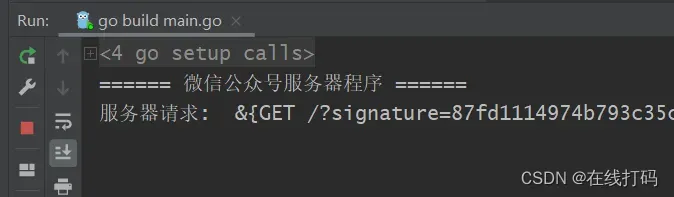
当在服务器配置页面点击启用时微信服务器会向配置服务器发送GET请求已验证服务器是否可用
func WechatServer(w http.ResponseWriter, req *http.Request) {
	defer req.Body.Close()

	fmt.Println("服务器请求: ", req) //打印http的请求url
	// 1、验证消息是否来自微信服务器
	hashcode,signature,echostr := handleValid(req)
	if hashcode != signature { // 校验
		return
	}
	// 2、请求处理
	if req.Method == "GET" {
		_, _ = w.Write([]byte(echostr)) // 验证成功返回echostr
	} else if req.Method == "POST" {
		handleMsg(w,req)
	}else {
		_, _ = w.Write([]byte("error"))
	}
}
验证代码
以下代码通过加密规则对请求参数进行加密,最后返回加密后的hashcode
func handleValid(r *http.Request) (hashcode string,signature string,echostr string){
	//1.尝试获取4个字段
	nonce := r.URL.Query().Get("nonce")
	timestamp := r.URL.Query().Get("timestamp")
	signature = r.URL.Query().Get("signature")
	echostr = r.URL.Query().Get("echostr")
	//2. 赋值一个token

	//3.token,timestamp,nonce按字典排序的字符串list
	strs := sort.StringSlice{token, timestamp, nonce} // 使用本地的token生成校验
	sort.Strings(strs)
	str := ""
	for _, s := range strs {
		str += s
	}
	// 4. 哈希算法加密list得到hashcode
	h := sha1.New()
	h.Write([]byte(str))
	hashcode = fmt.Sprintf("%x", h.Sum(nil)) // h.Sum(nil) 做hash
	return
}
消息处理
// 处理POST请求
// 微信服务器会将用户发送的数据以POST请求的方式转发给开发者服务器
func handleMsg(rw http.ResponseWriter, req *http.Request) {
	wc := wechat.NewWechat()
	//这里本地内存保存access_token,也可选择redis,memcache或者自定义cache
	memory := cache.NewMemory()
	cfg := &offConfig.Config{
		AppID:          appId,
		AppSecret:      appSecret,
		Token:          token,
		EncodingAESKey: encodingAESKey,
		Cache:          memory,
	}
	// 底层根据AppID和AppSecret获取access_token并保存到cache中
	// access_token每两个小时刷新一次
	officialAccount := wc.GetOfficialAccount(cfg)
	// 传入request和responseWriter
	server := officialAccount.GetServer(req, rw)
	// 设置接收消息的处理方法
	server.SetMessageHandler(controller.HandleMsg)
	//处理消息接收以及回复
	err := server.Serve()
	if err != nil {
		fmt.Println(err)
		return
	}
	//发送回复的消息
	_ = server.Send()
}
controller.HandleMsg
这里的基本逻辑是根据用户发送消息的类型作不同的处理,目前只处理了文本消息和事件推送消息。
当用户发送文本消息时回复用户自己发送的消息
// 处理用户发送的消息
func HandleMsg(msg *message.MixMessage) *message.Reply{
	fmt.Println("接收用户消息:",msg.Content)
	switch msg.MsgType {
	case message.MsgTypeText: // 文本消息
		return &message.Reply{
			MsgType: message.MsgTypeText,
			MsgData: message.NewText(msg.Content),
		}
	case message.MsgTypeEvent: // 事件推送
		return service.HandleEventMsg(msg)
	default:
		return &message.Reply{
			MsgType: message.MsgTypeText,
			MsgData: message.NewText("感谢关注沐风丶,更多功能正在开发中..."),
		}
	}
}
service.HandleEventMsg
// 处理事件推送
func HandleEventMsg(msg *message.MixMessage) *message.Reply{
	switch msg.Event {
	case message.EventSubscribe: // 用户订阅
		fmt.Printf("%s 订阅了你 \n",msg.FromUserName)
		return &message.Reply{
			MsgType: message.MsgTypeText,
			MsgData: message.NewText("感谢关注沐风丶,(* ̄︶ ̄)❀你真好看"),
		}
	case message.EventUnsubscribe: // 用户取消订阅
		fmt.Printf("%s 取消了订阅 \n",msg.FromUserName)
		return &message.Reply{
			MsgType: message.MsgTypeText,
			MsgData: message.NewText(""),
		}
	default:
		return &message.Reply{
			MsgType: message.MsgTypeText,
			MsgData: message.NewText("default"),
		}
	}
}
三、测试
1、启动项目
2、启动服务器配置
启动成功后服务器响应
3、用户关注公众号
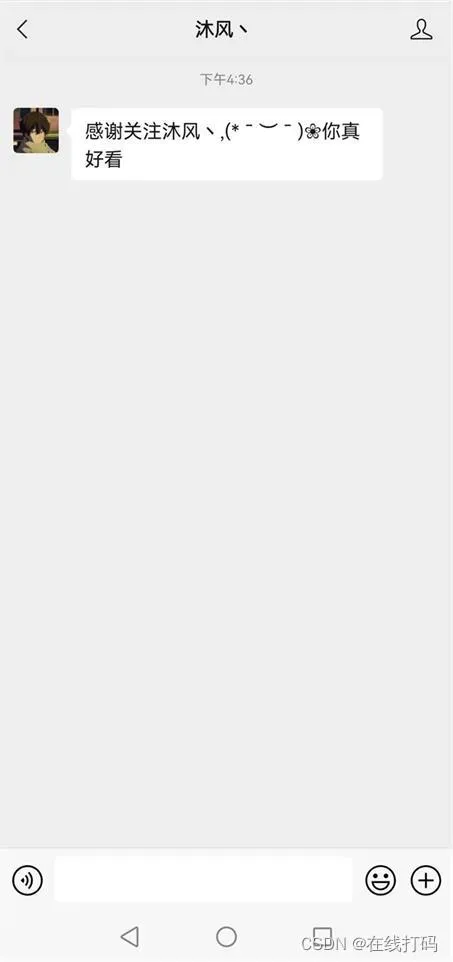
服务器响应

4、用户发送消息
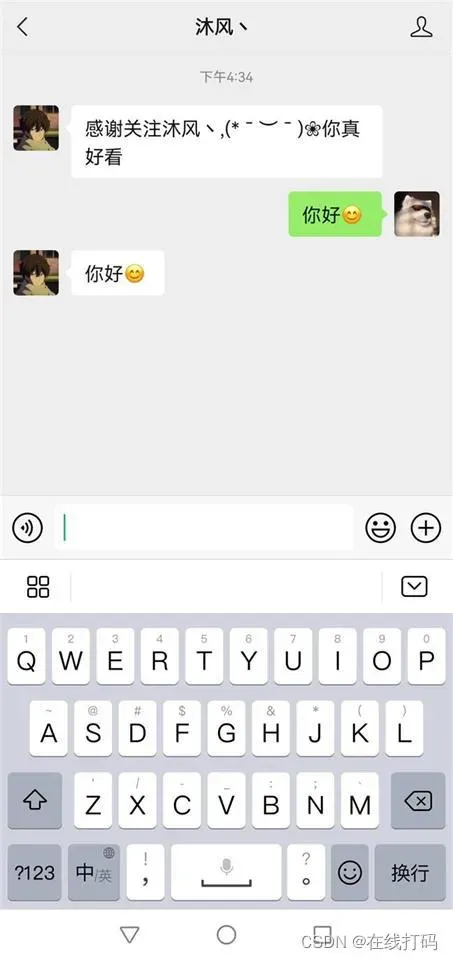
服务器响应

5、用户取消订阅
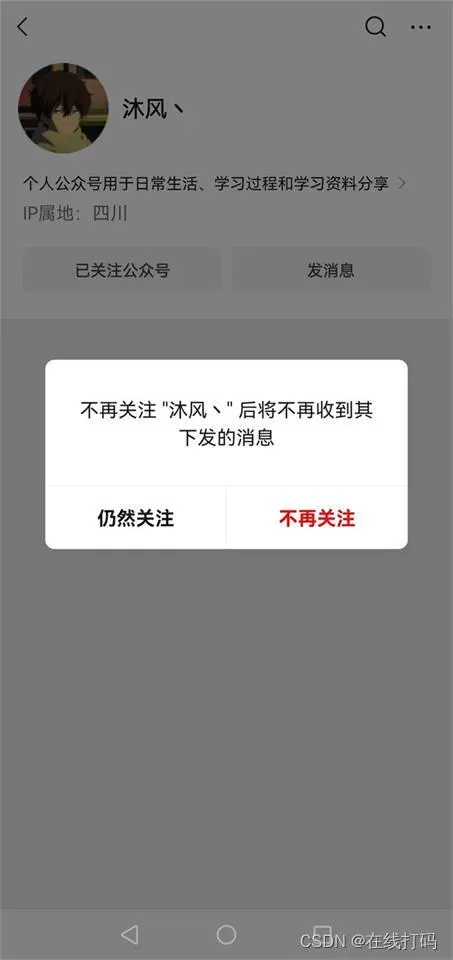
服务器响应

四、总结
更多文档:开发文档
个人订阅号无法进行微信认证,许多接口都没有权限,推荐使用个人页UI管理公众号
到此这篇关于Golang实现微信公众号后台接入的示例代码的文章就介绍到这了,更多相关Golang微信公众号后台内容请搜索aitechtogether.com以前的文章或继续浏览下面的相关文章希望大家以后多多支持aitechtogether.com!