VisionMaster支持使用第三方算法来丰富自身的功能。这里使用OpenCV作为第三方库作为样例进行说明。
1. 生成算子框架
1.1 启动自定义模块生成工具
- 打开 VisionMaster ,并找到菜单栏 >> 工具菜单 >> 自定义模板生成工具
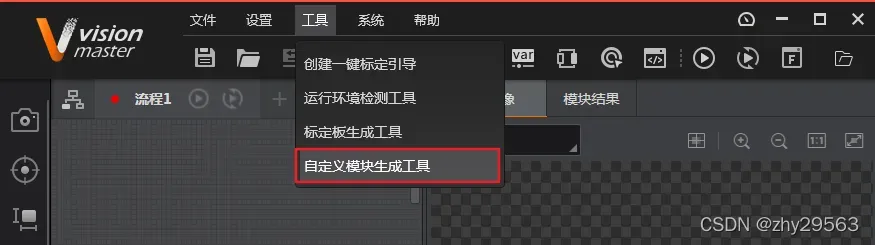
- 打开`自定义模块生成工具
1.2 自定义模块生成工具参数说明
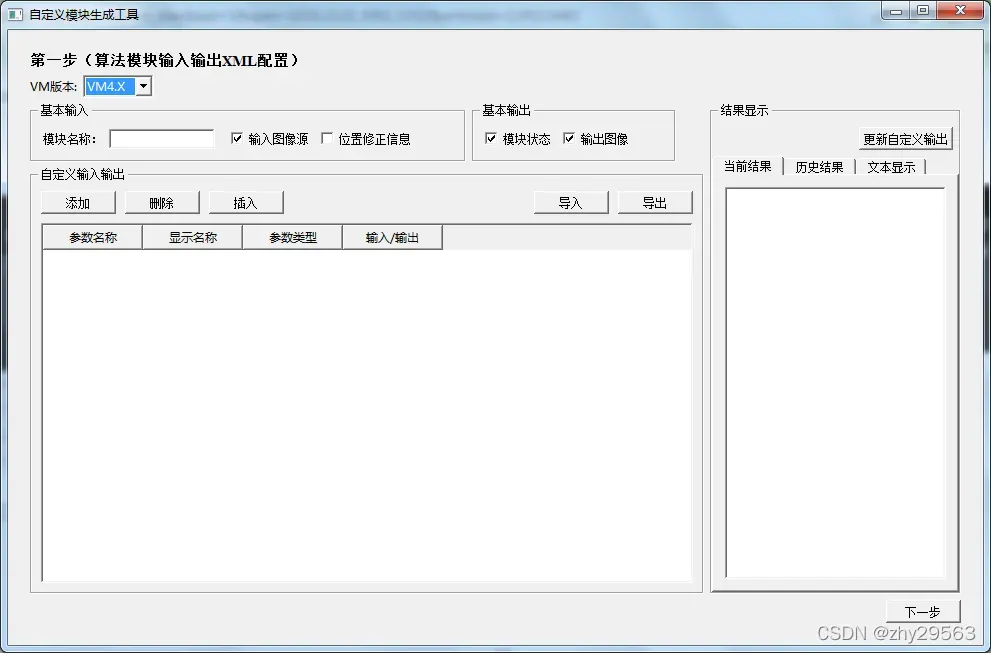
1.2.1 算法模块输入输出XML配置
- VM版本
指定为哪一个版本的 VisionMaster 开发自定义模块,当前支持 VM3.X 与 VM4.X ,根据需要进行选择 - 模块名称
开发自定义模块的名称,尽量保证单词传达意思 - 输入图像
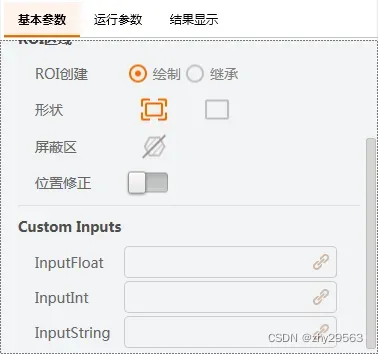
自定义模块是否支持图片输入,即是否包含下图中的输入。
- 位置修正信息
是否支持使用位置修正模块对该模块进行 ROI 的动态跟随。
- 模块状态
只是模块的运行状态,运行成功为 1 ,运行失败为 0 。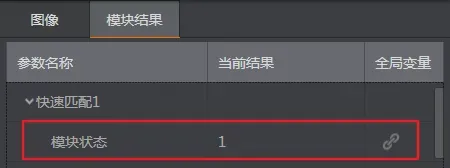
- 图像输出
指定此模块是否具有输出图像。具有输出图像的模块,可以在显示窗口的选择栏中选择并显示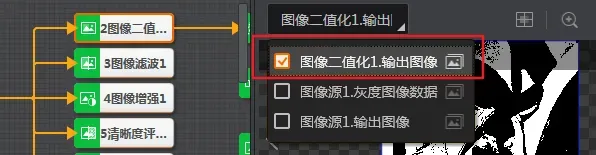
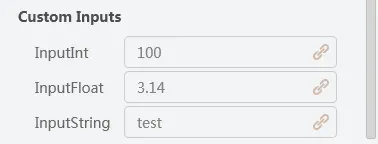
- 自定义输入和输出
用于定义一些输入输出参数,该试用版本目前仅支持 int 、 float 与 string 三种类型。 - 输入参数
- 输入参数说明>
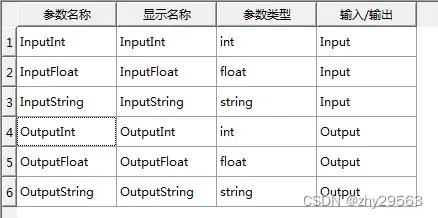
- 参数名称
代码中用于获取或设置参数的名称 - 显示名称
UI界面上显示的名称 - 参数类型
参数的类型。在代码中获取参数时,需要根据类型选择对应的函数。 - 输入/输出
指定参数是用于输入还是输出 - 输出参数
- 结果表明
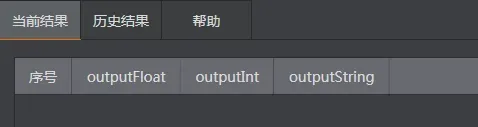
用于自定义输出参数的显示,点击下图中的更新自定义输出按钮,同步自定义输出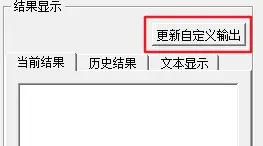
同步后如下图: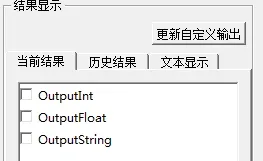
如果仅仅完成这些操作,数据不会被输出到 VisionMaster 的显示区域。为将数据显示到显示区域,需要选中输出参数前的复选框。如下图: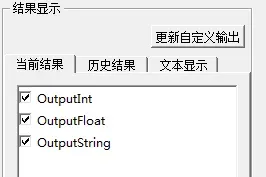
- 当前结果
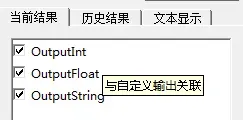
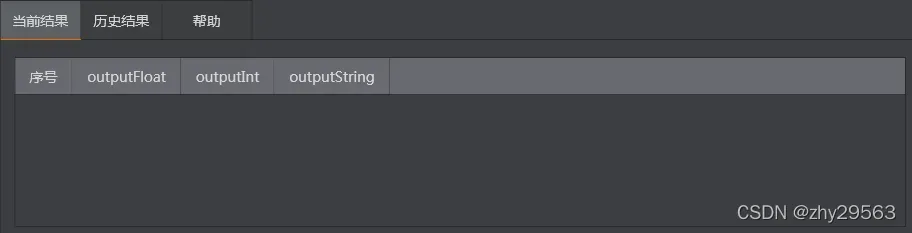
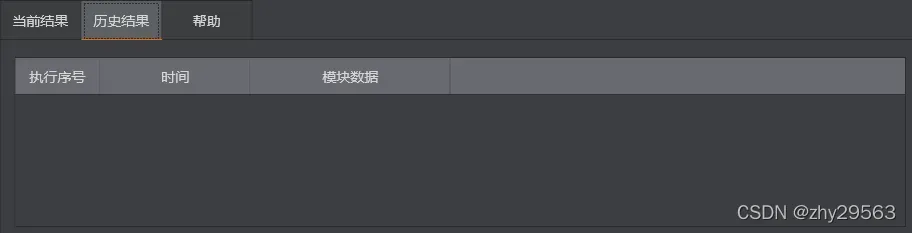
- 历史结果
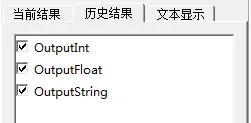
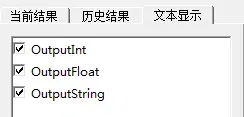
- 文本显示
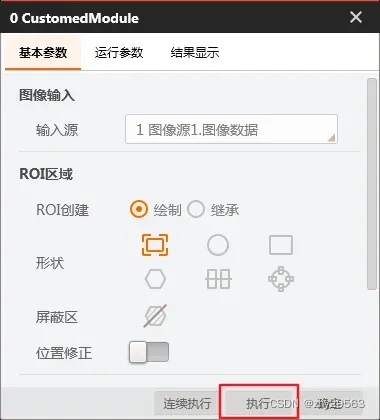
1.2.2 算法模块界面XML配置
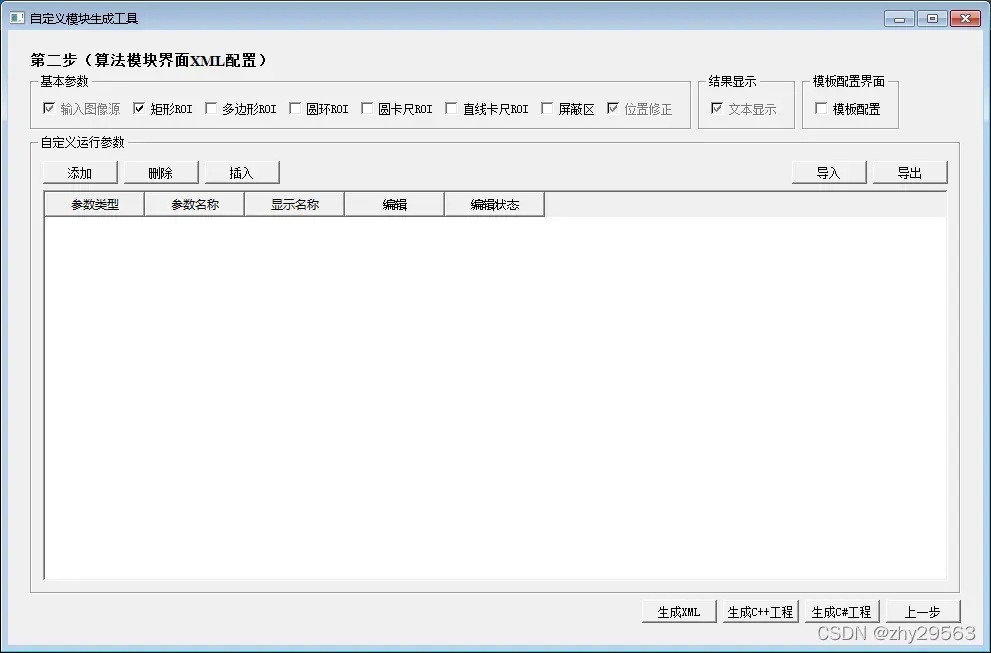
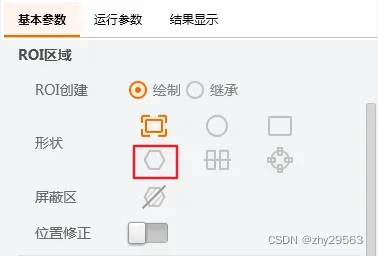
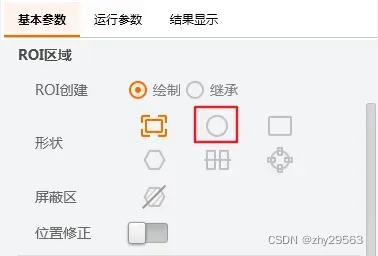
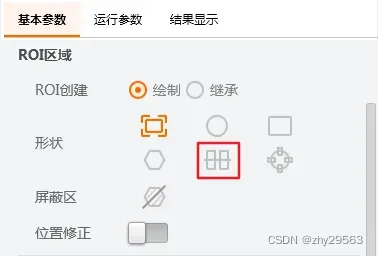
- 基本参数
- 输入图像源
不可更改,与算法模块输入输出XML配置中的输入图像源参数保持一致 - 矩形ROI
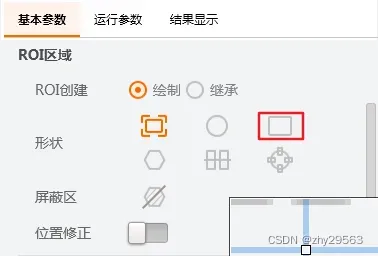
- 多边形ROI
- 圆环ROI
- 圆卡尺ROI
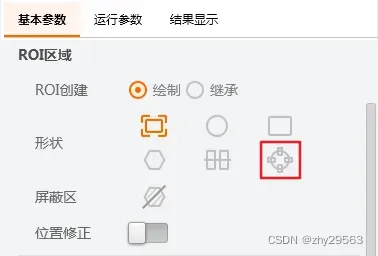
- 直线卡尺ROI
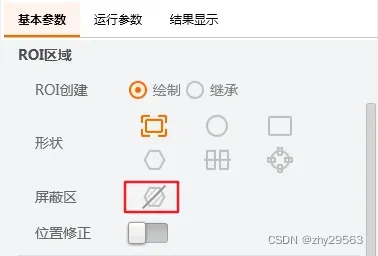
- 屏蔽区
- 位置校正
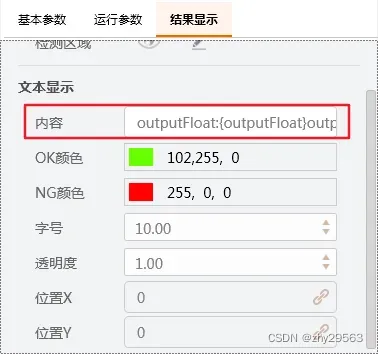
不可更改,与算法模块输入输出XML配置中的位置修正参数保持一致 - 结果表明
- 文字显示
不可更改,受算法模块输入输出XML配置中的文本显示参数的影响。如果在算法模块输入输出XML配置中的文本显示处至少勾选了一个输出参数,则此处默认勾选。否则,反之。 - 模板配置界面
- 模板配置
是否在配置中插入特征模板选项卡。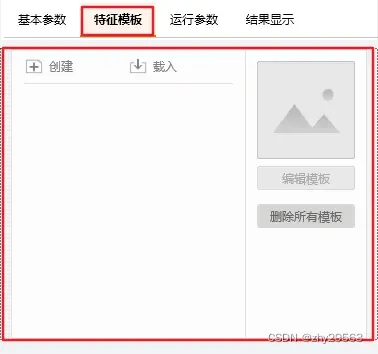
- 自定义运行参数
用于添加模块使用的算法的参数。单击添加按钮以添加以下参数: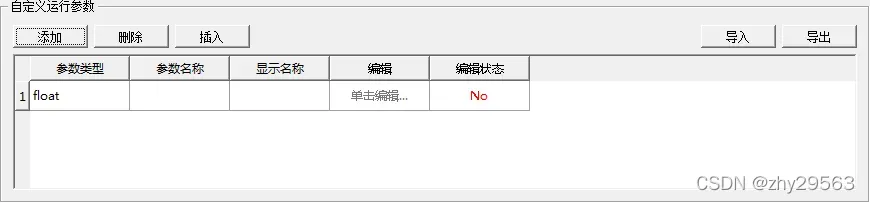
选择参数类型并输入参数名称和显示名称后,点击编辑栏中相应项的编辑按钮,弹出常用类型对话框。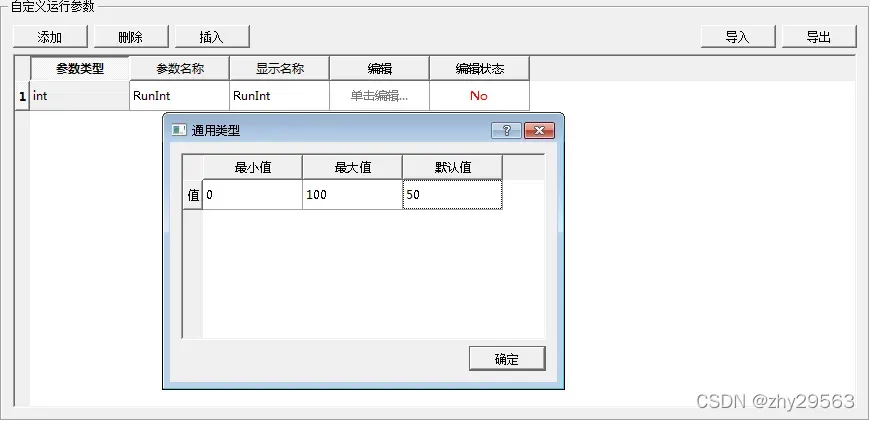
单击Generic Type对话框中的OK按钮后,关闭对话框并更新Edit Status列中对应项的状态。
支持以下类型: - int
- float
- bool
- string
- enumeration
- intBetween
- floatBetween
- 命令按钮
- 生成XML
生成自定义模块的相关配置 - 生成C++工程
用于生成自定义模块的算法工程 - 生成C#工程
用于生成自定义模块的UI工程
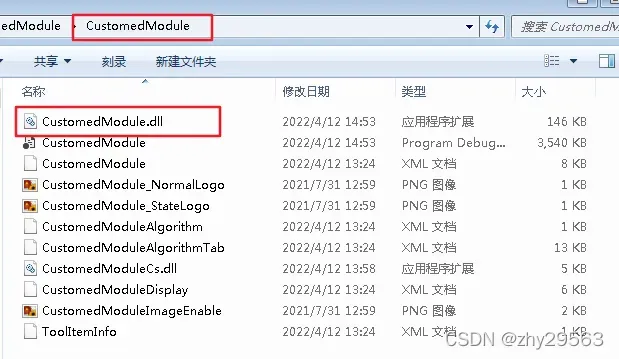
依次点击这三个命令后,生成如下文件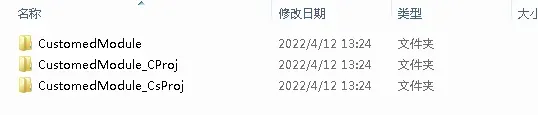
2. 编译工程
2.1 编译UI工程
- 使用 VS2013 及其以上版本打开 CustomedModule_CsProj\CustomedModuleCs\CustomedModuleCs.sln 。注意,该工程需要 .NET4.6.1 的支持
- 将编译类型切换为 Any CPU + Release

- 编译 CustomedModuleCs 工程
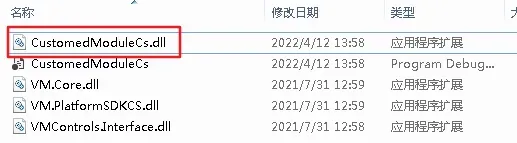
- 将生成的 CustomedModuleCs.dll 拷贝到使用工具生成的 CustomedModule 文件夹中
2.2 编译算法工程
- 使用 VS2013 及其以上版本打开 CustomedModule_CProj\CustomedModule\CustomedModule.sln 。
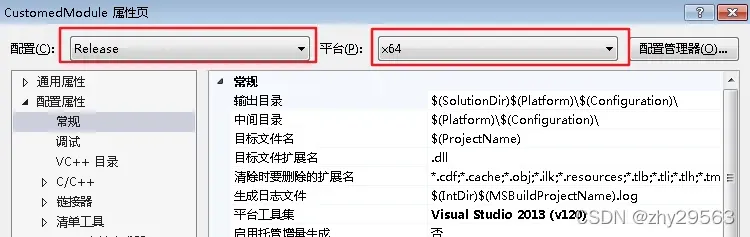
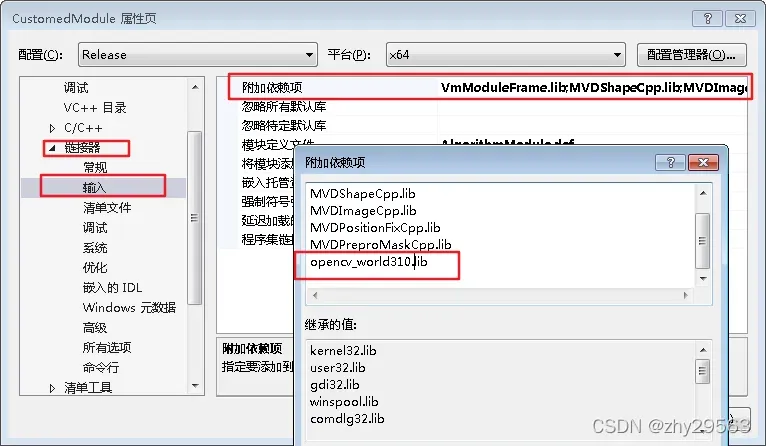
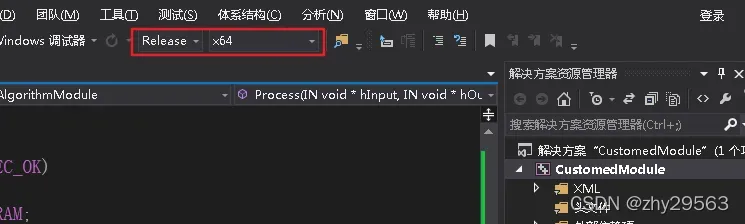
- 属性页配置 Release + x64
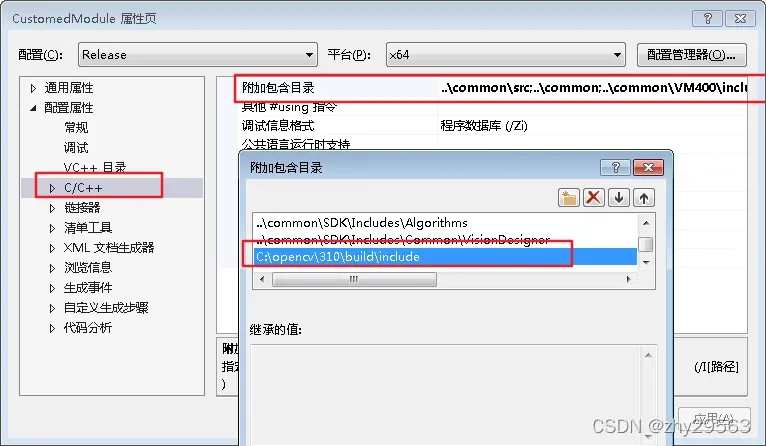
- 配置OpenCV头目录
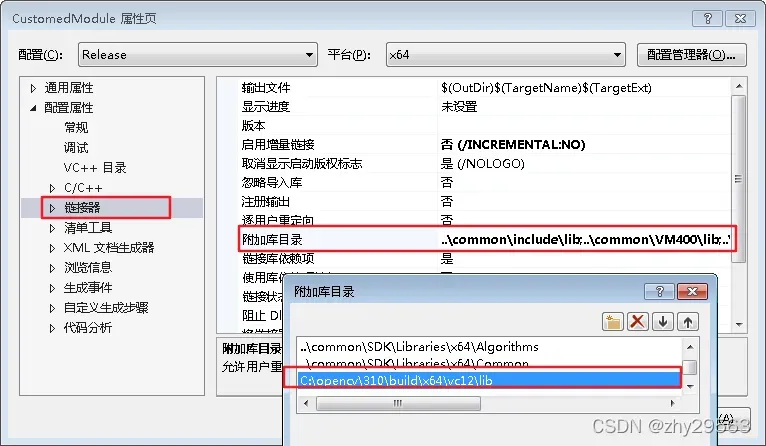
- 配置OpenCV库目录
- 配置OpenCV依赖项
- 切换编译配置到 Release + x64 ,并生成工程。

- 打开源文件 AlgorithmModule.cpp
- 添加OpenCV头文件
#include <opencv2\opencv.hpp>

using namespace cv;
- OpenCV::Mat与HKA_IMAGE互转
Mat HKAImageToMat(HKA_IMAGE hik_image)
{
	Mat mat;
	if (hik_image.format == HKA_IMG_MONO_08)
	{
		mat = Mat(hik_image.height, hik_image.width, CV_8UC1, hik_image.data[0]);
		int a = mat.cols;
	}
	else if (hik_image.format == HKA_IMG_RGB_RGB24_C3)
	{
		mat = Mat(hik_image.height, hik_image.width, CV_8UC3, hik_image.data[0]);
	}
	return mat;
}

HKA_IMAGE MatToHKAImage(Mat mat)
{
	HKA_IMAGE image;
	if (mat.channels() == 1)
	{
		image = { HKA_IMG_MONO_08, 0 };
		image.width = mat.cols;
		image.height = mat.rows;
		image.format = HKA_IMG_MONO_08;
		image.step[0] = mat.cols;
		image.data[0] = mat.data;
	}
	else if (mat.channels() == 3)
	{
		image = { HKA_IMG_RGB_RGB24_C3, 0 };
		image.width = mat.cols;
		image.height = mat.rows;
		image.format = HKA_IMG_RGB_RGB24_C3;
		image.step[0] = 3 * mat.cols;
		image.data[0] = mat.data;
	}
	return image;
}
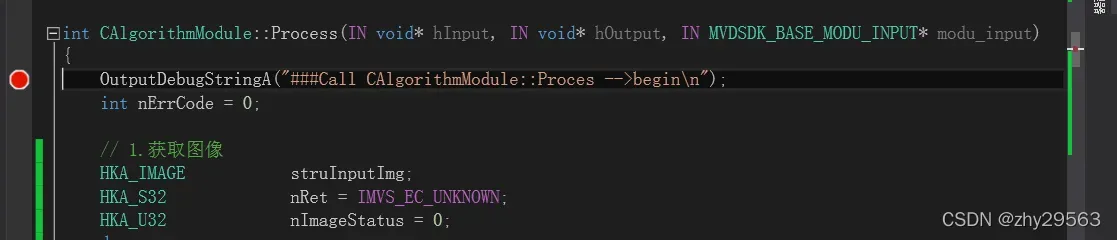
- 根据模块要求修改 CAlgorithmModule::Process 函数,这里仅演示二值化功能
int CAlgorithmModule::Process(IN void* hInput, IN void* hOutput, IN MVDSDK_BASE_MODU_INPUT* modu_input)
{
	OutputDebugStringA("###Call CAlgorithmModule::Proces -->begin\n");
	int nErrCode = 0;

	// 1.获取图像
	HKA_IMAGE			struInputImg;
	HKA_S32             nRet = IMVS_EC_UNKNOWN;
	HKA_U32             nImageStatus = 0;
	do
	{
		nRet = VmModule_GetInputImageByName(hInput, "InImage", "InImageWidth", "InImageHeight", "InImagePixelFormat", &struInputImg, &nImageStatus);
		HKA_CHECK_BREAK(IMVS_EC_OK != nRet);
	} while (0);

	// 2. 图像转换
	Mat input_image = HKAImageToMat(struInputImg);

	// 3. 获取输入参数
	int count = -1;

	int inputInt = -1;
	nRet = VM_M_GetInt(hInput, "InputInt", 0, &inputInt, &count);

	float inputFloat = 0;
	nRet = VM_M_GetFloat(hInput, "InputFloat", 0, &inputFloat, &count);


	int inputString1Length = 100;
	char inputString1[100];
	nRet = VM_M_GetString(hInput, "InputString", 0, inputString1, 100, &inputString1Length, &count);

	// 4. 获取运行参数
	auto runParam1 = this->m_nRunInt;

	// 5. 算法处理
	OutputDebugStringA("###Call CAlgorithmModule::Proces --> do algorighm process\n");

	Mat binary;
	cv::threshold(input_image, binary, 128, 255, cv::THRESH_BINARY);


	// 6. 输出图像格式转换
	HKA_IMAGE output_image = MatToHKAImage(binary);

	// 7. 输出图像
	if (MVD_PIXEL_MONO_08 == modu_input->pImageInObj->GetPixelFormat())
	{
		VmModule_OutputImageByName_8u_C1R(hOutput, 1, "OutImage", "OutImageWidth", "OutImageHeight", "OutImagePixelFormat", &output_image);
	}
	else if (MVD_PIXEL_RGB_RGB24_C3 == modu_input->pImageInObj->GetPixelFormat())
	{
		VmModule_OutputImageByName_8u_C3R(hOutput, 1, "OutImage", "OutImageWidth", "OutImageHeight", "OutImagePixelFormat", &output_image);
	}

	// 8. 设置自定义输出参数
	VM_M_SetInt(hOutput, "OutputInt", 0, 77);
	VM_M_SetFloat(hOutput, "OutputFloat", 0, 3.1425f);
	VM_M_SetString(hOutput, "OutputString", 0, "OK");

	// 9. 设置模块运行状态
	VM_M_SetInt(hOutput, "ModuStatus", 0, nErrCode == 0 ? 1 : nErrCode);


	if (nErrCode != IMVS_EC_OK)
	{
		return IMVS_EC_PARAM;
	}

	/************************************************/
	//默认算法时间20ms,根据实际时间计算
	MODULE_RUNTIME_INFO struRunInfo = { 0 };
	struRunInfo.fAlgorithmTime = 20;
	VM_M_SetModuleRuntimeInfo(m_hModule, &struRunInfo);

	OutputDebugStringA("###Call CAlgorithmModule::Proces end\n");

	return IMVS_EC_OK;
}
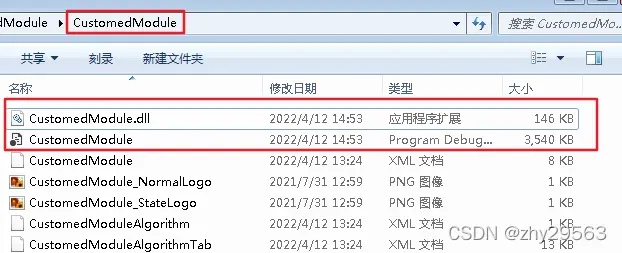
- 编译生成算法项目
- 将生成的 CustomedModule.dll 与 CustomedModule.pdb 文件拷贝到使用工具生成的 CustomedModule 文件夹中
- 完整的源代码
#include "stdafx.h"
#include "AlgorithmModule.h"
#include <stdlib.h>
#include <fstream>
#include "ErrorCodeDefine.h"
#include "iMVS-6000PixelFormatDefine.h"

#include <opencv2\opencv.hpp>

using namespace cv;

Mat HKAImageToMat(HKA_IMAGE hik_image)
{
	Mat mat;
	if (hik_image.format == HKA_IMG_MONO_08)
	{
		mat = Mat(hik_image.height, hik_image.width, CV_8UC1, hik_image.data[0]);
		int a = mat.cols;
	}
	else if (hik_image.format == HKA_IMG_RGB_RGB24_C3)
	{
		mat = Mat(hik_image.height, hik_image.width, CV_8UC3, hik_image.data[0]);
	}
	return mat;
}

HKA_IMAGE MatToHKAImage(Mat mat)
{
	HKA_IMAGE image;
	if (mat.channels() == 1)
	{
		image = { HKA_IMG_MONO_08, 0 };
		image.width = mat.cols;
		image.height = mat.rows;
		image.format = HKA_IMG_MONO_08;
		image.step[0] = mat.cols;
		image.data[0] = mat.data;
	}
	else if (mat.channels() == 3)
	{
		image = { HKA_IMG_RGB_RGB24_C3, 0 };
		image.width = mat.cols;
		image.height = mat.rows;
		image.format = HKA_IMG_RGB_RGB24_C3;
		image.step[0] = 3 * mat.cols;
		image.data[0] = mat.data;
	}
	return image;
}


int GetInputImage(IN void* hInput, HKA_IMAGE& struInputImg)
{
	HKA_S32             nRet = IMVS_EC_UNKNOWN;
	HKA_U32             nImageStatus = 0;

	do
	{
		nRet = VmModule_GetInputImageByName(hInput, "InImage", "InImageWidth", "InImageHeight", "InImagePixelFormat", &struInputImg, &nImageStatus);
		HKA_CHECK_BREAK(IMVS_EC_OK != nRet);
	} while (0);

	return nRet;
}

CAlgorithmModule::CAlgorithmModule()
{
	m_nRunInt = 50;
}

CAlgorithmModule::~CAlgorithmModule()
{

}

int CAlgorithmModule::Init()
{
	PARAM_VALUE_INFO_LIST stList = { 0 };
	int nRet = VM_M_GetDefaultConfigByFile(m_hModule, UNICODEtoUTF8(VmModule_GetXmlPath().GetBuffer()), &stList);
	if (nRet == IMVS_EC_OK)
	{
		for (int i = 0; i < stList.nNum; i++)
		{
			SetParam(stList.paramValueList[i].byParamName, stList.paramValueList[i].byParamValue, strlen(stList.paramValueList[i].byParamValue));
		}
	}

	return nRet;
}

int CAlgorithmModule::Process(IN void* hInput, IN void* hOutput, IN MVDSDK_BASE_MODU_INPUT* modu_input)
{
	OutputDebugStringA("###Call CAlgorithmModule::Proces -->begin\n");
	int nErrCode = 0;

	// 1.获取图像
	HKA_IMAGE			struInputImg;
	HKA_S32             nRet = IMVS_EC_UNKNOWN;
	HKA_U32             nImageStatus = 0;
	do
	{
		nRet = VmModule_GetInputImageByName(hInput, "InImage", "InImageWidth", "InImageHeight", "InImagePixelFormat", &struInputImg, &nImageStatus);
		HKA_CHECK_BREAK(IMVS_EC_OK != nRet);
	} while (0);

	// 2. 图像转换
	Mat input_image = HKAImageToMat(struInputImg);

	// 3. 获取输入参数
	int count = -1;

	int inputInt = -1;
	nRet = VM_M_GetInt(hInput, "InputInt", 0, &inputInt, &count);

	float inputFloat = 0;
	nRet = VM_M_GetFloat(hInput, "InputFloat", 0, &inputFloat, &count);


	int inputString1Length = 100;
	char inputString1[100];
	nRet = VM_M_GetString(hInput, "InputString", 0, inputString1, 100, &inputString1Length, &count);

	// 4. 获取运行参数
	auto runParam1 = this->m_nRunInt;

	// 5. 算法处理
	OutputDebugStringA("###Call CAlgorithmModule::Proces --> do algorighm process\n");

	Mat binary;
	cv::threshold(input_image, binary, 128, 255, cv::THRESH_BINARY);


	// 6. 输出图像格式转换
	HKA_IMAGE output_image = MatToHKAImage(binary);

	// 7. 输出图像
	if (MVD_PIXEL_MONO_08 == modu_input->pImageInObj->GetPixelFormat())
	{
		VmModule_OutputImageByName_8u_C1R(hOutput, 1, "OutImage", "OutImageWidth", "OutImageHeight", "OutImagePixelFormat", &output_image);
	}
	else if (MVD_PIXEL_RGB_RGB24_C3 == modu_input->pImageInObj->GetPixelFormat())
	{
		VmModule_OutputImageByName_8u_C3R(hOutput, 1, "OutImage", "OutImageWidth", "OutImageHeight", "OutImagePixelFormat", &output_image);
	}

	// 8. 设置自定义输出参数
	VM_M_SetInt(hOutput, "OutputInt", 0, 77);
	VM_M_SetFloat(hOutput, "OutputFloat", 0, 3.1425f);
	VM_M_SetString(hOutput, "OutputString", 0, "OK");

	// 9. 设置模块运行状态
	VM_M_SetInt(hOutput, "ModuStatus", 0, nErrCode == 0 ? 1 : nErrCode);


	if (nErrCode != IMVS_EC_OK)
	{
		return IMVS_EC_PARAM;
	}

	/************************************************/
	//默认算法时间20ms,根据实际时间计算
	MODULE_RUNTIME_INFO struRunInfo = { 0 };
	struRunInfo.fAlgorithmTime = 20;
	VM_M_SetModuleRuntimeInfo(m_hModule, &struRunInfo);

	OutputDebugStringA("###Call CAlgorithmModule::Proces end\n");

	return IMVS_EC_OK;
}


int CAlgorithmModule::GetParam(IN const char* szParamName, OUT char* pBuff, IN int nBuffSize, OUT int* pDataLen)
{
	OutputDebugStringA("###Call CAlgorithmModule::GetParam");

	int nErrCode = IMVS_EC_OK;
	if (szParamName == NULL || strlen(szParamName) == 0 || pBuff == NULL || nBuffSize <= 0 || pDataLen == NULL)
	{
		return IMVS_EC_PARAM;
	}
 	//memset(pBuff, 0, nBuffSize);

	if (0 == strcmp("RunInt", szParamName))
	{
		sprintf_s(pBuff, nBuffSize, "%d", m_nRunInt);
	}
	else
	{
		return CVmAlgModuleBase::GetParam(szParamName, pBuff, nBuffSize, pDataLen);
	}

	return nErrCode;
}

int CAlgorithmModule::SetParam(IN const char* szParamName, IN const char* pData, IN int nDataLen)
{
	OutputDebugStringA("###Call CAlgorithmModule::SetParam");

	int nErrCode = IMVS_EC_OK;
	if (szParamName == NULL || strlen(szParamName) == 0 || pData == NULL || nDataLen == 0)
	{
		return IMVS_EC_PARAM;
	}

	if (0 == strcmp("RunInt", szParamName))
	{
		sscanf_s(pData, "%d", &m_nRunInt);
	}
	else
	{
		return CVmAlgModuleBase::SetParam(szParamName, pData, nDataLen);
	}

	return nErrCode;
}


/模块须导出的接口(实现开始)//

LINEMODULE_API CAbstractUserModule* __stdcall CreateModule(void* hModule)
{
	assert(hModule != NULL);


	// 创建用户模块,并记录实例。
	CAlgorithmModule* pUserModule = new(nothrow) CAlgorithmModule;

	if (pUserModule == NULL)
	{
		return NULL;
	}

	pUserModule->m_hModule = hModule;

	int nRet = pUserModule->Init();
	if (IMVS_EC_OK != nRet)
	{
		delete pUserModule;
		return NULL;
	}

	printf("[ LineModule ] CreateModule, hModule = 0x%x, pUserModule = 0x%x \n", hModule, pUserModule);

	OutputDebugStringA("###Call CreateModule");

	return pUserModule;
}


LINEMODULE_API void __stdcall DestroyModule(void* hModule, CAbstractUserModule* pUserModule)
{
	assert(hModule != NULL);

	printf("\n[ LineModule ] DestroyModule, hModule = 0x%x\n", hModule);

	OutputDebugStringA("###Call DestroyModule");

	if (pUserModule != NULL)
	{
		delete pUserModule;
	}
}
/模块须导出的接口(实现结束)//
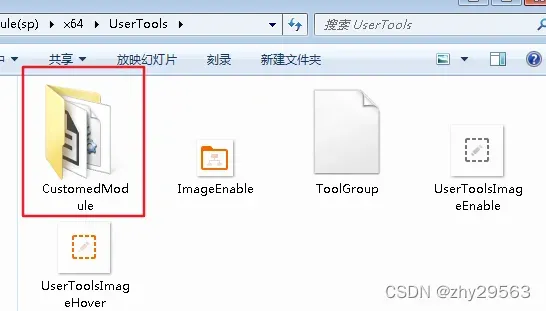
3. 模块导入
- 将 CustomedModule 文件夹拷贝到 C:\Program Files\VisionMaster4.0.0\Applications\Module(sp)\x64\UserTools 文件夹中
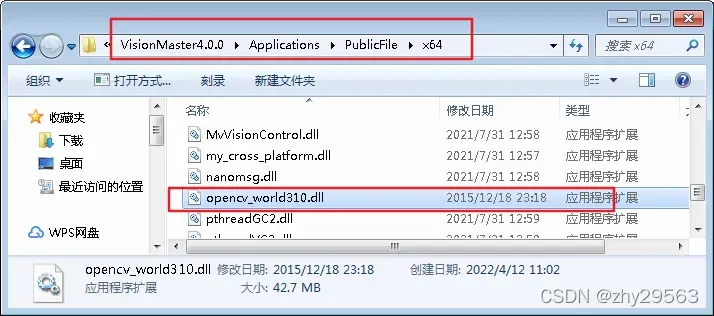
- 拷贝 opencv_world310.dll 到 C:\Program Files\VisionMaster4.0.0\Applications\PublicFile\x64 。如果将自定义模块拖拽到流程图中提示找不到模块,需要重启电脑。
4. 模块测试
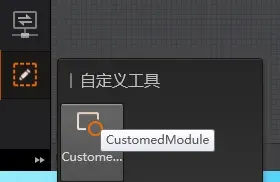
- 将自定义工具拖入流程图
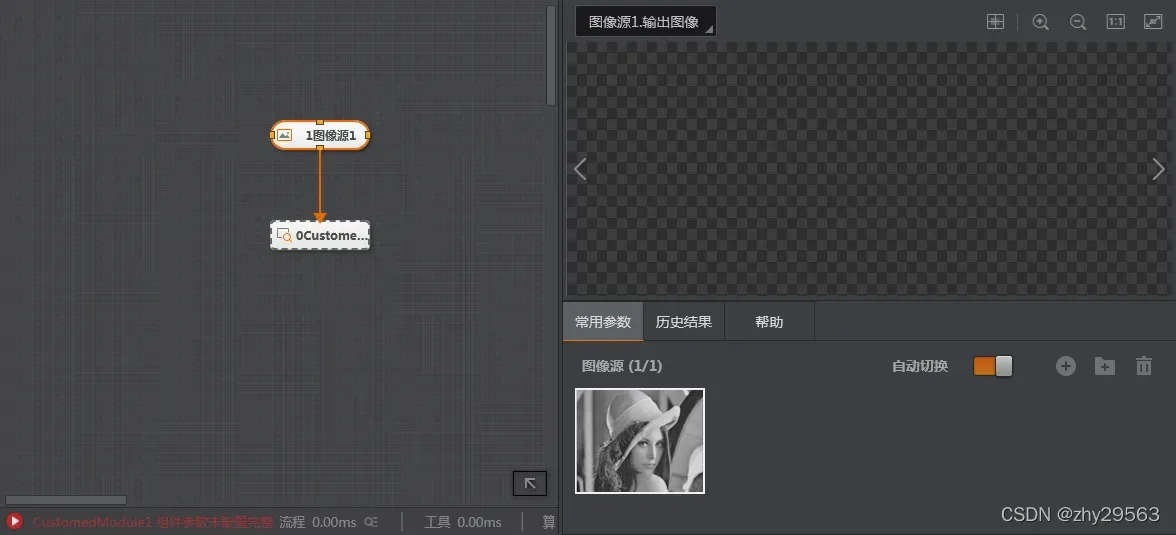
- 配置类似如下的方案
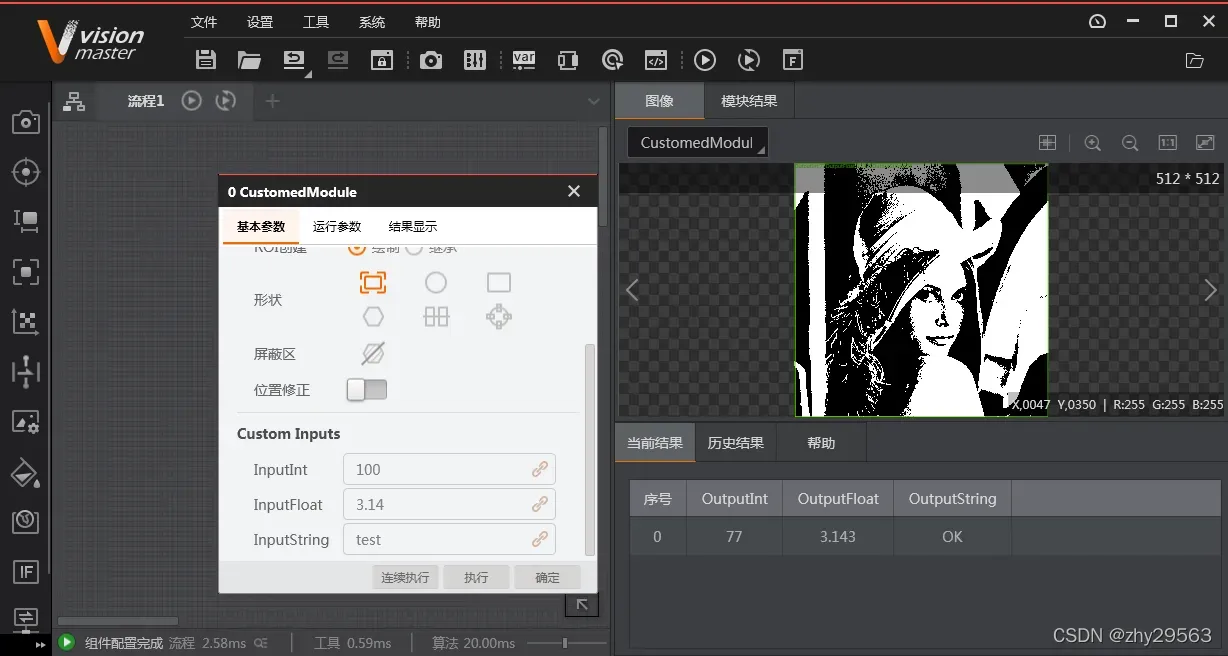
- 打开自定义模块,显示如下
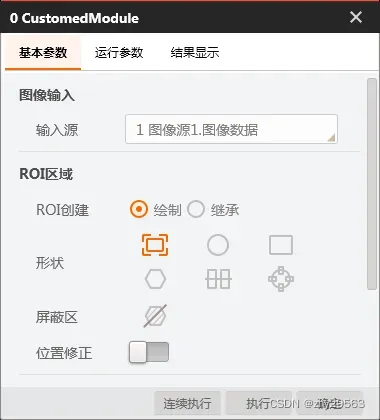
- 配置自定义输入参数
- 点击运行按钮查看结果
5. 调试自定义模块算法
- 配置方案并打开自定义模块
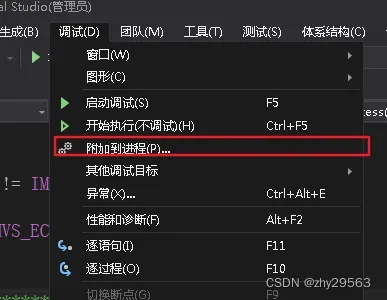
- 用 VS2013 及其以上版本打开算法工程
- 选择要处理的附件
- 选择 VmModuleProxy.exe
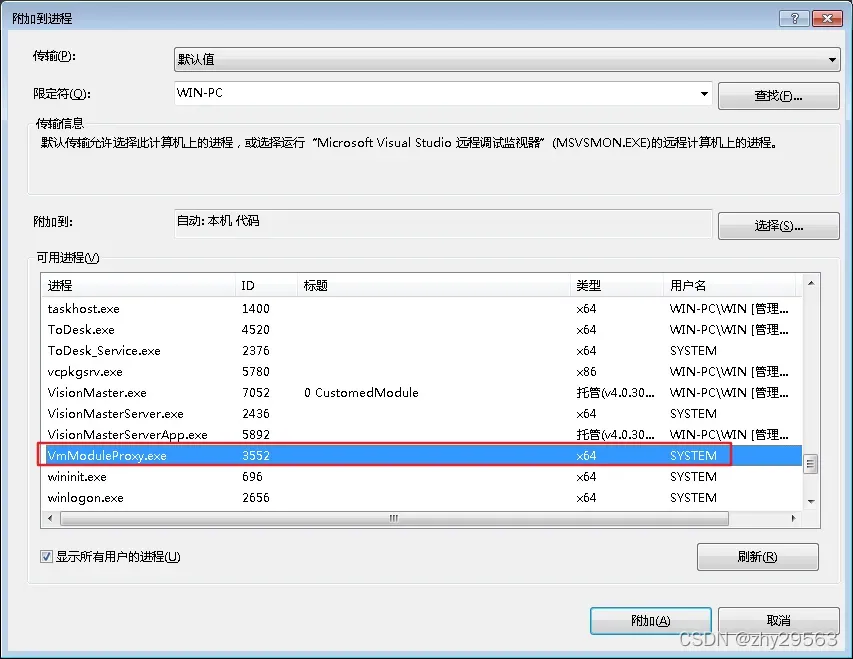
- 在源代码的适当位置放置断点
- 运行自定义模块
- 检查是否进入断点调试

文章出处登录后可见!
已经登录?立即刷新