lidar文件夹下面有多个雷达功能包。
还包括一个udev规则转换脚本。雷达使用cp2102usb转串口芯片。
多个设备通过usb连主机,很难分辨各个端口名所对应的设备。
给USB 转串口的芯片设定规则,根据芯片的 Vender ID 和 Product ID 进行筛选。读取到芯片后做一个符号链接,链接到对应端口。取名为rplidar等。
initenv.sh
#!/bin/bash
echo  'KERNEL=="ttyUSB*", ATTRS{idVendor}=="10c4", ATTRS{idProduct}=="ea60", MODE:="0777", SYMLINK+="hldslidar"' >/etc/udev/rules.d/hldslidar.rules

echo  'KERNEL=="ttyUSB*", ATTRS{idVendor}=="10c4", ATTRS{idProduct}=="ea60", MODE:="0777", GROUP:="dialout",  SYMLINK+="ydlidar"' >/etc/udev/rules.d/ydlidar.rules

echo  'KERNEL=="ttyUSB*", ATTRS{idVendor}=="10c4", ATTRS{idProduct}=="ea60", MODE:="0777", GROUP:="dialout",  SYMLINK+="iiilidar"' >/etc/udev/rules.d/iiilidar.rules

echo  'KERNEL=="ttyUSB*", ATTRS{idVendor}=="10c4", ATTRS{idProduct}=="ea60", MODE:="0777", GROUP:="dialout",  SYMLINK+="rplidar"' >/etc/udev/rules.d/rplidar.rules

echo  'KERNEL=="ttyUSB*", ATTRS{idVendor}=="10c4", ATTRS{idProduct}=="ea60", MODE:="0777", GROUP:="dialout",  SYMLINK+="sclidar"' >/etc/udev/rules.d/sclidar.rules

systemctl daemon-reload
service udev reload
sleep 1
service udev restart
robot_navigation这个文件夹很重要。
robot:
roslaunch robot_navigation lidar.launch  启动雷达
PC:
roslaunch robot_navigation lidar_rviz.launch  运行rviz工具

robot:
roslaunch robot_navigation robot_slam_laser.launch  激光雷达slam建图
pc:
roslaunch robot_navigation slam_rviz.launch

robot:保存地图
roscd robot_navigation/maps
rosrun map_server map_saver -f map

robot:
roslaunch robot_navigation robot_navigation.launch   导航和避障
pc:
roslaunch robot_navigation navigation_rviz.launch

robot:
roslaunch robot_navigation robot_slam_laser.launch slam_methods:=hector 建图算法切换
pc:
roslaunch robot_navigation navigation_rviz.launch

robot:
roslaunch robot_navigation robot_navigation.launch planner:=dwa 路径规划算法切换

robot:
roslaunch robot_navigation robot_slam_laser.launch planner:=teb 导航建图
pc:
roslaunch robot_navigation slam_rviz.launch
该文件包含:
rviz文件夹:rviz相关配置文件
maps文件夹:地图文件和地图配置信息相关的文件
param文件夹:yaml文件
launch文件夹
script文件夹:脚本文件
launch文件夹里面:
includes文件夹:建图算法的launch文件
lidar文件夹:雷达的launch文件
rviz文件夹:rviz的launch文件
robot_slam_laser.launch
robot_slam_laser.launch:
这里面主要就是launch文件的循环调用,比如,通过robot_slam_laser.launch文件调用了robot_lidar.launch文件。
这样做的好处是模块化。可以避免多个节点的重复启动。
<launch>
  <!-- Arguments -->

  <arg name="slam_methods" default="gmapping" doc="slam type [gmapping, hector, karto, cartographer]"/><!-- 可传入参数slam_methods,选择SLAM建图算法 -->
  <arg name="open_rviz" default="false"/>
  <arg name="simulation" default= "false"/> <!-- 判断启动实体机器人还是 stage 仿真器 -->
  <arg name="planner"  default="" doc="opt: dwa, teb"/> <!-- 无地图环境下边建图边导航,可选参数为dwa、teb局部路径规划器 -->

  <param name="/use_sim_time" value="$(arg simulation)" />

  <!-- simulation robot with lidar and map -->
  <!-- simulation为true 时启动仿真软件运行仿真机器人-->
  <group if="$(arg simulation)">
    <include file="$(find robot_simulation)/launch/simulation_one_robot.launch"/>
  </group>

  <!-- robot with lidar -->
  <!--simulation为false 启动launch文件夹下的robot_lidar.launch-->
  <group unless="$(arg simulation)">
    <include file="$(find robot_navigation)/launch/robot_lidar.launch"/>
  </group>
  <!-- SLAM: Gmapping, Cartographer, Hector, Karto -->
  <!-- 根据 slam_methods 参数选用不同的建图算法 -->
  <include file="$(find robot_navigation)/launch/includes/$(arg slam_methods).launch">
    <arg name="simulation"            value="$(arg simulation)"/>
  </include>
  <!-- move_base 无地图环境下导航建图功能,传入planner参数为dwa或teb,就会启动导航堆栈-->
  <group unless="$(eval planner == '')"><!--启动move_base.launch-->
    <include file="$(find robot_navigation)/launch/move_base.launch" unless="$(eval planner == '')">
        <arg name="planner"            value="$(arg planner)"/>
    </include>
  </group>

  <!--因为gmapping会发布map话题,这里不用启动地图服务器从本地读取地图也可以正常导航-->

  <!-- rviz open_rviz 参数为 true时,打开rviz-->
  <group if="$(arg open_rviz)">
    <node pkg="rviz" type="rviz" name="rviz" required="true"
          args="-d $(find robot_navigation)/rviz/slam.rviz"/><!-- 使用rviz文件夹中预置的配置文件slam.rviz -->
  </group>

</launch>
robot_lidar.launch
robot_lidar.launch:启动底盘和雷达这两个硬件
<launch>
    <!-- config param -->
    <arg name="pub_imu"       default="False" />
    <arg name="sub_ackermann"       default="False" />
    <arg name="lidar_frame" default="base_laser_link"/>

    <!-- include 标签包含了两个 launch -->

    <include file="$(find base_control)/launch/base_control.launch">
        <arg name="pub_imu"            value="$(arg pub_imu)"/>
        <arg name="sub_ackermann"            value="$(arg sub_ackermann)"/>
    </include>

    <include file="$(find robot_navigation)/launch/lidar.launch">
        <arg name="lidar_frame"            value="$(arg lidar_frame)"/>
    </include>

</launch>
lidar.launch
lidar.launch:这里面启动了雷达的launch文件
<launch>
    <!--robot bast type use different tf value-->
    <!-- 读取机器人底盘类型 -->
    <arg name="base_type"       default="$(env BASE_TYPE)" />
    <!-- robot frame -->

    <arg name="base_frame"       default="/base_footprint" />
    <!-- 读取机器人雷达类型 -->
    <arg name="lidar_type"       default="$(env LIDAR_TYPE)" />
    <arg name="lidar_frame" default="base_laser_link"/>

    <!-- 根据lidar_type类型启动节点,如果是rplidar,就启动rplidar.launch -->
    <include file="$(find robot_navigation)/launch/lidar/$(arg lidar_type).launch">
        <arg name="lidar_frame"            value="$(arg lidar_frame)"/>
    </include>

    <!-- TF 坐标转换 -->
    <group if="$(eval base_type == 'NanoRobot')">
        <node pkg="tf" type="static_transform_publisher" name="base_footprint_to_laser"
            args="-0.01225 0.0 0.18 3.14159265 0.0 0.0 $(arg base_frame) $(arg lidar_frame) 20">
        </node>
    </group>
    <group if="$(eval base_type == 'NanoRobot_Pro')">
        <node pkg="tf" type="static_transform_publisher" name="base_footprint_to_laser"
            args="-0.0515 0.0 0.18 -1.5708 0.0 0.0 $(arg base_frame) $(arg lidar_frame) 20">
        </node>
    </group>
    <group if="$(eval base_type == '4WD')">
        <node pkg="tf" type="static_transform_publisher" name="base_footprint_to_laser"
            args="0.01 0.0 0.25 3.14159265 0.0 0.0 $(arg base_frame) $(arg lidar_frame) 20">
        </node>
    </group>
    <group if="$(eval base_type == '4WD_OMNI')">
        <node pkg="tf" type="static_transform_publisher" name="base_footprint_to_laser"
            args="0.01 0.0 0.25 3.14159265 0.0 0.0 $(arg base_frame) $(arg lidar_frame) 20">
        </node>
    </group>
    <group if="$(eval base_type == 'NanoCar')">
        <node pkg="tf" type="static_transform_publisher" name="base_footprint_to_laser"
            args="0.1037 0.0 0.115 3.14159265 0.0 0.0 $(arg base_frame) $(arg lidar_frame) 20">
        </node>
    </group>
    <group if="$(eval base_type == 'NanoCar_Pro')">
        <node pkg="tf" type="static_transform_publisher" name="base_footprint_to_laser"
            args="0.1037 0.0 0.165 3.14159265 0.0 0.0 $(arg base_frame) $(arg lidar_frame) 20">
        </node>
    </group>
    <group if="$(eval base_type == 'NanoCar_SE')">
        <node pkg="tf" type="static_transform_publisher" name="base_footprint_to_laser"
            args="0.0955 0.0 0.115 1.5708 0.0 0.0 $(arg base_frame) $(arg lidar_frame) 20">
        </node>
    </group>

</launch>
raplidar.launch
raplidar.launch 雷达数据
端口名称使用了udev规则的名称。
<param name="serial_port" type="string" value="/dev/rplidar"/>
<launch>
    <arg name="lidar_frame" default="lidar"/>

    <node name="rplidarNode"          pkg="rplidar_ros"  type="rplidarNode" output="screen">
        <param name="serial_port"         type="string" value="/dev/rplidar"/>
        <param name="serial_baudrate"     type="int"    value="115200"/><!--A1/A2 -->
        <!--param name="serial_baudrate"     type="int"    value="256000"--><!--A3 -->
        <param name="frame_id"            type="string" value="$(arg lidar_frame)"/>
        <param name="inverted"            type="bool"   value="false"/>
        <param name="angle_compensate"    type="bool"   value="true"/>
    </node>
</launch>
karto.launch
karto.launch文件,配置参数是通过yaml文件载入的。
<launch>

  <arg name="simulation" default= "false"/>

  <param name="/use_sim_time" value="$(arg simulation)" />

  <!-- slam_karto -->

  <node pkg="slam_karto" type="slam_karto" name="slam_karto" output="screen">

    <rosparam command="load" file="$(find robot_navigation)/config/karto_params.yaml" />

  </node>

</launch>
karto_params.yaml
# General Parameters

base_frame: base_footprint

map_update_interval: 5

use_scan_matching: true

use_scan_barycenter: true

minimum_travel_distance: 0.12

minimum_travel_heading: 0.174             #in radians

scan_buffer_size: 70

scan_buffer_maximum_scan_distance: 3.5

link_match_minimum_response_fine: 0.12

link_scan_maximum_distance: 3.5

loop_search_maximum_distance: 3.5

do_loop_closing: true

loop_match_minimum_chain_size: 10

loop_match_maximum_variance_coarse: 0.4   # gets squared later

loop_match_minimum_response_coarse: 0.8

loop_match_minimum_response_fine: 0.8


# Correlation Parameters - Correlation Parameters

correlation_search_space_dimension: 0.3

correlation_search_space_resolution: 0.01

correlation_search_space_smear_deviation: 0.03


# Correlation Parameters - Loop Closure Parameters

loop_search_space_dimension: 8.0

loop_search_space_resolution: 0.05

loop_search_space_smear_deviation: 0.03


# Scan Matcher Parameters

distance_variance_penalty: 0.3      # gets squared later

angle_variance_penalty: 0.349       # in degrees (gets converted to radians then squared)

fine_search_angle_offset: 0.00349   # in degrees (gets converted to radians)

coarse_search_angle_offset: 0.349   # in degrees (gets converted to radians)

coarse_angle_resolution: 0.0349     # in degrees (gets converted to radians)

minimum_angle_penalty: 0.9

minimum_distance_penalty: 0.5

use_response_expansion: false
与上面对比的话,就是通过launch文件直接传参数。他们两个效果其实是一样的。
gmapping.launch
<launch>
  <arg name="set_base_frame" default="base_footprint"/>
  <arg name="set_odom_frame" default="odom"/>
  <arg name="set_map_frame"  default="map"/>
  <arg name="scan_topic" default="/scan" />
  <arg name="simulation" default= "false"/>
  <param name="/use_sim_time" value="$(arg simulation)" />
  <!-- Gmapping -->
  <node pkg="gmapping" type="slam_gmapping" name="gmapping" output="screen">
    <param name="base_frame" value="$(arg set_base_frame)"/>
    <param name="odom_frame" value="$(arg set_odom_frame)"/>
    <param name="map_frame"  value="$(arg set_map_frame)"/>
    <param name="map_update_interval" value="2.0"/>
    <param name="maxUrange" value="5.0"/>
    <param name="sigma" value="0.05"/>
    <param name="kernelSize" value="1"/>
    <param name="lstep" value="0.05"/>
    <param name="astep" value="0.05"/>
    <param name="iterations" value="5"/>
    <param name="lsigma" value="0.075"/>
    <param name="ogain" value="3.0"/>
    <param name="lskip" value="0"/>
    <param name="minimumScore" value="50"/>
    <param name="srr" value="0.1"/>
    <param name="srt" value="0.2"/>
    <param name="str" value="0.1"/>
    <param name="stt" value="0.2"/>
    <param name="linearUpdate" value="1.0"/>
    <param name="angularUpdate" value="0.2"/>
    <param name="temporalUpdate" value="0.5"/>
    <param name="resampleThreshold" value="0.5"/>
    <param name="particles" value="100"/>
    <param name="xmin" value="-10.0"/>
    <param name="ymin" value="-10.0"/>
    <param name="xmax" value="10.0"/>
    <param name="ymax" value="10.0"/>
    <param name="delta" value="0.05"/>
    <param name="llsamplerange" value="0.01"/>
    <param name="llsamplestep" value="0.01"/>
    <param name="lasamplerange" value="0.005"/>
    <param name="lasamplestep" value="0.005"/>
    <remap from="scan" to="$(arg scan_topic)"/>
  </node>
</launch>
cartographer.launch
它里面使用了lua脚本语言载入配置文件。
-configuration_basename revo_lds_$(arg version).lua"
revo_lds_melodic.lua
include "map_builder.lua"
include "trajectory_builder.lua"

options = {
  map_builder = MAP_BUILDER,
  trajectory_builder = TRAJECTORY_BUILDER,
  map_frame = "map",
-- tracking_frame = "base_laser_link",
-- published_frame = "base_laser_link",
-- odom_frame = "odom",
-- provide_odom_frame = true,
-- use_odometry = false,

  tracking_frame = "base_footprint",
  published_frame = "odom",
  odom_frame = "odom",
  provide_odom_frame = false,
  publish_frame_projected_to_2d = false,
  use_odometry = true,
  use_nav_sat = false,
  use_landmarks = false,
  num_laser_scans = 1,
  num_multi_echo_laser_scans = 0,
  num_subpisions_per_laser_scan = 1,
  num_point_clouds = 0,
  lookup_transform_timeout_sec = 0.2,
  submap_publish_period_sec = 0.3,
  pose_publish_period_sec = 5e-3,
  trajectory_publish_period_sec = 30e-3,
  rangefinder_sampling_ratio = 1.,
  odometry_sampling_ratio = 1.,
  fixed_frame_pose_sampling_ratio = 1.,
  imu_sampling_ratio = 1.,
  landmarks_sampling_ratio = 1.,
}

MAP_BUILDER.use_trajectory_builder_2d = true

TRAJECTORY_BUILDER_2D.submaps.num_range_data = 35
TRAJECTORY_BUILDER_2D.min_range = 0.3
TRAJECTORY_BUILDER_2D.max_range = 8.
TRAJECTORY_BUILDER_2D.missing_data_ray_length = 1.
TRAJECTORY_BUILDER_2D.use_imu_data = false
TRAJECTORY_BUILDER_2D.use_online_correlative_scan_matching = true
TRAJECTORY_BUILDER_2D.real_time_correlative_scan_matcher.linear_search_window = 0.1
TRAJECTORY_BUILDER_2D.real_time_correlative_scan_matcher.translation_delta_cost_weight = 10.
TRAJECTORY_BUILDER_2D.real_time_correlative_scan_matcher.rotation_delta_cost_weight = 1e-1

POSE_GRAPH.optimization_problem.huber_scale = 1e2
POSE_GRAPH.optimize_every_n_nodes = 35
POSE_GRAPH.constraint_builder.min_score = 0.65

return options
cartographer.launch
<launch>
  <arg name="simulation" default= "true"/>
  <arg name="version" default="$(env ROS_DISTRO)"/><!-- 读取环境变量ROS_DISTRO的版本 -->
  <param name="/use_sim_time" value="$(arg simulation)" />
  <!-- cartographer_node -->
  <node name="cartographer_node" pkg="cartographer_ros"
        type="cartographer_node" args="
            -configuration_directory $(find robot_navigation)/config
            -configuration_basename revo_lds_$(arg version).lua"
        output="screen">  <!--根据version的参数选择配置文件-->
  </node>
  <group if="$(eval version == 'melodic')"><!--对于melodic版本,手动启动下面这个节点-->
      <node pkg="cartographer_ros" type="cartographer_occupancy_grid_node" name="cartographer_occupancy_grid_node"/>
  </group>
</launch>
robot_navigation.launch
两个group,每个都,实现了机器人、雷达、地图、amcl四个节点的启动。
<launch>
  <!-- Arguments -->
    <!--传入地图文件所在的路径-->
  <arg name="map_file" default="$(find robot_navigation)/maps/map.yaml"/><!--参数map_file传入maps文件下的map.yaml文件 -->
  <!--如果地图名称和保存路径是自定义的,只需修改传入的map_file的值-->
  <arg name="simulation" default= "false"/>
  <arg name="planner"  default="teb" doc="opt: dwa, teb"/>
  <arg name="open_rviz" default="false"/>
  <arg name="use_dijkstra" default= "true"/>

  <group if="$(arg simulation)">
    <!-- simulation robot with lidar and map-->
    <!-- simulation 参数为 true,在那个launch文件中启动地图服务 -->
    <include file="$(find robot_simulation)/launch/simulation_one_robot_with_map.launch"/>
  </group>

  <group unless="$(arg simulation)">
    <!-- robot with lidar 启动底盘和雷达-->
    <include file="$(find robot_navigation)/launch/robot_lidar.launch">
          <!--<arg name="robot_name"            value="$(arg robot_name)"/>-->
    </include>
    <!-- Map server 启动地图服务器读入map_file参数获取地图文件-->
    <node pkg="map_server" name="map_server" type="map_server" args="$(arg map_file)">
      <param name="frame_id" value="map"/>
    </node>
    <!-- AMCL,启动一个定位节点 amcl -->
    <node pkg="amcl" type="amcl" name="amcl" output="screen">
      <!-- 通过yaml文件读取配置文件-->
      <rosparam file="$(find robot_navigation)/param/$(env BASE_TYPE)/amcl_params.yaml" command="load" />
      <!-- 通过下面的设置,机器人启动时候默认就是位于地图零点 -->
        <!-- 如果机器人从一个固定位置启动且不是原点,可以修改参数 -->
      <param name="initial_pose_x"            value="0.0"/>
      <param name="initial_pose_y"            value="0.0"/>
      <param name="initial_pose_a"            value="0.0"/><!--航向-->
    </node>
  </group>

  <!-- move_base 导航堆栈-->
  <include file="$(find robot_navigation)/launch/move_base.launch" >
    <!--传入的参数-->
    <arg name="planner"            value="$(arg planner)"/>
    <arg name="simulation"            value="$(arg simulation)"/>
    <arg name="use_dijkstra"     value="$(arg use_dijkstra)"/>

  </include>

  <!-- rviz -->
  <group if="$(arg open_rviz)">
    <node pkg="rviz" type="rviz" name="rviz" required="true"
          args="-d $(find robot_navigation)/rviz/navigation.rviz"/>
  </group>

</launch>
map.yaml
包括地图的一些基本配置信息。
image: map.pgm
resolution: 0.050000
origin: [-10.000000, -10.000000, 0.000000]
negate: 0
occupied_thresh: 0.65
free_thresh: 0.196
里面参数的含义:可以在wiki中找到对应的函数包,英文介绍中有参数。
image:地图名称。
resolution:地图分辨率,米/像素
origin:地图中左下角像素的二维姿态,为x,y,yaw。偏航为逆时针旋转,偏航=0表示无旋转
occupied_thresh:大于此阈值的像素,完全占用。
free_thresh:小于此阈值的像素,完全空闲。
negate:
像素的COLOR值x在[0,255]范围内。
首先,将整数x转换为一个浮点数p,转换公式具体取决于yaml中negate标志的定义。
如果negate=0,则p =(255 - x)/ 255.0。这意味着黑色(0)现在具有最高值(1.0)而白色(255)具有最低值(0.0)。
如果negate=1,则p = x / 255.0。
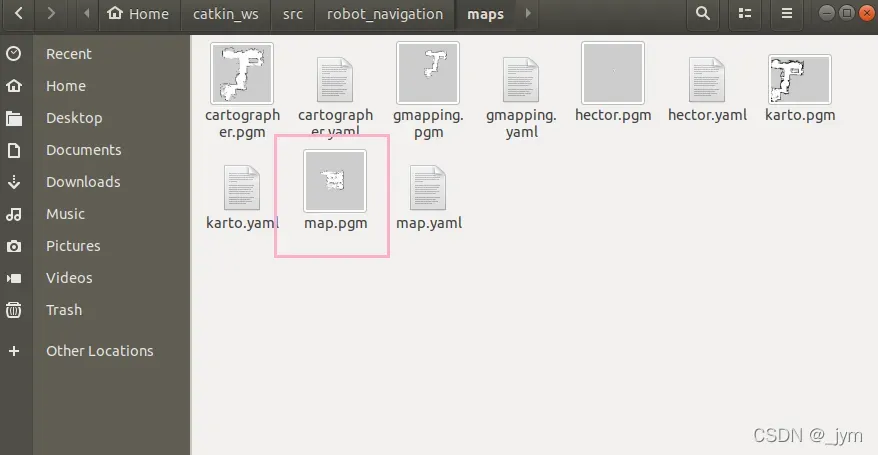
map.pgm
pgm是一个图像的格式。
amcl_params.yaml
可以通过amcl的ros wiki介绍页面查看参数信息。
use_map_topic: true


odom_frame_id: "odom"

base_frame_id: "base_footprint"

global_frame_id: "map"


## Publish scans from best pose at a max of 10 Hz

odom_model_type: "diff"

odom_alpha5: 0.1

gui_publish_rate: 10.0

laser_max_beams: 60

laser_max_range: 12.0

min_particles: 500

max_particles: 2000

kld_err: 0.05

kld_z: 0.99

odom_alpha1: 0.2

odom_alpha2: 0.2

## translation std dev, m

odom_alpha3: 0.2

odom_alpha4: 0.2

laser_z_hit: 0.5

aser_z_short: 0.05

laser_z_max: 0.05

laser_z_rand: 0.5

laser_sigma_hit: 0.2

laser_lambda_short: 0.1

laser_model_type: "likelihood_field" # "likelihood_field" or "beam"

laser_likelihood_max_dist: 2.0

update_min_d: 0.25

update_min_a: 0.2


resample_interval: 1


## Increase tolerance because the computer can get quite busy

transform_tolerance: 1.0

recovery_alpha_slow: 0.001

recovery_alpha_fast: 0.1
move_base.launch
move_base.launch:ros下的导航堆栈
默认传入的 planner 参数是 dwa,但是robot_navigation.launch调用move_base.launch时,传入的参数是teb。所以这里planner参数置为teb。
<launch>
  <!-- Arguments -->
  <arg name="cmd_vel_topic" default="cmd_vel" />
  <arg name="odom_topic" default="odom" />
  <arg name="planner"  default="dwa" doc="opt: dwa, teb"/> <!--默认传入的 planner 参数是 dwa-->
  <arg name="simulation" default= "false"/>
  <arg name="use_dijkstra" default= "true"/>


  <arg name="base_type" default= "$(env BASE_TYPE)"/> <!--不同车型不同配置-->
  <arg name="move_forward_only" default="false"/><!--使用深度相机导航和建图,只有前向视野没有后向视野-->
    <!--禁止车的后向运行保证运行安全-->

  <!-- 使用了两个 group 区分DWA和TEB两个不同的局部路径规划算法 -->
  <!-- move_base use DWA planner-->
  <group if="$(eval planner == 'dwa')">
    <!-- 启动move_base节点 -->
    <node pkg="move_base" type="move_base" respawn="false" name="move_base" output="screen">
      <!-- use global_planner replace default navfn as global planner ,global_planner support A* and dijkstra algorithm-->
      <!--设置传入节点的参数-->
      <param name="base_global_planner" value="global_planner/GlobalPlanner"/>
      <param name="base_local_planner" value="dwa_local_planner/DWAPlannerROS" />
      <!-- <rosparam file="$(find robot_navigation)/param/$(env BASE_TYPE)/global_planner_params.yaml" command="load" />       -->
      <rosparam file="$(find robot_navigation)/param/$(env BASE_TYPE)/costmap_common_params.yaml" command="load" ns="global_costmap" />
      <rosparam file="$(find robot_navigation)/param/$(env BASE_TYPE)/costmap_common_params.yaml" command="load" ns="local_costmap" />
      <rosparam file="$(find robot_navigation)/param/$(env BASE_TYPE)/local_costmap_params.yaml" command="load" />
      <rosparam file="$(find robot_navigation)/param/$(env BASE_TYPE)/global_costmap_params.yaml" command="load" />
      <rosparam file="$(find robot_navigation)/param/$(env BASE_TYPE)/move_base_params.yaml" command="load" />
      <rosparam file="$(find robot_navigation)/param/$(env BASE_TYPE)/dwa_local_planner_params.yaml" command="load" />
      <remap from="cmd_vel" to="$(arg cmd_vel_topic)"/>
      <remap from="odom" to="$(arg odom_topic)"/>
        <!-- move_forward_only时,不让有负速度(后向运动) -->
      <param name="DWAPlannerROS/min_vel_x" value="0.0" if="$(arg move_forward_only)" />
      <!--default is True,use dijkstra algorithm;set to False,usd A* algorithm-->
      <param name="GlobalPlanner/use_dijkstra " value="$(arg use_dijkstra)" />
    </node>
  </group>
  <!-- move_base use TEB planner-->
  <group if="$(eval planner == 'teb')">
    <node pkg="move_base" type="move_base" respawn="false" name="move_base" output="screen">
      <!-- use global_planner replace default navfn as global planner ,global_planner support A* and dijkstra algorithm-->
      <param name="base_global_planner" value="global_planner/GlobalPlanner"/>
      <param name="base_local_planner" value="teb_local_planner/TebLocalPlannerROS" />
      <!-- <rosparam file="$(find robot_navigation)/param/$(env BASE_TYPE)/global_planner_params.yaml" command="load" /> -->
      <rosparam file="$(find robot_navigation)/param/$(env BASE_TYPE)/costmap_common_params.yaml" command="load" ns="global_costmap" />
      <rosparam file="$(find robot_navigation)/param/$(env BASE_TYPE)/costmap_common_params.yaml" command="load" ns="local_costmap" />
      <rosparam file="$(find robot_navigation)/param/$(env BASE_TYPE)/local_costmap_params.yaml" command="load" />
      <rosparam file="$(find robot_navigation)/param/$(env BASE_TYPE)/global_costmap_params.yaml" command="load" />
      <rosparam file="$(find robot_navigation)/param/$(env BASE_TYPE)/move_base_params.yaml" command="load" />
      <rosparam file="$(find robot_navigation)/param/$(env BASE_TYPE)/teb_local_planner_params.yaml" command="load" />
      <remap from="cmd_vel" to="$(arg cmd_vel_topic)"/>
      <remap from="odom" to="$(arg odom_topic)"/>
      <param name="TebLocalPlannerROS/max_vel_x_backwards" value="0.0" if="$(arg move_forward_only)" />
      <!--default is True,use dijkstra algorithm;set to False,usd A* algorithm-->
      <param name="GlobalPlanner/use_dijkstra " value="$(arg use_dijkstra)" />
      <!--stage simulator takes the angle instead of the rotvel as input (twist message)-->


    </node>
  </group>
    <!-- move_base -->
</launch>
costmap_common_params.yaml
其中一个车型的costmap_common_params.yaml文件如下。
#---(in meters)---
#单位是米

footprint: [ [-0.035,-0.1], [0.18,-0.1], [0.18,0.1], [-0.035,0.1] ]
#机器人的矩形轮廓尺寸
#以机器人中心为坐标轴原点,这四个坐标点(x,y)分别对应机器人的四个角
#路径规划器获取到机器人轮廓大小从而规划相应的路径

#参数含义通过move_base的ros wiki查看
transform_tolerance: 0.2

obstacle_layer:

 enabled: true

 obstacle_range: 2.5

 raytrace_range: 3.0

 inflation_radius: 0.05

 track_unknown_space: false

 combination_method: 1

 observation_sources: laser_scan_sensor

 laser_scan_sensor: {data_type: LaserScan, topic: scan, marking: true, clearing: true}

inflation_layer:

  enabled:              true

  cost_scaling_factor:  10.0  # exponential rate at which the obstacle cost drops off (default: 10)

  inflation_radius:     0.1  # max. distance from an obstacle at which costs are incurred for planning paths.


static_layer:

  enabled:              true

  map_topic:            "/map"
local_costmap_params.yaml
机器人避障功能通过local costmap实现。全局地图不存在障碍,通过局部地图发现障碍然后重新规划路线实现。
#指定发布频率和更新频率
local_costmap:

  global_frame: map

  robot_base_frame: base_footprint

  update_frequency: 5.0

  publish_frequency: 5.0

  rolling_window: true#滑动窗口
  #以机器人所在位置为中心的 3*3 滑动窗口
  #这个框设置得越小路径规划效果越差,越大机器人负担的运算就越大
  width: 3
  height: 3

  resolution: 0.05

  transform_tolerance: 0.5

  plugins:#设置了一个地图的层
  #静态层
   - {name: static_layer,        type: "costmap_2d::StaticLayer"}
  #障碍物层,地图中不存在而实际扫描到的障碍物,会被识别在障碍物层。
   - {name: obstacle_layer,      type: "costmap_2d::ObstacleLayer"}
global_costmap_params.yaml
#设置一些发布频率等信息
global_costmap:

  global_frame: map

  robot_base_frame: base_footprint

  update_frequency: 1.0

  publish_frequency: 0.5

  # static_map: true

  transform_tolerance: 0.5

  plugins:

    - {name: static_layer,            type: "costmap_2d::StaticLayer"}

    - {name: obstacle_layer,          type: "costmap_2d::VoxelLayer"}

    - {name: inflation_layer,         type: "costmap_2d::InflationLayer"}
move_base_params.yaml:
#进行一些频率设置

#对底盘的控制频率
controller_frequency: 2.0
controller_patience: 15.0

#路径规划频率
planner_frequency: 0.2
planner_patience: 5.0

conservative_reset_dist: 3.0

#机器人在一个点持续震荡时最大允许震荡时间
oscillation_timeout: 10.0
oscillation_distance: 0.2

clearing_rotation_allowed: false

#clearing_rotation_allowed为True时,机器人被困住,会原地 360 度转一圈重新扫描找到一条出路(激光雷达不是360才需要用)
#阿克曼结构,不具备原地转向的能力,需要禁用
dwa_local_planner_params.yaml
DWAPlannerROS:

# Robot Configuration Parameters
#设置机器人导航的最大最小速度
#x方向最大速度的绝对值,单位m/s
  max_vel_x: 0.25
#x方向最小值绝对值,如果为负值表示可以后退
  min_vel_x: -0.25
#y轴速度,麦克纳姆轮才用
  max_vel_y: 0.0

  min_vel_y: 0.0


# The velocity when robot is moving in a straight line
#最大角速度,单位rad/s
  max_vel_trans:  0.26

  min_vel_trans:  0.13


  max_vel_theta: 1.0

  min_vel_theta: 0.5

#x方向的加速度绝对值,m/s2
  acc_lim_x: 2.5
#y方向的加速度绝对值,该值只有全向移动的机器人才需配置.
  acc_lim_y: 0.0
#旋转加速度的绝对值.rad/s2
  acc_lim_theta: 3.2


# Goal Tolerance Parametes
#允许机器人所到目标的坐标(以米为单位)偏差,过小可能导致机器人在目标位置附近不断调整到精确的目标位置
  xy_goal_tolerance: 0.1
#角度的容忍
  yaw_goal_tolerance: 0.2

  latch_xy_goal_tolerance: false


# Forward Simulation Parameters

  sim_time: 2.0

  vx_samples: 20

  vy_samples: 0

  vtheta_samples: 40

  controller_frequency: 10.0


# Trajectory Scoring Parameters

  path_distance_bias: 32.0

  goal_distance_bias: 20.0

  occdist_scale: 0.02

  forward_point_distance: 0.325

  stop_time_buffer: 0.2

  scaling_speed: 0.25

  max_scaling_factor: 0.2


# Oscillation Prevention Parameters

  oscillation_reset_dist: 0.05


# Debugging

  publish_traj_pc : true

  publish_cost_grid_pc: true


  prune_plan: false

  use_dwa: true

  restore_defaults: false
teb_local_planner_params.yaml
TebLocalPlannerROS:

 odom_topic: odom

 # Trajectory

 teb_autosize: True

 dt_ref: 0.3

 dt_hysteresis: 0.1

 max_samples: 500

 global_plan_overwrite_orientation: True

 allow_init_with_backwards_motion: True

 max_global_plan_lookahead_dist: 3.0

 global_plan_viapoint_sep: -1

 global_plan_prune_distance: 1

 exact_arc_length: False

 feasibility_check_no_poses: 2

 publish_feedback: False

 # Robot
#最大x向前速度
 max_vel_x: 0.2
#最大x后退速度
 max_vel_x_backwards: 0.2

 max_vel_y: 0.0
#最大转向角速度
 max_vel_theta: 0.53 # the angular velocity is also bounded by min_turning_radius in case of a carlike robot (r = v / omega)
#最大x加速度
 acc_lim_x: 0.5
#最大角速度
 acc_lim_theta: 0.5

 # ********************** Carlike robot parameters ********************
#设置最小转向半径的参数
 min_turning_radius: 0.375        # Min turning radius of the carlike robot (compute value using a model or adjust with rqt_reconfigure manually)
#轮距参数
 wheelbase: 0.145                 # Wheelbase of our robot

 #将收到的角度消息转换为操作上的角度变化
 cmd_angle_instead_rotvel: False  # stage simulator takes the angle instead of the rotvel as input (twist message)
#使用仿真器仿真阿克曼车型,将cmd_angle_instead_rotvel改为true,
#stage 仿真器中”Car”车型接受的 cmd_vel 话题里面的z轴角速度并非给定机器人角速度,而是指转向结构的转向角度。
#cmd_angle_instead_rotvel: False,角速度就是定机器人真实的角速度
 # ********************************************************************

 footprint_model: # types: "point", "circular", "two_circles", "line", "polygon"

   type: "line"

   line_start: [0.05, 0.0] # for type "line"

   line_end: [0.10, 0.0] # for type "line"

 # GoalTolerance

 xy_goal_tolerance: 0.1

 yaw_goal_tolerance: 0.2

 free_goal_vel: False

 complete_global_plan: True

 # Obstacles

 min_obstacle_dist: 0.12 # This value must also include our robot's expansion, since footprint_model is set to "line".

 inflation_dist: 0.6

 include_costmap_obstacles: True

 costmap_obstacles_behind_robot_dist: 1.5

 obstacle_poses_affected: 15


 dynamic_obstacle_inflation_dist: 0.6

 include_dynamic_obstacles: True


 costmap_converter_plugin: ""

 costmap_converter_spin_thread: True

 costmap_converter_rate: 5


 # Optimization

 no_inner_iterations: 5

 no_outer_iterations: 4

 optimization_activate: True

 optimization_verbose: False

 penalty_epsilon: 0.1

 obstacle_cost_exponent: 4

 weight_max_vel_x: 2

 weight_max_vel_theta: 1

 weight_acc_lim_x: 1

 weight_acc_lim_theta: 1

 weight_kinematics_nh: 1000

 weight_kinematics_forward_drive: 1

 weight_kinematics_turning_radius: 1

 weight_optimaltime: 1 # must be > 0

 weight_shortest_path: 0

 weight_obstacle: 100

 weight_inflation: 0.2

 weight_dynamic_obstacle: 10 # not in use yet

 weight_dynamic_obstacle_inflation: 0.2

 weight_viapoint: 1

 weight_adapt_factor: 2


 # Homotopy Class Planner


 enable_homotopy_class_planning: False

 enable_multithreading: True

 max_number_classes: 4

 selection_cost_hysteresis: 1.0

 selection_prefer_initial_plan: 0.95

 selection_obst_cost_scale: 1.0

 selection_alternative_time_cost: False


 roadmap_graph_no_samples: 15

 roadmap_graph_area_width: 5

 roadmap_graph_area_length_scale: 1.0

 h_signature_prescaler: 0.5

 h_signature_threshold: 0.1

 obstacle_heading_threshold: 0.45

 switching_blocking_period: 0.0

 viapoints_all_candidates: True

 delete_detours_backwards: True

 max_ratio_detours_duration_best_duration: 3.0

 visualize_hc_graph: False

 visualize_with_time_as_z_axis_scale: False


# Recovery


 shrink_horizon_backup: True

 shrink_horizon_min_duration: 10

 oscillation_recovery: False

 oscillation_v_eps: 0.1

 oscillation_omega_eps: 0.1

 oscillation_recovery_min_duration: 10

 oscillation_filter_duration: 10
多点导航
多点导航:
普通的导航只能发布一个目标点。
在抵达目标点前,如果发布了新的目标点,则会舍弃原本的目标点直接前往新的目标点。
多目标点导航则是按照目标点发布顺序依次前往。

stage 仿真:roslaunch robot_navigation robot_navigation.launch simulation:=true
实体机器人上运行则无需传入 simulation:=true

启动多点导航工具:roslaunch robot_navigation multi_points_navigation.launch
启动rviz:roslaunch robot_navigation multi_navigation.launch

rviz多出了一个2D Nav Goal按钮,可以连续给机器人指定多个目标点,机器人会依次去往各个目标点
multi_points_navigation.launch
multi_points_navigation.launch,多点导航
<launch>

    <!--<node name="robot_pose_publisher" pkg="robot_pose_publisher" type="robot_pose_publisher" />-->
    <!--启动了一个 multi_goal_point.py 的节点-->
    <node name="multi_mark" pkg="robot_navigation" type="multi_goal_point.py" output="screen" />

</launch>
multi_navigation.launch
<launch>
  <!-- rviz -->
    <node pkg="rviz" type="rviz" name="rviz" required="true"
          args="-d $(find robot_navigation)/rviz/multi_navigation.rviz"/>
</launch>
multi_goal_point.py:
核心理念:
通过rviz按钮,发布goal话题,而不是发布/move_base_simple/goal话题,因为/move_base_simple/goal话题会直接发送给movebase 直接产生一个新的导航目标。
通过markerArray把goal缓存起来,通过move_base对每一个点导航的结果,触发status callback,执行下一个目标点。
来回循环。
#!/usr/bin/python


from visualization_msgs.msg import Marker
from visualization_msgs.msg import MarkerArray
import rospy
import math
from geometry_msgs.msg import PointStamped,PoseStamped
import actionlib
from move_base_msgs.msg import *
import tf

def status_callback(msg):#收到move base导航结果时,判断是读取下一个点继续发布;或是当前已是最后一个点做标记标识

    global goal_pub, index,markerArray
    global add_more_point,try_again

    if(msg.status.status == 3):#状态是3,导航成功到目标点
        try_again = 1
        if add_more_point == 0:
            print 'Goal reached'

        if index < count:

            pose = PoseStamped()
            pose.header.frame_id = "map"
            pose.header.stamp = rospy.Time.now()
            pose.pose.position.x = markerArray.markers[index].pose.position.x#给pose一个新的值
            #从markerArray读取一个新的目标点
            pose.pose.position.y = markerArray.markers[index].pose.position.y
            pose.pose.orientation.w = 1
            goal_pub.publish(pose)#发布给move base

            index += 1
        elif index == count:#执行到 最后一个点
            add_more_point = 1
    else:
    # status值及其含义
    # uint8 PENDING         = 0   # The goal has yet to be processed by the action server
    # uint8 ACTIVE          = 1   # The goal is currently being processed by the action server
    # uint8 PREEMPTED       = 2   # The goal received a cancel request after it started executing
    #                             #   and has since completed its execution (Terminal State)
    # uint8 SUCCEEDED       = 3   # The goal was achieved successfully by the action server (Terminal State)
    # uint8 ABORTED         = 4   # The goal was aborted during execution by the action server due
    #                             #    to some failure (Terminal State)
    # uint8 REJECTED        = 5   # The goal was rejected by the action server without being processed,
    #                             #    because the goal was unattainable or invalid (Terminal State)
    # uint8 PREEMPTING      = 6   # The goal received a cancel request after it started executing
    #                             #    and has not yet completed execution
    # uint8 RECALLING       = 7   # The goal received a cancel request before it started executing,
    #                             #    but the action server has not yet confirmed that the goal is canceled
    # uint8 RECALLED        = 8   # The goal received a cancel request before it started executing
    #                             #    and was successfully cancelled (Terminal State)
    # uint8 LOST            = 9   # An action client can determine that a goal is LOST. This should not be
    #                             #    sent over the wire by an action server
        #如果是失败
        print 'Goal cannot reached has some error :',msg.status.status," try again!!!!"
        if try_again == 1:#把目标点再发给move base,让它重试
            pose = PoseStamped()
            pose.header.frame_id = "map"
            pose.header.stamp = rospy.Time.now()
            pose.pose.position.x = markerArray.markers[index-1].pose.position.x
            pose.pose.position.y = markerArray.markers[index-1].pose.position.y
            pose.pose.orientation.w = 1
            goal_pub.publish(pose)
            try_again = 0
        else:#已经重试过但还是到不了,就跳过它执行下个点
            if index < len(markerArray.markers):
                pose = PoseStamped()
                pose.header.frame_id = "map"
                pose.header.stamp = rospy.Time.now()
                pose.pose.position.x = markerArray.markers[index].pose.position.x
                pose.pose.position.y = markerArray.markers[index].pose.position.y
                pose.pose.orientation.w = 1
                goal_pub.publish(pose)
                index += 1


def click_callback(msg):#rviz给定一个多目标点,会触发
    global markerArray,count
    global goal_pub,index
    global add_more_point

    marker = Marker()
    marker.header.frame_id = "map"
    marker.header.stamp = rospy.Time.now()
    # marker.type = marker.TEXT_VIEW_FACING
    marker.type = marker.CYLINDER
    marker.action = marker.ADD
    marker.scale.x = 0.2
    marker.scale.y = 0.2
    marker.scale.z = 0.5
    marker.color.a = 1.0
    marker.color.r = 0.0
    marker.color.g = 1.0
    marker.color.b = 0.0
    marker.pose.orientation.x = 0.0
    marker.pose.orientation.y = 0.0
    marker.pose.orientation.z = 0.0
    marker.pose.orientation.w = 1.0
    marker.pose.position.x = msg.pose.position.x#读出msg中的位置信息,传到marker消息中
    marker.pose.position.y = msg.pose.position.y
    marker.pose.position.z = msg.pose.position.z

    markerArray.markers.append(marker)

    # Renumber the marker IDs
    id = 0
    for m in markerArray.markers:
       m.id = id
       id += 1

    # Publish the MarkerArray
    mark_pub.publish(markerArray)#发布

    #first goal,第一次发布多目标点的时候,直接把话题发布出去
    if count==0:#没有目标点的时候
        pose = PoseStamped()#把话题读到pose消息
        pose.header.frame_id = "map"
        pose.header.stamp = rospy.Time.now()
        pose.pose.position.x = msg.pose.position.x
        pose.pose.position.y = msg.pose.position.y
        pose.pose.position.z = msg.pose.position.z
        pose.pose.orientation.x = msg.pose.orientation.x
        pose.pose.orientation.y = msg.pose.orientation.y
        pose.pose.orientation.z = msg.pose.orientation.z
        pose.pose.orientation.w = msg.pose.orientation.w
        goal_pub.publish(pose)#通过goal_pub发布
        #goal_pub发布的就是move base需要的goal话题。包含了目标点的位置和角度信息
        index += 1

        #add_more_point=1时,在ros发布一个status=3,触发status_callback,这样能再次发布新的目标点
        #为解决当所有导航点完成后想要再发布新的导航点的问题
    if add_more_point and count > 0:
        add_more_point = 0
        move =MoveBaseActionResult()
        move.status.status = 3
        move.header.stamp = rospy.Time.now()
        goal_status_pub.publish(move)
    quaternion = (msg.pose.orientation.x, msg.pose.orientation.y, msg.pose.orientation.z, msg.pose.orientation.w)
    theta = tf.transformations.euler_from_quaternion( quaternion)[2]
    count += 1#每点击一次,count加1
    # print 'add a path goal point %f %f %f'%(msg.pose.position.x,msg.pose.position.y,theta*180.0/3.14)


markerArray = MarkerArray()#定义一个变量

count = 0       #total goal num 统计发布的目标点数量
index = 0       #current goal point index 统计当前执行到哪个目标点
add_more_point = 0 # after all goal arrive, if add some more goal 标志位
try_again = 1  # try the fail goal once again 尝试次数

rospy.init_node('multi_goal_point_demo') #创建节点

mark_pub = rospy.Publisher('/path_point_array', MarkerArray,queue_size=100)#发布器发布MarkARRAY类型数据
click_goal_sub = rospy.Subscriber('/goal',PoseStamped,click_callback)#订阅器订阅goal话题,在rviz中发布多目标点所发布的话题,每次接收到goal进入click_callback
goal_pub = rospy.Publisher('/move_base_simple/goal',PoseStamped,queue_size=1)#发布器发布/move_base_simple/goal话题。
#触发move_base进行导航的话题
goal_status_sub = rospy.Subscriber('/move_base/result',MoveBaseActionResult,status_callback)#订阅movebase导航的结果。
#after all goal arrive, if add some more goal
#we deleberate pub a topic to trig the goal sent
goal_status_pub = rospy.Publisher('/move_base/result',MoveBaseActionResult,queue_size=1)
rospy.spin()#在节点中发布/move_base/result
#
多点自动巡航
仿真:roslaunch robot_navigation robot_navigation.launch simulation:=true
实体机器人上运行则无需传入 simulation:=true 参数

rviz: roslaunch robot_navigation navigation_rviz.launch

pc开终端:rostopic echo /move_base_simple/goal
(订阅/move_base_simple/goal 话题)

通过“2D Nav Goal”按钮设置巡航的点,记录输出的内容。
pose:
	position:
	    x:
	    y:
	    z
	orizntation:
	    x
	    v
	    z:

打开robot_navigation 功能包下的 way_point.launch 文件修改goallistx,y,z

巡航次数:
roslaunch robot_navigation way_point.launch loopTimes loopTimes:=2
loopTimes参数为巡航次数,2,机器人在巡航点来回巡航两遍后停止;0,一直巡航。

巡航中每到达一个巡航点,输出下一巡航点的目标ID,巡航次数到达后会输出Loop: 2 Times Finshed 信息。
way_point.launch
<launch>
    <!-- For Simulation -->
    <arg name="sim_mode" default="false" />
    <param name="/use_sim_time" value="$(arg sim_mode)"/>
    <arg name="loopTimes"       default="0" />
    <!-- move base -->
    <!--launch 文件启动 way_point.py节点-->
    <node pkg="robot_navigation" type="way_point.py" respawn="false" name="way_point" output="screen">
        <!-- params for move_base 编写好预设的地点-->
        <param name="goalListX" value="[2.0, 4.0, 3.0]" />
        <param name="goalListY" value="[3.0, 2.0, 2.0]" />
        <param name="goalListZ" value="[0.0, 0.0, 0.0]" />
        <param name="loopTimes" value="$(arg loopTimes)"/>
        <param name="map_frame" value="map" />
    </node>


</launch>
multi_goal_point.py
核心理念:
先预设一系列航路点,然后依次释放。只有达到上一个点后,才会释放下一个点。
#!/usr/bin/python

import rospy
import string
import math
import time
import sys

from std_msgs.msg import String
from move_base_msgs.msg import MoveBaseActionResult
from actionlib_msgs.msg import GoalStatusArray
from geometry_msgs.msg import PoseStamped
import tf
class MultiGoals:
    def __init__(self, goalListX, goalListY, goalListZ,loopTimes, map_frame):
        #订阅器,订阅move_base/result,move base导航结果话题发布,每次收到导航结果话题就会进入statusCB回调
        self.sub = rospy.Subscriber('move_base/result', MoveBaseActionResult, self.statusCB, queue_size=10)
        #发布器,发布move_base_simple/goal,move_base真正接收的目标点话题
        self.pub = rospy.Publisher('move_base_simple/goal', PoseStamped, queue_size=10)
        # params & variables
        self.goalListX = goalListX
        self.goalListY = goalListY
        self.goalListZ = goalListZ
        self.loopTimes = loopTimes
        self.loop = 1
        self.wayPointFinished = False
        self.goalId = 0#执行当前目标点的序列号
        self.goalMsg = PoseStamped()
        self.goalMsg.header.frame_id = map_frame
        self.goalMsg.pose.orientation.z = 0.0
        self.goalMsg.pose.orientation.w = 1.0
        # Publish the first goal
        time.sleep(1)
        #把goalList中xyz分别付给goalMsg消息
        self.goalMsg.header.stamp = rospy.Time.now()
        self.goalMsg.pose.position.x = self.goalListX[self.goalId]
        self.goalMsg.pose.position.y = self.goalListY[self.goalId]
        self.goalMsg.pose.orientation.x = 0.0
        self.goalMsg.pose.orientation.y = 0.0
        if abs(self.goalListZ[self.goalId]) > 1.0:
            self.goalMsg.pose.orientation.z = 0.0
            self.goalMsg.pose.orientation.w = 1.0
        else:
            w = math.sqrt(1 - (self.goalListZ[self.goalId]) ** 2)
            self.goalMsg.pose.orientation.z = self.goalListZ[self.goalId]
            self.goalMsg.pose.orientation.w = w
        self.pub.publish(self.goalMsg) #赋值完goalMsg,通过发布器,发布给move ase
        rospy.loginfo("Current Goal ID is: %d", self.goalId)  #输出日志
        self.goalId = self.goalId + 1 #目标点发步出去就会等待statusCB回调

        #机器人到达一个目标点就进入statusCB函数
    def statusCB(self, data):
        if self.loopTimes and (self.loop > self.loopTimes):
            rospy.loginfo("Loop: %d Times Finshed", self.loopTimes)
            self.wayPointFinished = True
        if data.status.status == 3 and (not self.wayPointFinished): # reached,而且路径巡航没结束
            self.goalMsg.header.stamp = rospy.Time.now()
            self.goalMsg.pose.position.x = self.goalListX[self.goalId]
            self.goalMsg.pose.position.y = self.goalListY[self.goalId]
            if abs(self.goalListZ[self.goalId]) > 1.0:
                self.goalMsg.pose.orientation.z = 0.0
                self.goalMsg.pose.orientation.w = 1.0
            else:
                w = math.sqrt(1 - (self.goalListZ[self.goalId]) ** 2)
                self.goalMsg.pose.orientation.z = self.goalListZ[self.goalId]
                self.goalMsg.pose.orientation.w = w
            self.pub.publish(self.goalMsg) #读取下一个点然后发布出去
            rospy.loginfo("Current Goal ID is: %d", self.goalId)
            if self.goalId < (len(self.goalListX)-1):
                self.goalId = self.goalId + 1
            else:
                self.goalId = 0
                self.loop += 1


if __name__ == "__main__":
    try:
        # ROS Init
        rospy.init_node('way_point', anonymous=True)

        # Get params 获取launch文件中传入的goalListXYZ
        goalListX = rospy.get_param('~goalListX', '[2.0, 2.0]')
        goalListY = rospy.get_param('~goalListY', '[2.0, 4.0]')
        goalListZ = rospy.get_param('~goalListZ', '[0.0, 0.0]')
        map_frame = rospy.get_param('~map_frame', 'map' )
        loopTimes = int(rospy.get_param('~loopTimes', '0'))

        goalListX = goalListX.replace("[","").replace("]","")
        goalListY = goalListY.replace("[","").replace("]","")
        goalListZ = goalListZ.replace("[","").replace("]","")
        goalListX = [float(x) for x in goalListX.split(",")]
        goalListY = [float(y) for y in goalListY.split(",")]
        goalListZ = [float(z) for z in goalListZ.split(",")]#处理成数组的形式
        if len(goalListX) == len(goalListY) == len(goalListZ) & len(goalListY) >=2:  #判断三个数组长度等
            # Constract MultiGoals Obj
            rospy.loginfo("Multi Goals Executing...")
            mg = MultiGoals(goalListX, goalListY, goalListZ, loopTimes, map_frame)#循环次数 地图基座标
            rospy.spin()
        else:
            rospy.errinfo("Lengths of goal lists are not the same")
    except KeyboardInterrupt:
        print("shutting down")
版权声明:本文为博主_jym原创文章,版权归属原作者,如果侵权,请联系我们删除!
原文链接:https://blog.csdn.net/qq_40828914/article/details/123059651